Easy Duck Breast with Pan Sauce
Crispy skin, tender meat, and a red wine pan sauce—this easy-to-follow duck breast recipe brings restaurant-level flavor home.
or read on for step-by-step instructions with photos
The Secret to Perfectly Crispy Duck Breast at Home
Duck is easier to cook than you might think. While dishes like duck confit or Peking duck might feel intimidating, the truth is that a perfectly seared duck breast is no harder to master than chicken or steak—it’s just different.
As a professional chef, I’ve cooked a lot of duck over the years, both in restaurants and at home. With just a few essential techniques, you can recreate those restaurant-quality results in your own kitchen—even if it’s your first time.
My Tips for Crispy, Juicy Duck Breast Every Time
Score the skin: Shallow cuts across the skin help fat render out and give you ultra-crispy results.
Start in a cold pan: This slowly renders the fat so the skin crisps without burning.
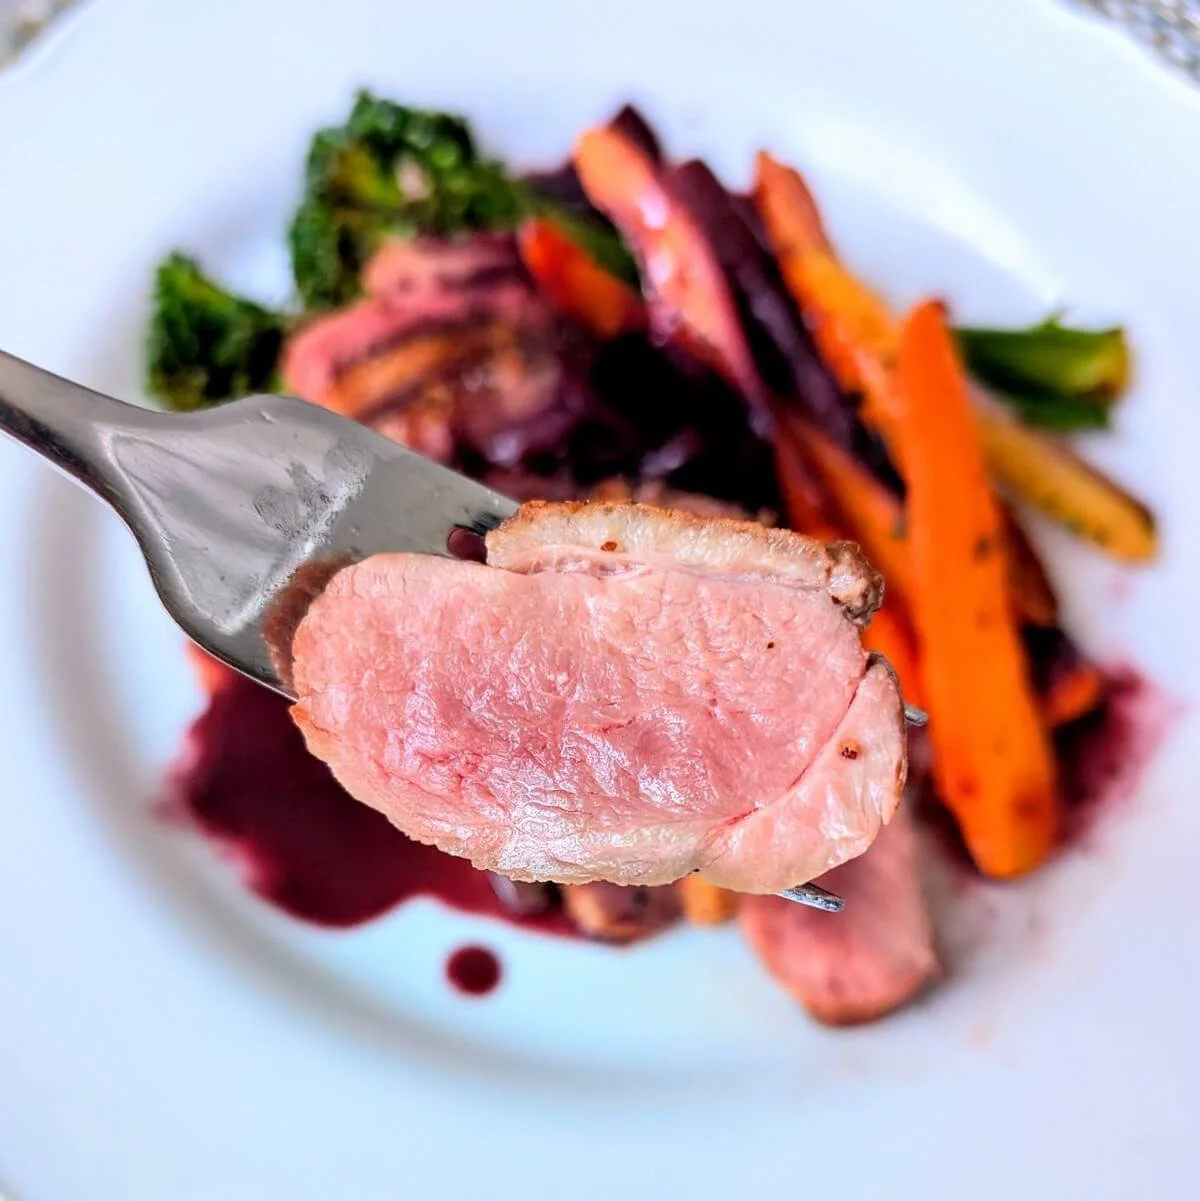
Treat it like steak: Duck breast is best served medium-rare to medium—beyond that, it starts to get tough. Sear, rest, and slice against the grain.
Make a quick duck pan sauce: Deglaze the fond (the browned bits left in the pan) with red wine for a rich, flavorful pan sauce in minutes—with zero waste.
Next, I’ll take you through the steps to achieve crispy yet tender duck breast perfection, plus we’ll make a simple duck pan sauce with onions, red wine, and butter for a restaurant-worthy finish.
This duck recipe is quick, elegant, and surprisingly easy—perfect for holidays, date nights, or even weeknights when you’re craving something a little special.
Let’s get searing!
What You’ll Need to Make Crispy Duck Breast with Pan Sauce
Duck Breast and Pan Sauce Ingredients
2 duck breasts (about 1½ pounds total)
1 cup red wine
½ white onion, thinly sliced
2 tablespoons butter
salt & pepper
Tools You’ll Need to Cook Duck Breast
Heavy-bottomed pan (cast iron or stainless steel)
Knife & cutting board
Tongs & Spatula
Instant-read meat thermometer
Makes: 2 generous servings
Prep: 5 min Cook: 20 min
How to Make Crispy Duck Breast with Red Wine Pan Sauce
Step-by-Step with Photos
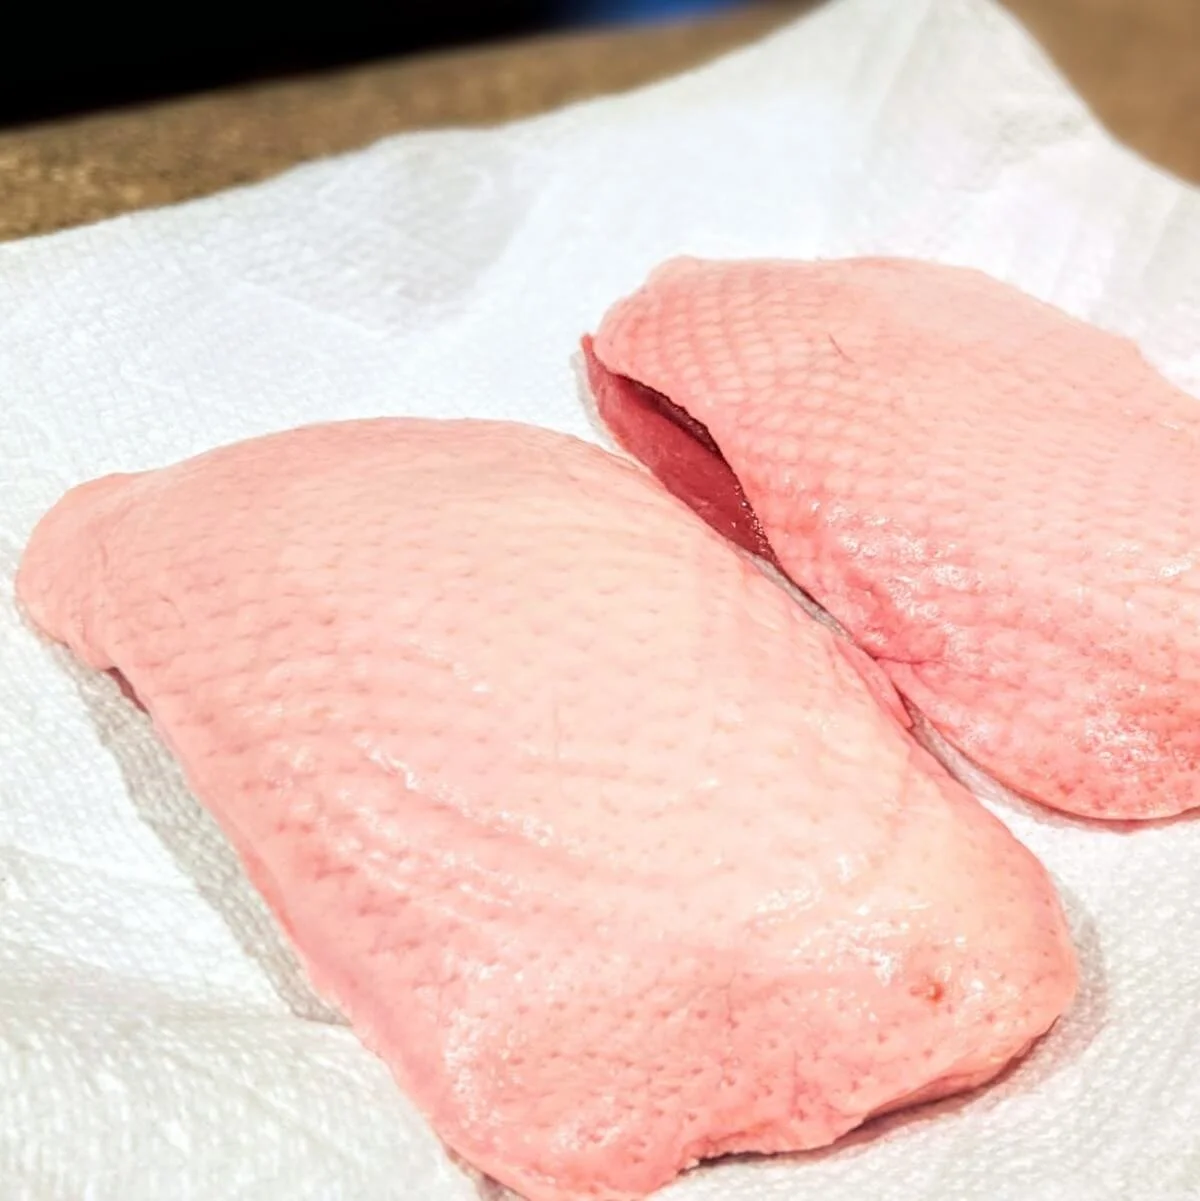
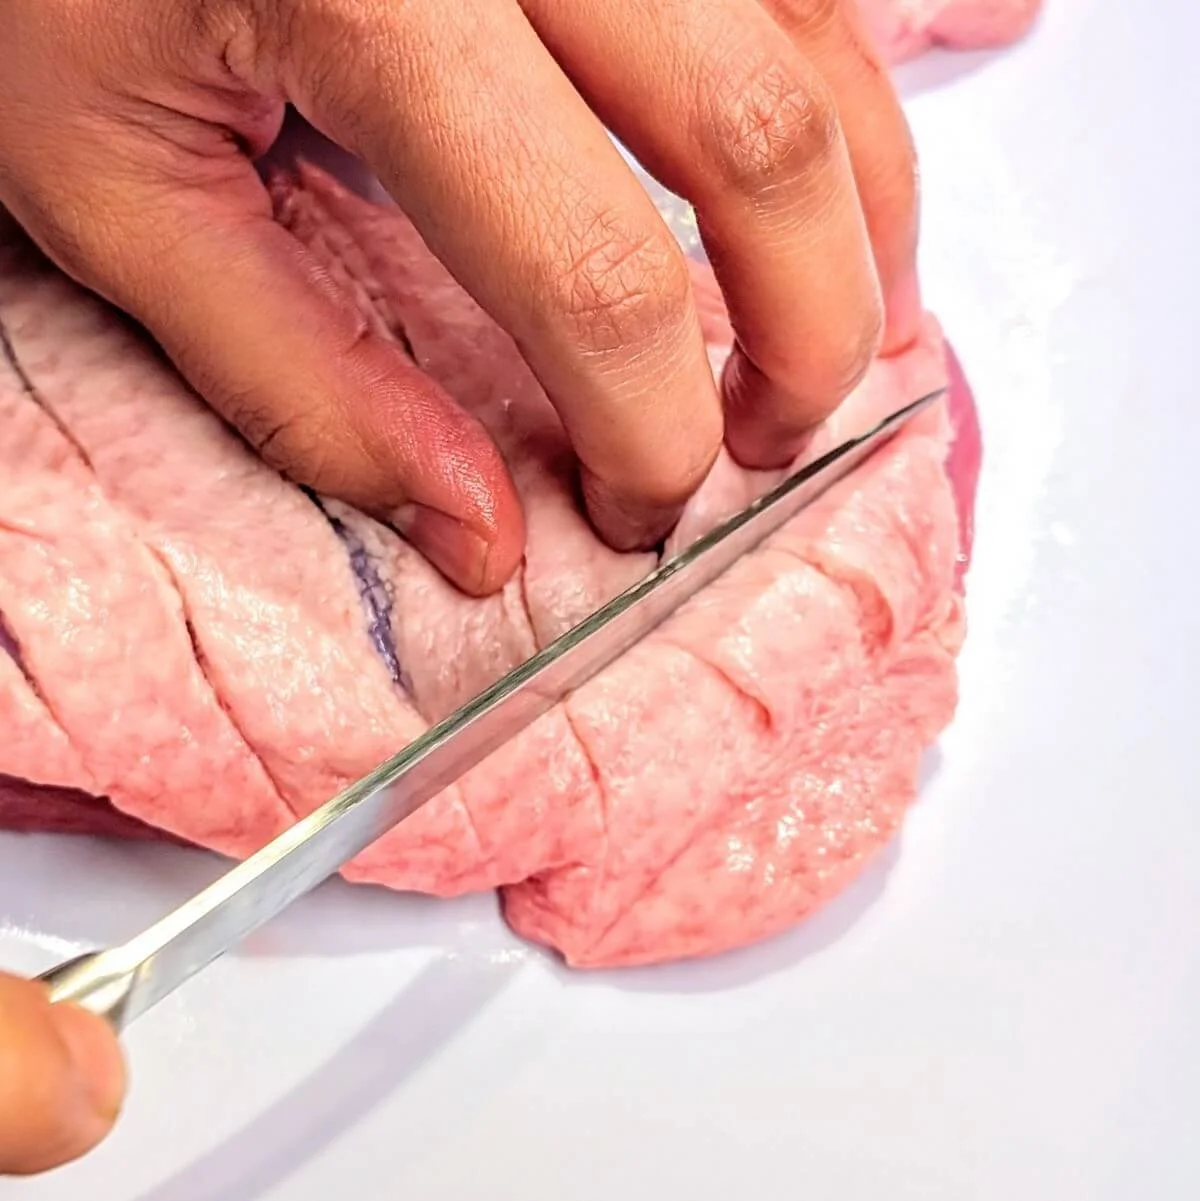
Step 1: Pat dry and score the duck skin
Thoroughly dry the duck breasts by patting them with a paper towel.
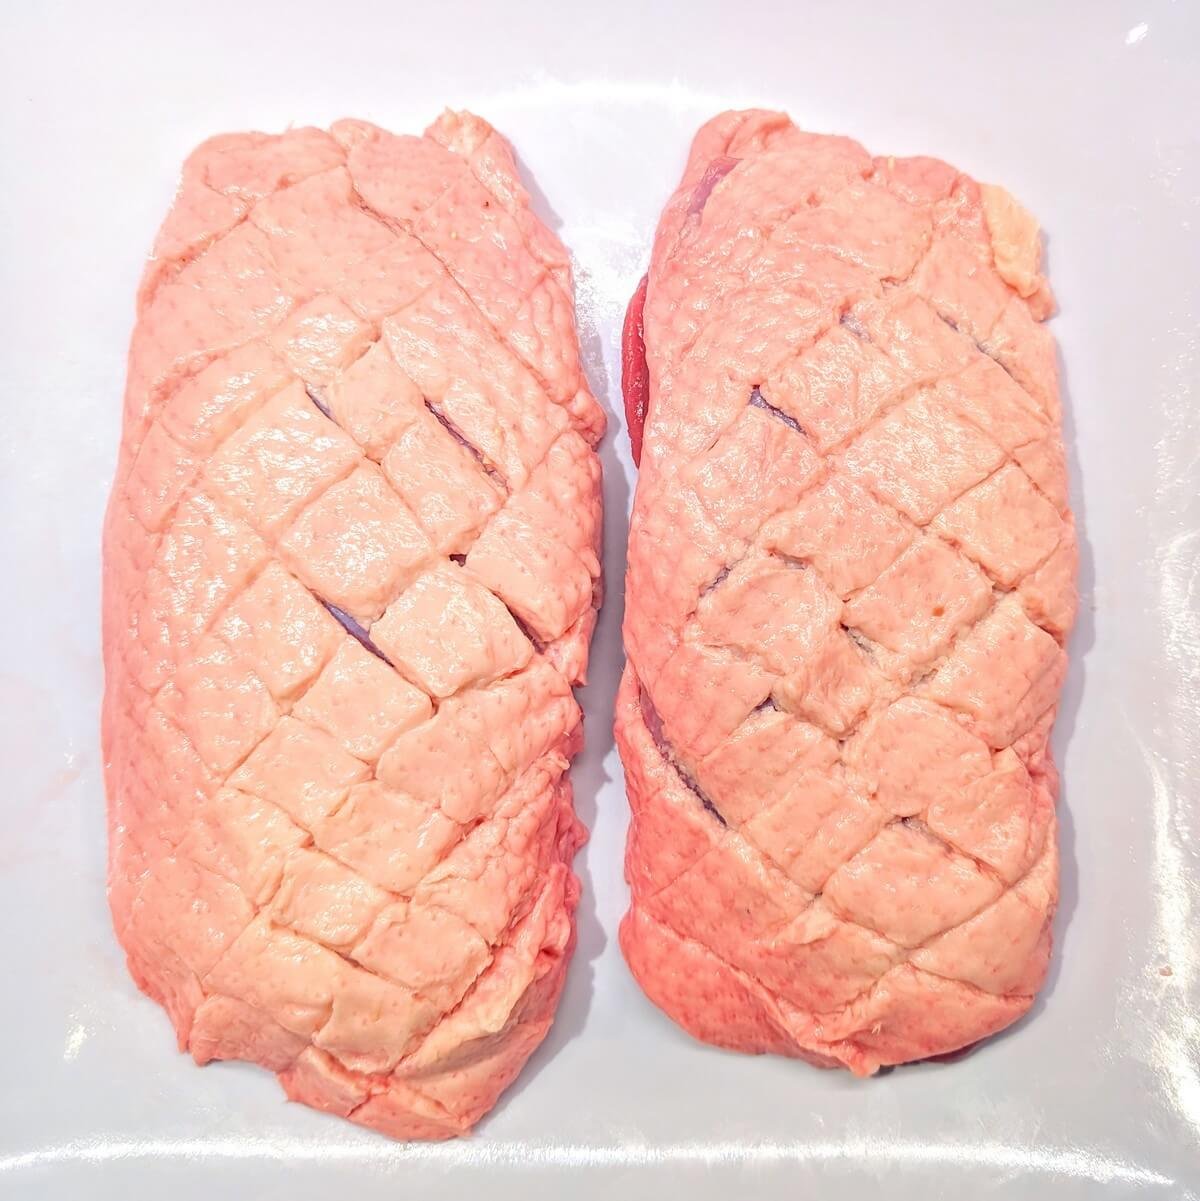
Using the tip of a very sharp knife, gently score the skin in diagonal lines about ½ inch apart. Be careful to make shallow cuts that go through the skin only, not into the meat.
Repeat in the opposite direction to create a crosshatch pattern, which helps the duck fat render evenly for crispy skin.

Step 2: Start duck skin-side down in a cold pan
Place the scored duck breasts skin-side down in a cold, dry heavy-bottomed pan (cast iron or stainless steel works best), then turn the heat to medium.
As the pan gradually heats, the duck fat will begin to render slowly—this helps crisp the skin evenly without burning. You don’t need to add oil; the duck fat will begin releasing and pooling in the pan almost immediately.
Avoid moving the duck in the first few minutes. The skin will stick at first, but will naturally release as the fat renders.

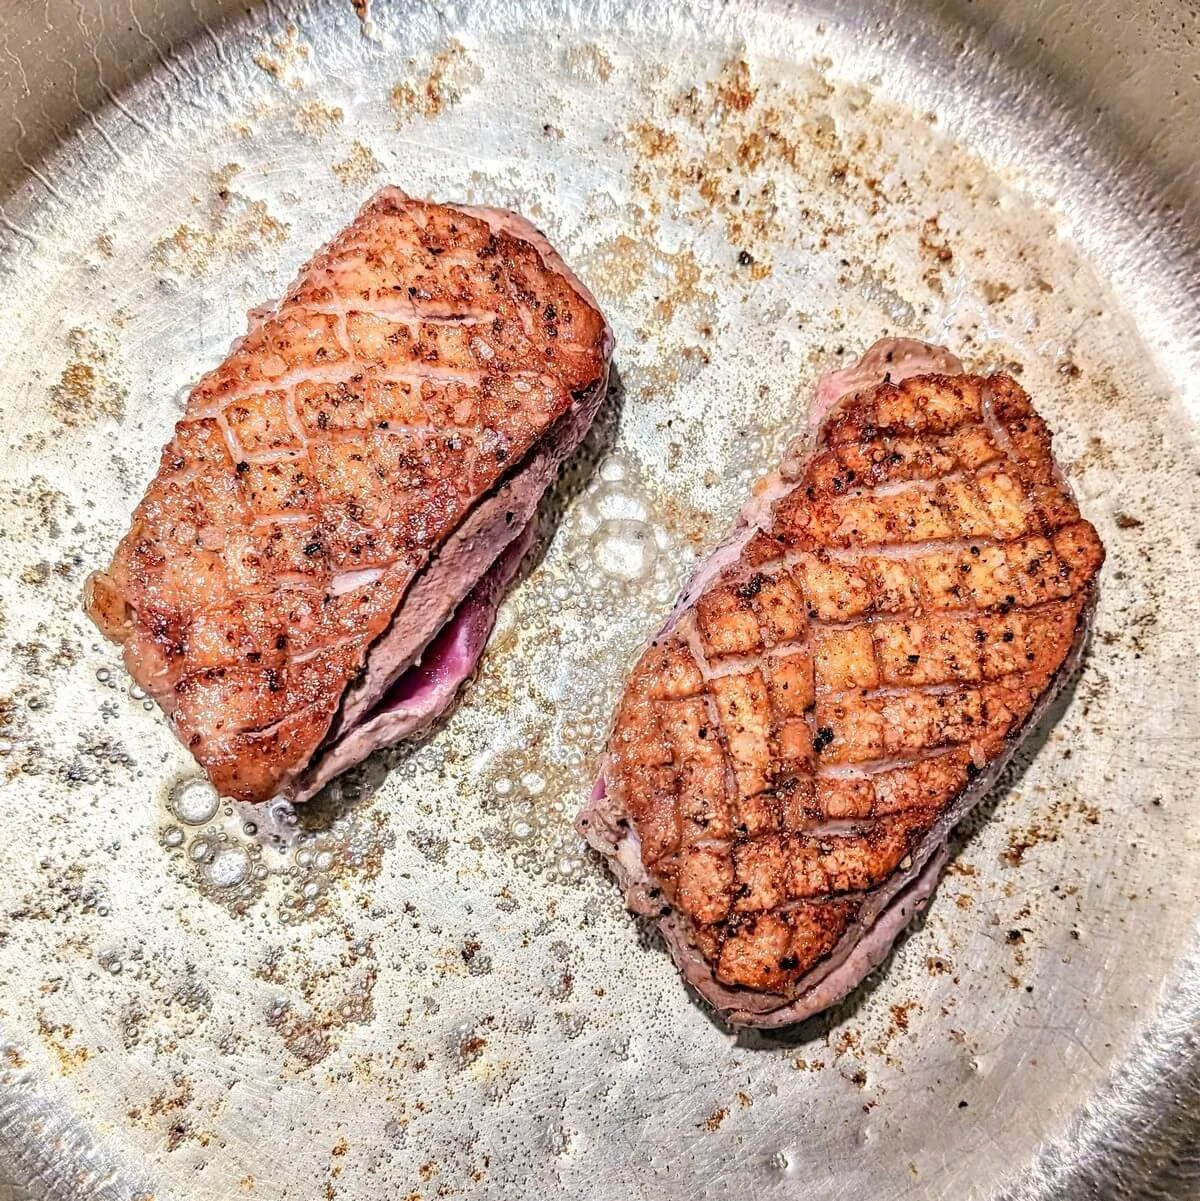
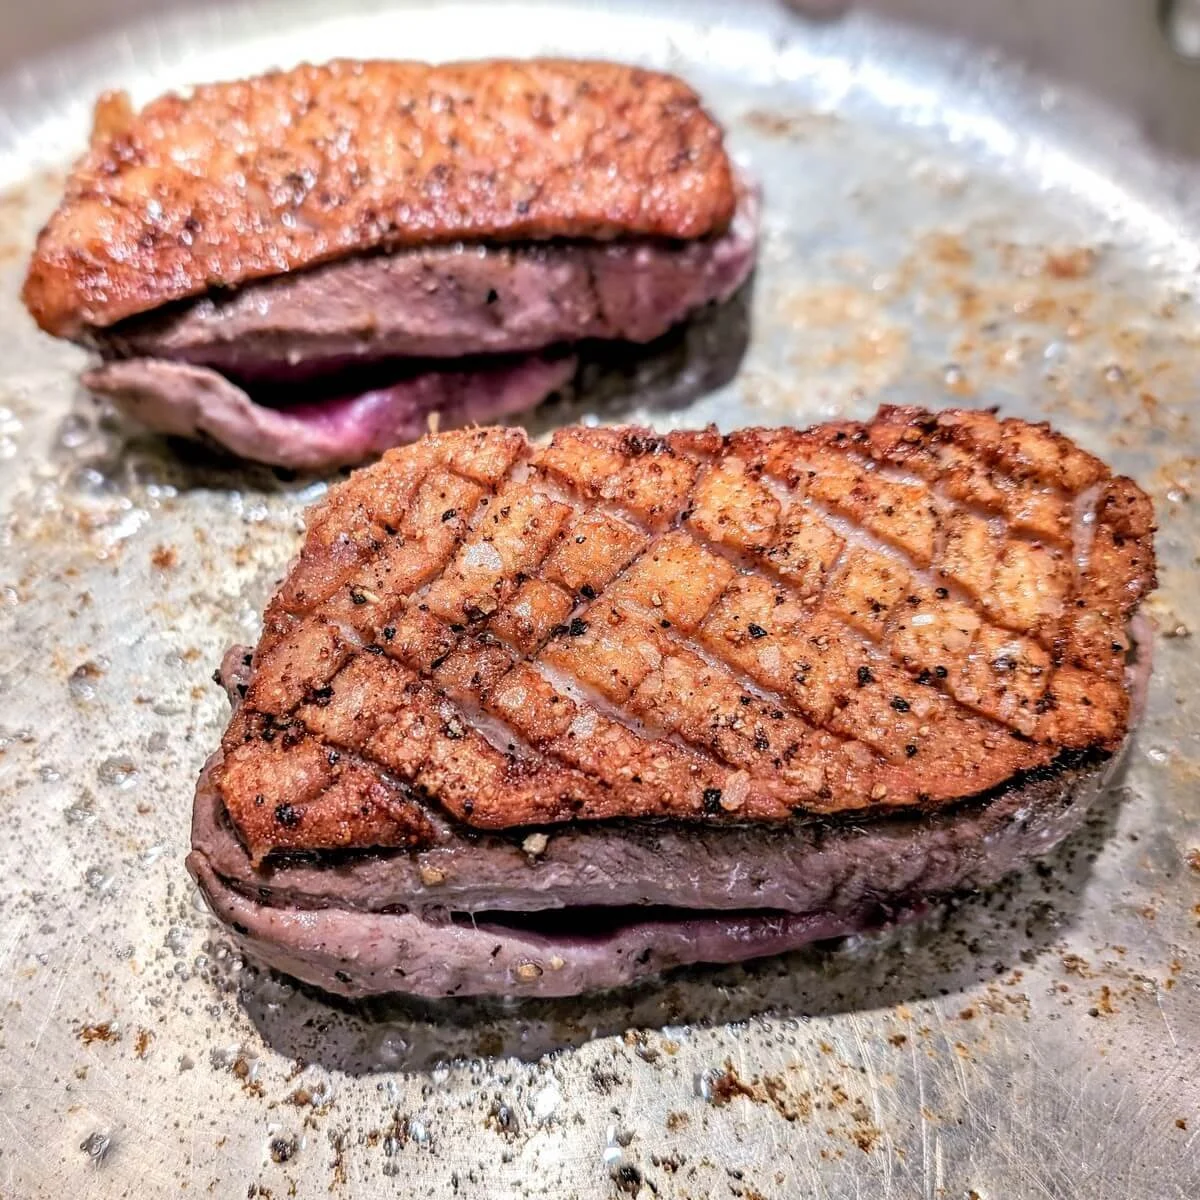
Step 3: Flip duck when the skin is golden and crisp
After about 5 minutes, check that the duck is picking up some color and fat is rendering properly. If you see smoke or fat spitting, lower the heat. If nothing’s happening, turn the heat up slightly.
After around 10 minutes, check if the skin is deep golden brown and crisp. If not, continue cooking until it is.
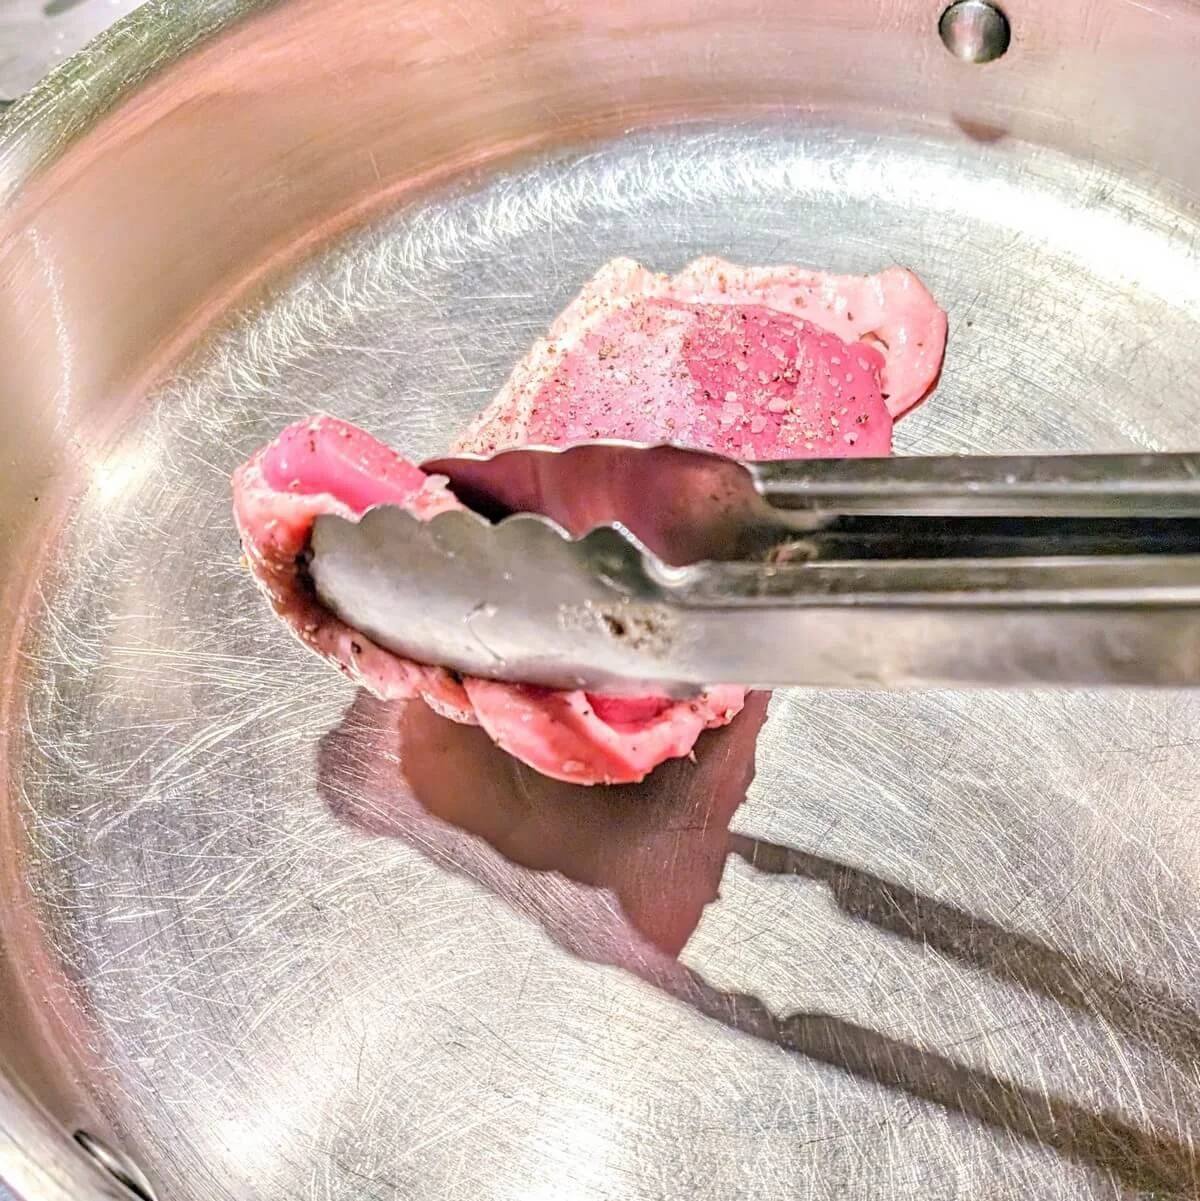
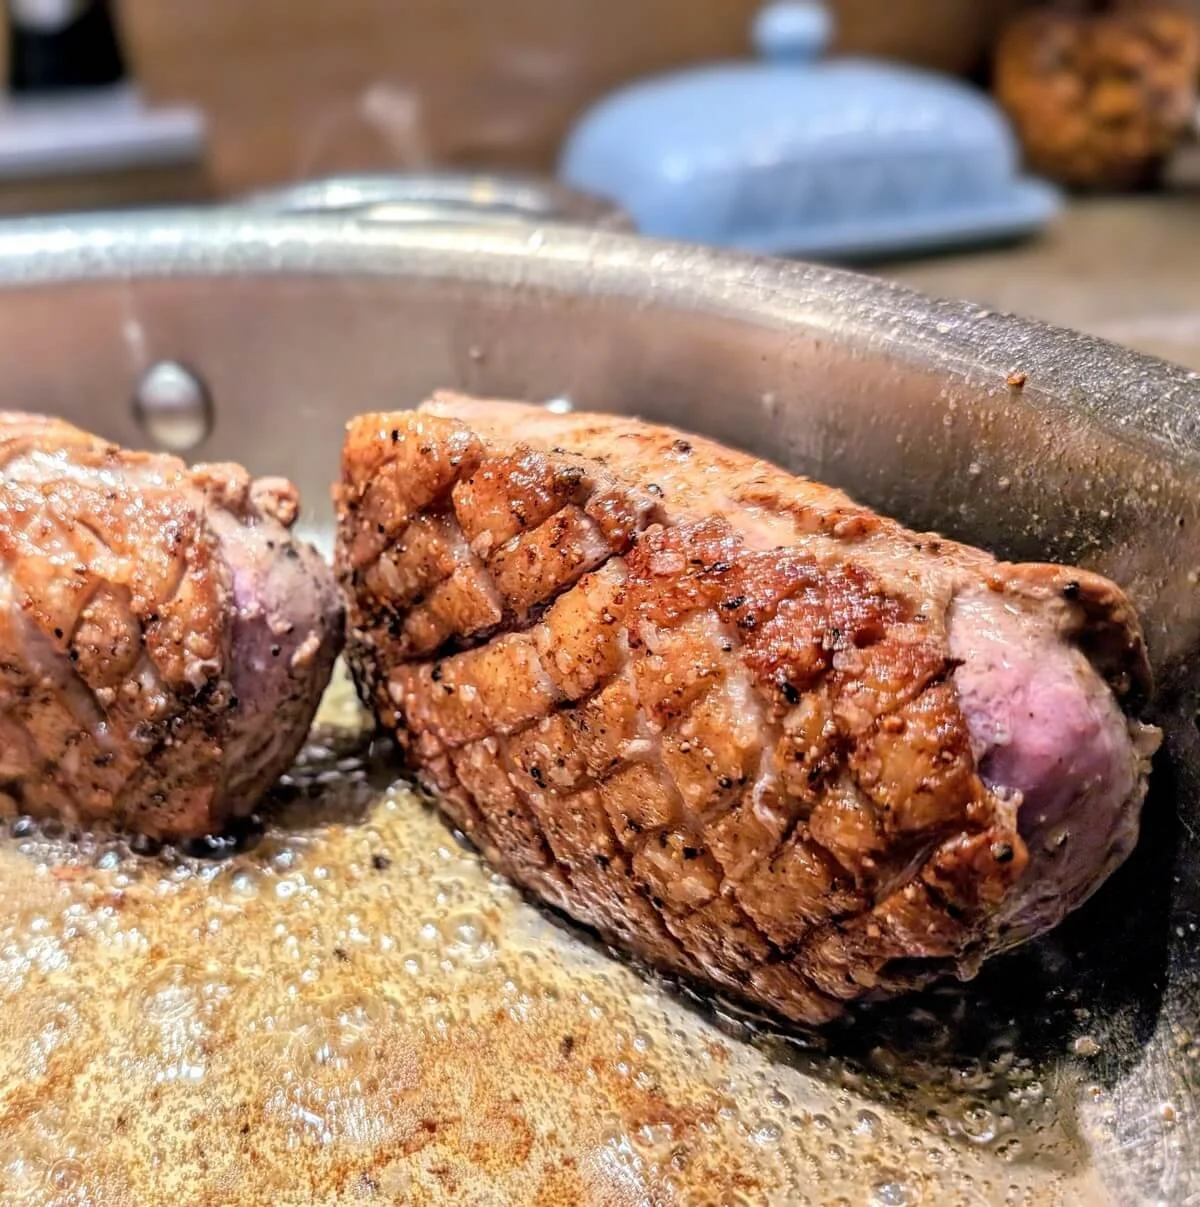
Once the skin is perfectly golden and crisp, flip the duck breasts and sear the flesh side and side edges for a few minutes per side, until evenly browned.

Step 4: Check internal temperature and let duck rest
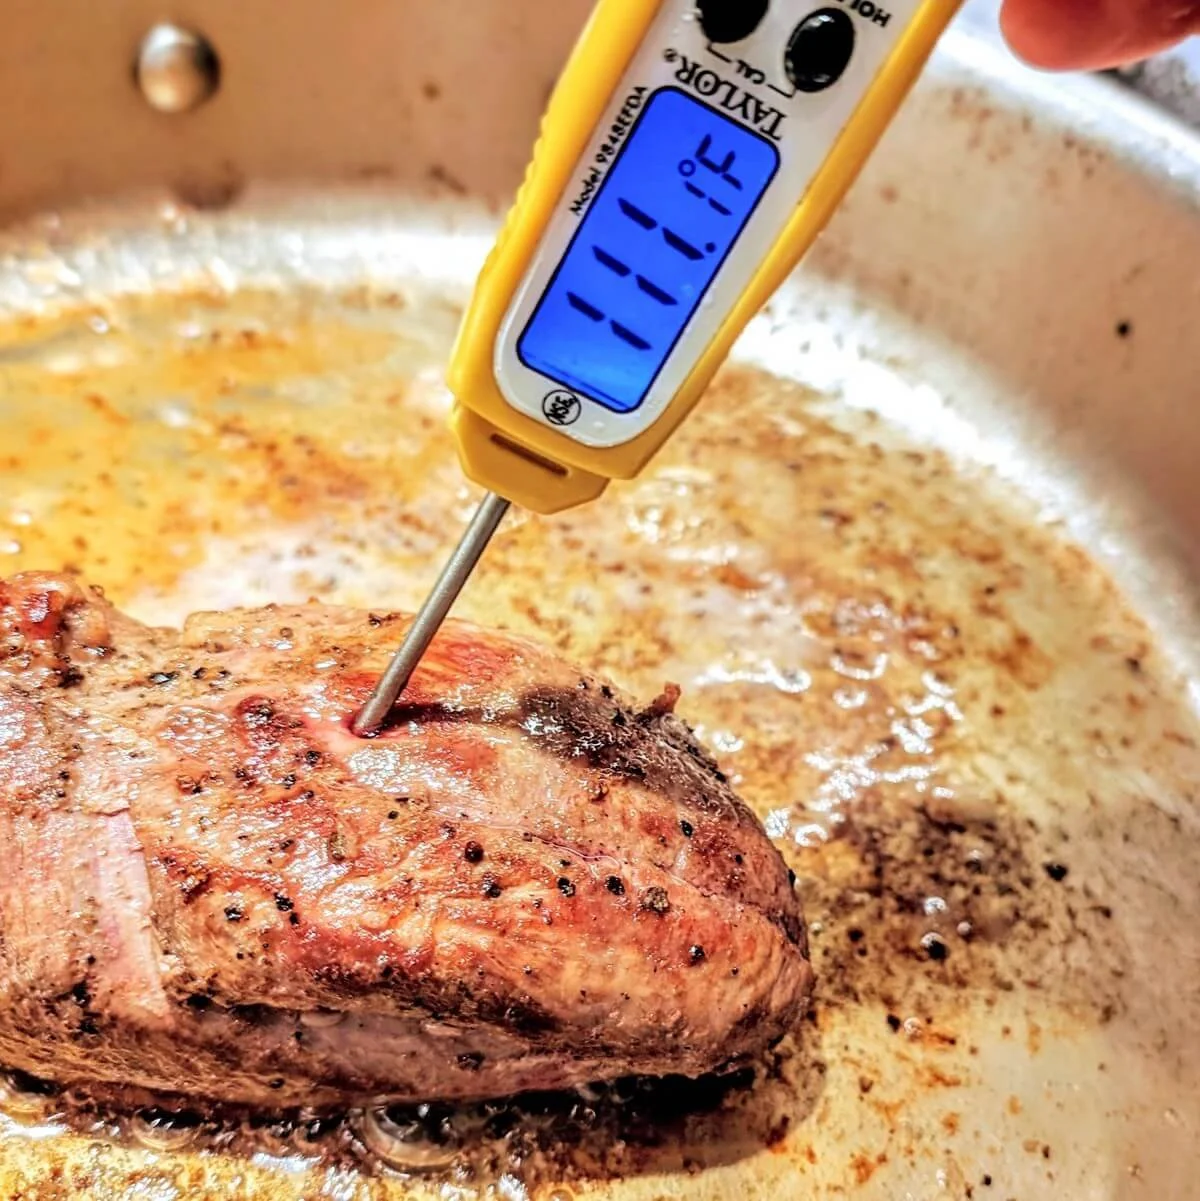
Use an instant-read meat thermometer to check the internal temperature in the thickest part of each duck breast.
Remove the duck from the pan when it reaches 110°F for medium-rare or 120°F for medium.
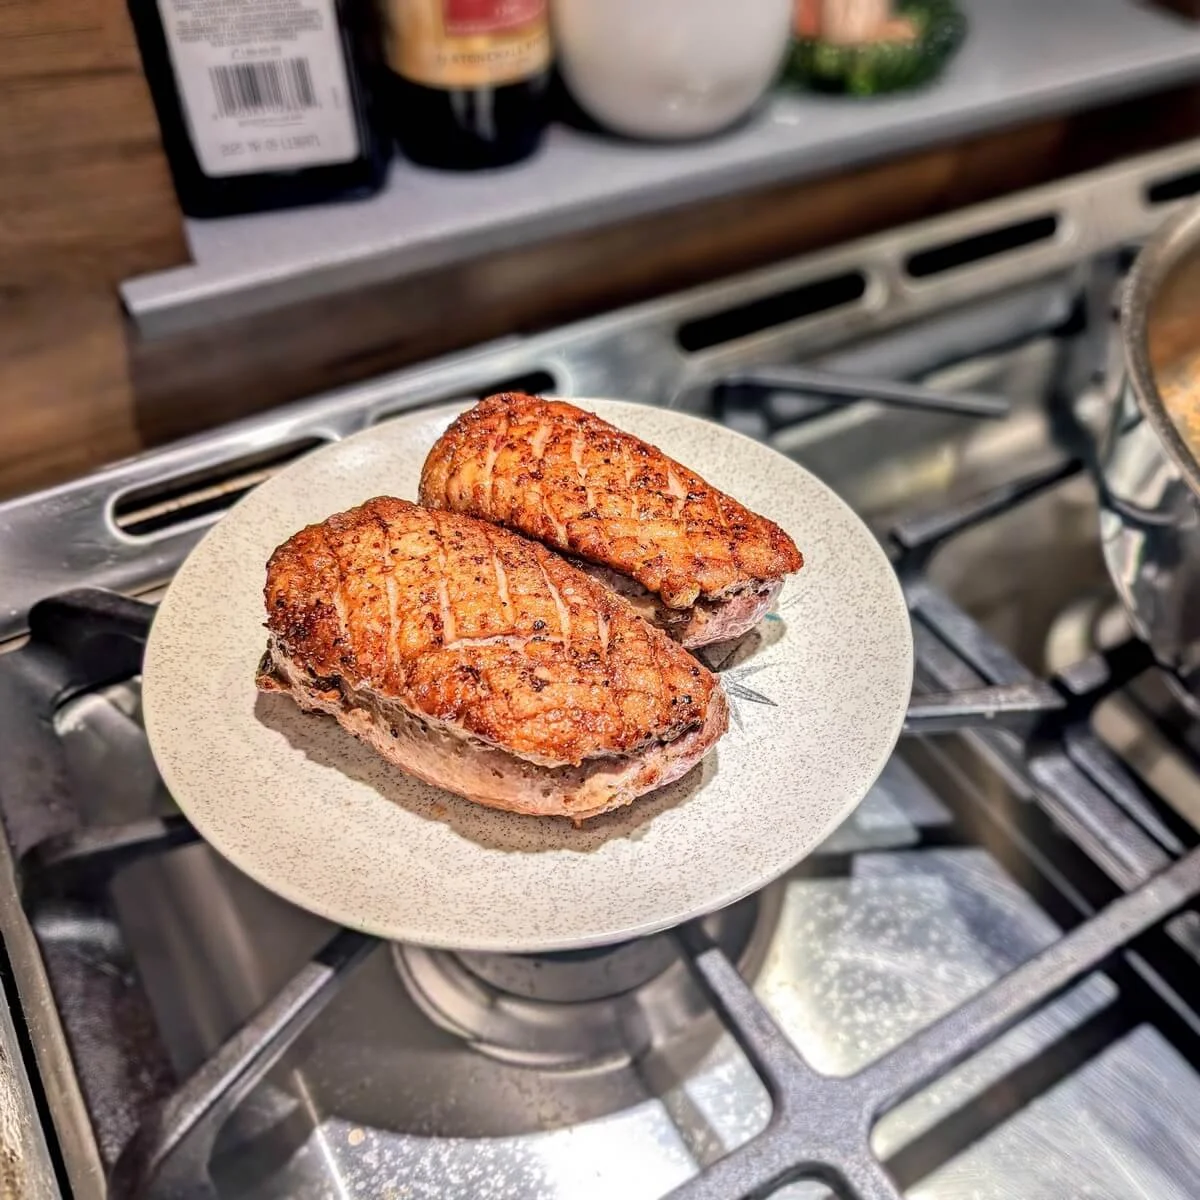
Place the duck breasts, uncovered, on a plate or tray to rest for at least 15 minutes—this keeps the skin crispy while the juices redistribute.
As the duck rests, the temperature will continue to rise about 20 degrees, reaching a final temp of 130°F (medium-rare) or 140°F (medium) by the time you slice.
Step 5: Make a quick duck pan sauce
Pour off the excess duck fat from the pan into a heat-safe container and reserve it for later. Leave just a thin coating of fat in the pan.
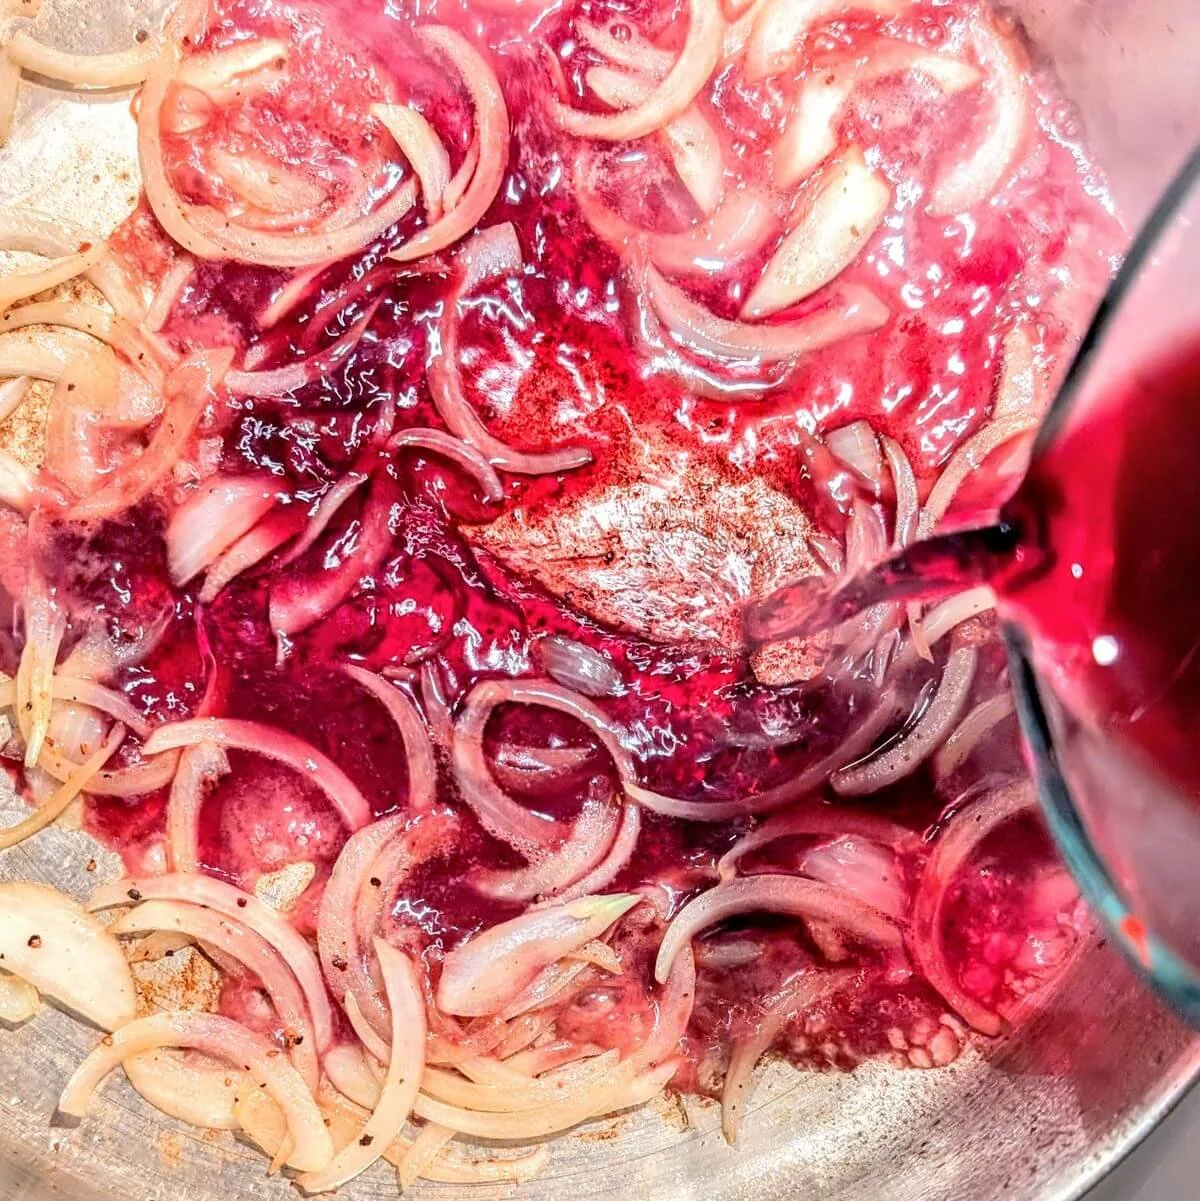
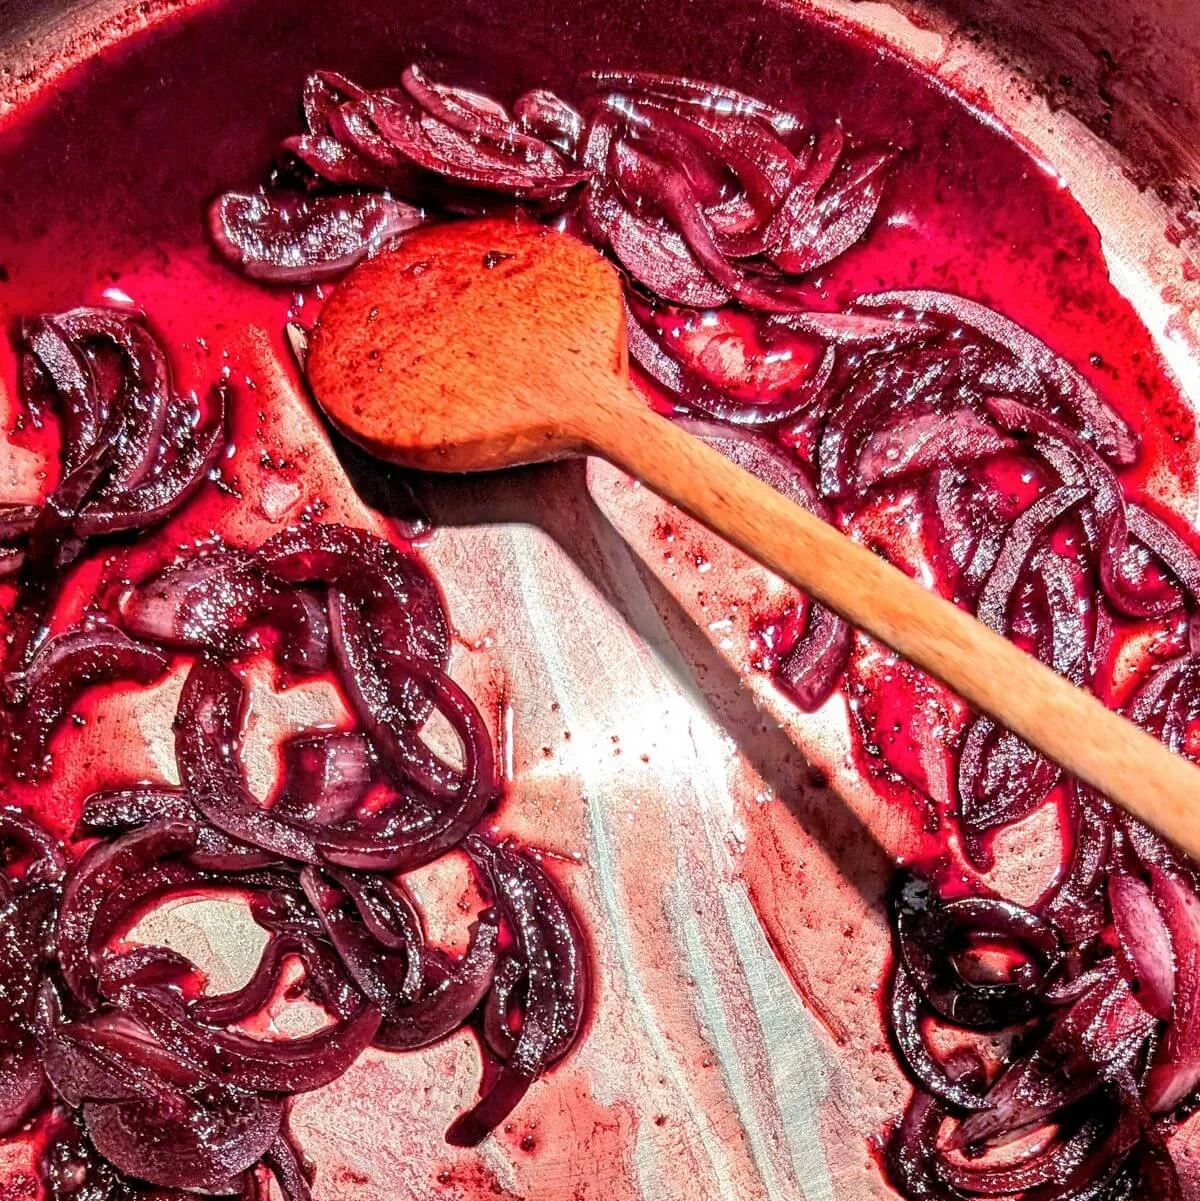
Turn the heat to high, then add the sliced onions and sauté until softened. Deglaze the pan with red wine, scraping up the fond (leftover browned bits).
Bring the wine to a boil and reduce by half, until it thickens slightly. You’ll know it’s ready when you can drag a spoon across the bottom and it leaves a clean line.
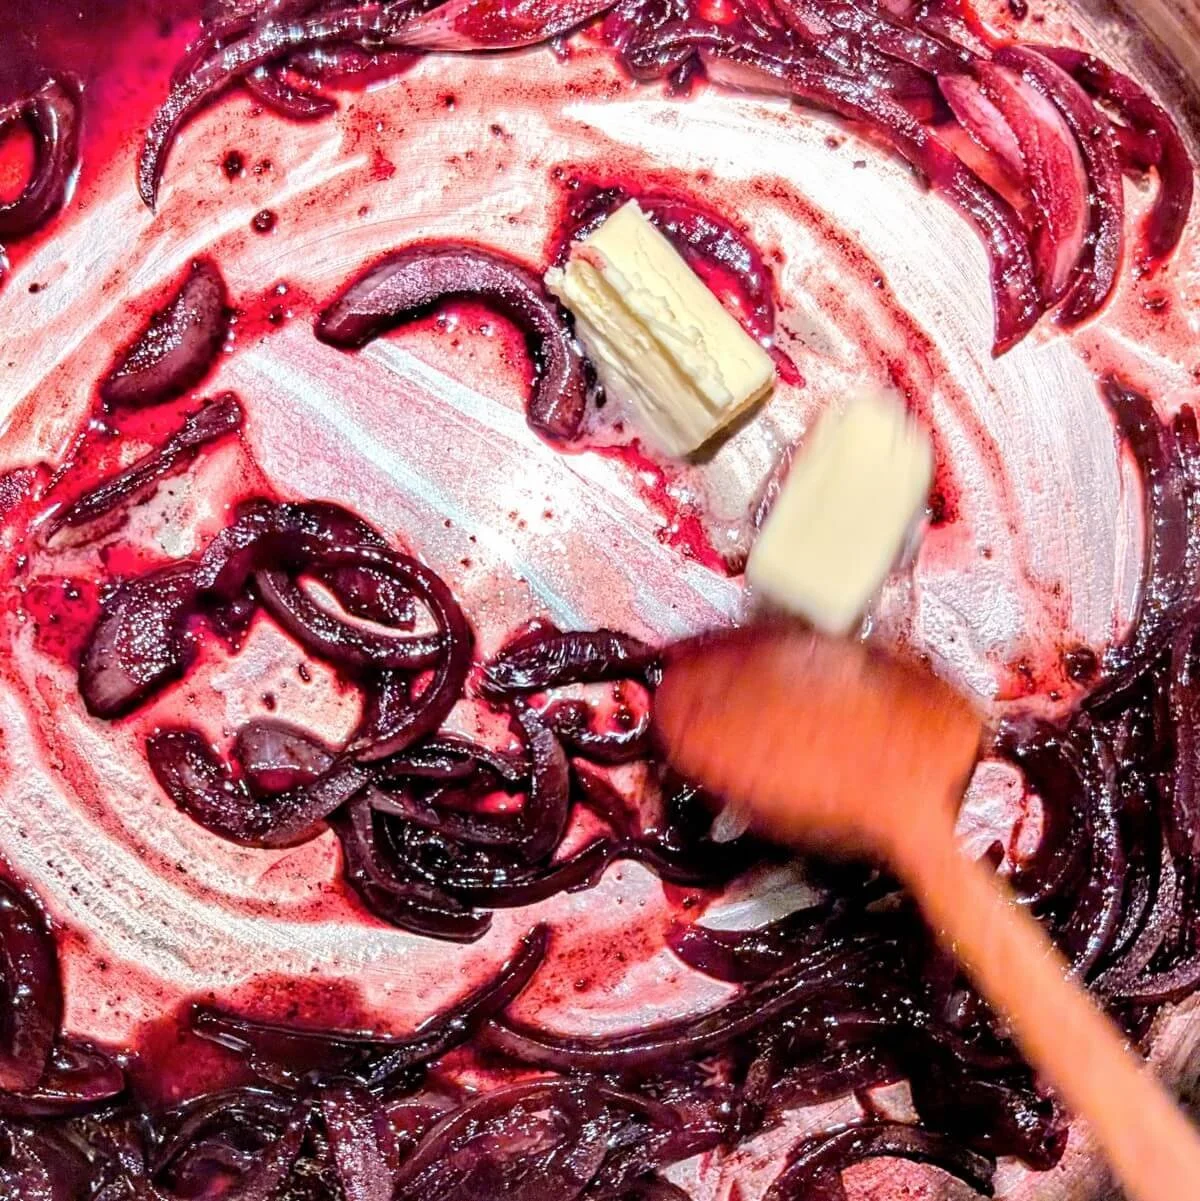
Remove the pan from the heat and stir in the butter until the sauce looks glossy and cohesive. Taste and season with salt if needed, then transfer to a ramekin or sauce dish for serving.

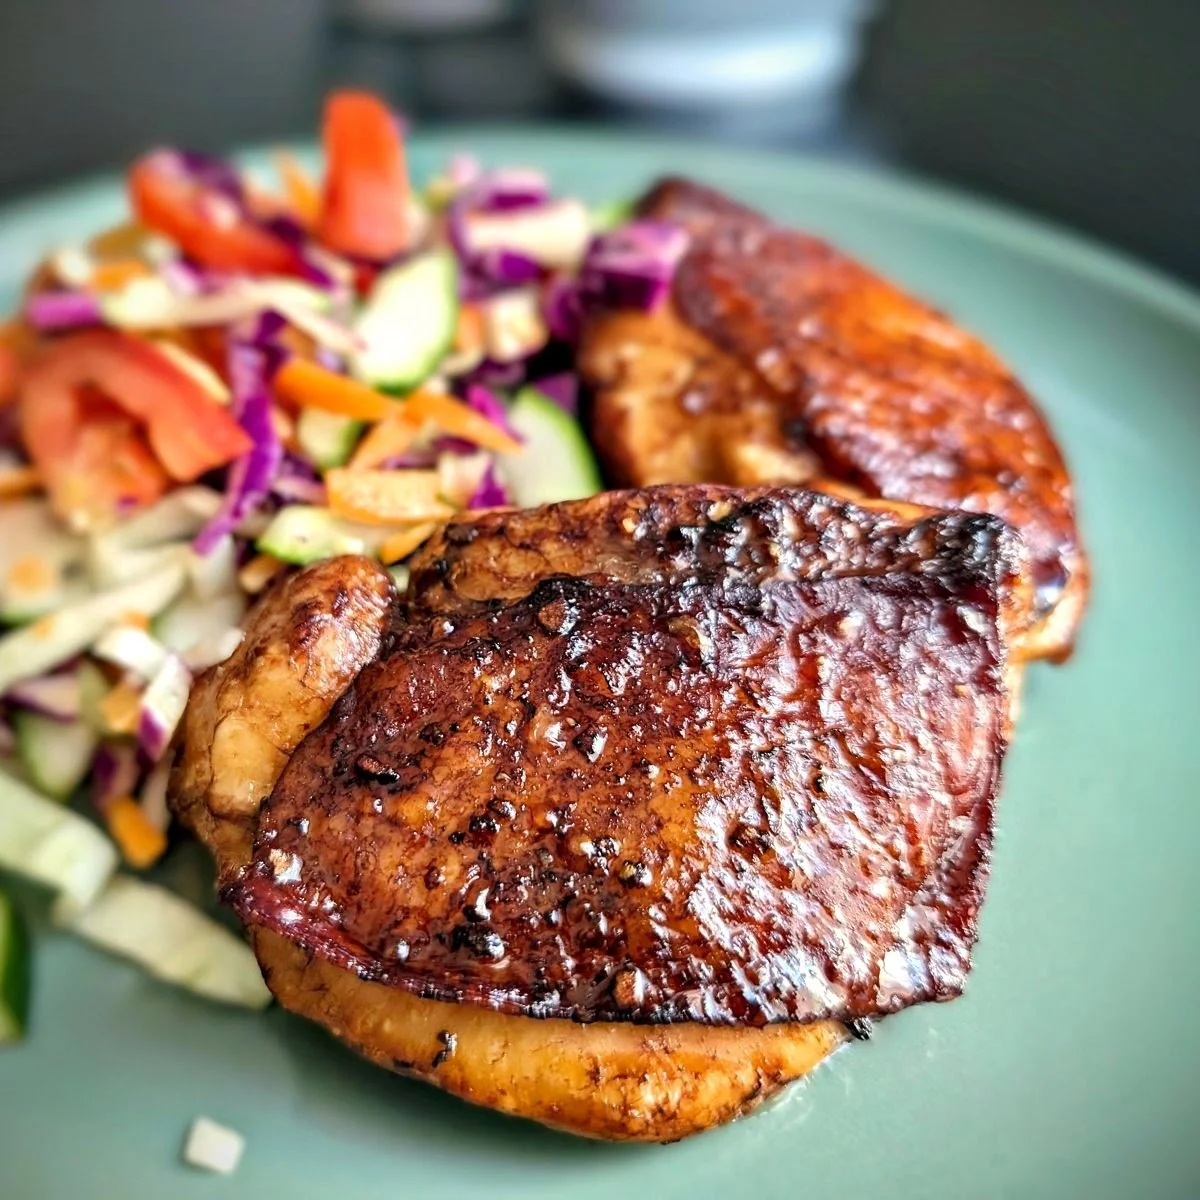
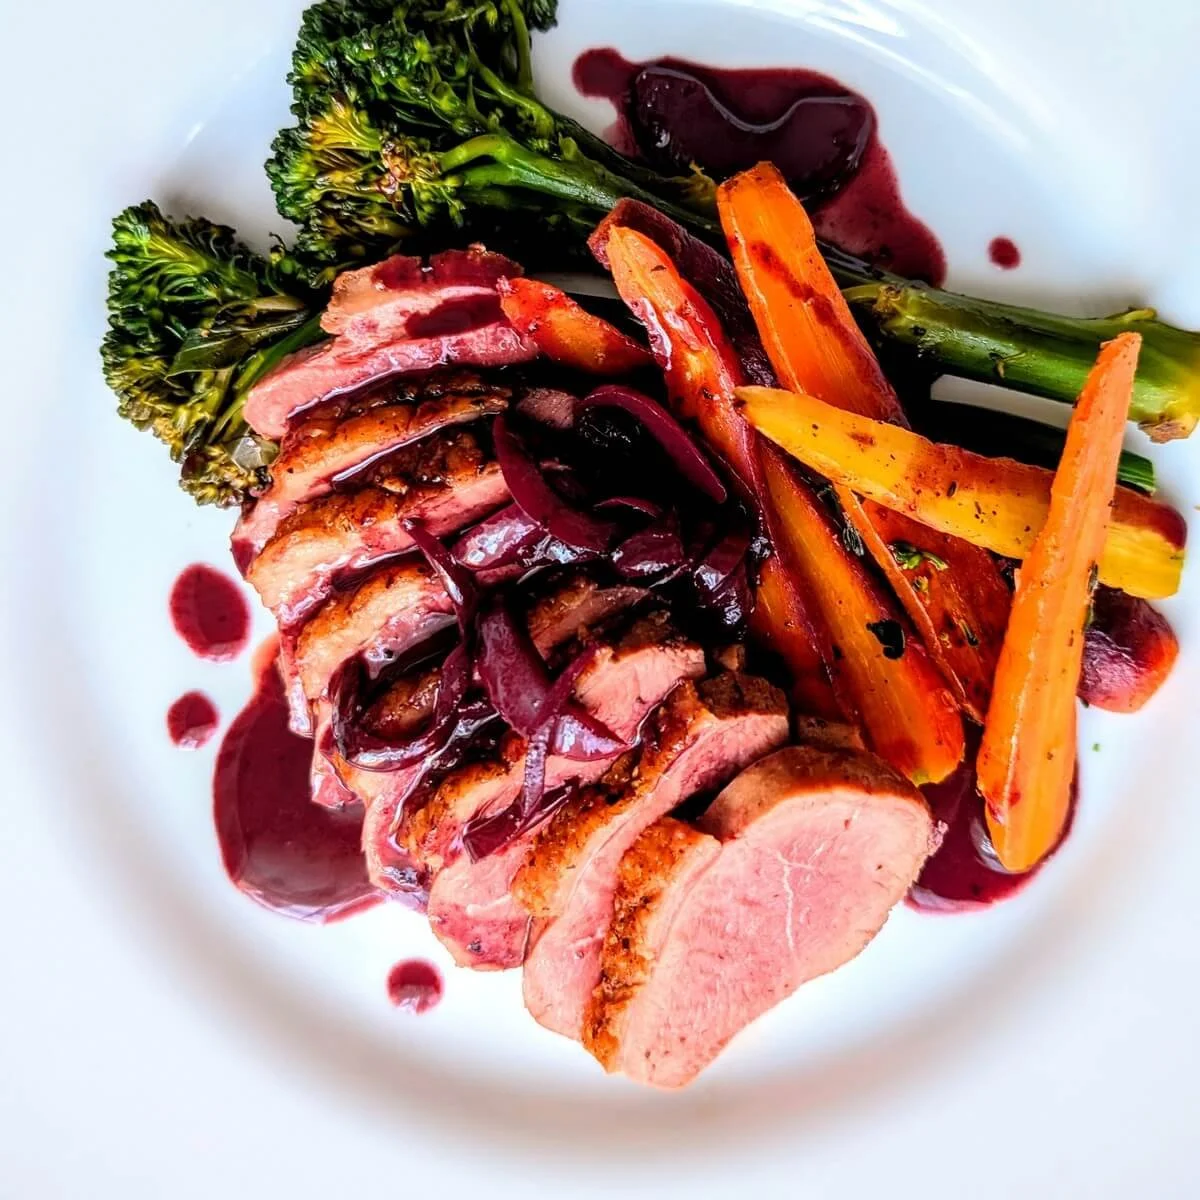
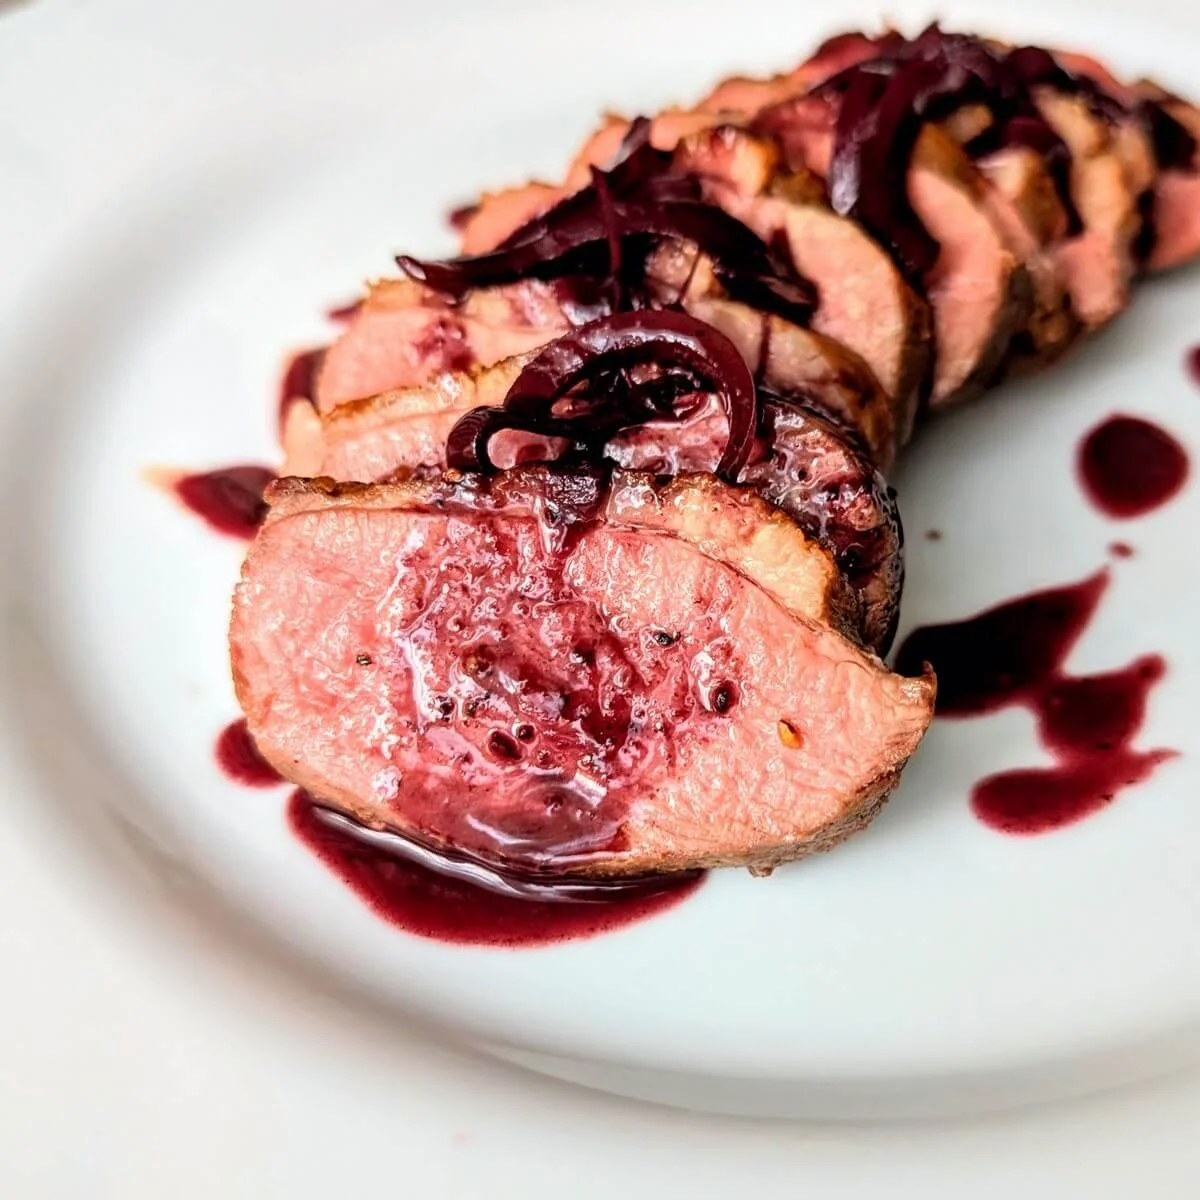
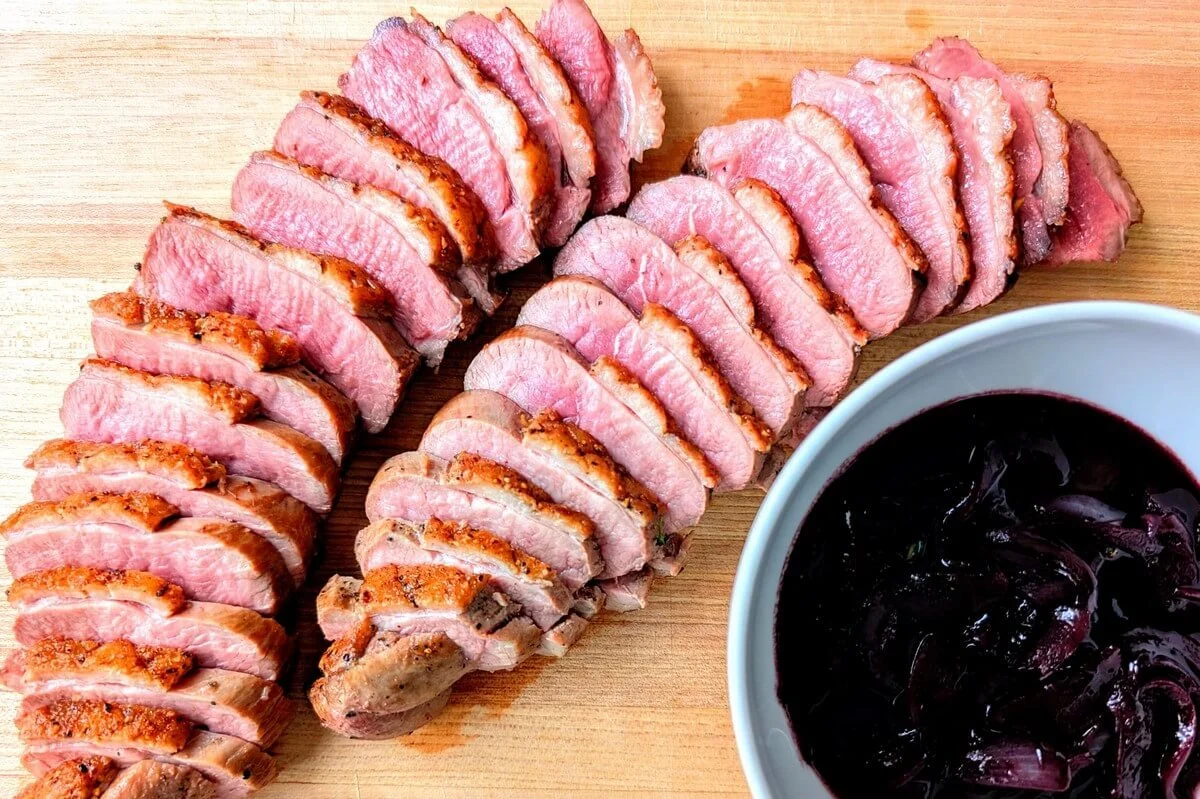
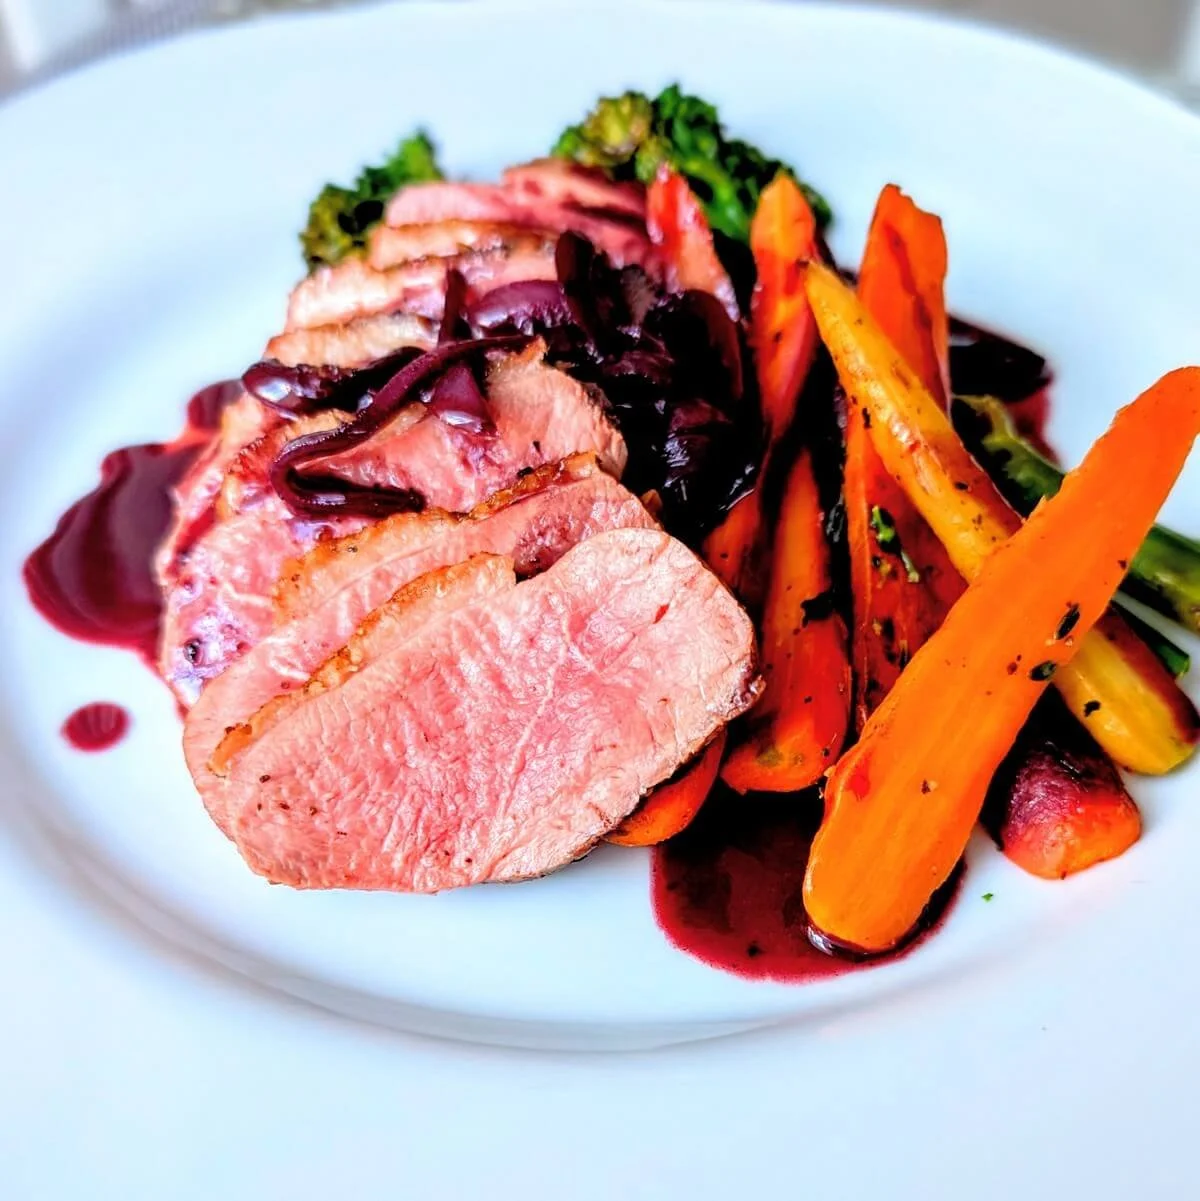
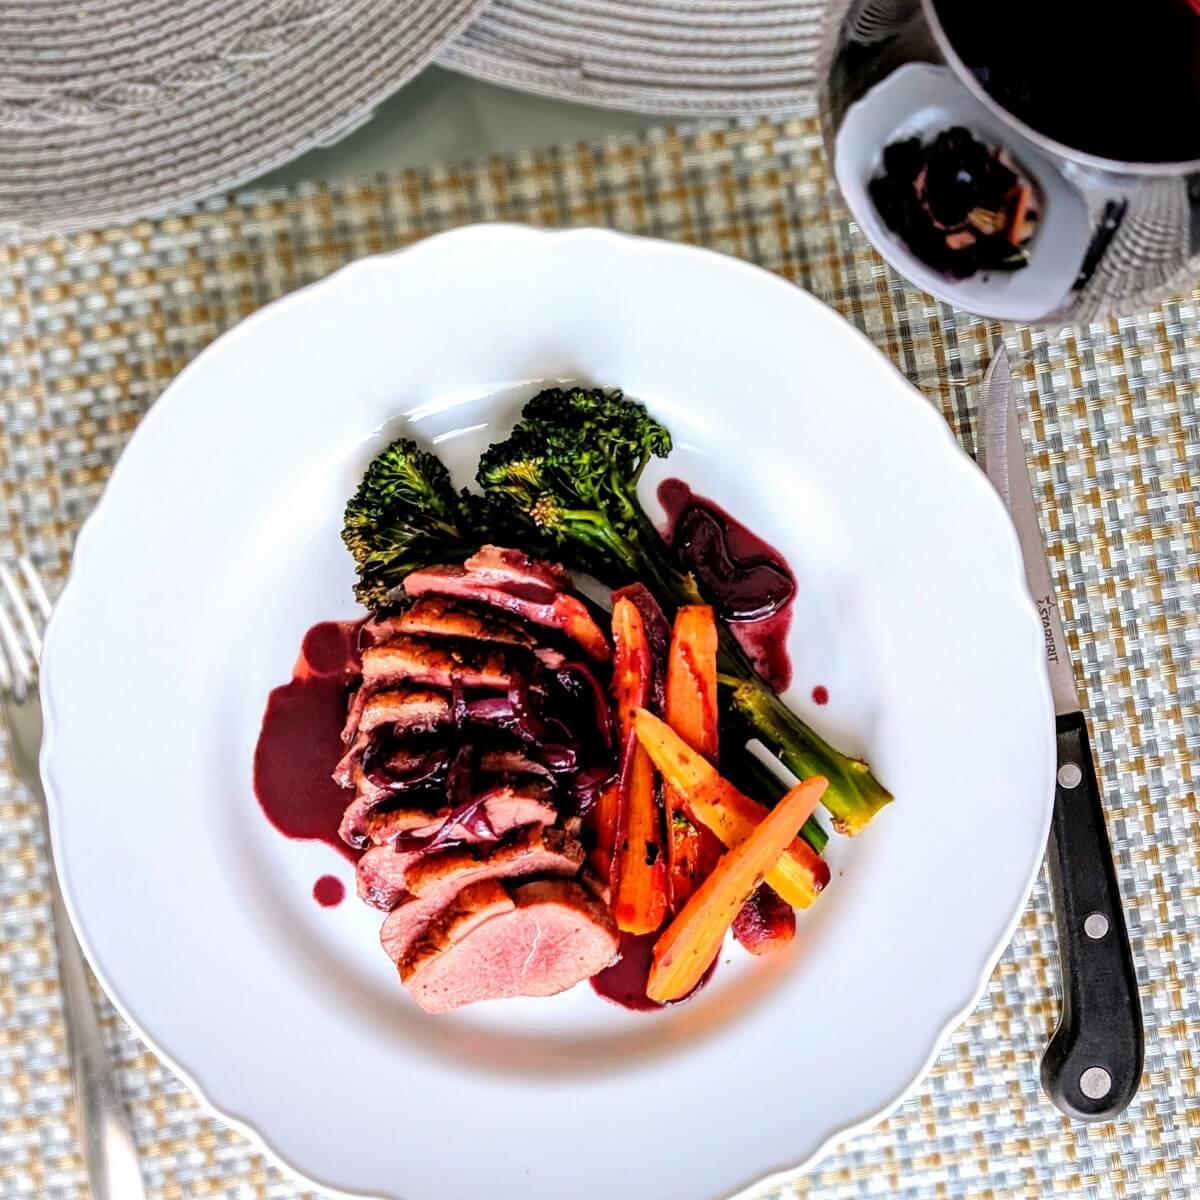
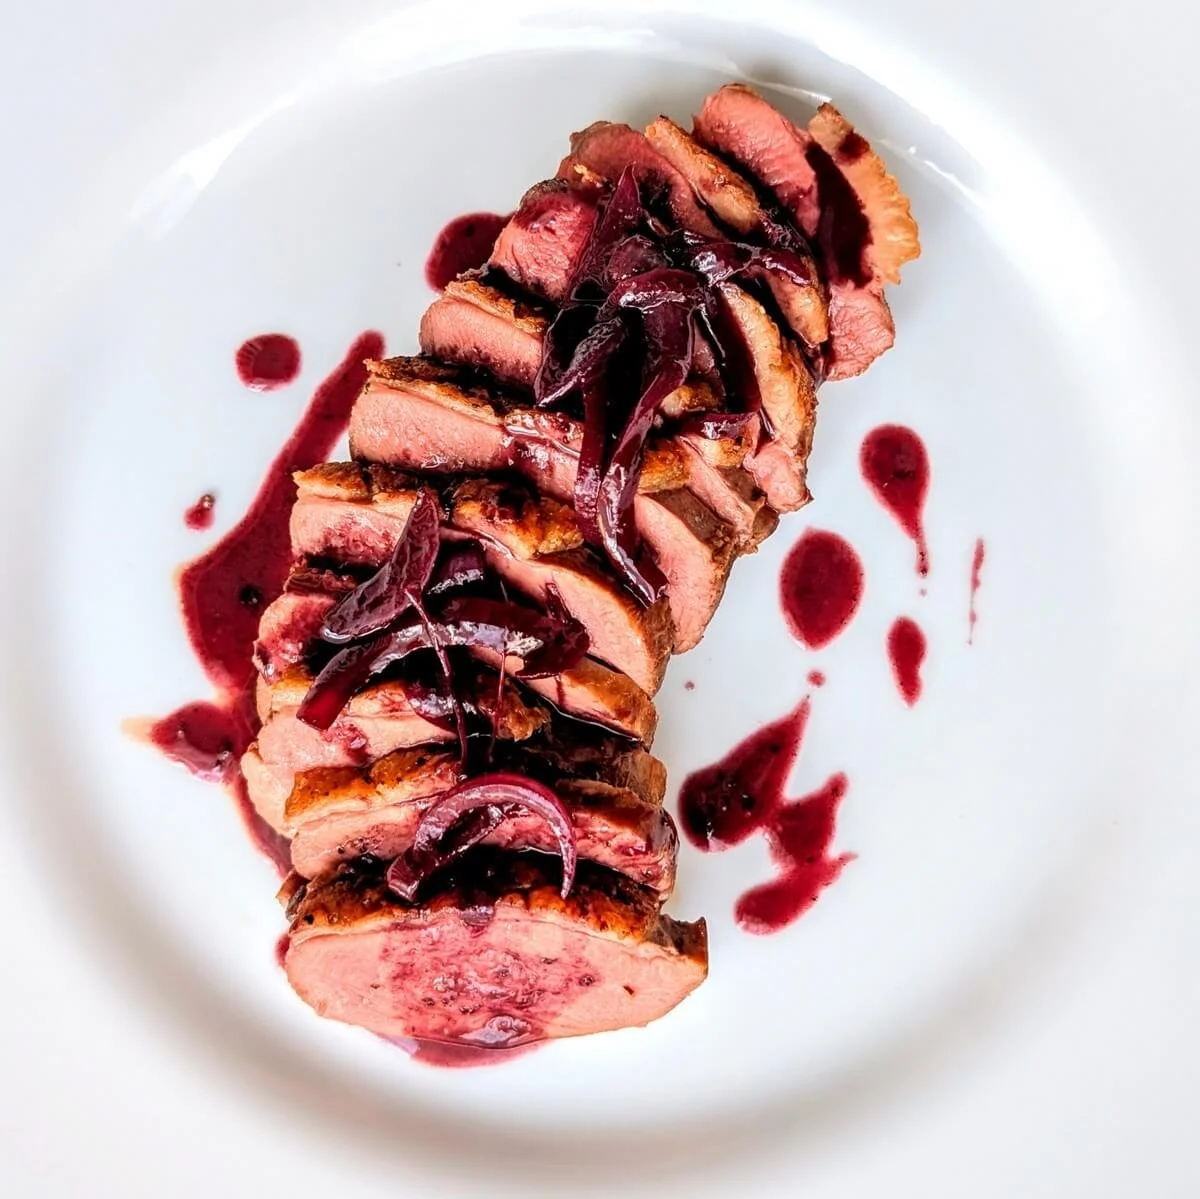
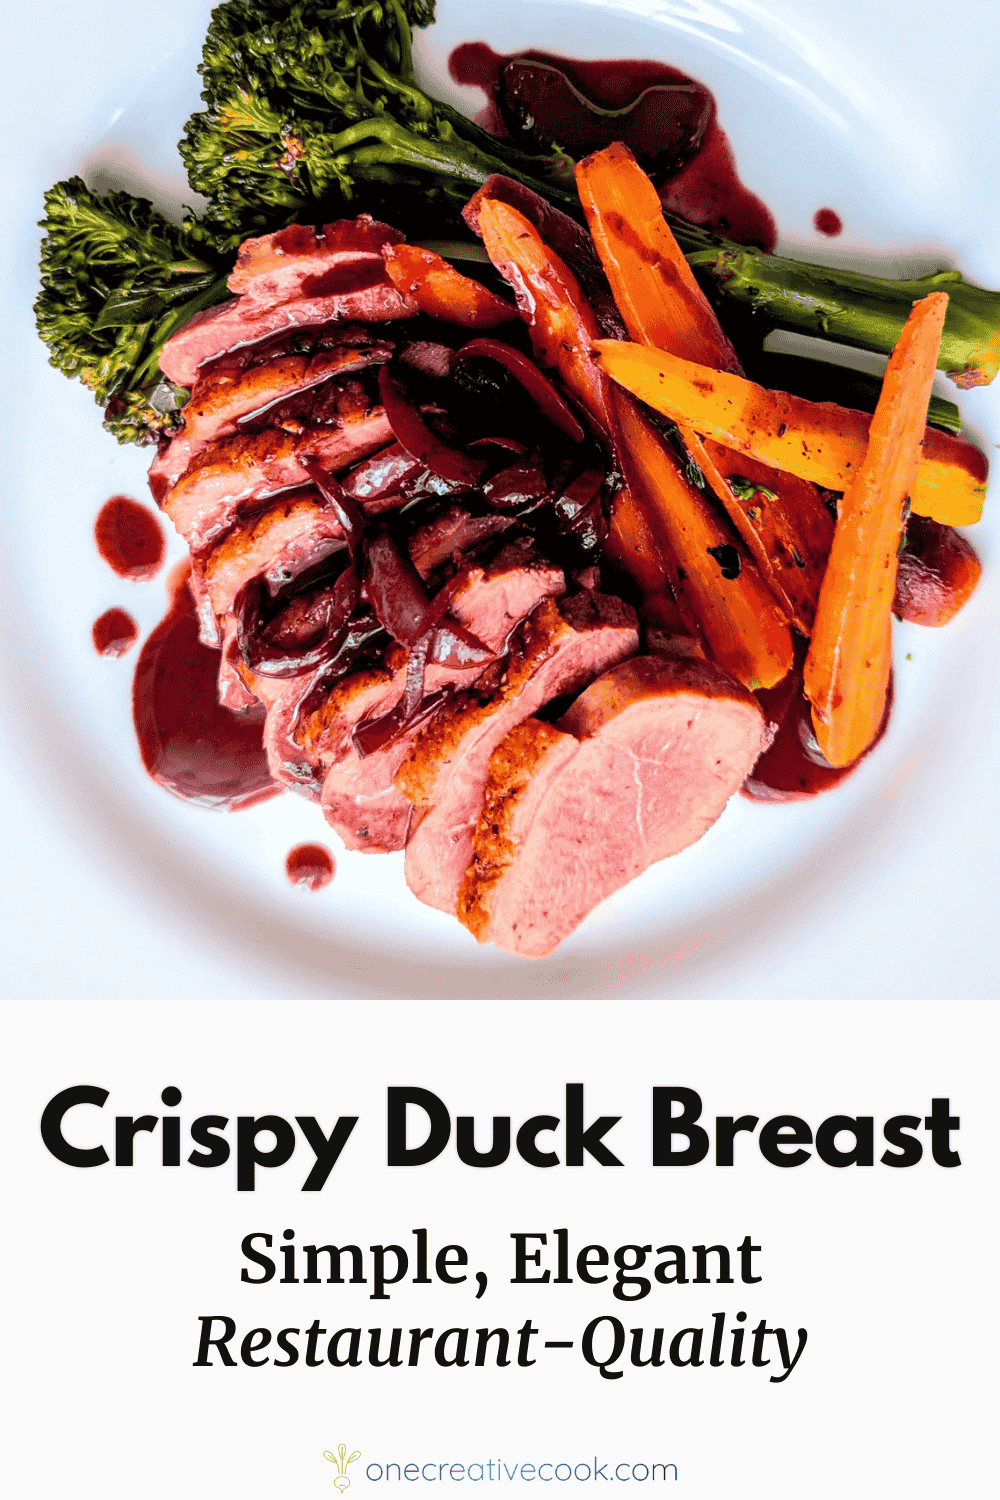
Step 6: Slice duck and serve with red wine pan sauce
Once the red wine pan sauce is finished, your duck should be fully rested and ready to slice.
Cut the duck breasts crosswise into thin slices and fan them out on a serving platter or individual plates.
Spoon the pan sauce generously over the top, and serve extra on the side for dipping or drizzling.
Chef Tips for Crispy Duck Breast and Red Wine Sauce
Score the duck skin carefully: Shallow cuts help the fat render and the skin crisp. Avoid slicing into the meat, as piercing it allows juices to escape, which can dry out the breast.
Let the duck rest uncovered: Rest the duck breast skin-side up on a plate, uncovered, to keep the skin crisp while juices redistribute. It stays warm for 15 minutes—just enough time to make your red wine duck pan sauce.
Use rendered duck fat to cook your sides: Save that flavorful duck fat to roast squash, Brussels sprouts, or potatoes. It adds rich, savory depth to any side dish.
Mind your portion size: Duck breasts vary in size depending on the breed. Plan for 6 to 8 ounces per person. One large duck breast (around 12–16 oz) can easily serve two.
Ingredient & Flavor Variations for Duck Breast and Pan Sauce
Switch up the duck breast seasonings:
Chinese five-spice for a warm, aromatic flavor
Smoked paprika or ground fennel gives earthy depth
Crushed juniper berries add a wild, savory edge
Add aromatics to the duck pan sauce:
Fresh herbs like rosemary or thyme
Alliums like garlic, shallots, or green onions
Citrus zest, such as orange or lemon
Fruits like orange segments, cherries, or dried figs
How to Store Leftover Duck Breast and Pan Sauce
Fridge: Store leftover duck breast in an airtight container in the refrigerator for up to 3 days. Keep the pan sauce separate in a small sealed container to preserve its texture.
To Reheat: For best results, reheat the duck gently skin-side down in a skillet over low heat to re-crisp the skin, then flip to warm the flesh before slicing. If already sliced, steam briefly in a pan with a splash of water to prevent drying out.
Reheat the pan sauce separately on the stovetop or in the microwave, adding a little water if needed to loosen.
Freezer: Cooked duck can be frozen, but the texture may become grainy once thawed. Slice it into small pieces before freezing and repurpose it in soups, stews, or fried rice, where texture matters less.
How to Serve Duck Breast and Red Wine Pan Sauce
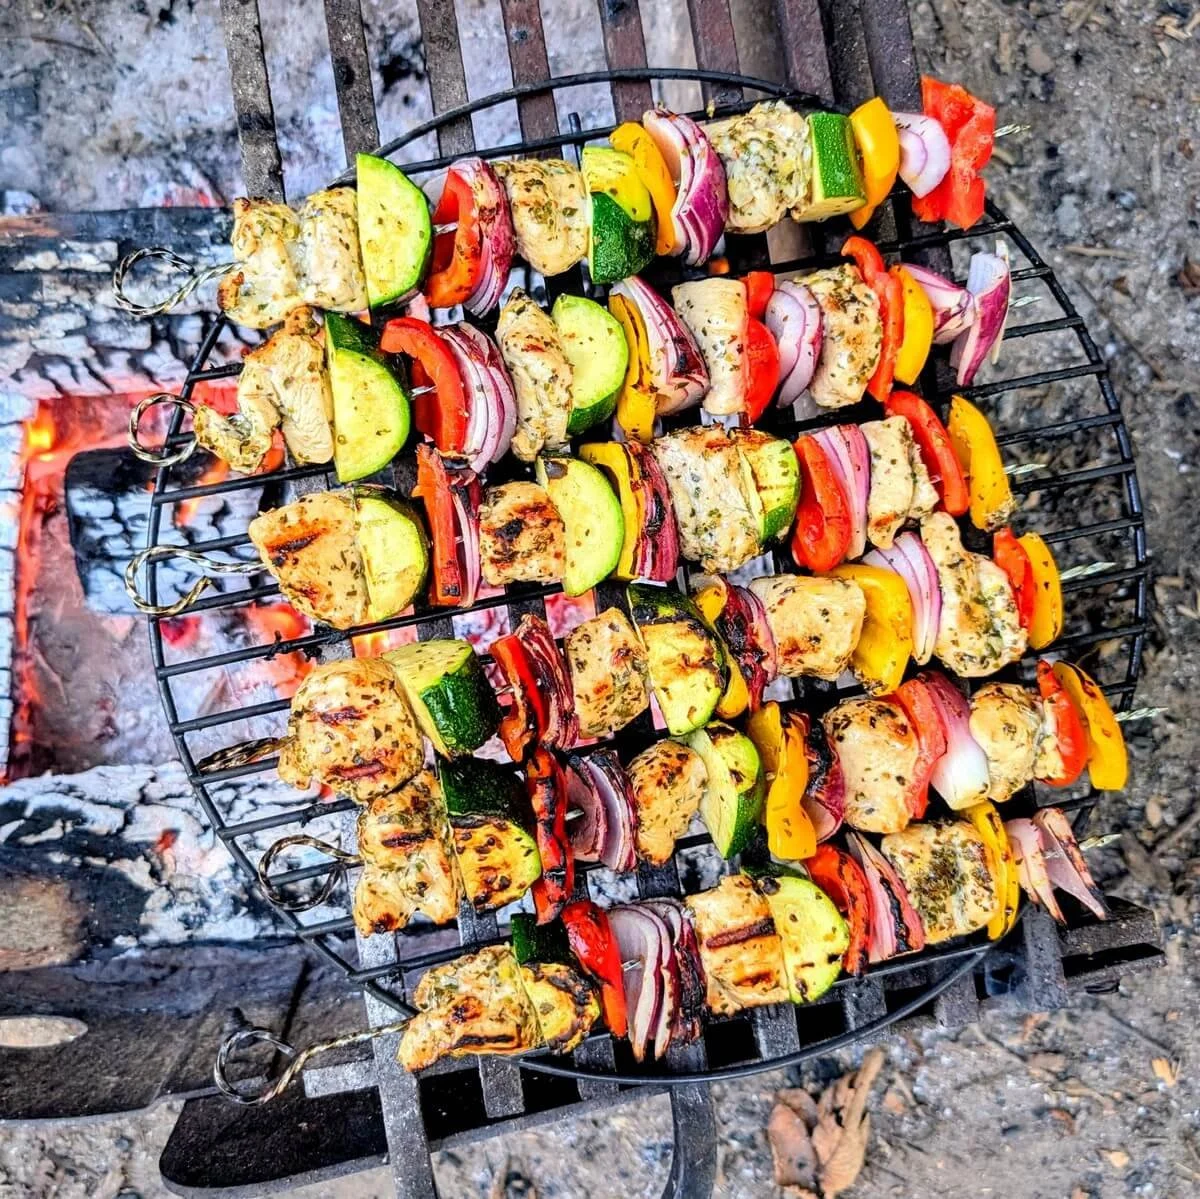
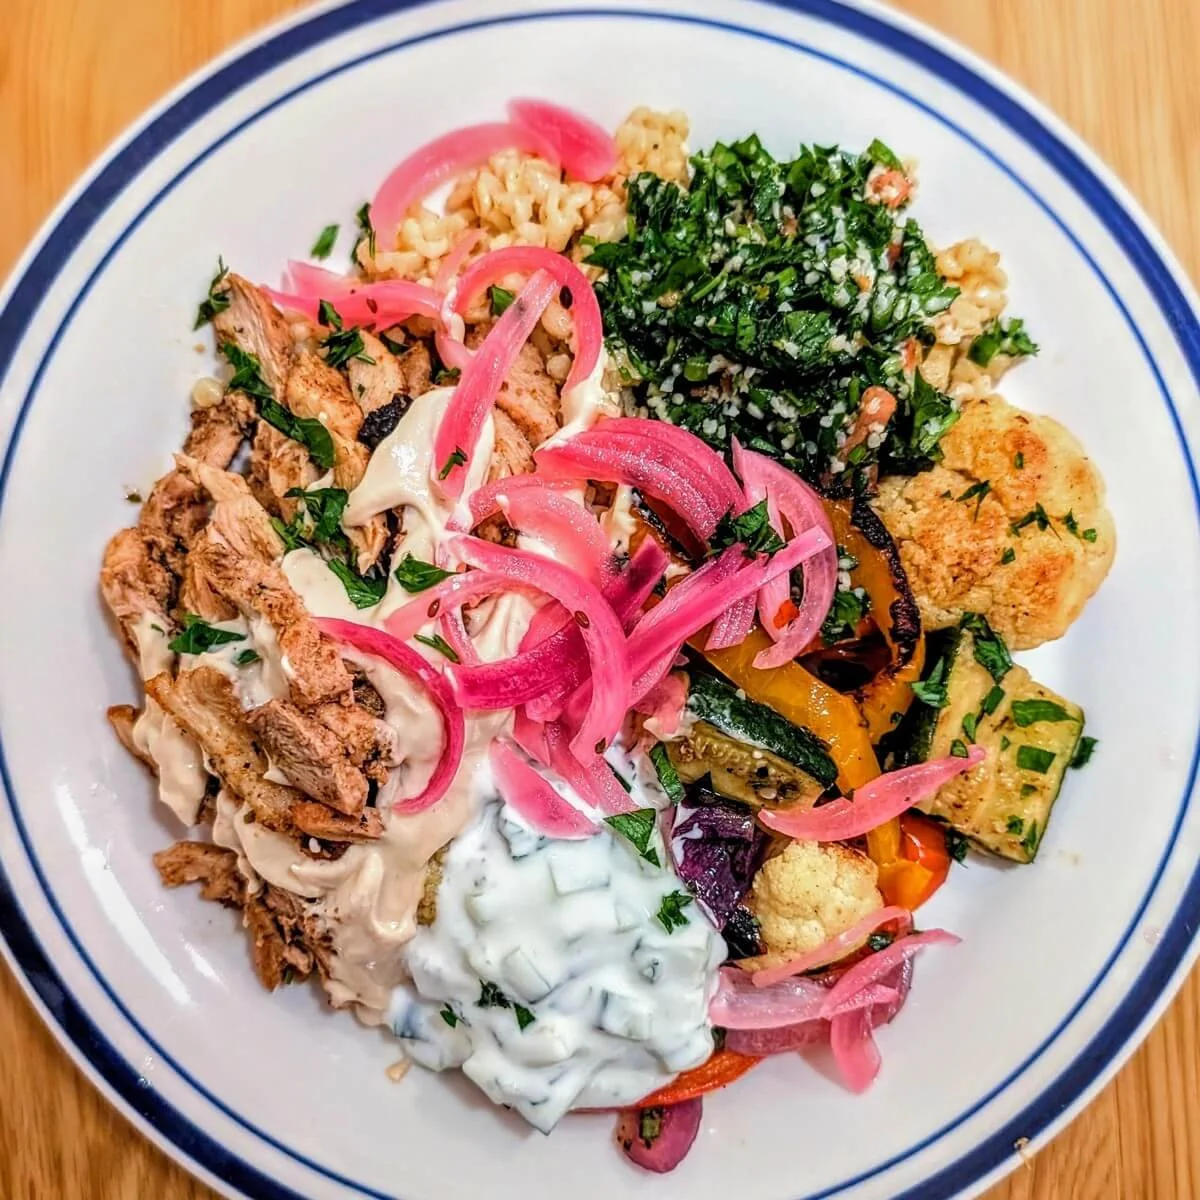
Vegetables: Pair your crispy duck breast with seasonal vegetables for a balanced plate. Go for marinated green beans, sheet-pan Mediterranean vegetables, bacon-fat Brussels sprouts, or sumac-roasted squash—each brings color and texture to complement the duck.
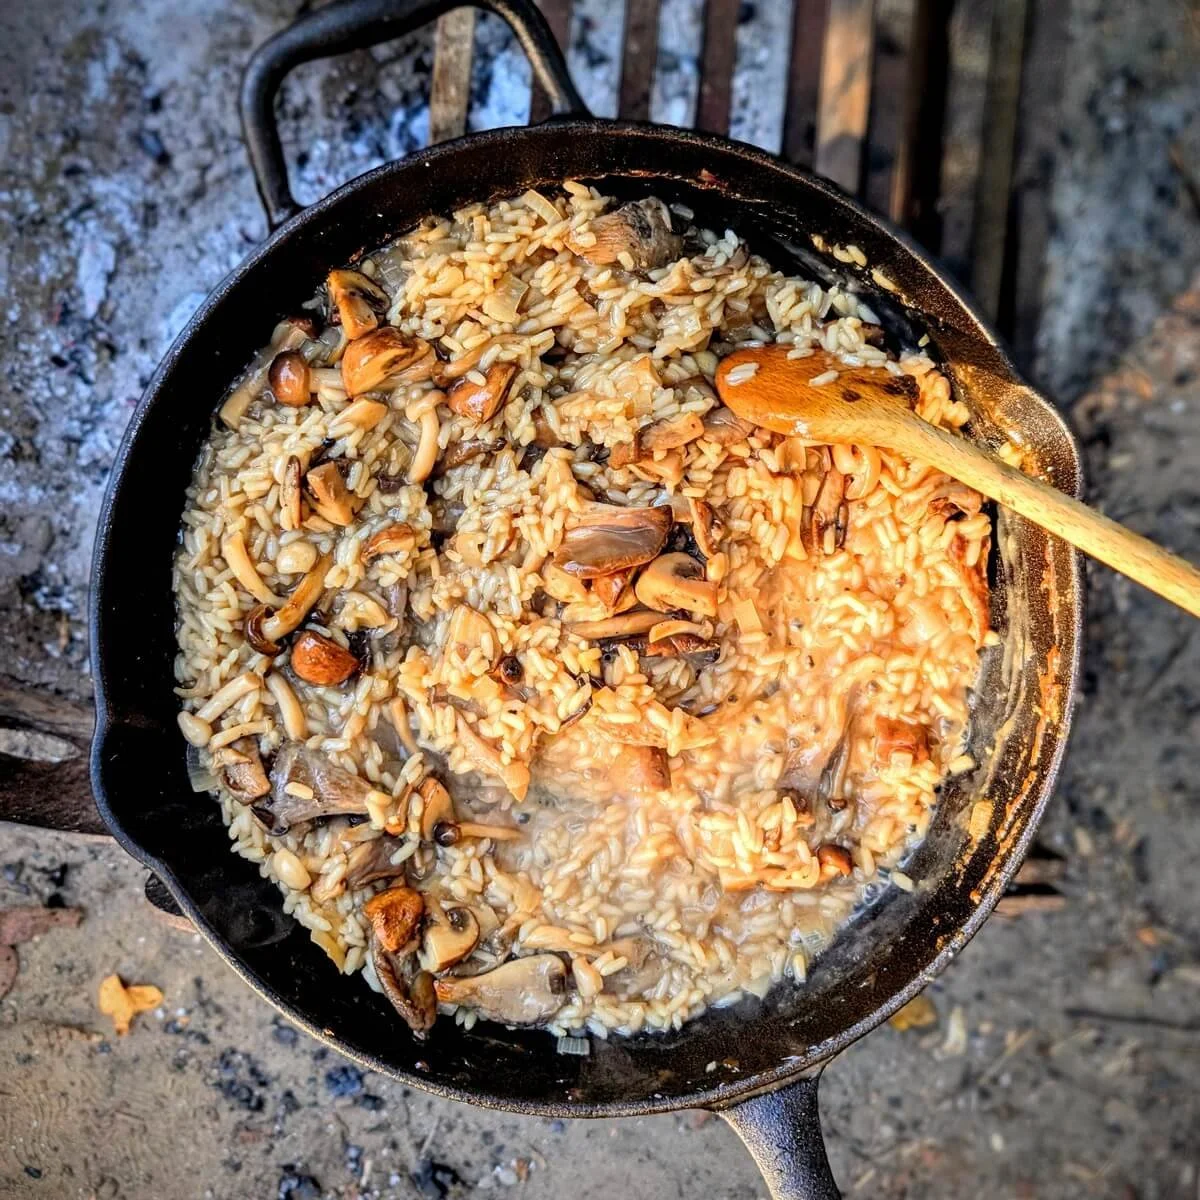
Starches: Serve the duck over a cozy base like roasted garlic and chive cauliflower mash, grilled buttered potato wedges, creamy polenta, or fluffy herbed couscous. These hearty sides soak up the red wine pan sauce beautifully.
Salads: Bright, slightly bitter greens are a great match for the richness of duck. Try a simple chopped salad, arugula with citrus segments, or grilled radicchio and endive for a restaurant-style presentation.
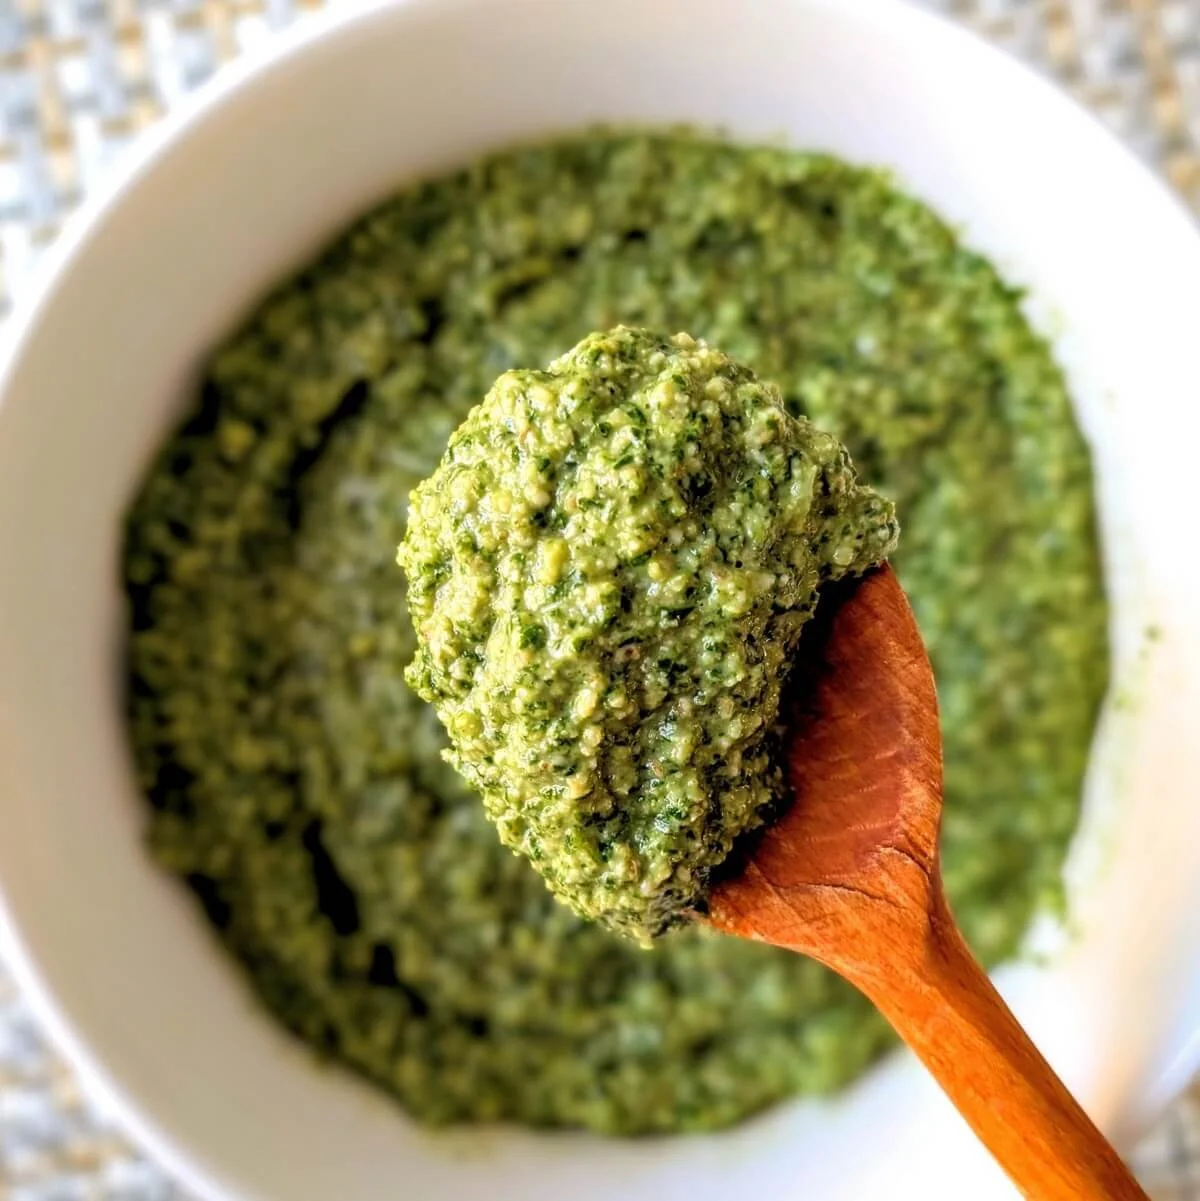
Sauces: Looking for an alternative to the red wine pan sauce? Switch things up with this Chasseur mushroom sauce—it adds a deeply rich and earthy flavor profile that pairs perfectly with duck.
Leftover Ideas: Sliced leftover duck breast is excellent served cold over a salad for lunch the next day. Try it with greens, chopped veggies, and a sesame-soy vinaigrette for an easy meal-prep upgrade.
Duck Breast FAQs
How do I check duck breast doneness without a thermometer?
You can check duck breast doneness without a thermometer by using the poke test. Gently press the meat with your finger—if it feels soft with a bit of resistance (like the fleshy part below your thumb), it’s likely medium-rare. Firmer means more cooked. It’s better to undercook slightly, since duck breast continues to cook while resting, and overcooked duck can turn tough.
That said, the poke test takes practice. If it’s your first time cooking duck, a meat thermometer is your best friend for perfect results.
What kind of red wine should I use for the pan sauce?
My rule of thumb: cook with something you’d actually enjoy drinking. It doesn't need to be expensive, but avoid the bottom-shelf "cooking wines" or the cheapest boxed options. Remember, while the wine matters, your technique—reducing it properly to concentrate the flavor—is what truly makes the sauce.
Do I need to trim duck fat before cooking?
Most duck breasts come pre-trimmed, but it’s a good idea to check. If there are thick flaps of fat that hang over the sides beyond the meat, trim those down a bit. Leave the fat and skin on top of the meat intact—they’ll render in the pan to give you that ultra-crispy duck skin.
Can I cook duck breast well‑done?
You can cook duck breast well-done, but I don’t recommend it. Duck breast is best served medium-rare to medium so the meat stays juicy and flavorful. Cooking it well-done dries it out and makes it chewy. For a tender, restaurant-style duck breast, pull it from the heat at 110°F–120°F, then let it rest to reach its final temp of 130°F–140°F.
Is it safe to eat duck breast pink in the middle?
Yes, it’s generally safe to eat duck breast that’s pink in the middle, as long as it’s cooked to a proper medium-rare temperature (about 130°F to 135°F) and handled safely. Culinarily, we treat duck breast more like steak than chicken. While the USDA recommends cooking poultry to 165°F, many chefs (myself included) prefer this slightly lower temperature for duck for better texture. As long as you’re sourcing high-quality duck and following basic food safety practices, this method is widely used and considered safe by many home cooks and professionals alike.
That’s it—enjoy your perfectly seared duck breast with red wine pan sauce!
Duck breast doesn’t need to be saved for special occasions. Once you know the method, it’s weeknight-friendly and still fancy enough for a date night or holiday dinner—without hours in the kitchen.
It’s one of those dishes that just works with whatever you’ve got. I even made it while camping once. I cooked some cauliflower and chorizo in the leftover duck fat while the duck was resting, and honestly, it might’ve been the best meal of the trip.
So make it your own and have fun with it. Once you’ve got the technique down, crispy duck breast with pan sauce can turn any night into something special!
Pin This Duck Breast with Pan Sauce Recipe for Later!
Duck Breast Recipe with Red Wine Sauce
Pan-seared duck breast with crispy skin and a red wine duck pan sauce—easy, elegant, and ready in just 30 minutes!
Makes: 2 generous servings
Prep: 5 min Cook: 20 min
Dietary Notes: Gluten-free, Egg-free, Low-carb, High-protein
Duck Breast and Pan Sauce Ingredients
2 duck breasts (about 1½ pounds total)
1 cup red wine
½ white onion, thinly sliced
2 tablespoons butter
salt & pepper
How to Make Duck Breast with Pan Sauce
Prep and score the duck. Pat the duck breasts dry with paper towels. Using a sharp knife, score the skin in diagonal lines about ½ inch apart, without cutting into the flesh. Repeat in the opposite direction to create a crosshatch pattern.
Start duck skin-side down in a cold pan. Season the duck with salt and pepper. Place the breasts skin‑side down in a cold, dry heavy‑bottomed pan and turn the heat to medium. Let the fat render slowly—don’t move the duck for at least 5 minutes so the skin can release from the pan naturally.
Flip and sear the other sides. Once the skin is deep golden and crisp (after about 10 minutes), flip the duck and sear the flesh side and sides for a few minutes each, until evenly browned.
Check temperature and rest. Use a meat thermometer to check doneness—110°F for medium‑rare, 120°F for medium. Transfer the duck to a plate to rest uncovered for 15 minutes. The temperature will continue to rise as it rests by about 20 degrees, reaching a final temp of around 130°F (medium‑rare) or 140°F (medium) by the time you slice.
Make the red wine pan sauce. Pour off excess duck fat, leaving a thin layer in the pan. Sauté the sliced onions over high heat until softened, then deglaze with red wine, scraping up the browned bits. Bring the wine to a boil and reduce it by half—when you can drag a spoon across the pan and it leaves a clean line, it’s ready. Remove from heat and stir in the butter until the sauce is glossy. Season with salt to taste.
Slice and serve. Slice the rested duck breast crosswise and fan out on plates or a platter. Spoon the red wine pan sauce over the top and serve extra on the side.
Top Tips for the Best Duck Breast and Pan Sauce
Storage: Keep leftover duck breast in an airtight container in the fridge for up to 3 days. Store the pan sauce separately to maintain its texture.
Save your duck fat: Use that flavorful rendered fat to roast veggies like squash, Brussels sprouts, or potatoes—it adds incredible depth to any side.
Portion smart: Duck breasts can vary by breed. Aim for 6–8 ounces per person—one large breast (12–16 oz) can easily feed two.
For more, check out my tips, substitutions, how to store, serving ideas, and FAQs!
Did you try this easy duck with pan sauce recipe?
One reader on Pinterest shared, “I made this Duck Breast for Christmas and it was delicious. The family loved it!” ❤️
I’d love to hear how it went for you—and how you made it your own. Leave a comment below or tag me on Instagram@onecreativecook if you share your creation!
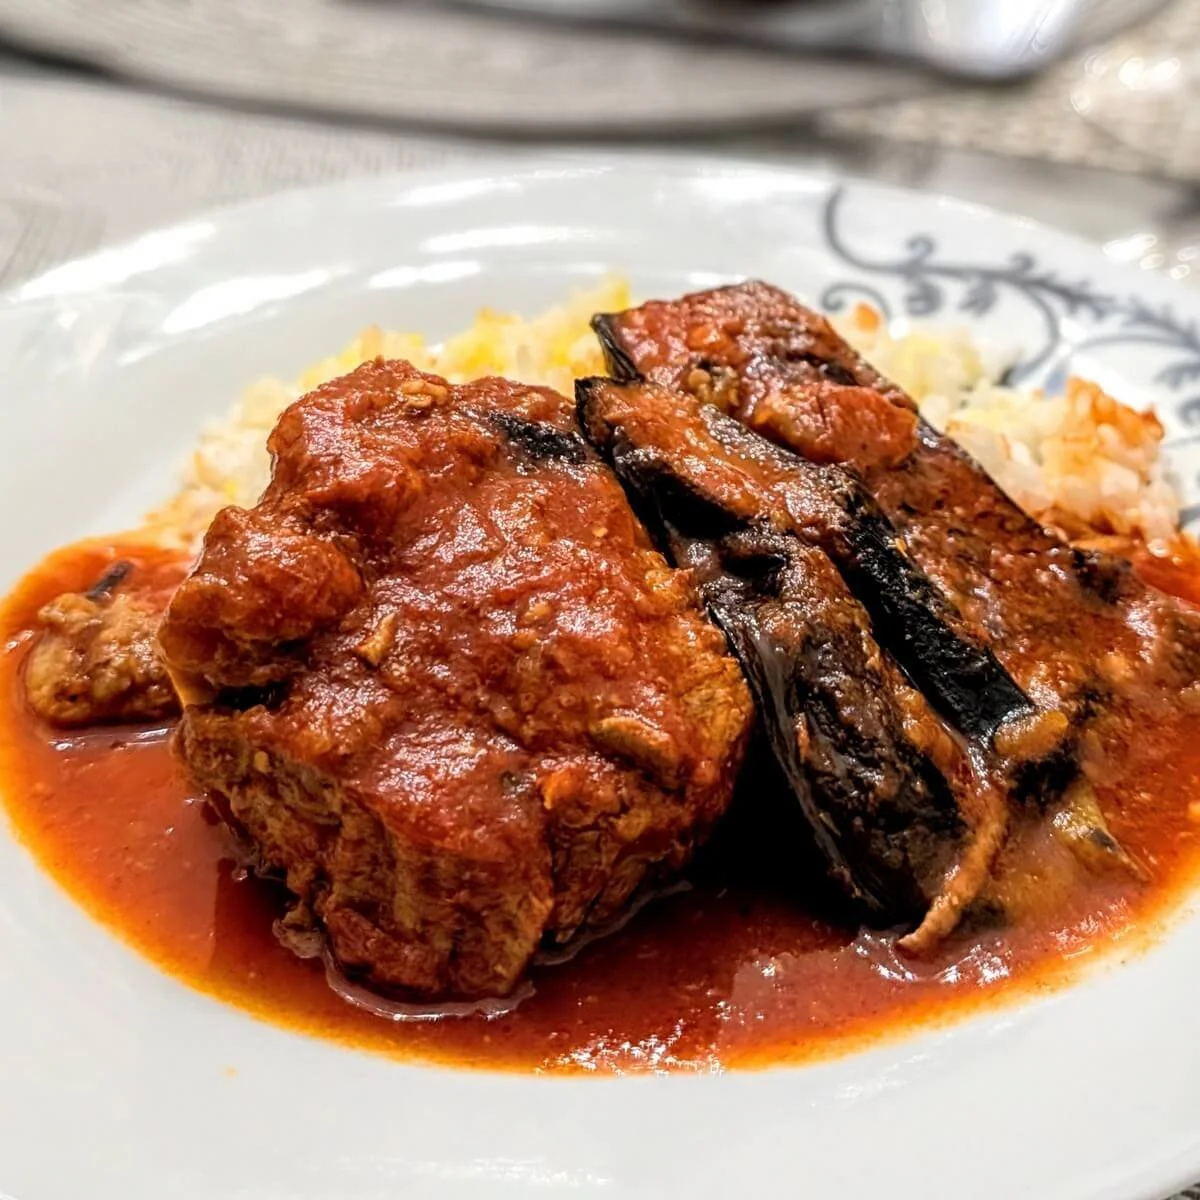
More Special Occasion-Worthy Recipes You’ll Love
Elegant holiday dinner ideas: This curated menu features 18 chef-tested recipes—everything from mains to desserts—for a Christmas dinner everyone will remember.
Melt-in-your-mouth braised brisket: Slow-cooked in red wine jus, this brisket is even better the next day—perfect for stress-free entertaining.
Grilled lamb roast with summer veggies: A simply marinated lamb roast served with charred seasonal vegetables for a colorful, flavor-packed platter.
Small Thanksgiving dinner made easy: Roast turkey breast, gravy, and root veggies scaled perfectly for a cozy holiday meal for two to four.
The 5 French sauces every cook should know: Learn how to make the five mother sauces (and what to pair them with) in this essential guide.