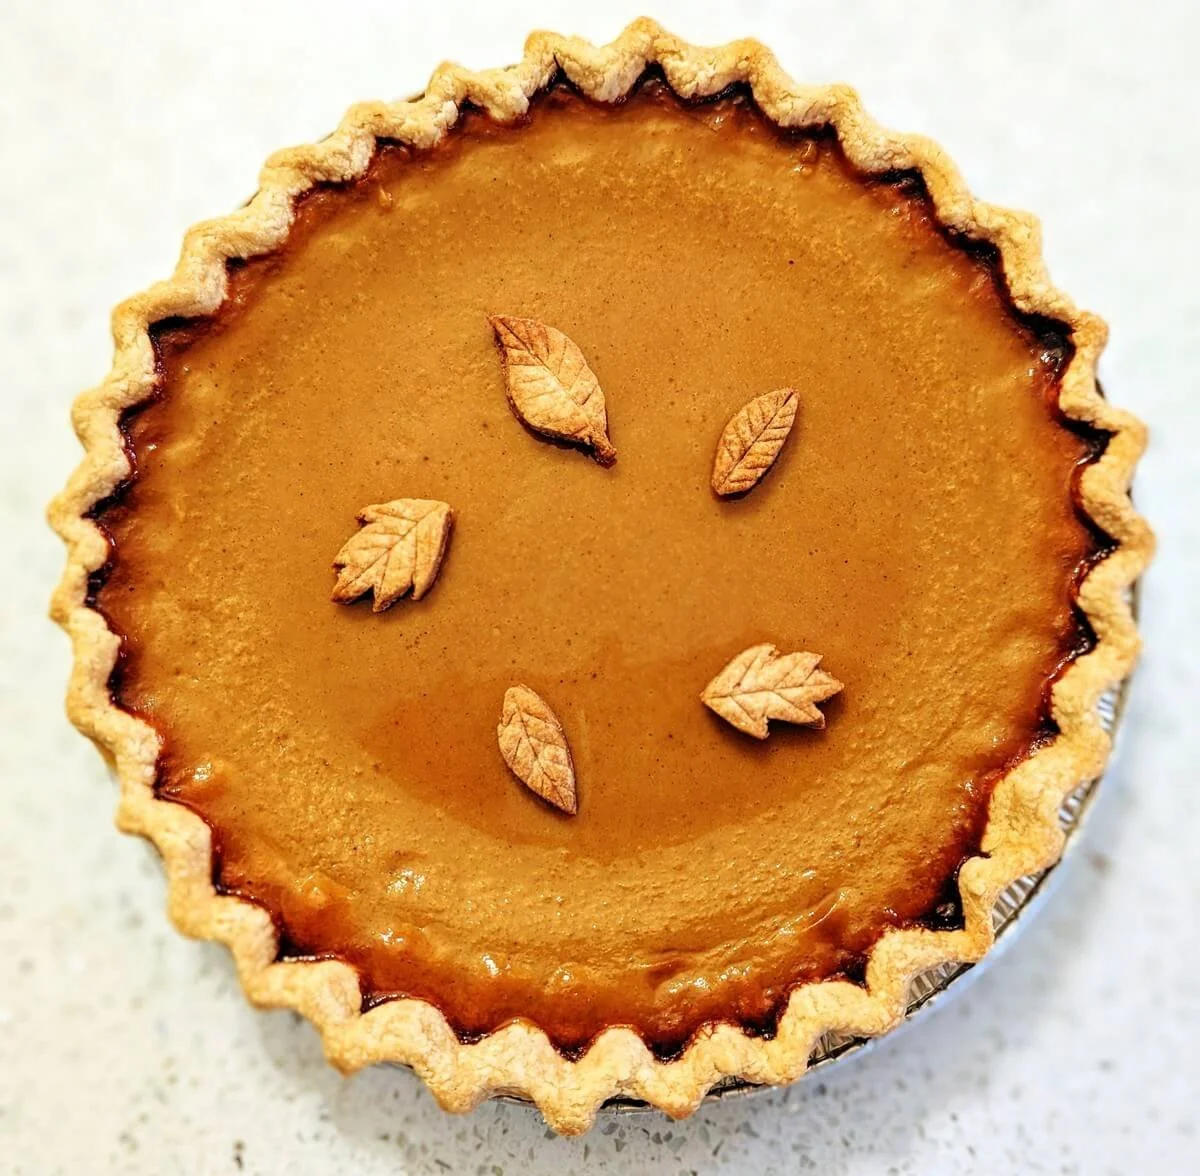
Perfect Pumpkin Pie Crust
This homemade pumpkin pie crust is so flaky, buttery, and delicious—well worth the effort. It only takes 3 ingredients and a little bit of patience.
or read on for step-by-step instructions with photos

How to make a tender, flaky pie crust every time
The most important thing when it comes to pie dough is temperature. Ever wonder how good, made-from-scratch pie crust has all those flaky layers? Cold butter is key.
Cold butter makes flaky layers: Layers of cold butter within the dough release steam while baking, creating air pockets that make a light, flaky crust.
Fat helps keep the crust tender: The butter also helps prevent gluten formation by coating the flour particles with fat. This leads to a tender crust rather than a tough one.
Keep butter cold through every step: Ensuring the butter is as cold as possible, not just at the beginning but throughout the entire process, maximizes the air pockets created when that cold crust hits the hot oven.
I’ll be honest with you—this one takes a little more finesse than most of my recipes. The ingredients are simple, but the technique might take a couple of tries to master.
Even if it’s not perfect the first time, it’s still a fun and rewarding one to make. And honestly? I’ve never had a store-bought pie crust as good as a homemade one.
Next up, I’ll share my homemade pie crust and easy pumpkin pie filling recipe that I’ve been making at home and in restaurant kitchens for years—step-by-step with photos.
And if you're baking more this season, don’t miss my salted dark chocolate chunk cookies too. I make them every Thanksgiving and they’re always a hit!
What You’ll Need to Make Homemade Pumpkin Pie
Ingredients for Pumpkin Pie Dough
1 ¼ cups all-purpose flour
1 stick (4 ounces) salted butter (or use unsalted + ½ teaspoon salt)
3 tablespoons cold water
Ingredients for Pumpkin Pie Filling
1 ½ cups (one 12-ounce can) evaporated milk
3 eggs
1 ½ cups pumpkin puree (canned or homemade)
¾ cup light brown sugar, packed
¾ teaspoon cinnamon
¾ teaspoon dried ginger
½ teaspoon salt
⅛ teaspoon freshly grated nutmeg
Equipment to Make Pumpkin Pie from Scratch
Mixing bowl
Measuring cups and spoons
Pastry cutter (or just use your hands)
Rolling pin
Knife
9” pie plate
Pie weights or dried beans
Parchment paper
Baking sheet
Oven
Freezer
Makes: one 9” pie
Prep: 60 min Cook: 90 min
How to Make Pumpkin Pie Crust and Filling
Step-by-Step with Photos
Please read through the entire recipe before you begin, as this one will turn out best with a bit of multitasking and anticipation for the next step.
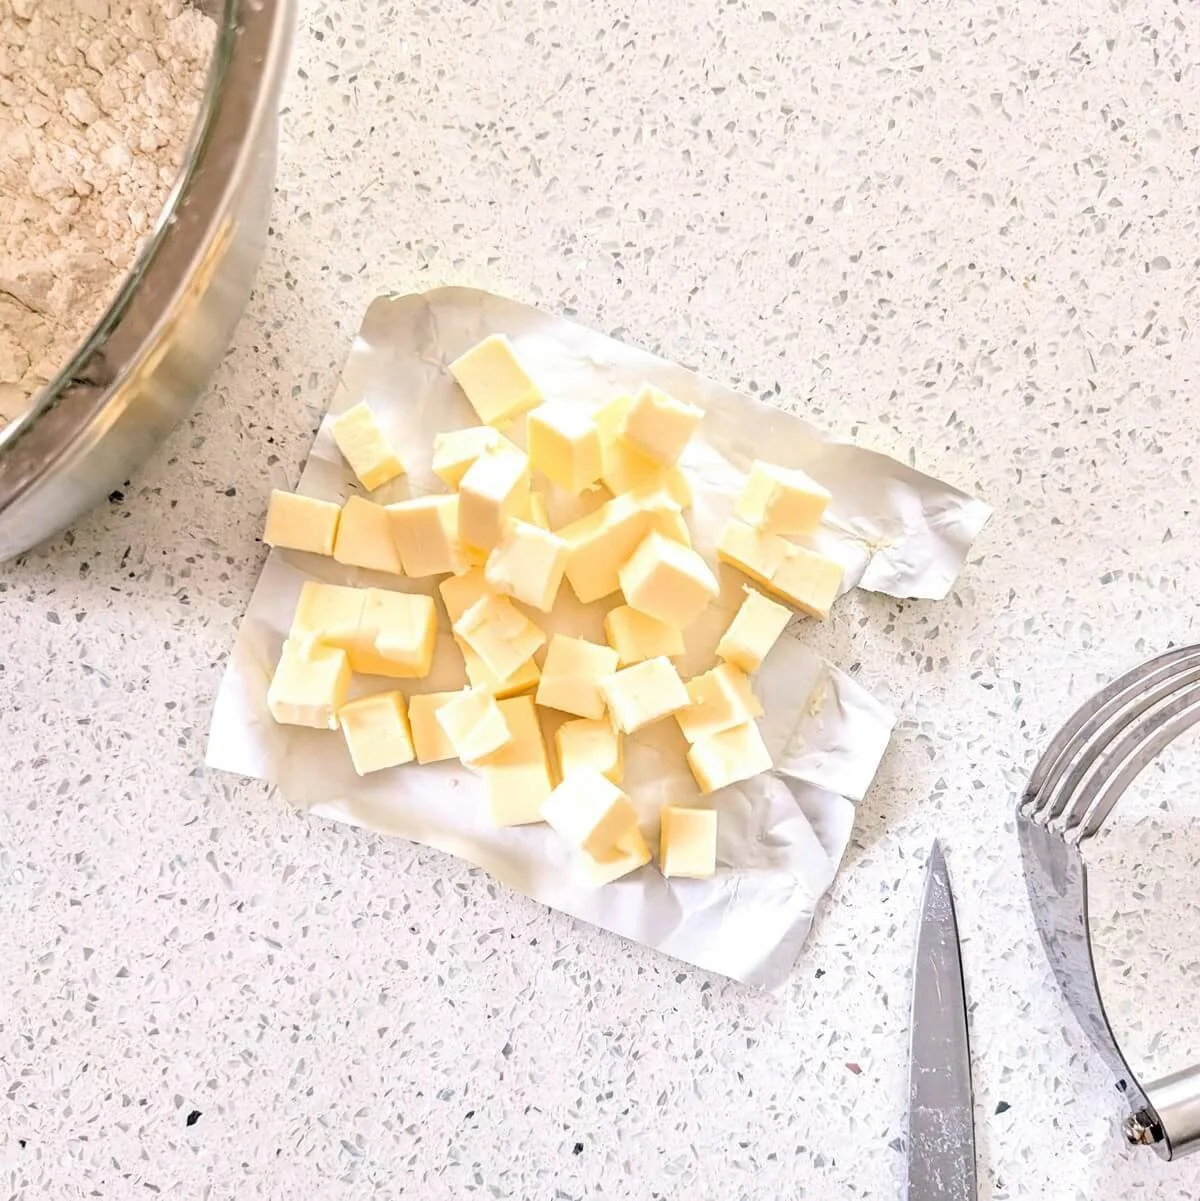
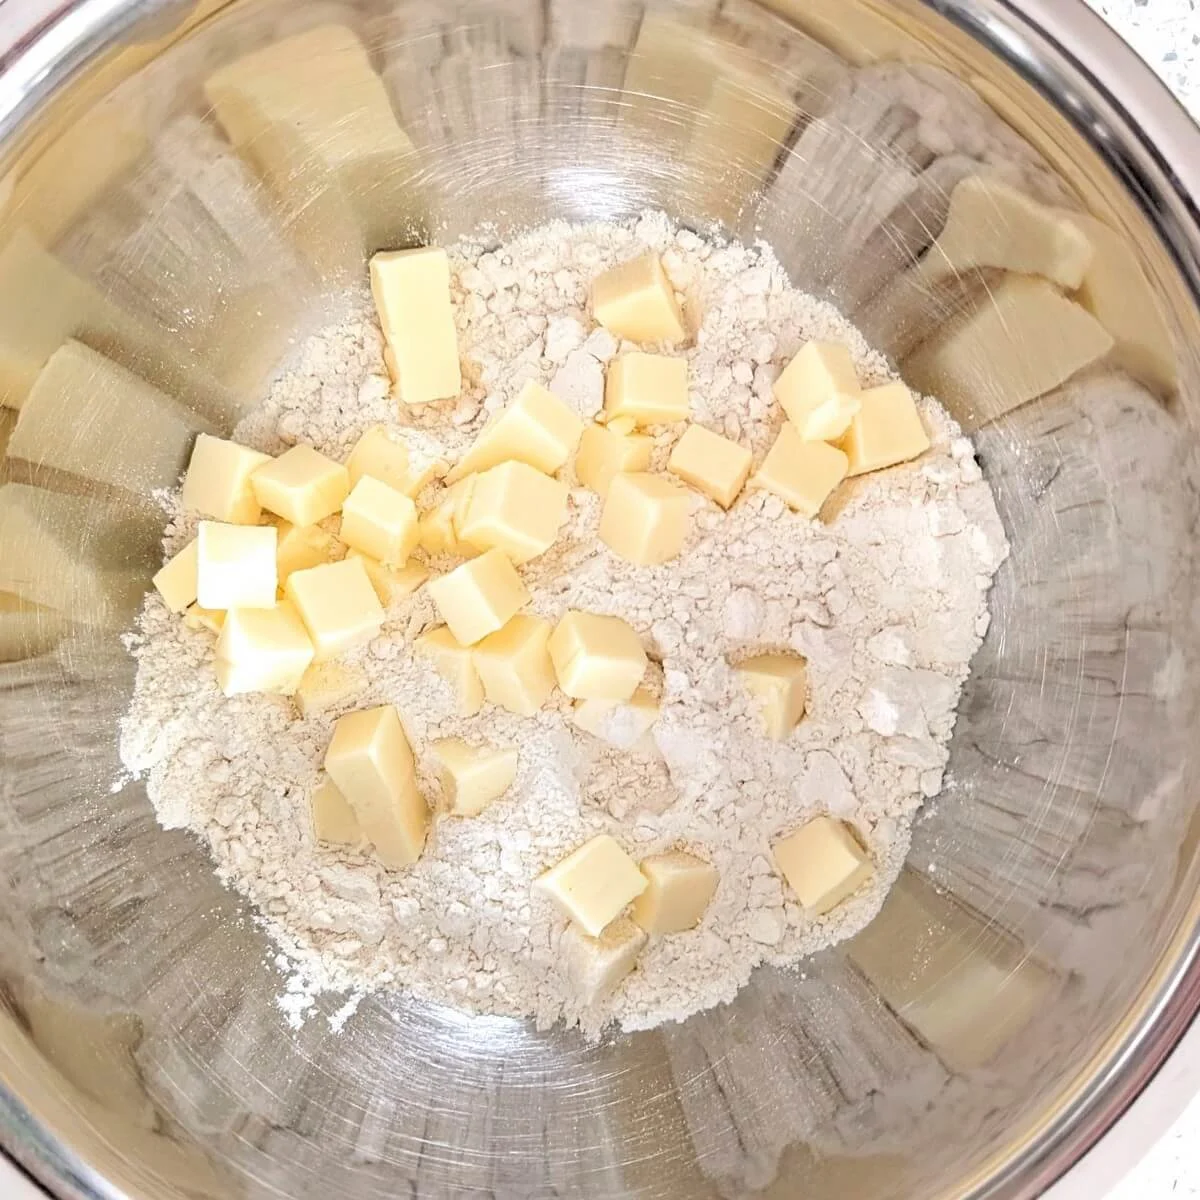
Step 1: Measure flour and prep the butter
Measure the flour into a mixing bowl. Cut the butter into small cubes and place it in the bowl with the flour.
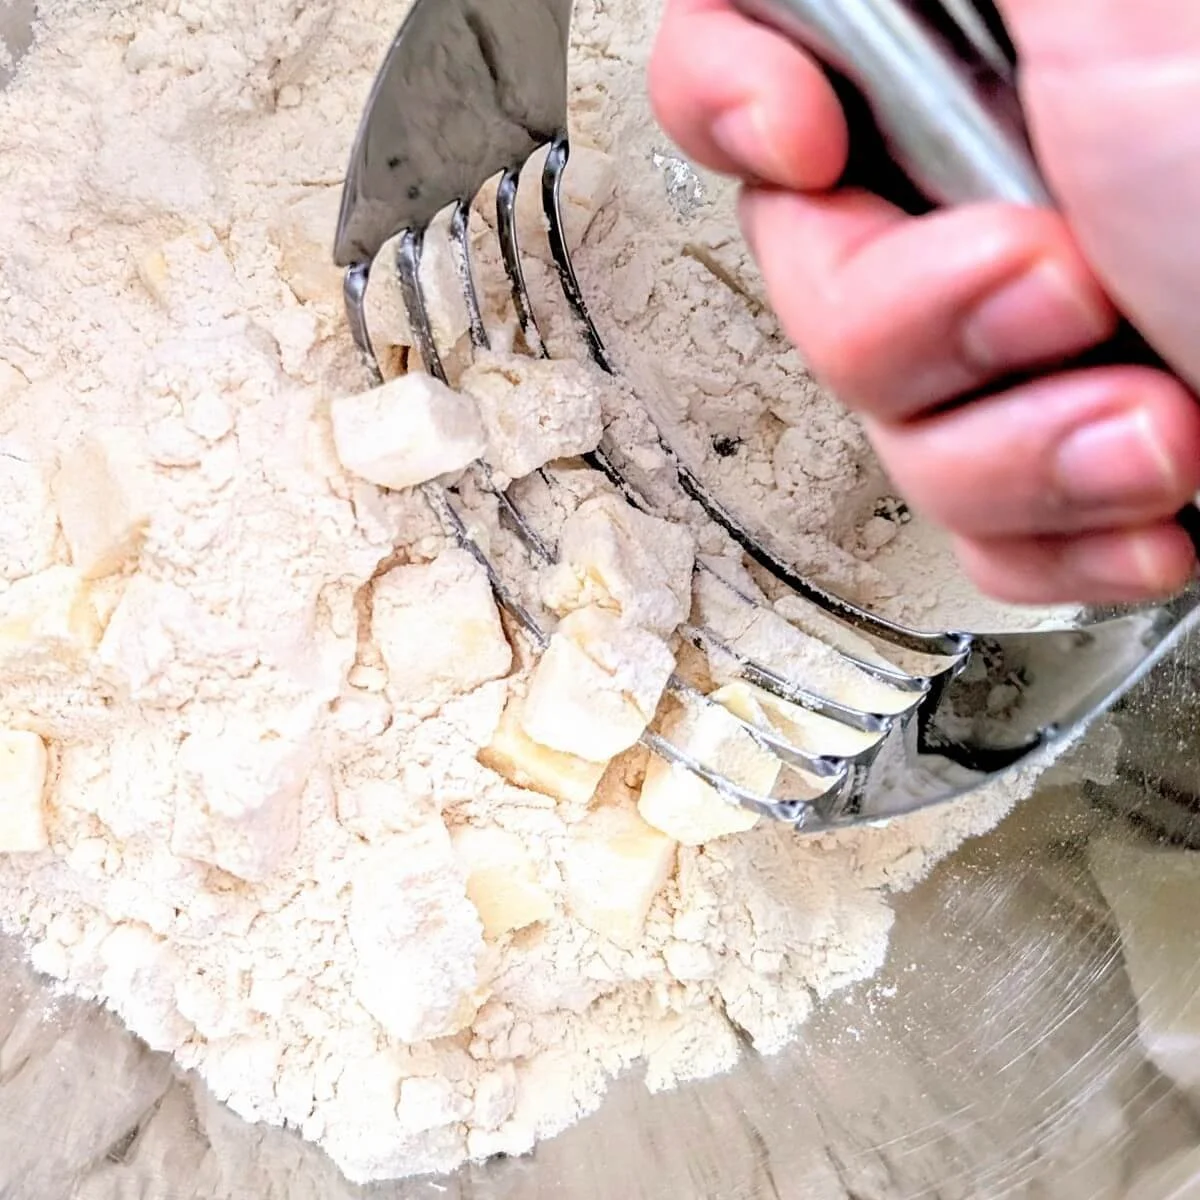
Step 2: Cut the butter into the flour
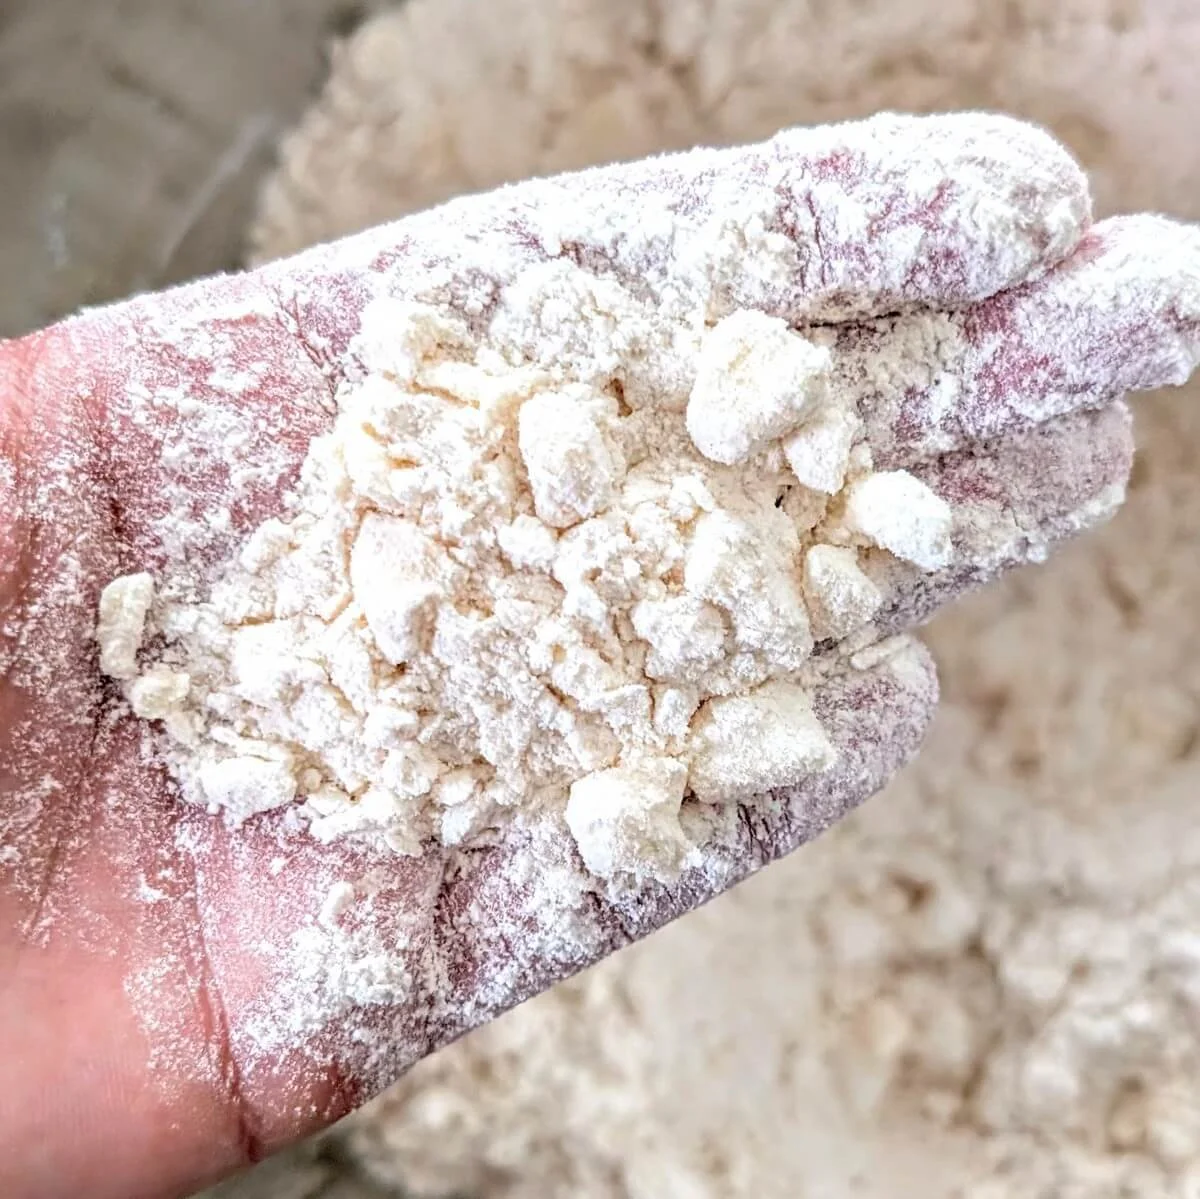
Toss the cubed butter in the flour to coat. Use a pastry cutter to press down through the butter until it breaks into pea-sized pieces.
If you don’t have a pastry cutter, gently squish the butter and flour together with your hands until broken down into pea-sized chunks—just work quickly to avoid warming the butter.
Don’t stress about a perfectly even consistency—some variation in size helps create a flakier crust.
Step 3: Form the pie dough and chill
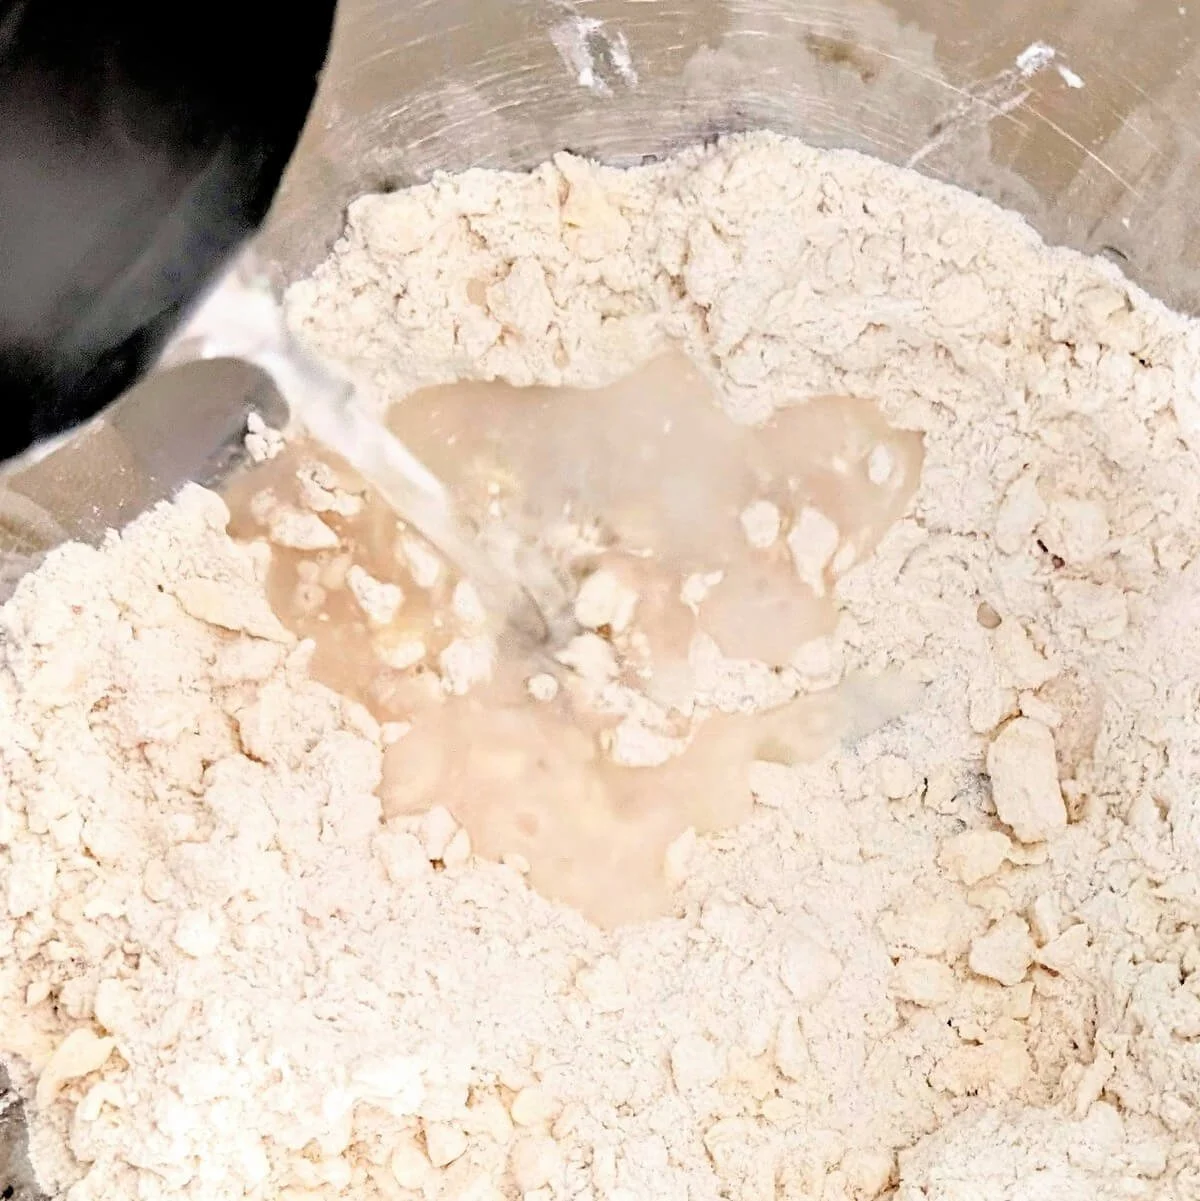
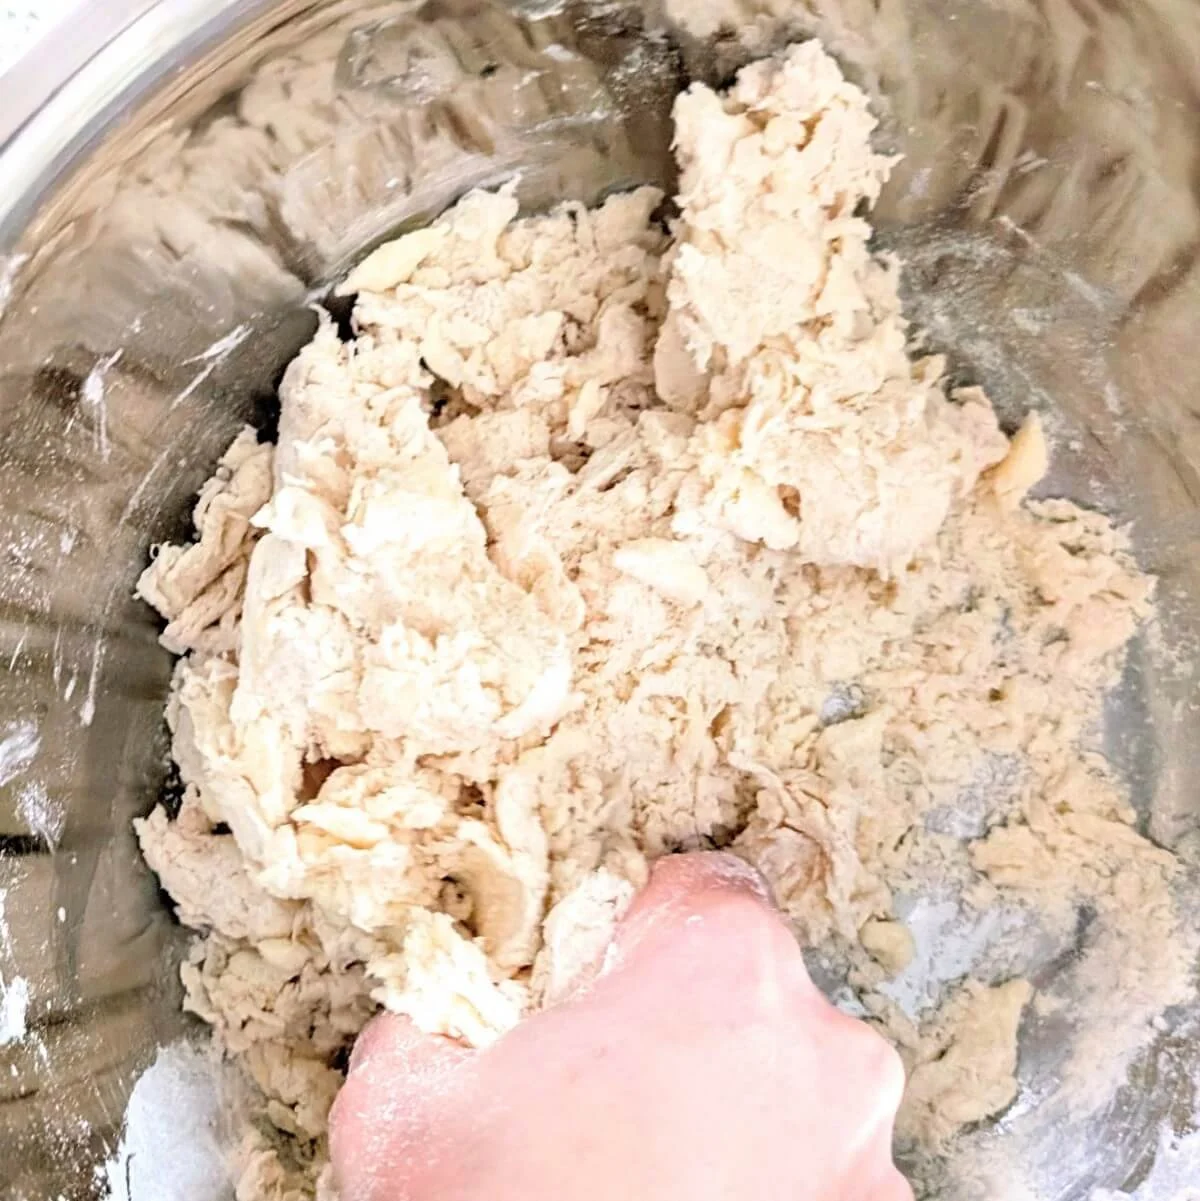
Add cold water to the butter-flour mixture and gently mix with your hand until a shaggy dough forms.
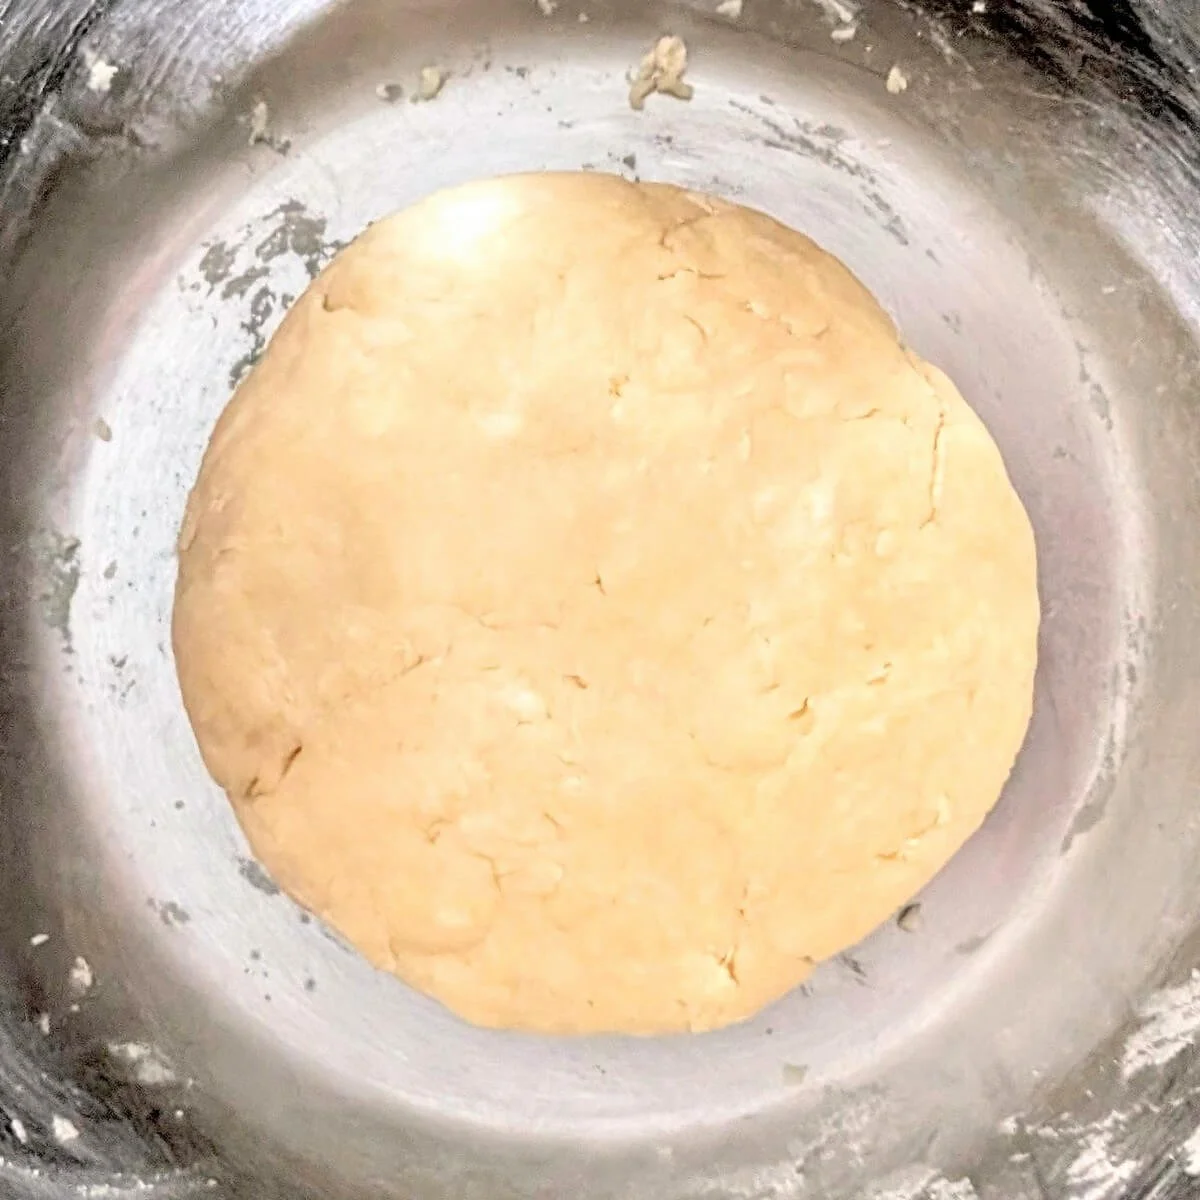
Bring the dough together by gently pressing it into a ball—either in the bowl or on the counter. Avoid overworking it to prevent a tough crust.
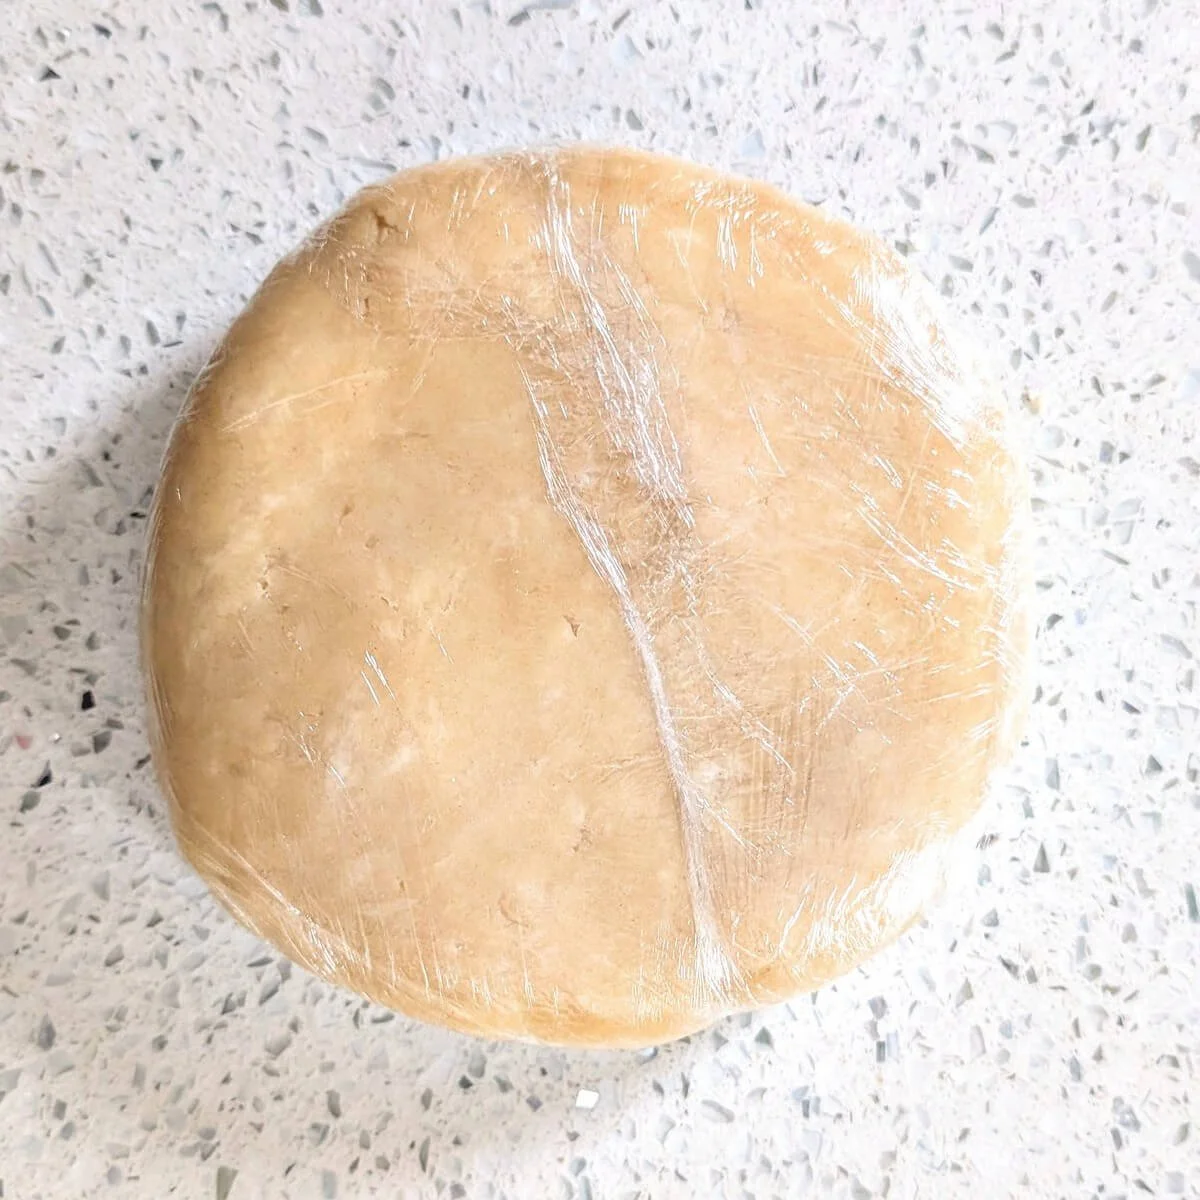
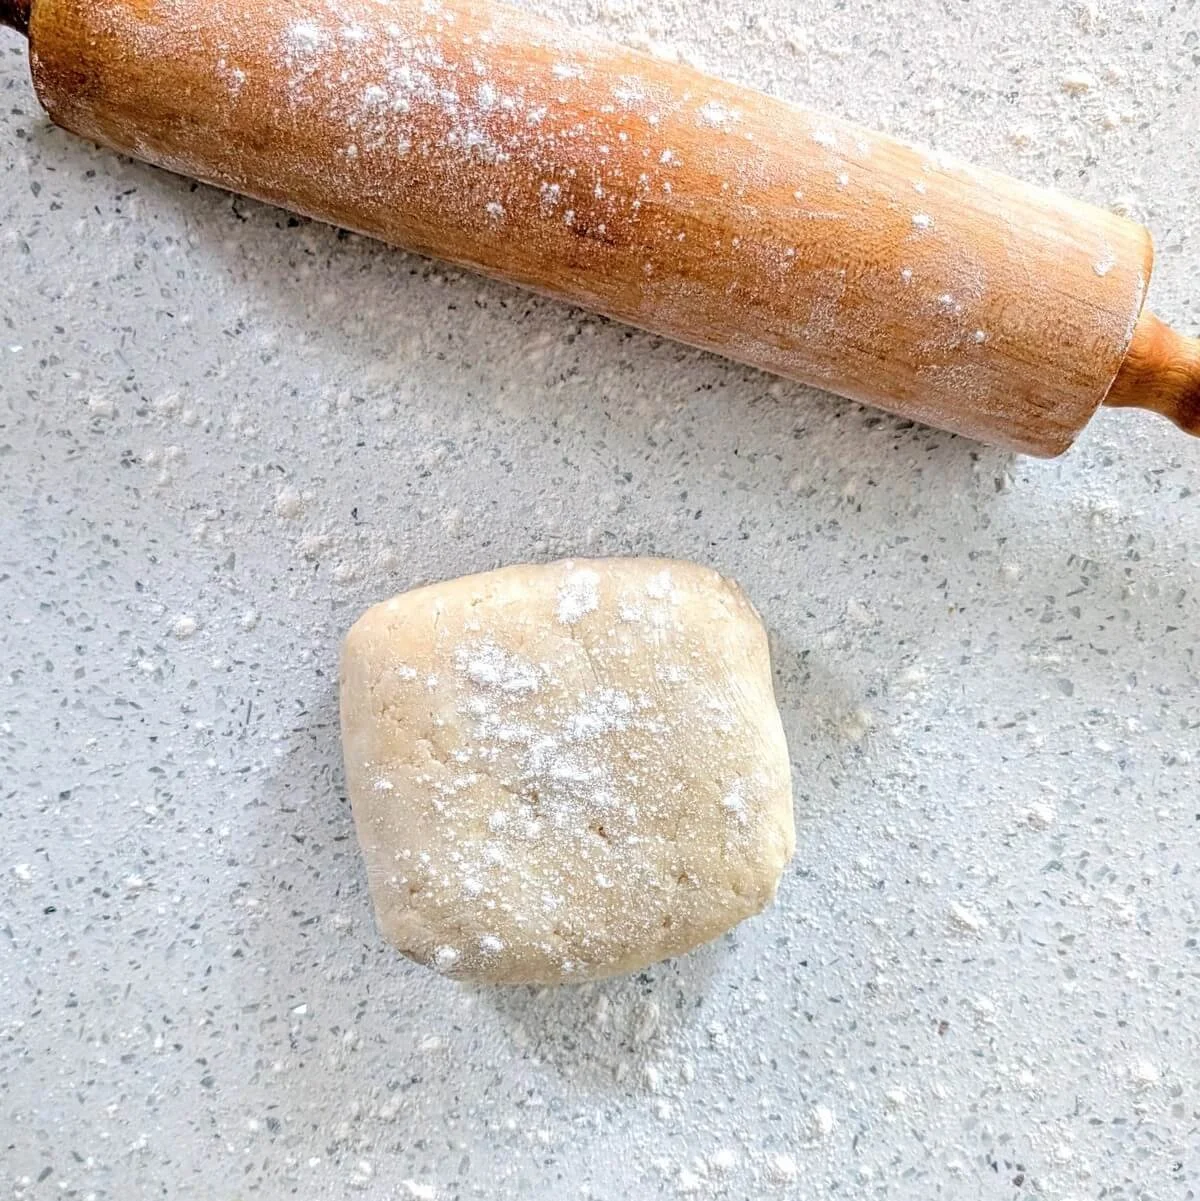
Once the dough holds together, flatten it into a disk, wrap it in plastic wrap, and freeze it until firm—about 20 minutes.
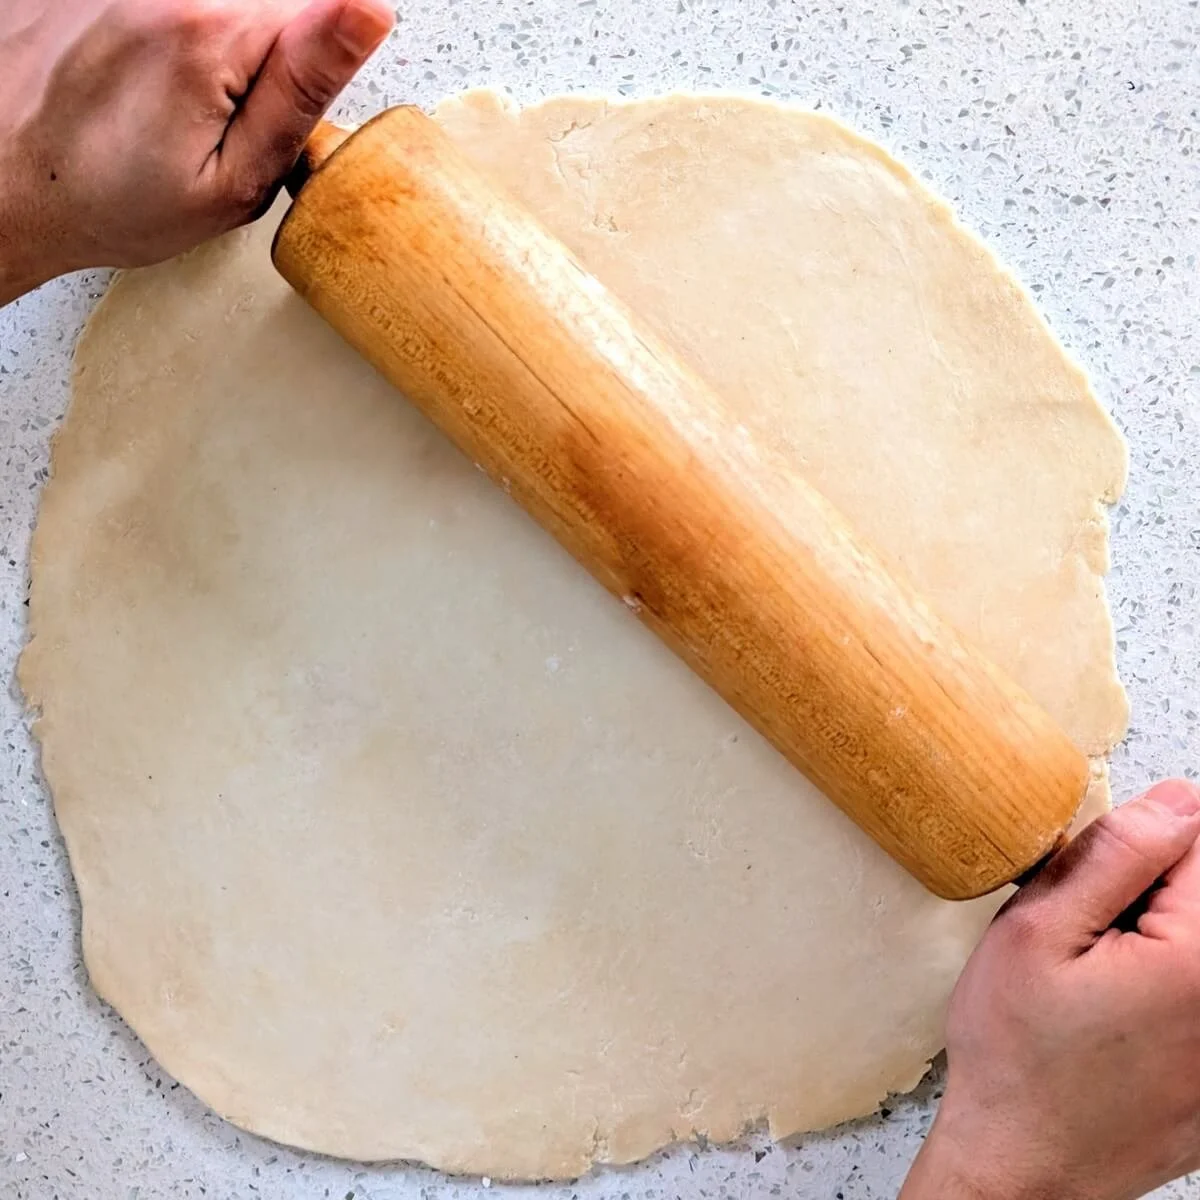
Step 4: Roll out the pie dough
Once the pie dough is firm and cold, dust your countertop and the dough with flour.
Using a rolling pin, roll the dough into a circle that’s about 2 inches wider than your 9” pie pan.
Start from the center and roll outward, then turn the dough ¼ turn and repeat—this helps prevent sticking and keeps the circle even.
Continue rolling and turning, dusting with more flour as needed.
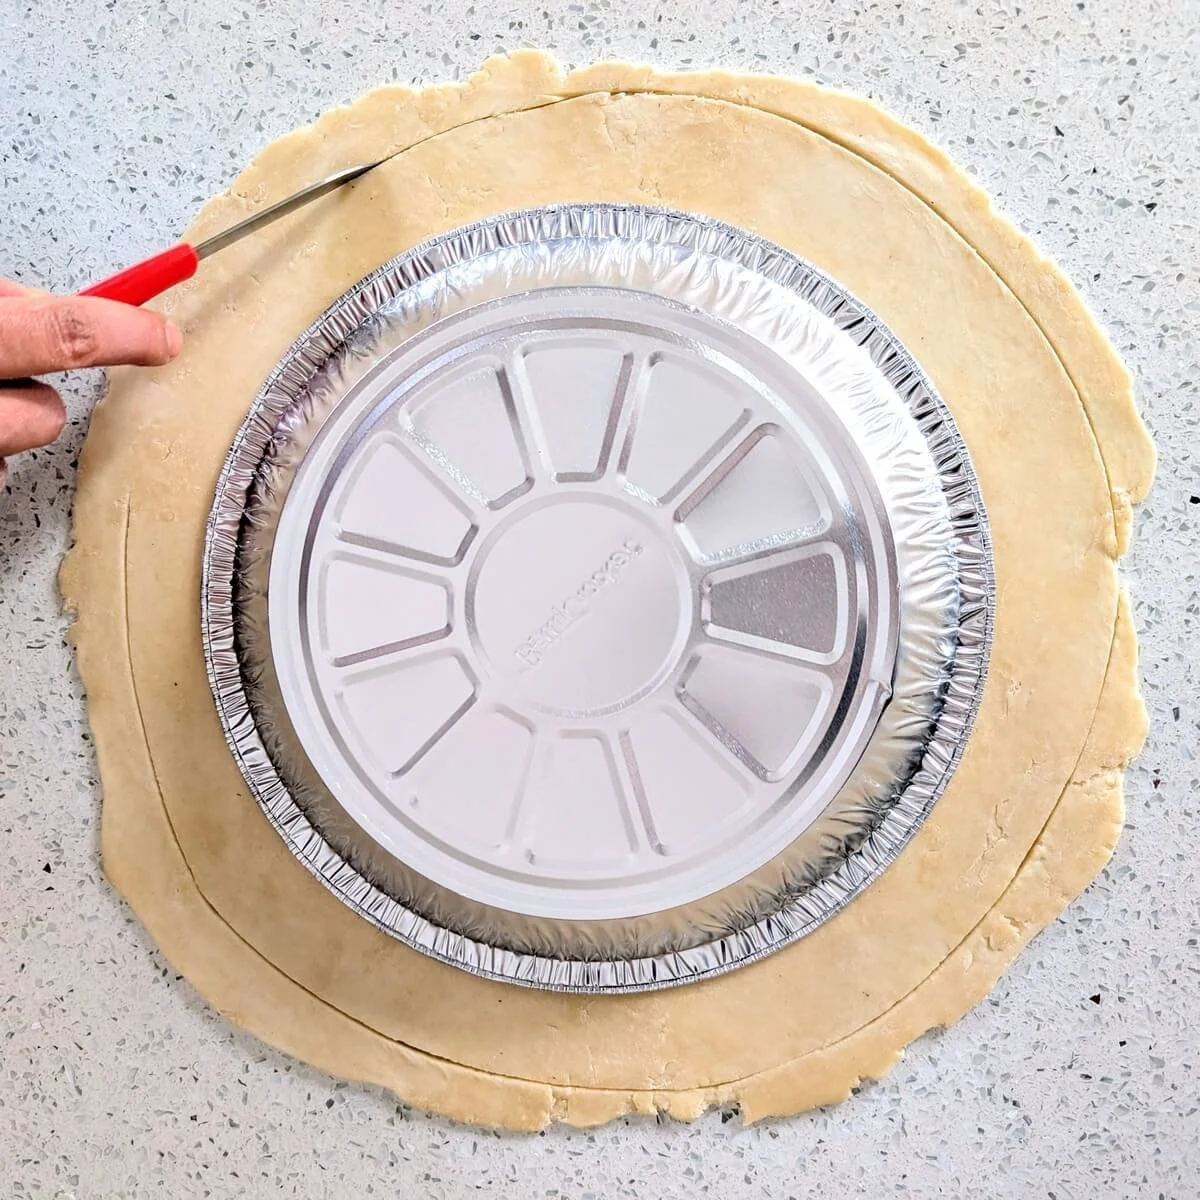
If the edges crack (which is normal), just press them back together and roll over them.
Once you have an even circle, trim the edges slightly—leaving at least 1 inch of overhang. Save the trimmed dough in the fridge for decorations later.

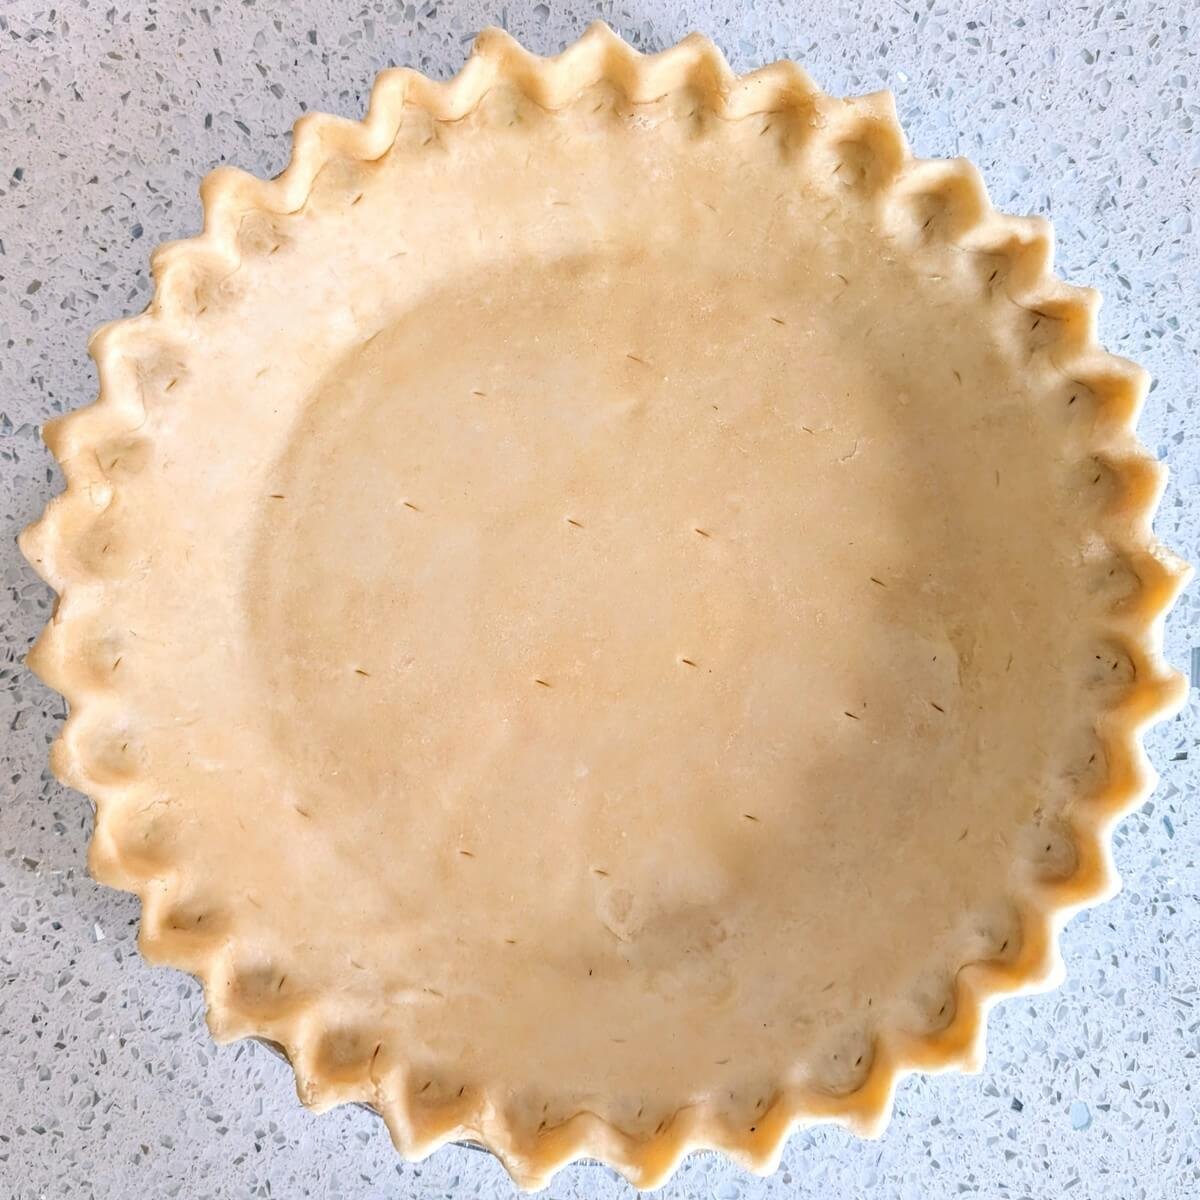
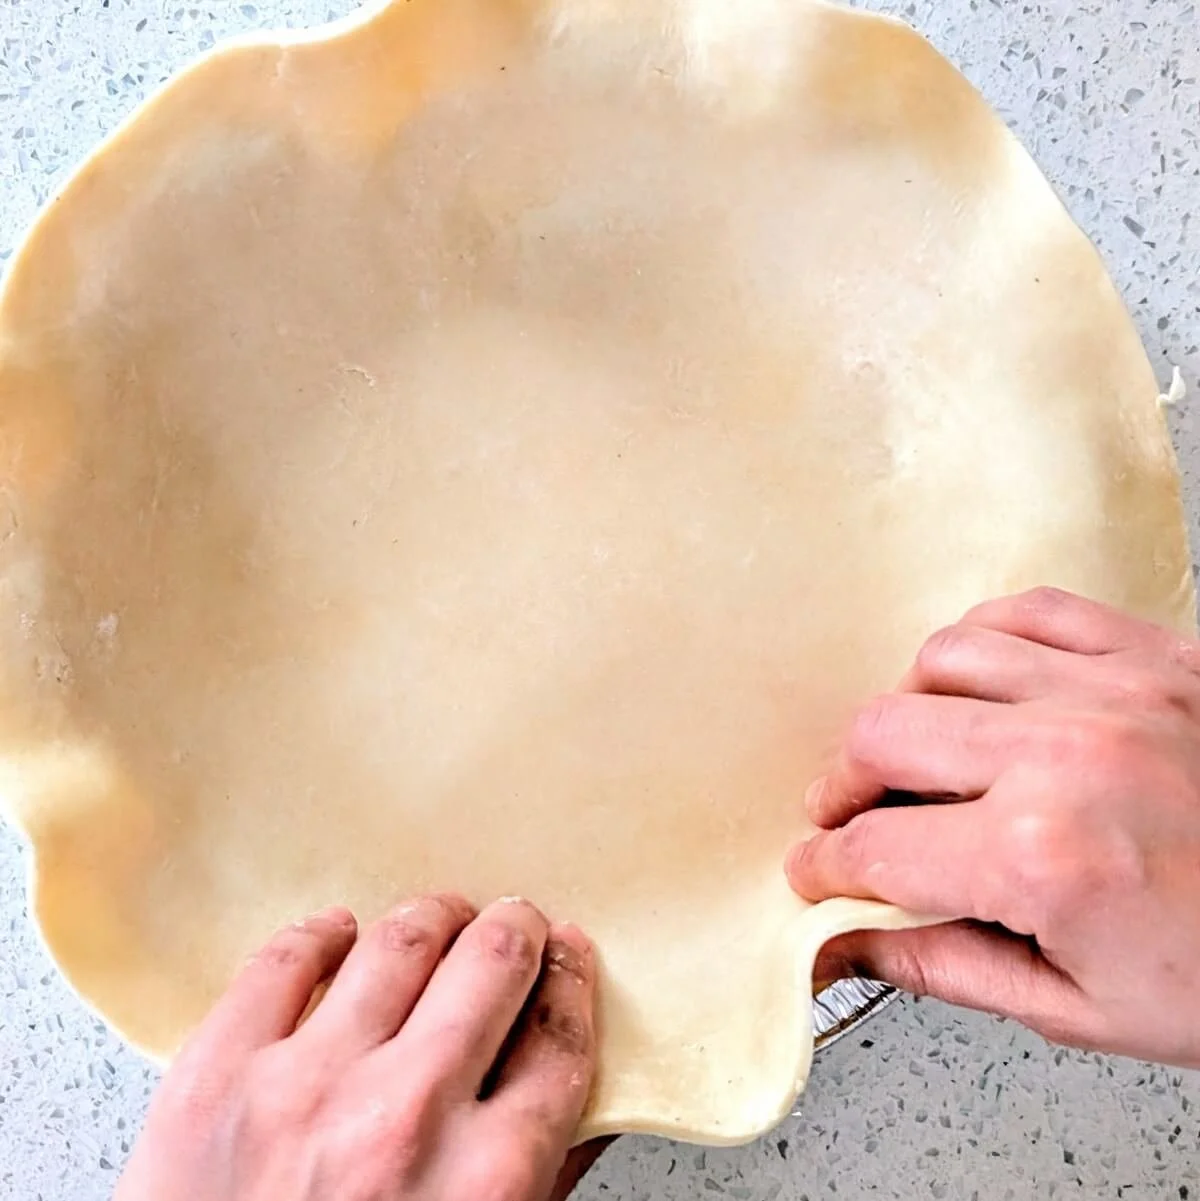
Step 5: Shape the pie crust
Carefully place the rolled-out pie dough into a 9” pie pan, making sure it’s centered. Gently press the dough into the corners, along the bottom, and firmly against the sides so it stays in place.
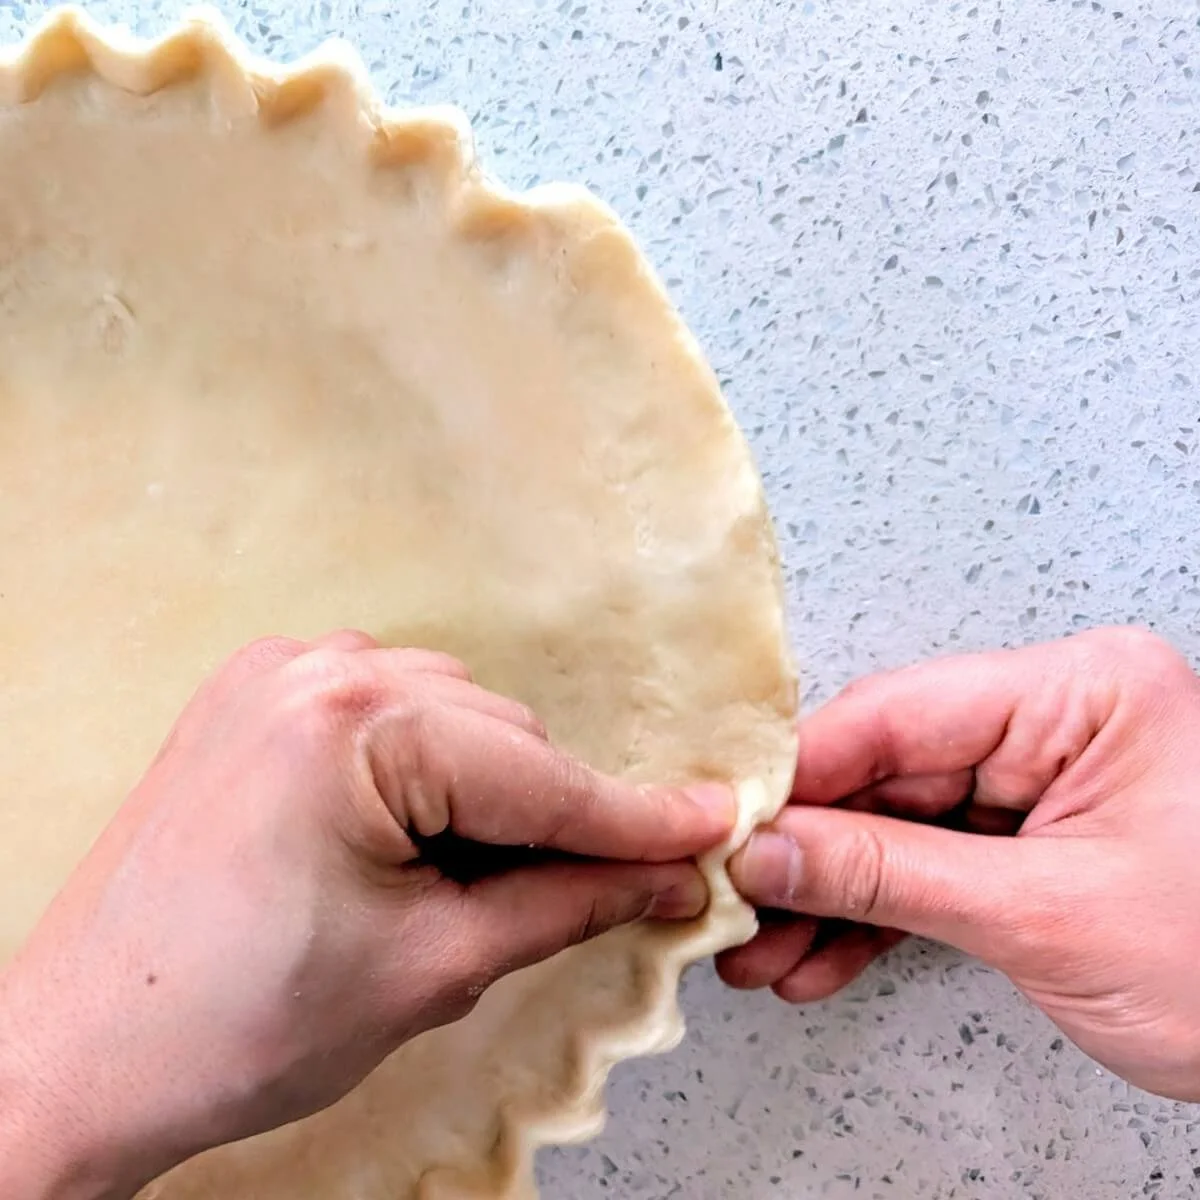
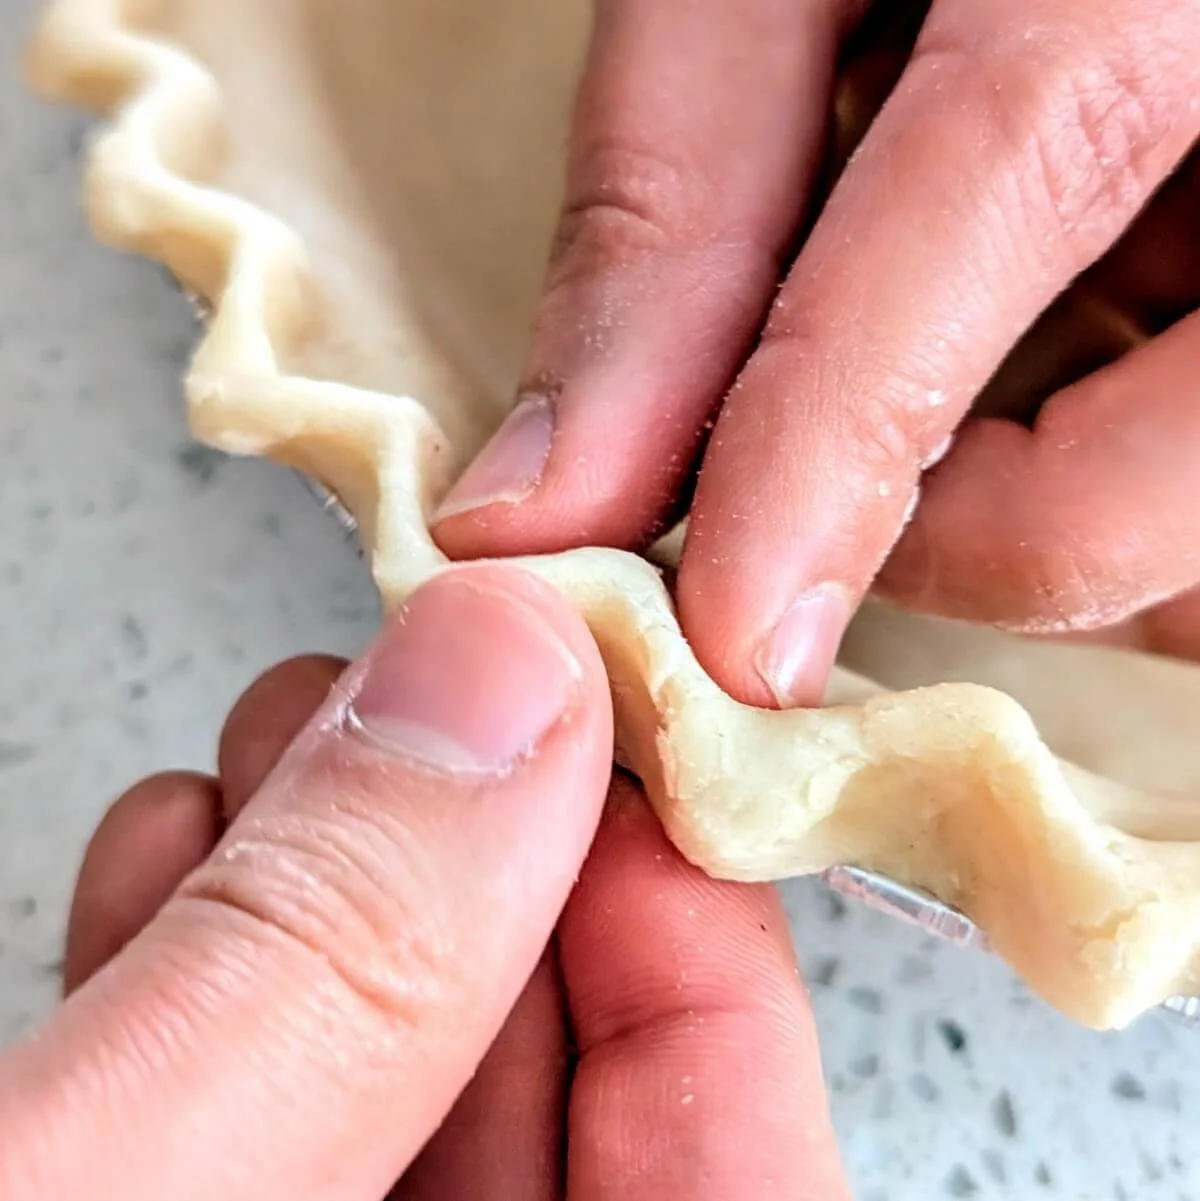
To create the edge design, use your thumb to push the dough into your other hand’s thumb and index finger to make a classic crimp. As you crimp, gently press the dough into the edge of the pie pan to help it grip the pan and prevent shrinkage as it bakes. Go around the edge once or twice to smooth out the shape.
Next, “dock” the crust by poking small holes all over the bottom with the tip of a knife—about one every couple of inches. This allows steam to escape during baking and prevents large air bubbles from forming.
Place the prepared pie crust in the freezer until it’s firm and cold—about 15 minutes.

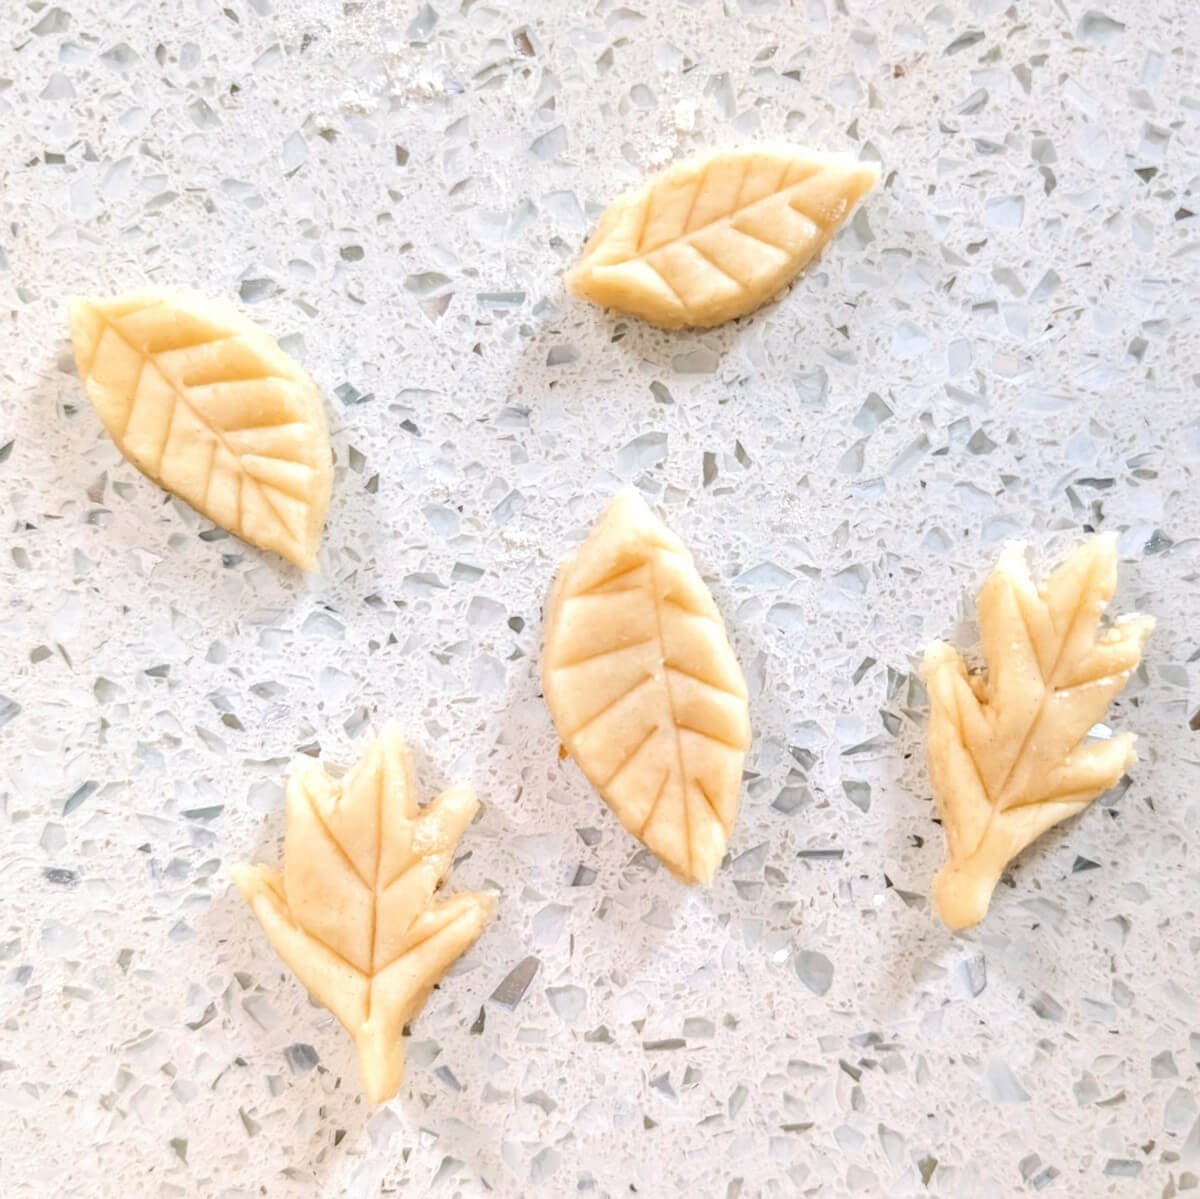
Step 6: Make decorative pie leaves or shapes (optional)
This step is optional, but it adds a festive and elegant touch.
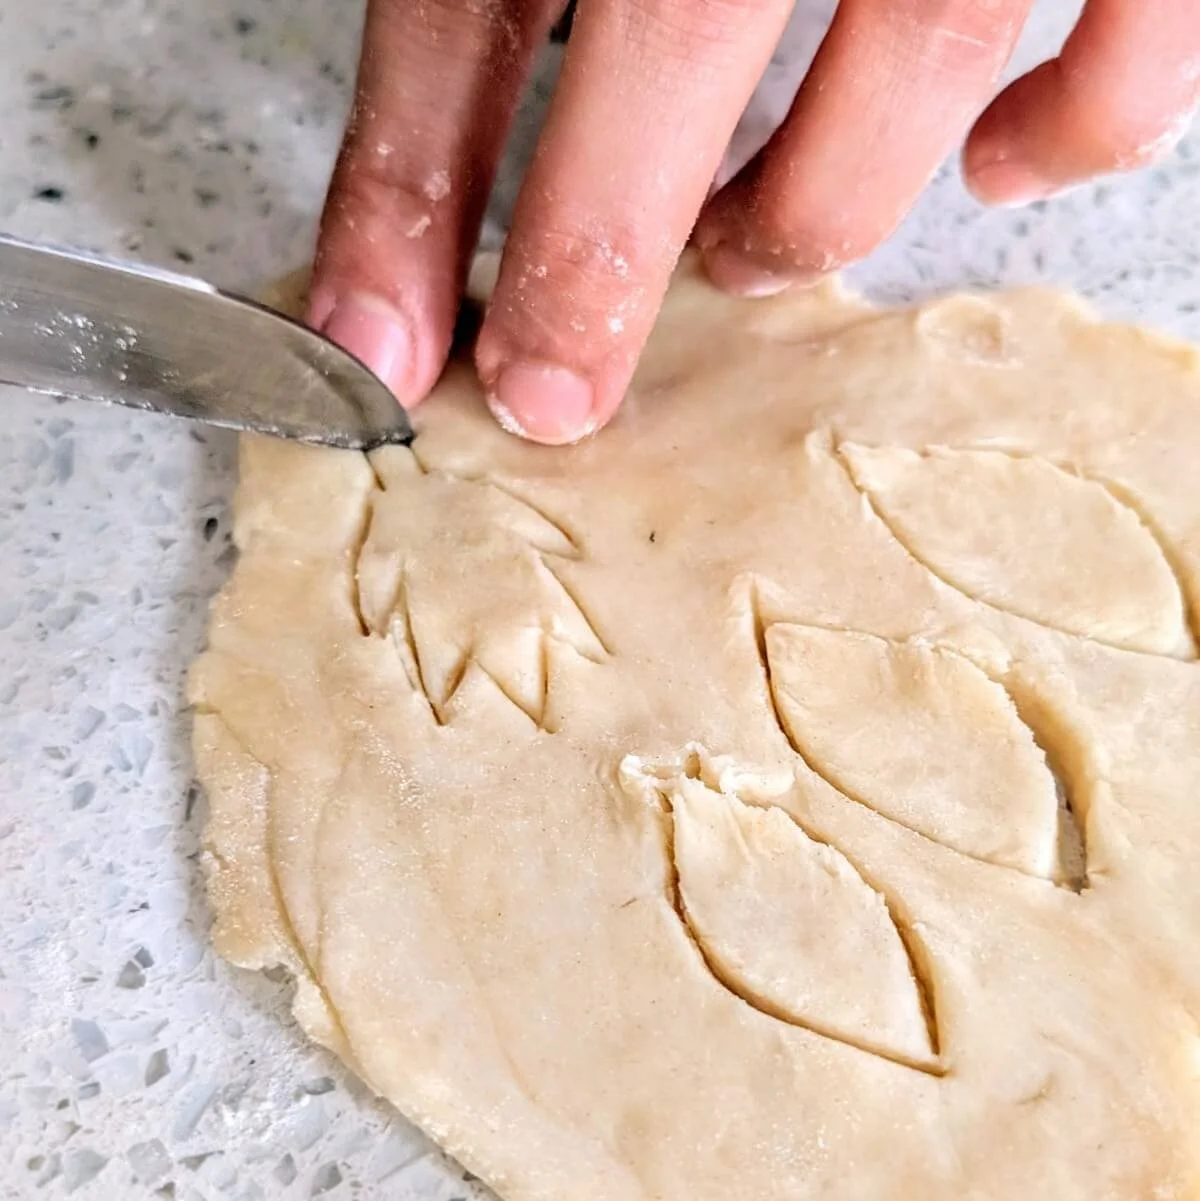
Gather the excess pie dough scraps from earlier and gently form them back into a ball. Roll the dough out into a ⅛-inch thick disk, then cut out decorative shapes.
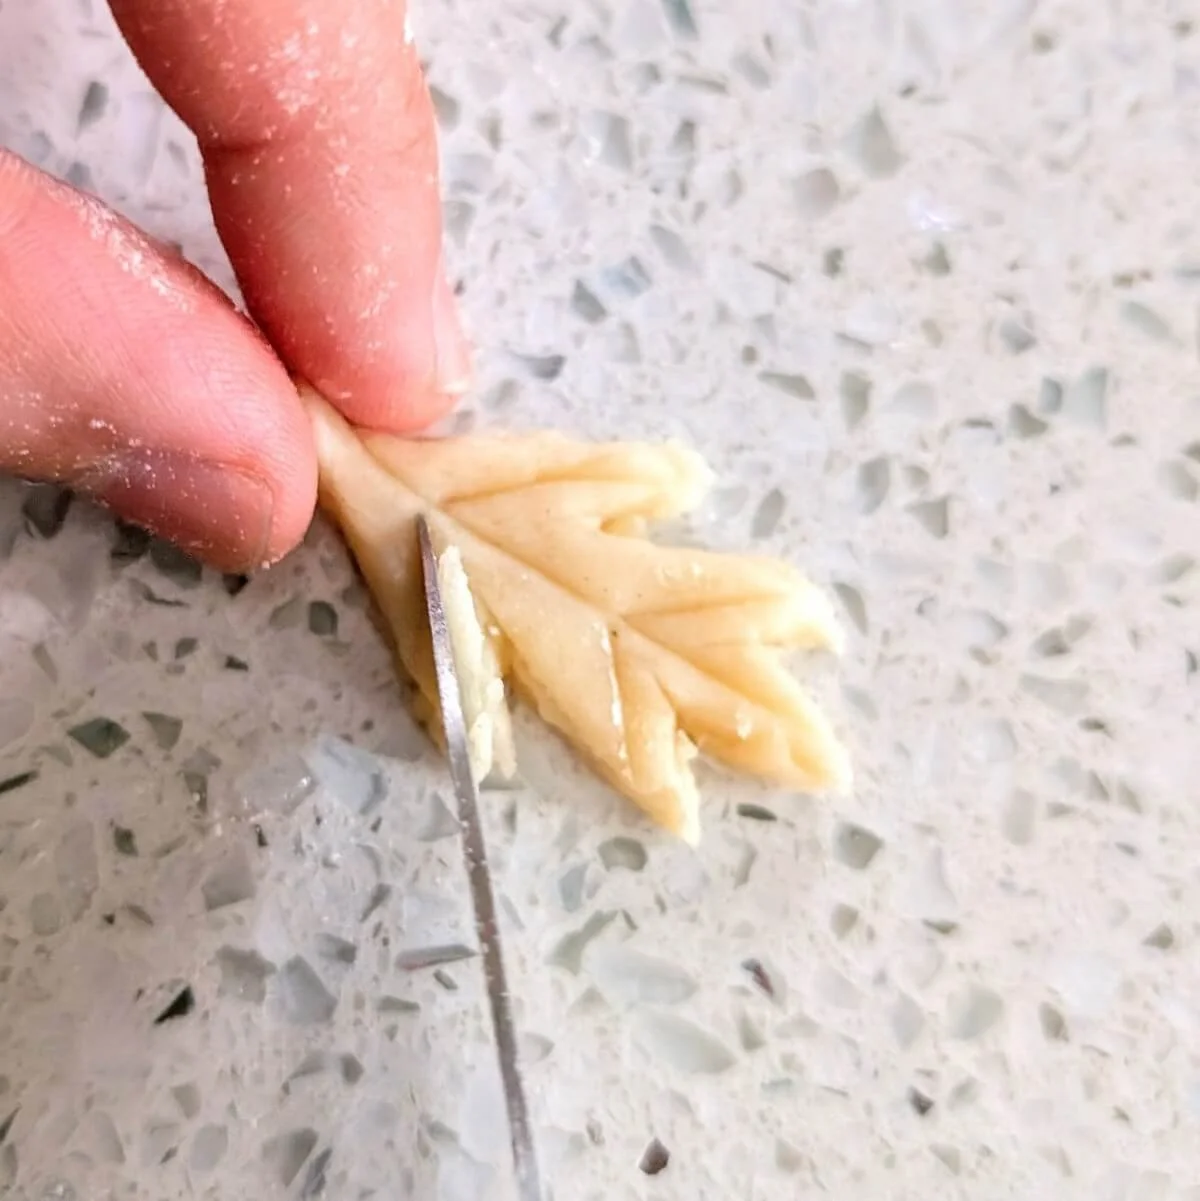
I like to make small leaves by hand with a paring knife, but small cookie cutters work great too if you have them.
Place the pie dough decorations on a plate or tray and freeze them alongside the pie crust until firm.
💡 Pro Tip: Only re-roll pie dough once and discard the remainder. Rolling it out more than twice can make it tough.

Step 7: Blind bake the pie crust
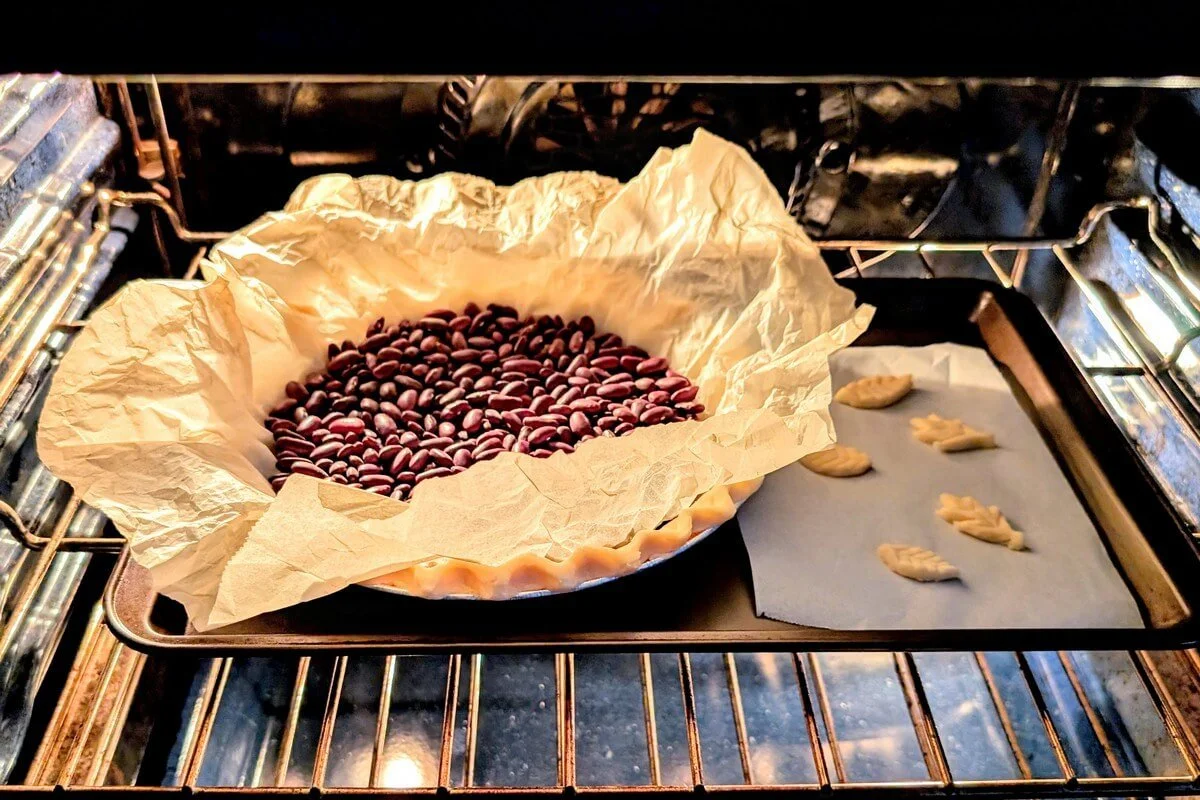
Preheat your oven to 375°F. Place the chilled pie crust (and decorative leaves, if using) on a sheet tray.
Cut a large circle of parchment paper with at least 3 inches of overhang so you can lift it out easily later. Line the crust with the parchment and fill it with pie weights or dried beans (I used dried kidney beans).
Place the tray (with crust and leaves) on the middle rack of the preheated oven.
Bake the decorative leaves for 5–10 minutes until they turn golden brown, then remove them and set aside.
Blind-bake the crust with weights for 20–30 minutes, until the edge is slightly golden and the dough appears set.
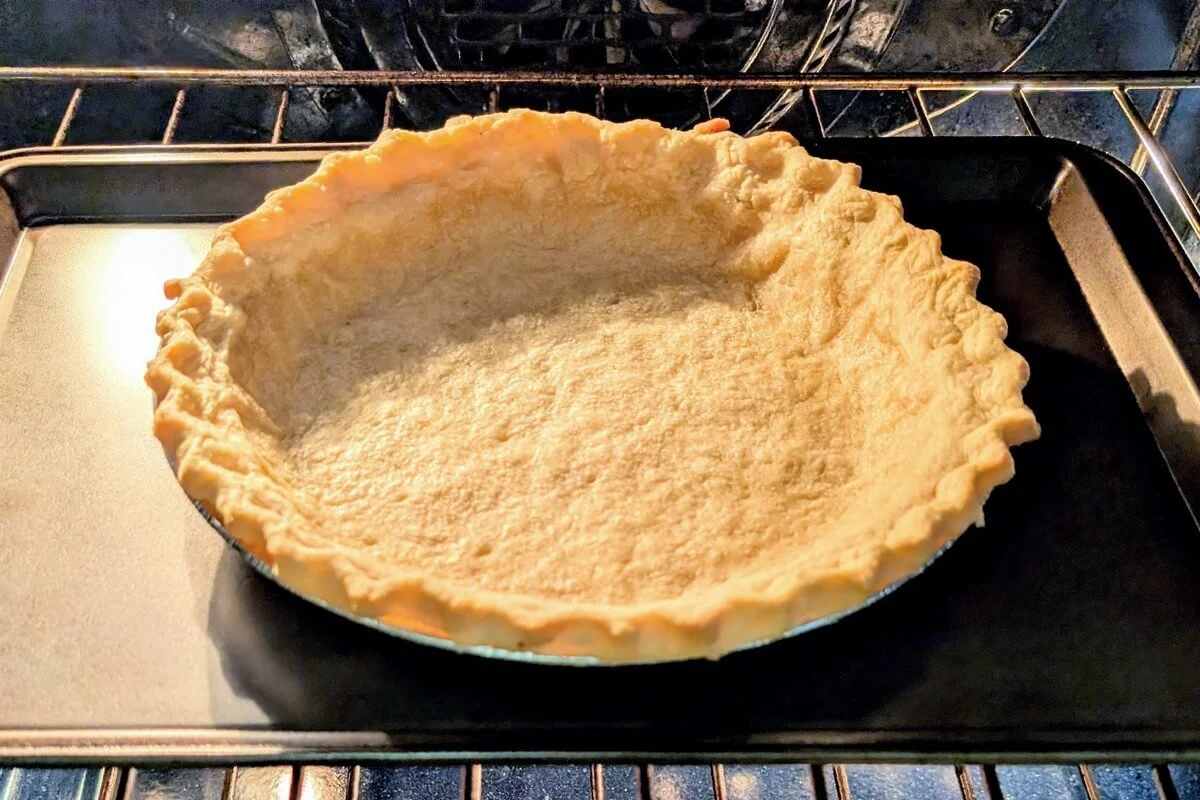
Carefully remove the parchment with weights; then return the crust to the oven for an additional 10 minutes to bake the bottom.
Remove the blind-baked crust and allow it to cool before adding the filling.
💡 Why blind-baking matters: It partially bakes the crust ahead of time, which helps prevent a soggy bottom, especially with custard-style fillings. The pie weights help prevent large air bubbles from forming during baking for a nice, even shape. Don’t skip this step!
Step 8: Make the pumpkin filling and bake the pie
While the blind-baked crust cools, reduce the oven temperature to 325°F.
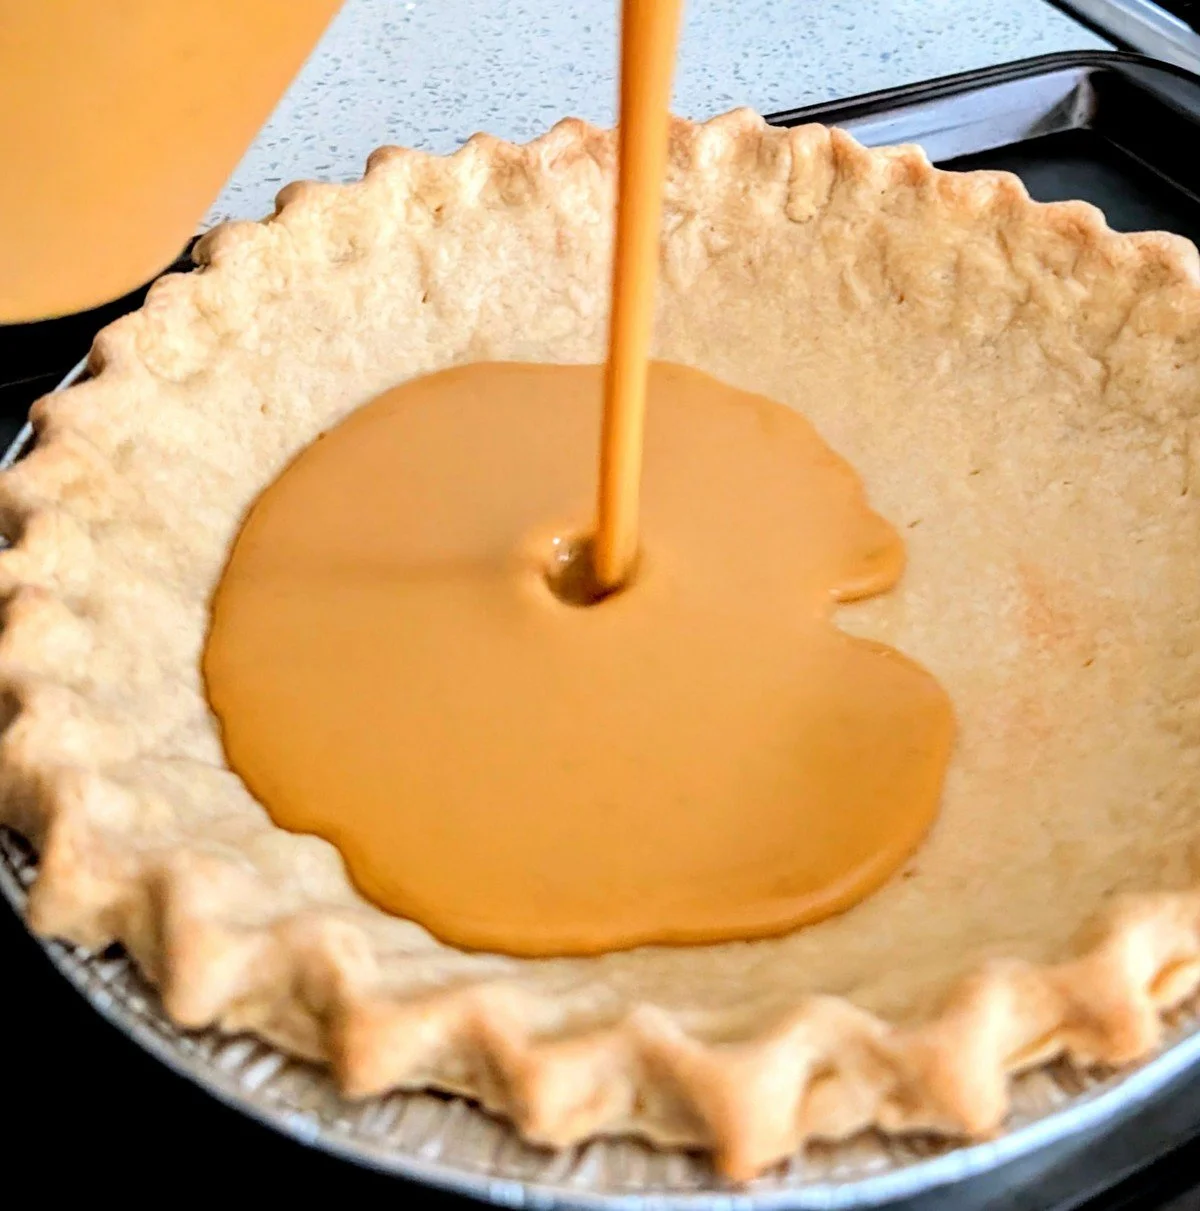
In a bowl, whisk together the evaporated milk, eggs, pumpkin puree, brown sugar, and spices—or blend them in a stand mixer or blender.
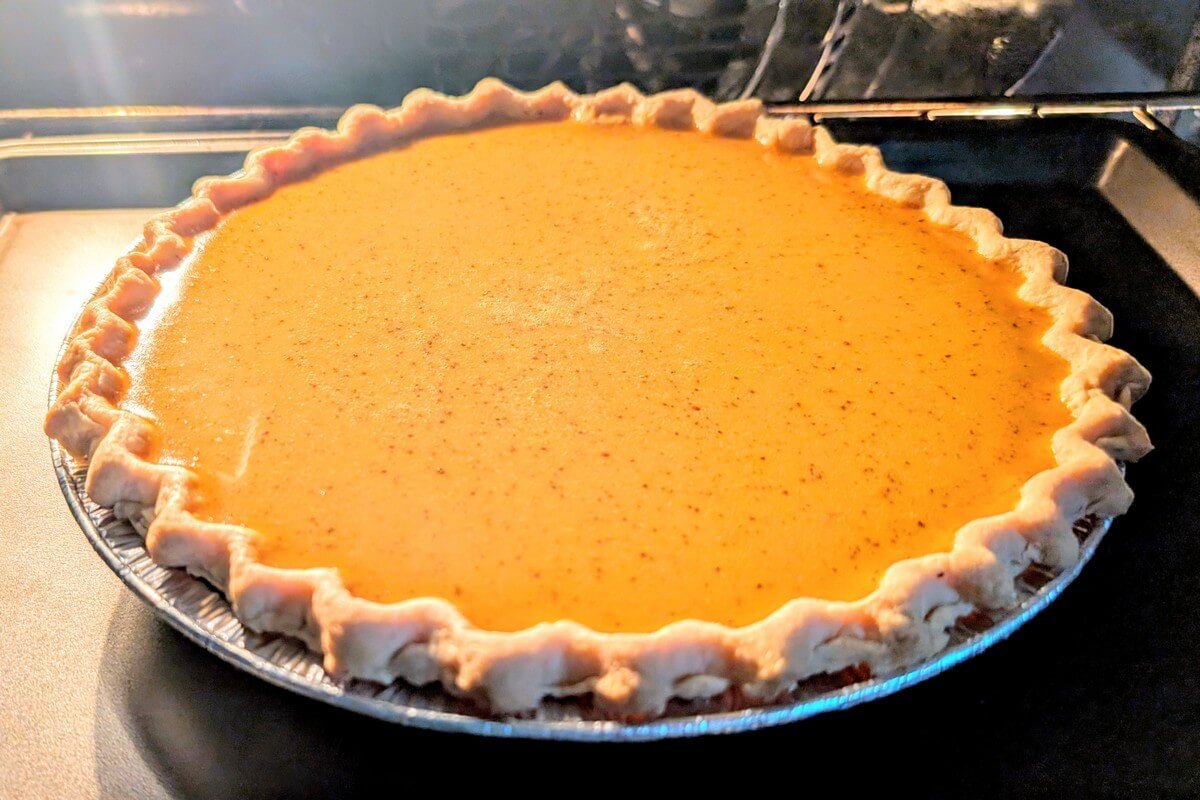
Place the cooled crust on a baking sheet, pour in the pumpkin filling, and carefully transfer to the middle rack of your preheated 325°F oven.
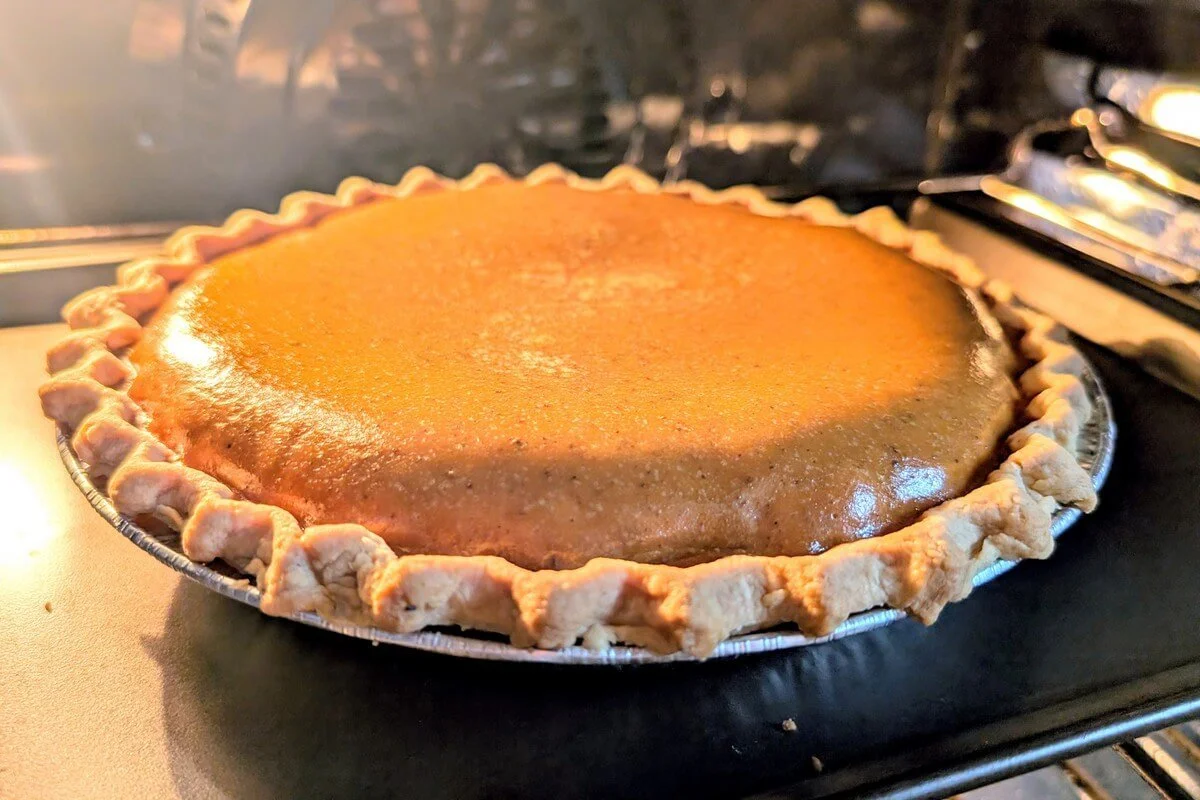
Bake for 50–60 minutes, or until the filling is mostly set, slightly puffed, and still a bit jiggly in the center when gently shaken. It shouldn’t look liquidy—just a slight wobble in the middle is perfect.

Step 9: Chill, decorate, and serve.
For best results, chill the pumpkin pie uncovered in the fridge overnight. This allows the custard filling to fully set and enhances the flavor and texture.
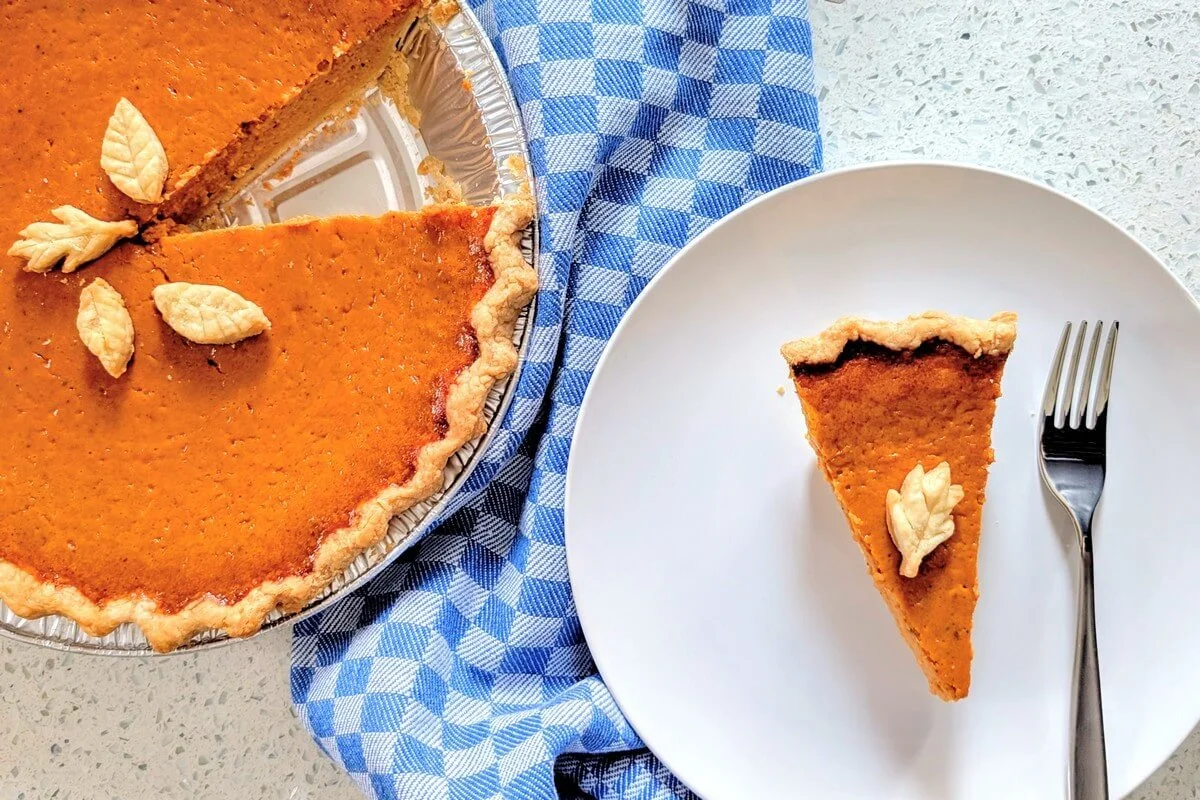
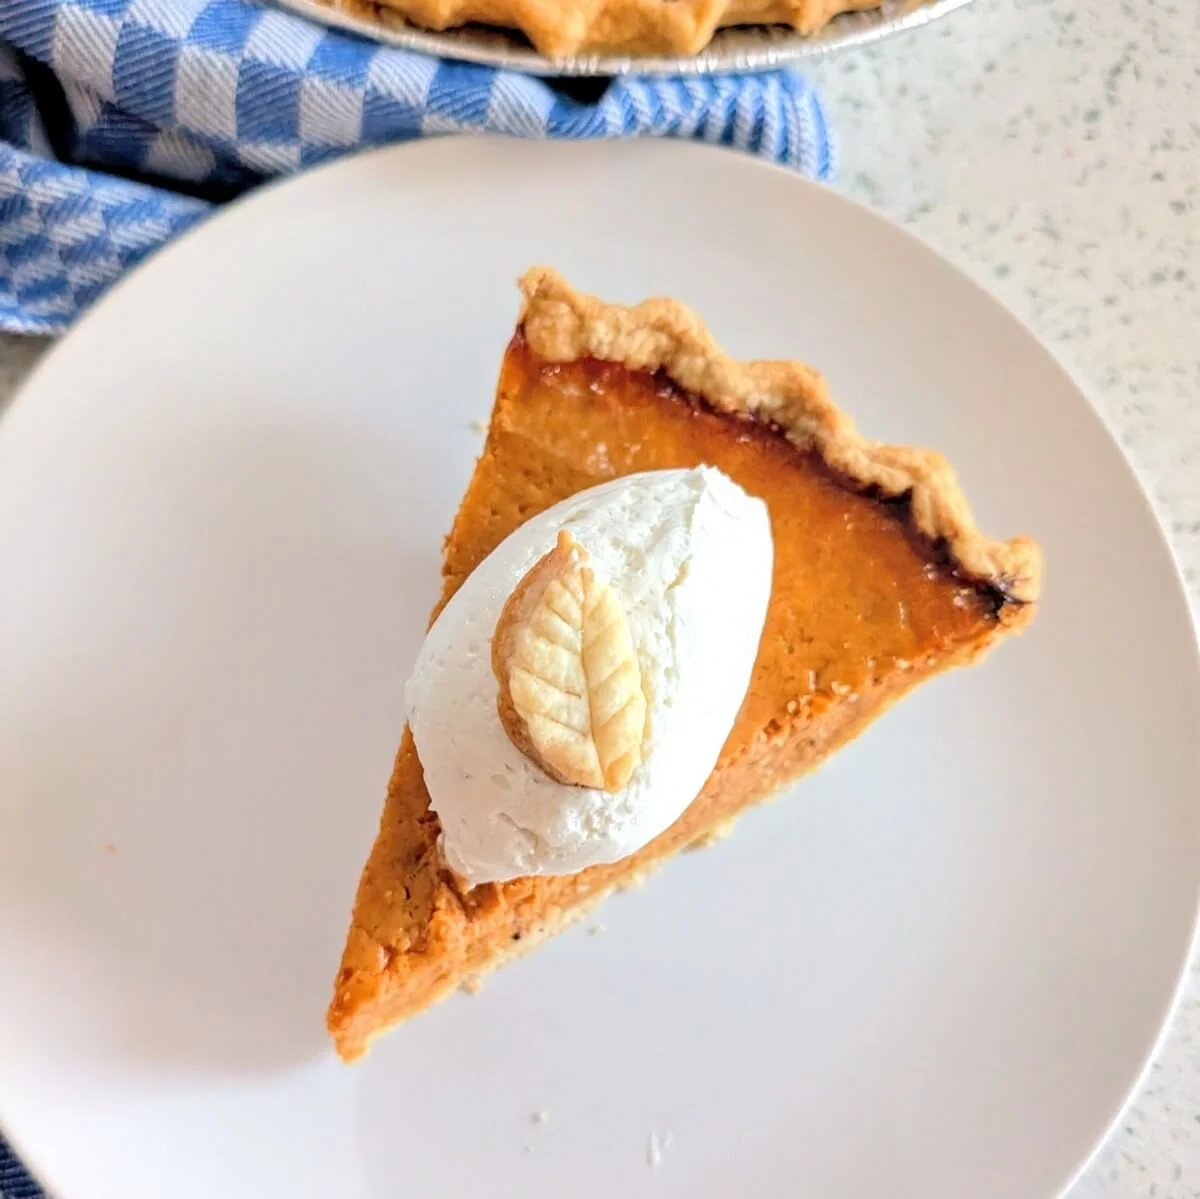
Once fully chilled, place the decorative leaves on top just before serving.
If you're short on time, refrigerate for at least 2 hours to let the pie firm up enough to slice cleanly.
💡 Pro Tip: Avoid adding decorations while the pie is still warm—this can cause the surface to crack as it cools and contracts (I did this once and regretted it!).
My Tips for Making the Best Pumpkin Pie Crust
Keep the dough cold at every stage: Chilling the dough after mixing, rolling, and shaping is key to a tender, flaky crust that holds its shape and doesn’t shrink in the oven. If it ever starts to feel soft or sticky, pop it back in the fridge or freezer before continuing.
Watch the edges: If the crust edges start to brown too quickly while baking, loosely cover them with foil or a pie shield to prevent burning. That said, with this method and lower baking temp, I haven’t run into this issue myself.
Use homemade pumpkin puree for extra flavor: If you have the time, making your own pumpkin puree from scratch adds an earthy richness and freshness you just don’t get from canned.
Save your blind-baking beans: If you used dried beans for blind-baking, let them cool completely and store them (along with the parchment) for future pies. You can reuse them a few times for blind-baking, but don’t try to cook or eat them afterward—they’ll be hard and bitter.
Make it ahead for less stress: Both the crust and filling can be prepped a day in advance, and the baked pie keeps beautifully in the fridge for up to a week. The filling actually improves over time as the spices infuse into the pumpkin. Plus, blind-baking keeps the crust crisp, even after chilling, so there’s no need to worry about sogginess.
Pair it with a drink: Pumpkin pie goes perfectly with eggnog—try making a batch of my aged eggnog for extra depth and complexity.
Pumpkin Pie Substitutions
Butter: I use salted butter because that’s what I usually have on hand. To substitute with unsalted butter, use the same amount the recipe calls for and just add ½ teaspoon of salt.
Pumpkin: If making homemade pumpkin puree and fresh pumpkins aren’t available, use roasted sweet potatoes or squash instead. I’ve done it multiple times and can confirm the flavor is very similar.
Evaporated Milk: If you’re out of evaporated milk, you can use half-and-half cream or whole milk, reduced on the stove until it thickens a bit. This keeps the creamy texture without watering down the filling.
Food processor method: Another way to cut the butter into the flour is with a food processor. Just place the flour and butter cubes in the processor and pulse until the butter is in pea-sized chunks. Then transfer the mixture to a bowl before adding the water to form the dough.
How to Store Leftover Pumpkin Pie
Fridge: Wrap the pie tightly or store individual slices in an airtight container. It’ll keep in the fridge for up to 1 week.
Freezer: Pumpkin pie freezes beautifully. Just place it in an airtight container, zip-top bag, or wrap well in plastic wrap. Freeze for up to 3 months, then defrost in the fridge overnight before serving.
Make ahead: Both the pie dough and pumpkin filling can be made ahead and frozen separately for up to 3 months. That way, when you’re ready to bake, all you have to do is thaw, assemble, and bake.
Pumpkin Pie FAQs
Can I use shortening instead of butter for pumpkin pie crust?
You can use shortening instead of butter in pumpkin pie crust, but I always recommend butter for the best flavor and texture. Butter contains water, which releases steam during baking, creating air pockets for those flaky layers. Shortening, on the other hand, is 100% fat—it doesn’t release steam, and it lacks the depth of flavor you get from butter. Some say it’s easier to handle, but to me, the flavor and texture you get from butter is more than worth it.
How do I prevent my pie crust from shrinking in the oven?
To keep your pumpkin pie crust from shrinking while baking, make sure it's cold, pressed tightly into the corners of the pie pan, and has a little overhang to account for natural shrinkage. Most importantly, freeze the crust until solid before blind-baking—this helps it hold its shape when it hits the hot oven.
Can I skip the blind-baking step for pumpkin pie?
Please don’t skip blind-baking your pumpkin pie crust! Since pumpkin pie filling is a liquid custard, skipping this step means the dough won’t set properly underneath—you’ll end up with a dense, soggy crust instead of a crisp, golden base. Blind baking ensures the bottom is partially cooked before the filling is added, helping it stay flaky and crisp.
How do I know when my pumpkin pie is done baking?
Pumpkin pie is done baking when the filling looks puffed up and the center still has a slight jiggle. If the middle looks wet or runny, it needs more time. Be careful not to overbake it, though—overbaking can cause the custard to curdle or turn grainy. Aim for a just-set center with a subtle wobble. At 325°F, this usually takes 50–60 minutes for a standard 9” pie.
That’s it—enjoy your perfect homemade pumpkin pie!
I know it’s a lot, but it’s so satisfying to make both the crust and pumpkin filling from scratch. Plus, it fills your kitchen with the irresistible aroma of pumpkin and spices—like a warm, cozy hug from grandma.
Still craving more from-scratch goodness? Check out my homemade pumpkin puree recipe—it freezes beautifully, so you can make a big batch and have it ready for all your fall baking!
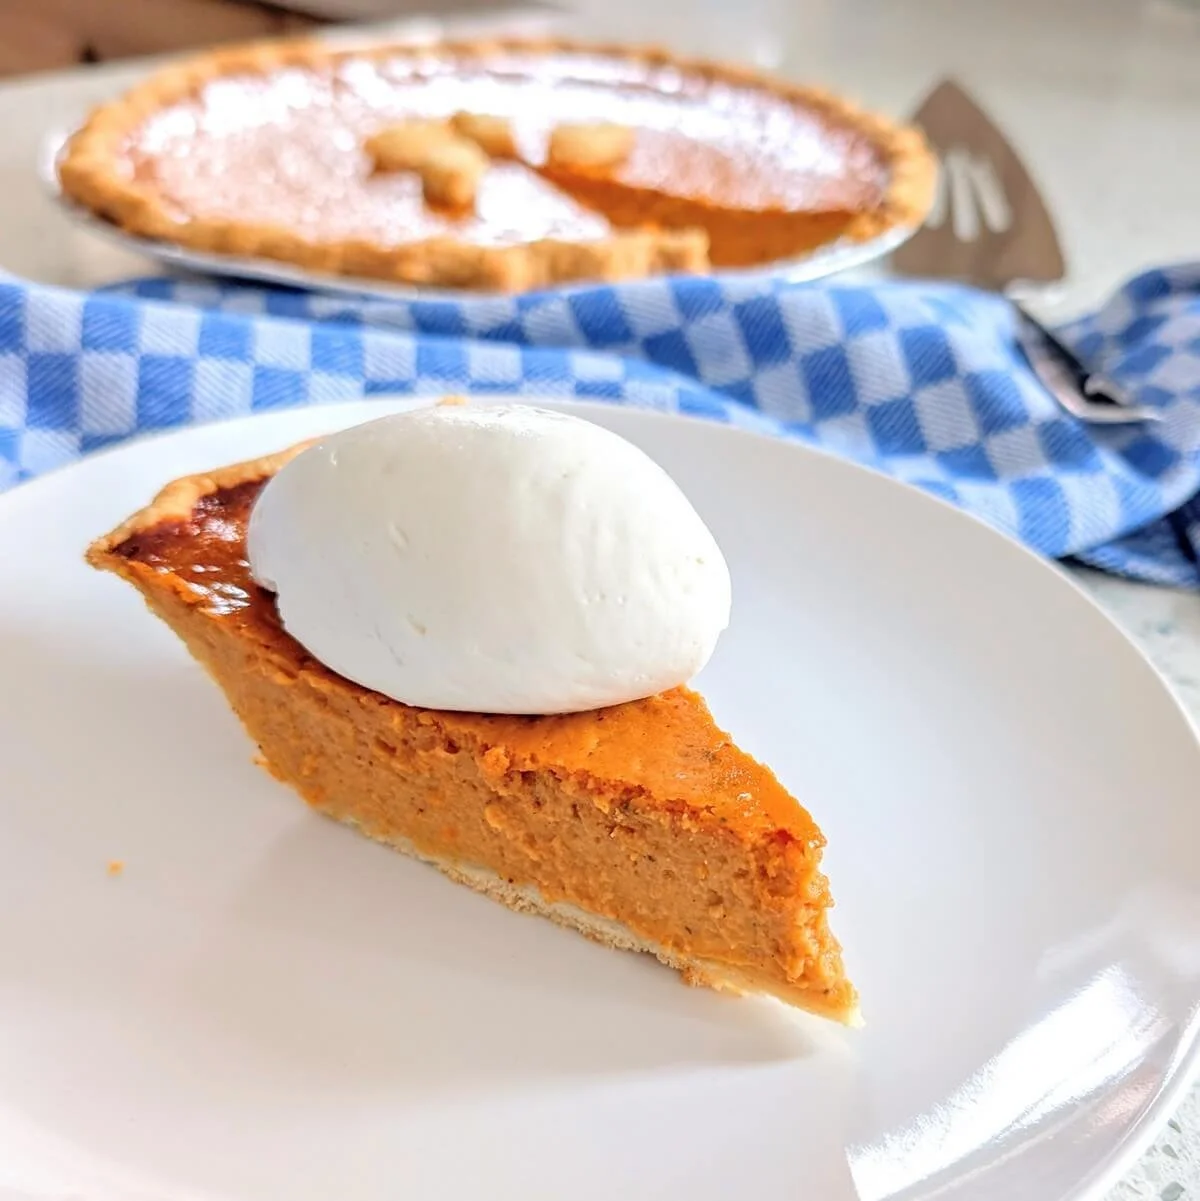
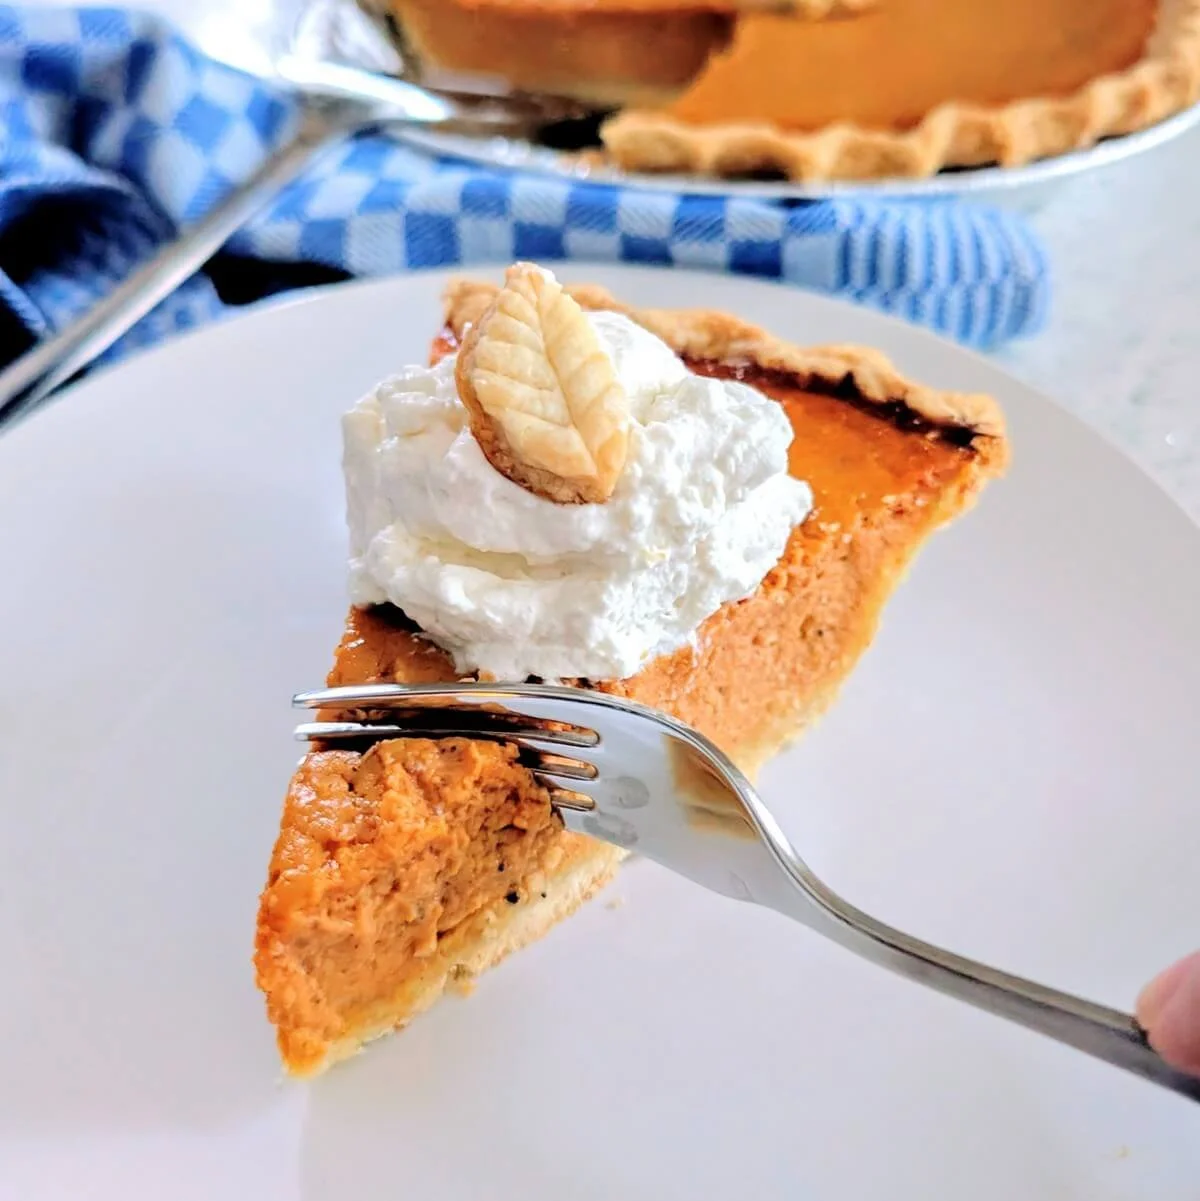
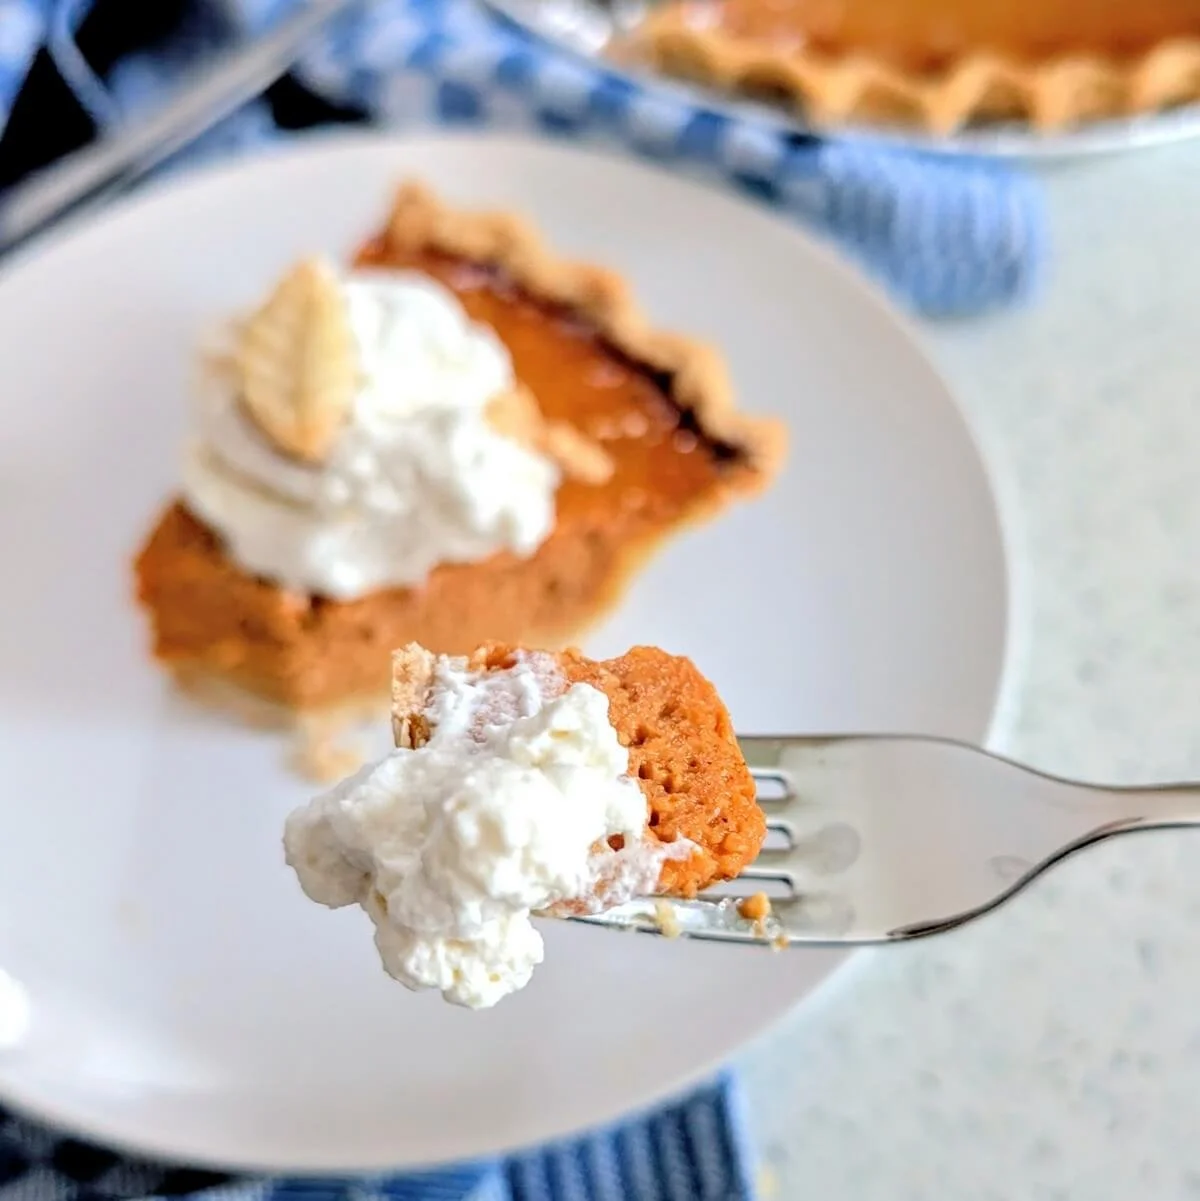
I hope you enjoy every delicious bite of your pie, topped with fluffy whipped cream. Whether it's a centerpiece for Thanksgiving, Christmas, or just a weekend treat—I hope it becomes a new tradition in your home. Happy baking!
Pin This Pumpkin Pie Crust Recipe for Later!

Perfect Homemade Crust and Pumpkin Filling Recipe
This homemade pumpkin pie is perfectly flaky, buttery, spiced just right, and not too sweet!
Makes: One 9” pie
Prep: 60 min Cook: 90 min
Dietary Notes: Vegetarian
Ingredients for Pumpkin Pie Dough
1 ¼ cups all-purpose flour
1 stick (4 ounces) salted butter (or use unsalted + ½ teaspoon salt)
3 tablespoons cold water
Ingredients for Pumpkin Pie Filling
1 ½ cups (one 12-ounce can) evaporated milk
3 eggs
1 ½ cups pumpkin puree (canned or homemade)
¾ cup light brown sugar, packed
¾ teaspoon cinnamon
¾ teaspoon dried ginger
½ teaspoon salt
⅛ teaspoon freshly grated nutmeg
How to Make Pumpkin Pie From Scratch
Prep flour and butter. Measure flour into a mixing bowl. Cut cold butter into small cubes and add to the flour.
Cut butter into flour. Toss butter cubes to coat with flour, then use a pastry cutter (or your hands) to break the butter down into pea-sized pieces. Some variation in size is fine—it helps with flakiness.
Form and chill dough. Add cold water and gently mix until a shaggy dough forms. Press into a ball, then flatten into a disk, being careful not to overwork it. Wrap in plastic, and freeze until firm (about 20 minutes).
Roll out pie dough. Dust the counter and dough with flour. Roll into a circle about 2 inches wider than a 9” pie pan all around, turning and flouring as you go to prevent sticking. Once rolled, trim edges to create a more even circle with a 1-inch overhang, saving scraps for decorations.
Shape pie crust. Place dough in a 9” pie pan, ensuring it's centered. Press dough into place, then form edge design using your thumb to push the dough into your other hand’s thumb and index finger to make a classic crimp. Dock the bottom with a knife to vent steam. Freeze until firm, about 15 minutes.
Make decorations (optional). Roll out scraps into a ⅛-inch thick disk. Cut into shapes like leaves or stars, then freeze until firm.
Blind bake pie crust. Preheat oven to 375°F. Line crust with parchment paper (leave a 3-inch overhang) and fill with pie weights or dried beans. Bake 20–30 minutes until edges are slightly golden and set. Remove weights and bake another 10 minutes to finish the bottom. Bake decorations separately for 5–10 minutes until golden. Cool crust completely before filling.
Make filling and bake pie. Lower oven to 325°F. Whisk together pumpkin filling ingredients: evaporated milk, eggs, pumpkin puree, brown sugar, and spices. Place cooled pie crust on a tray, pour filling into the crust, and carefully place the tray on the middle oven rack. Bake 50–60 minutes, until set but slightly jiggly in the center.
Chill and serve. For best results, refrigerate pumpkin pie uncovered overnight before decorating with baked cutouts. If short on time, chill for at least 2 hours before serving.
Top Tips for the Best Pumpkin Pie
Keep the dough cold: If the dough gets soft while rolling, pop it back into the fridge or freezer until it firms up again. Cold dough = maximum flakiness.
Fix cracks easily: Don’t stress if the dough cracks while rolling. Just press the edges back together and roll over them.
Cut parchment properly: Watch this quick video on cutting a parchment round. Always make it about 3 inches wider than your pie pan for easy removal during blind-baking.
Why blind-baking matters: It partially bakes the crust ahead of time, which helps prevent a soggy bottom—especially with custard-style fillings. Pie weights also stop large air bubbles from forming, keeping the shape even.
Add decorations after chilling: Avoid placing pie crust cutouts or toppings while the pie is still warm. As it cools, the custard contracts, and decorations can crack the surface (learned this the hard way!).
Storage and make-ahead: Store pumpkin pie tightly wrapped in the fridge for up to 1 week, or freeze in an airtight container for up to 3 months. The dough and filling can also be made ahead and frozen separately for up to 3 months.
For more, check out my tips, substitutions, how to store, and FAQs!
Did you try this homemade pumpkin pie recipe?
I’d love to hear how it turned out—or how you made it your own. Leave a comment below, or tag me on Instagram @onecreativecook so I can see your beautiful pie!
More Holiday Recipes You’ll Love
Thanksgiving turkey breast dinner: Skip the whole bird—this scaled-down feast includes juicy dry-brined turkey breast, roasted veggies, and gravy, perfect for couples or small gatherings.
Overnight marinated green beans: This bright, garlicky side dish is a holiday table upgrade you can prep the night before.
Baked butternut squash: Roasted with nutmeg and sumac, this cozy side dish brings sweet-savory balance to any meal.
Aged eggnog: This make-ahead classic gets deeper and smoother with time—perfect for gifting or sipping by the fire.
Dark chocolate chunk cookies with sea salt: Rich, gooey, and just the right amount of salty—these bakery-style cookies always disappear fast.