How to Pack a Cooler for Camping: Keep Food Fresh and Organized
Learn to pack your camping cooler like a pro chef—keep food organized, easy to grab, and fresh for days without sogginess.
Why Smart Cooler Packing Matters for Camping
No one wants to find soggy food floating in their cooler. When you’re miles from the nearest store, staying organized and keeping your food fresh isn’t just convenient — it’s essential for a successful trip.
As a full-time traveler and chef who loves to camp, I’ve learned through trial and error how crucial it is to pack your cooler the right way. A well-layered and organized cooler keeps your food crisp, cold, and safe. It just makes mealtime at camp so much easier.
In this guide, I’ll show you exactly how to layer, organize, and protect your food, so your meals stay fresh, properly chilled, and ready to enjoy for days!

Coming up, you’ll learn:
Smart layering techniques: How to organize your cooler like a pro and keep food fresh longer.
Essential camping cooler tips: Avoid soggy food, maximize space, and extend your ice life.
How to keep your cooler cold for days: Tips to maintain a cold cooler for at least 3 days without adding fresh ice.
Make-ahead meal strategies: Foods that hold up well and double as built-in ice packs.
Cooler packing FAQs: Answers to common questions like whether pre-chilling your cooler is necessary and what foods are best for long trips.
Ready? Let’s get packing!

How to Pack a Cooler for Camping: Step-by-Step
Choose the Right Cooler Setup
Pick the right size cooler: Extra air makes ice melt faster, so you want a cooler that’s just big enough for your trip, so you can pack it tightly.
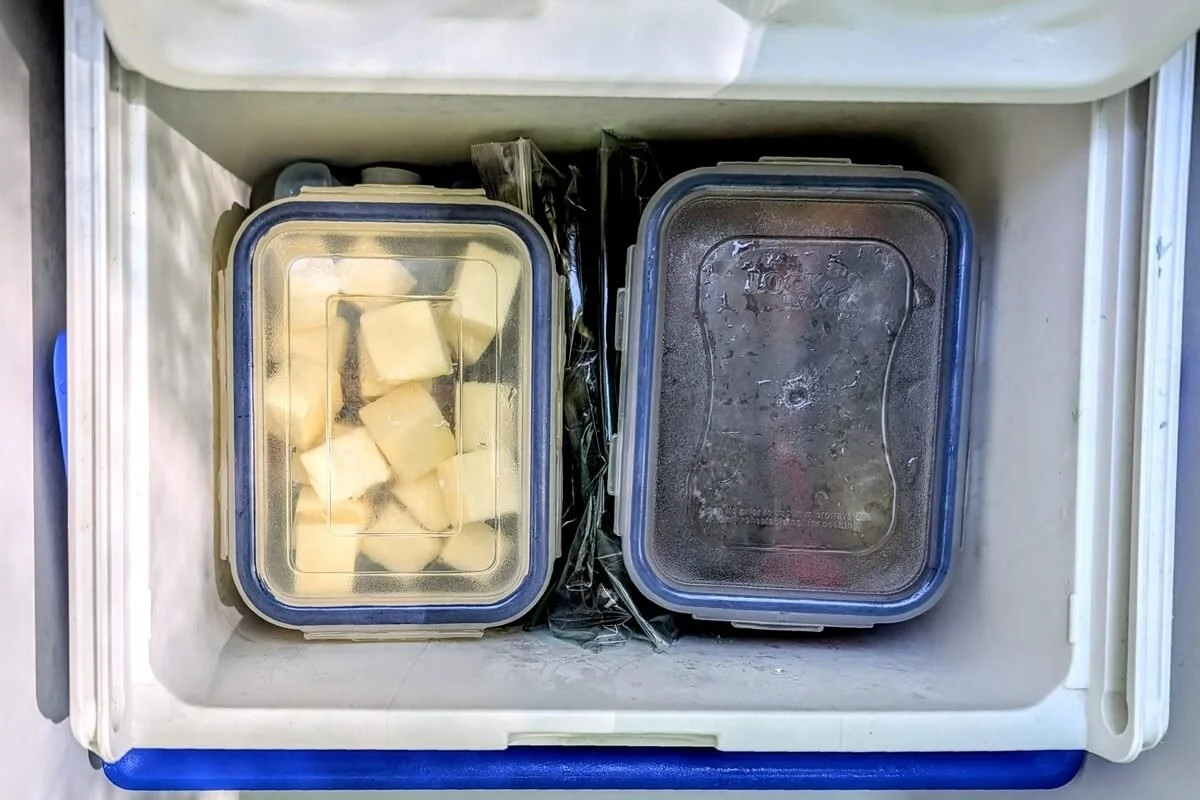
Use a container inside to stay organized: Pack small things like condiments, cheese, pickles, butter, and herbs into a separate lidded container. I used a mini cooler that fits perfectly inside my big cooler (see pics below) — it keeps everything from floating around as ice melts.
Bring a second cooler for drinks: If possible, keep drinks in a separate cooler. This helps your food cooler stay cold longer because every time you open the lid or dig around for a drink, cold air escapes, melting your ice faster.
Make sure everything is chilled before packing: Chill everything you can overnight — drinks, produce, anything that’s going into the cooler. Starting cold makes a huge difference.
Aim for more ice than food: A good rule of thumb is about twice as much ice as food by volume. It sounds like a lot, but it’s key for keeping your cooler cold on multi-day trips. Frozen foods can count toward your ice ratio, too — more on that below.

The Best Way to Layer Food and Ice in Your Cooler
1 – Bottom Cooler Layer
Large ice block or big ice pack: Start by laying down a solid block of ice to create a cold base that lasts for days. I like to make a homemade ice block by freezing water in a large zip-top bag inside a loaf pan or casserole dish. You can also pack frozen water bottles here for extra ice blocks that double as drinking water as they thaw.
Frozen food: Next, add frozen foods to help build your cold base. Start with flat, sturdy containers like frozen stews or sauces — chili or tomato sauce packed in locking containers is perfect. Then pack frozen meats around them, ideally vacuum-sealed or in sturdy, leak-proof zip-top bags. If you’re bringing lots of frozen meals, they can even take the place of an ice block.
Medium-sized sealed containers: Add sturdy containers next — things like condiment squeeze bottles, hummus tubs, sour cream dips, or anything packed in locking storage containers. These can handle sitting close to the ice without getting crushed or soggy.
Separate compartment for small items: Off to one side, pack a small lidded bin (or mini cooler) to hold small items like condiment packets, butter, cheese, and pickles. I like to toss a small ice pack or a few cubes in there too to keep things extra cold.
2 – Middle Cooler Layer
Sturdy veggies: Vegetables that are less fragile, like carrots, cucumbers, and celery, can be stacked above the bottom layer. Keep them sealed in leak-proof bags or their original waterproof packaging if possible.
Meal-prepped items: This is the spot for anything prepped ahead: veggie sticks, marinated skewers, hearty salads — anything durable that won’t crush easily. Just make sure it’s packed in leak-proof bags or containers.
Ice packs or cubed ice: Cover this middle layer with plenty of ice packs or cubed ice. If you’re using bagged ice, try to keep it mostly together inside the bag — bigger chunks melt slower than loose pieces.
Fill all gaps: Pack everything in tight to eliminate air pockets. Less air means slower melting. Use slim ice packs along the cooler sides if you have them, or stuff loose ice cubes into any open spaces.
3 – Top Cooler Layer
Delicate items: Place anything that gets crushed easily, like berries, lettuce, or tomatoes, right on top of the ice.
Easy-access snacks: Anything you’ll want to grab quickly, like pre-made sandwiches, snack bags, or fruit, should go here too.
No extra space: Ideally, your cooler should be packed tight by now. If there’s still room, add more cubed ice around or under delicate foods to keep things snug. Use loose ice sparingly to avoid excess water pooling later.


Chef Tips to Stay Organized and Avoid Soggy Food in Your Camping Cooler
Pack and Store Meats Safely
Vacuum-sealed or leak-proof packaging: Pick meats like steaks, sausages, and hot dogs that already come vacuum-sealed. It’s easier to pack, freeze, and stack.
Freeze meats ahead if you’re not eating them right away: Freeze anything you’re saving for later meals. I like to marinate meats before freezing too, they’ll thaw slowly and soak up even more flavor, ready to cook by day two or three.
Pack extra zip-top bags for leftovers: Once a meat package is opened — like a big pack of hot dogs — transfer it into a leak-proof bag to avoid messy leaks or water seeping in.
Keep a dedicated meat section in the cooler: Stack meats together near the bottom of the cooler so you can easily find what you need and keep them as cold as possible. When packed this way, frozen meats can even stay frozen for a couple of days.


Keep Produce Fresh and Crisp
Buy prepared produce to save time and space: Celery hearts, baby carrots, and bagged veggies usually come washed, trimmed, and sealed in leak-proof packaging, perfect if you don’t have time to prep ahead.
Skip delicate produce when you can: Berries and lettuce take up space and get crushed easily. Bring sturdier fruits and veggies like apples, citrus, and root vegetables instead — most don’t even need to be in the cooler!
Grab fresh produce at farm stands: Don’t miss stopping at a local farm stand along the way. Fresh corn, squash, potatoes, and zucchini don’t need cooler space and stay fresh for days.
Keep produce near the top of the cooler: Store produce in the middle or top layers, near the ice, so it stays crisp without getting crushed by heavier items. Keeping everything bagged or contained also helps prevent waterlogging.


The Best Way to Pack Condiments for Camping
Downsize everything: Bring only what you’ll actually use. Portion out sour cream, salsa, pickles, or dressings into small containers instead of packing full jars or tubs.
Save takeout condiment packets: These are perfect for camping. They're pre-portioned, don’t usually need refrigeration, and save a ton of cooler space.
Prep your toppings: Pre-slice things like pickles, onions, and tomatoes for burgers or sandwiches, and cube butter or chop chives for baked potatoes. It makes camp assembly quicker and a lot less messy.
Pack in locking containers: Use locking containers for anything liquid or messy. They keep water out and prevent leaks inside your cooler.
Use small compartments to organize: Pack these little items into small bins or containers. I use a mini cooler inside my big cooler to keep condiments, cheese, and herbs separate, dry, and easy to grab.


How to Manage Ice in Your Camping Cooler
Use ice packs whenever possible: Ice packs melt more slowly, don’t leak, and keep your cooler dry — but they’re best for shorter trips. Once they thaw, you’ll need to refill the cooler with fresh ice.
Avoid loose cubed ice if you can: Loose ice melts faster and shifts around every time you move things in the cooler. Instead, aim for one big block of ice for your base and one bag of cubed ice for the top, keeping it mostly intact if you can. Only scatter a little loose ice to fill gaps as needed.
Keep melted water in the cooler (at first): Cold water helps fill air gaps and keep everything colder early on. Drain it only after most of the ice has melted and you’re ready to top off the cooler again.

How to Keep a Cooler Cold for 3 Days
Your cooler really can stay cold for 3 days — or even longer. If you pack it right, you can lock in the cold, slow down melting, and keep your food fresh the whole trip.
Start with a good cooler: A well-insulated, hard-sided cooler makes a big difference. Thick-walled models with tight-fitting lids hold cold temperatures much longer, especially for multi-day trips.
If you already have a cooler, use what you’ve got. I still use an old, basic hard-sided one with a snug lid, and with smart packing, it can keep food cold for up to 3 days. Just avoid soft coolers with zippers if you can. They tend to let cold air out and don’t hold ice nearly as well.
If you are thinking about upgrading, investing in a high-performance cooler like Yeti or RTIC can be worth it in the long run. A good one will last for years and handle heat and longer trips much better.
Pack the cooler tight: Air pockets make ice melt faster. Pack everything in tightly, using ice packs, frozen foods, frozen water bottles, or extra ice to fill any gaps. Aim for about twice as much ice (or frozen food) as non-frozen items by volume.
Keep your cooler in the shade: Direct sun will heat up your cooler fast, even if it’s packed perfectly. Set it up in a shady spot — under trees, a tarp, or anywhere cool. Avoid leaving it in your car unless it's actually cooler than the outside air.
Minimize opening the lid: Every time you open the cooler, cold air escapes and warm air rushes in. Try to plan ahead and grab what you need all at once. Having a separate drinks cooler helps a lot with this — people can grab what they want without constantly opening the main food cooler.
Cover the cooler with a blanket or reflective tarp: If it’s really hot, cover the cooler with a towel, blanket, or reflective emergency tarp. It helps to insulate the cooler a tiny bit more and prolong its cooling power.

Easy Make-Ahead Camping Meal Ideas
Cooking at camp is a lot easier when you prep ahead. With just a little work at home, you can spend less time slicing and dicing at the campsite — and more time relaxing, exploring, and eating great food.
Here are some easy make-ahead meal ideas to pack for your next trip:
Frozen hearty stews and soups: Make a big batch of chunky beef chili, cozy chicken soup, or a hearty curry ahead of time. Freeze it in locking containers and pack it at the bottom of the cooler. It doubles as an ice block and is perfect for easy dinners after a long day.
Frozen pasta sauce: Make a batch of San Marzano tomato sauce, all-beef bolognese, or a classic creamy bechamel. At camp, you can use it as the base for a one-pot pasta or spoon it over grilled spaghetti squash for a cozy meal. Prep my cheese-stuffed garlic bread ahead of time as well, then finish it on the grill for the ultimate fireside pasta dinner.
Pre-made sandwiches: Wrap meaty Italian subs or New Orleans muffaletta in foil, freeze them, and heat them over the campfire until crispy and melty inside. Easy lunch, no extra work.
Prep marinated meats: Marinate chicken, beef, or pork with my easy all-purpose marinade or spicy jerk chicken marinade. For a tangy twist, try my pickle-brined chicken thighs. Freeze the meat in zip-top or vacuum-sealed bags and grill it at camp when thawed.
Pack hearty salads: Make sturdy, cooler-friendly salads like marinated green beans, potato salad, or my make-ahead camper's power salad with kale and chickpeas. They hold up well in the cooler and make easy lunches or sides.
Upgrade your hot dog toppings: Prep all seven of the classic Chicago-style hot dog toppings ahead of time. It’s the easiest way to turn a basic campfire hot dog into something truly special.
Prep kebabs ahead of time: Pre-skewer veggies, mushrooms, and meats before you leave. Pack them in zip-top bags or containers so they’re ready to hit the grill the moment you set up camp.
Bring easy-to-build snack boards: Pack pre-cut cheese, salami, crackers, olives, and pickles in small containers for a no-cook lunch or happy hour snack spread.

Packing a Cooler for Camping FAQs
Should I pre-chill my cooler?
Pre-chilling your cooler can help it stay cold longer, but it’s not essential. Pre-chilling works by cooling down the insulation, so when you pack your cooler, the first few hours aren’t wasted chilling the cooler itself.
If you have time and extra ice or ice packs, filling the cooler the night before your trip can be helpful. Just remember to replace that ice with fresh ice when you're ready to pack your food. If you're starting with frozen meals, ice blocks, and cold food, you'll still be in good shape without this step—I always skip it myself.
Ice on top or bottom of cooler?
For the best results, you want ice on both the top and bottom of your cooler. Start with a big ice block and/or frozen foods on the bottom to create a cold base. Add another layer of ice packs or cubed ice around the middle food layer, and place the most delicate foods on top.
Fill any gaps with more ice to lock in the cold. If possible, also insulate the sides of the cooler with slim ice packs or packed cubed ice.
How long does a cooler keep food cold?
How long a cooler keeps food cold depends on a few things: the type of cooler, how you pack it, and how you store it at camp.
A well-packed hard-sided cooler with thick insulation can keep food cold for 3 to 4 days, sometimes longer if you minimize lid openings and keep it shaded.
Soft-sided or lower-quality, thin-walled coolers may only last 1 to 2 days. No matter what cooler you use, packing it tight, layering ice properly, and using a higher ratio of frozen to non-frozen items can make a huge difference.
How do you keep food dry in a cooler?
The best way to keep food dry in a cooler is to pack everything in leak-proof containers, zip-top bags, or vacuum-sealed bags.
Ice packs and frozen water bottles also help because they don’t create puddles like loose ice does. If you’re using cubed ice, try to keep it bagged and as compact as possible to slow melting and minimize water pooling.
Packing small items into separate lidded compartments also keeps things dry and organized, even as ice melts.
Best foods to pack in a cooler for 3+ days?
The best foods to pack in a cooler for longer trips are frozen items like meats, hearty stews, soups, and pasta sauces.
Sturdy veggies like carrots, celery, and cucumbers, hard cheeses, and cured meats like pepperoni, salami, and prosciutto hold up really well too.
Avoid delicate foods like berries or lettuce unless you plan to eat them early. And remember — a lot of staples don’t even need cooler space, like citrus fruits, apples, corn on the cob, potatoes, canned goods, bread, and crackers.
Should I use dry ice for my camping cooler?
Dry ice can work for camping coolers on long trips, but it’s usually overkill for regular camping. It’s expensive, needs special handling, and tends to freeze everything solid — better for keeping frozen food frozen than for chilling fresh foods.
For most trips, ice blocks, ice packs, or even cubed ice are safer, cheaper, and much easier to manage.

Final Tips for Packing the Perfect Camping Cooler
Packing your cooler right makes your whole camping trip easier. You’ll keep food fresh longer, skip last-minute grocery runs, and avoid the soggy, disappointing mess when water leaks into your food.
You don’t need fancy gear to make it work. An old hard-sided cooler, smart packing layers, and a little prep at home go a long way toward keeping everything cold for days. And if you get grocery deliveries or meal kits, hang onto those leftover delivery ice packs — they’re perfect for camping and work great a few times before they wear out.
Now it’s time to load up your cooler and hit the road. You’ve got everything you need for fresh meals, easy make-ahead camping food, and staying organized — so you can be a happy camper all trip long.
What’s your must-pack camping meal?
Whether it’s chili, sandwiches, or your favorite campfire snack, I’d love to hear what you always stash in your cooler. Share it in the comments below — I’m always looking for new ideas to try on my next trip!
More Camping Cooking Resources
How to cook over a fire like a pro: Simple tips and techniques to build the perfect cooking fire, and master campfire meals, even if it’s your first time.
My favorite campfire cooking tools: A full list of my chef-tested camping gear that makes outdoor cooking easier, faster, and more fun.
Easy camping recipes without foil: Camping food can go way beyond hot dogs and foil packs. These fire-cooked and make-ahead meals make gourmet campfire cooking totally doable—and actually fun!
Delter coffee press review & brew guide: A lightweight, easy-to-clean coffee press that’s perfect for making fresh coffee at your campsite.