Gingerbread Cookies with Royal Icing
These chef-tested gingerbread cookies are warmly spiced, chewy in the middle, and crisp around the edges, with homemade royal icing for holiday decorating.
or read on for step-by-step instructions with photos

Chewy Gingerbread Cookies for Decorating
Gingerbread cookies are supposed to be fun to make, but the dough can be tricky. If it’s too soft, it can stick and stretch, and if it’s too cold or dry, it can crack when you roll it. Homemade royal icing has its own learning curve, too. The whole process can be a lot more fun when you know what to look for at each stage.
I’ve been making gingerbread cookies since I was a kid, and later made them in a restaurant bakery as a professional chef. After all those batches, I’ve learned what makes the dough easier to work with, how long to bake the cookies for the texture I like, and what the royal icing should look like when it’s ready.
I built this gingerbread cookie recipe around the techniques I’ve picked up over the years, and I’ll walk you through it step by step—from mixing the dough to rolling and baking the cookies, then getting the icing consistency just right for decorating.
Why This Gingerbread Cookie Recipe Works
Chilling makes the dough easier to handle: Chilled dough is firmer and less sticky, so it’s easier to roll and cut. If you have time, let it chill overnight so the flavors have more time to develop.
A shorter bake keeps the centers chewy: I bake these gingerbread cookies just until the edges are set, and the centers are still a little soft. They firm up as they cool, giving you chewy centers with crisp edges.
Generous spice blend for deep gingerbread flavor: Ginger, cinnamon, cloves, and nutmeg each bring a different warm note, while brown sugar and molasses add sweetness and depth and give the cookies their beautiful dark brown color.

What You’ll Need
Ingredients
For the Gingerbread Cookies
3 cups all-purpose flour, plus more for dusting
½ teaspoon baking soda
¼ teaspoon baking powder
1 stick salted butter, softened (or 1 stick unsalted butter plus ½ teaspoon salt)
½ cup dark brown sugar
2 teaspoons ground ginger
2 teaspoons ground cinnamon
1 teaspoon ground cloves
½ teaspoon ground nutmeg
1 large egg
½ cup unsulfured fancy molasses
For the Royal Icing
½ cup icing sugar
2 teaspoons egg white
½ to ¾ teaspoon lemon juice
1 drop vanilla extract (optional)
Note: This makes enough royal icing for simple decorations on all 48 cookies. If you want more detailed designs, make another batch of icing as needed.
Equipment for Making Gingerbread Cookies
Measuring cups and spoons
Mixing bowls
Whisk
Stand mixer with paddle attachment
Plastic wrap
Rolling pin
Cookie cutters
Spatula
Baking sheet and parchment paper
Piping bag with small round piping tip
Makes: 48 cookies
Prep: 20 min Chill: at least 1 hour
Bake: about 10 min
How to Make Gingerbread Cookies
Step-by-Step
Step 1: Measure and gather the ingredients
Measure the flour, baking soda, and baking powder into a bowl and whisk them together so they’re evenly distributed.
Measure out the brown sugar, spices, and molasses.
Crack the egg and grab the softened butter so everything’s ready to go.
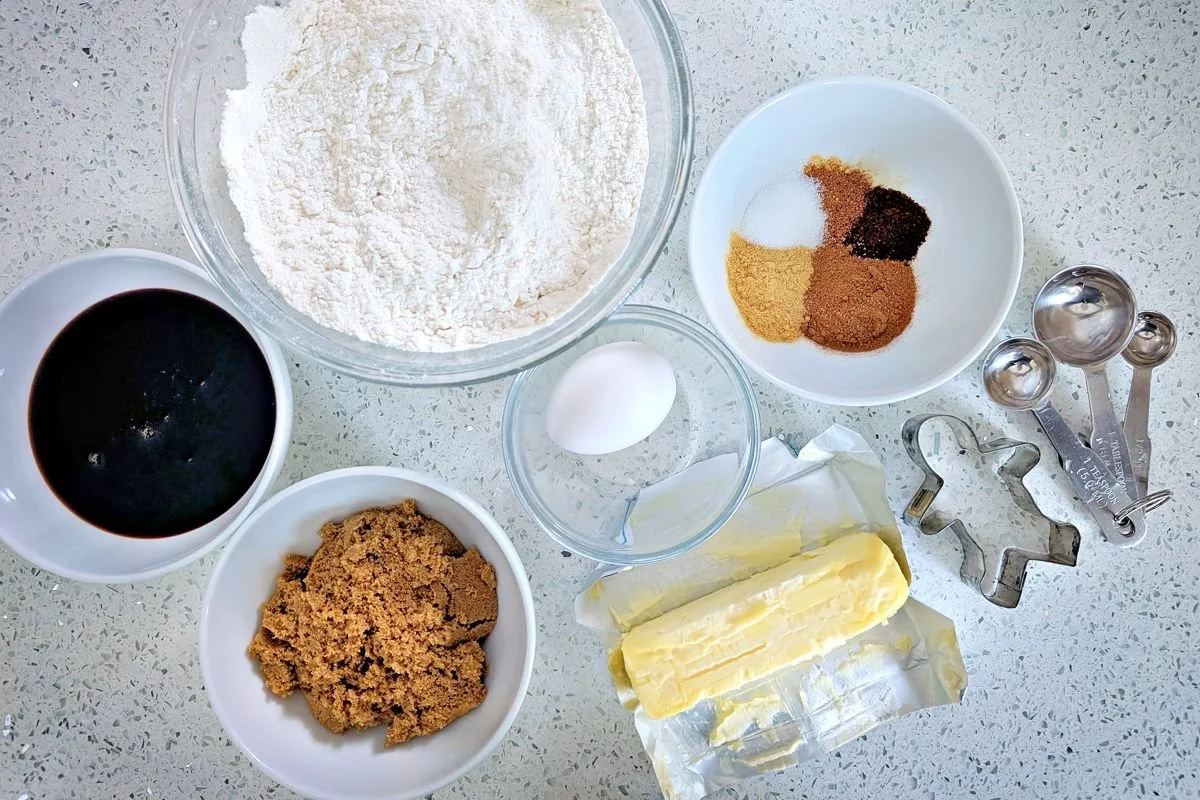
Step 2: Cream the butter and sugar
Add the room-temperature butter and brown sugar to the bowl of a stand mixer fitted with the paddle attachment.
Cream on medium speed for about 3–5 minutes, scraping down the bowl as needed.
You’ll see the mixture change from medium brown to a much lighter golden color. When it looks light and fluffy, it’s ready to go.
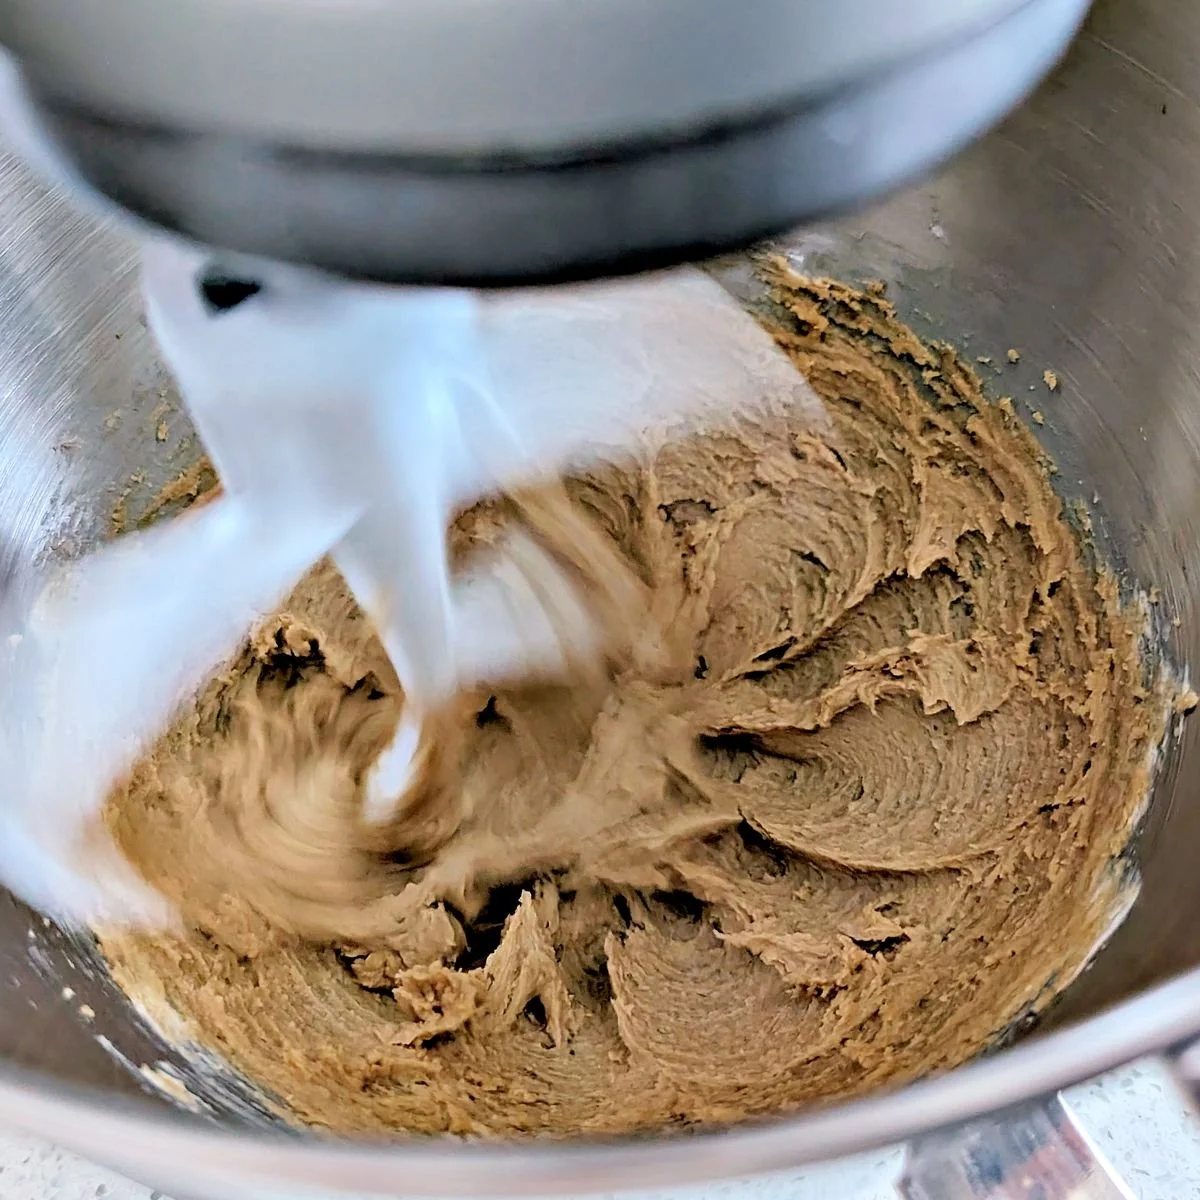
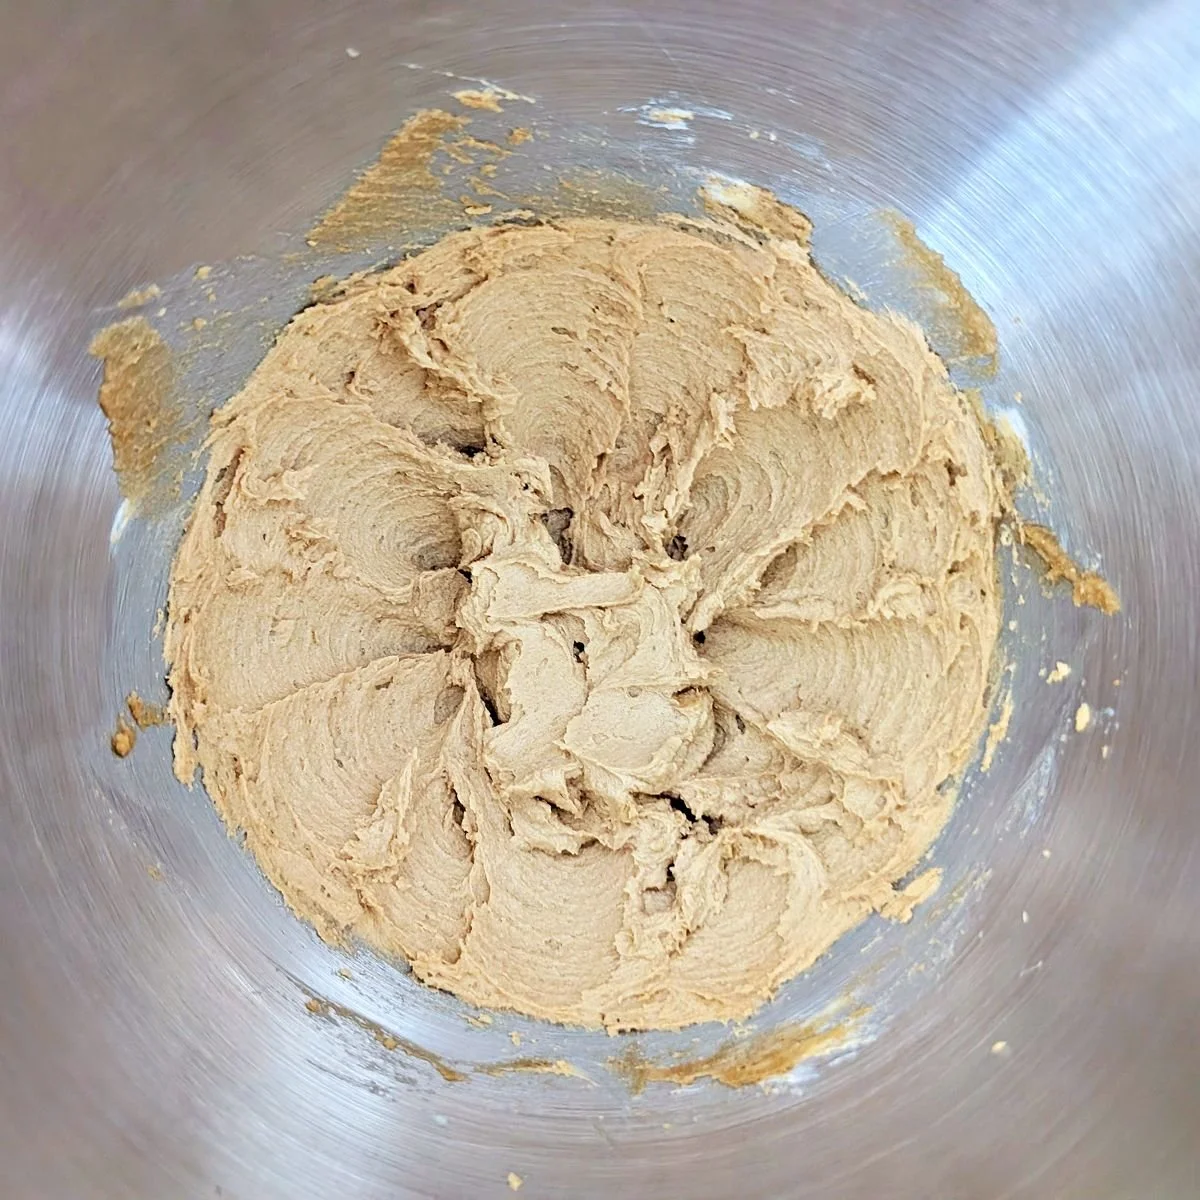
Step 3: Mix the gingerbread dough
With the mixer on low, add the spices to the butter mixture and mix until they’re evenly distributed. Add the egg and molasses and mix until combined.
Add the flour mixture in a few additions, mixing just until the dough is evenly brown and starts to clump together. Stop to scrape the bottom and sides of the bowl if you need to.
The dough won’t necessarily form one big ball in the mixer, but it should look soft and pliable, and hold together when you press it, without sticking to your fingers.
If the dough seems really sticky, add a little more flour. If it seems really dry and crumbly and won’t hold together, add a splash of water.
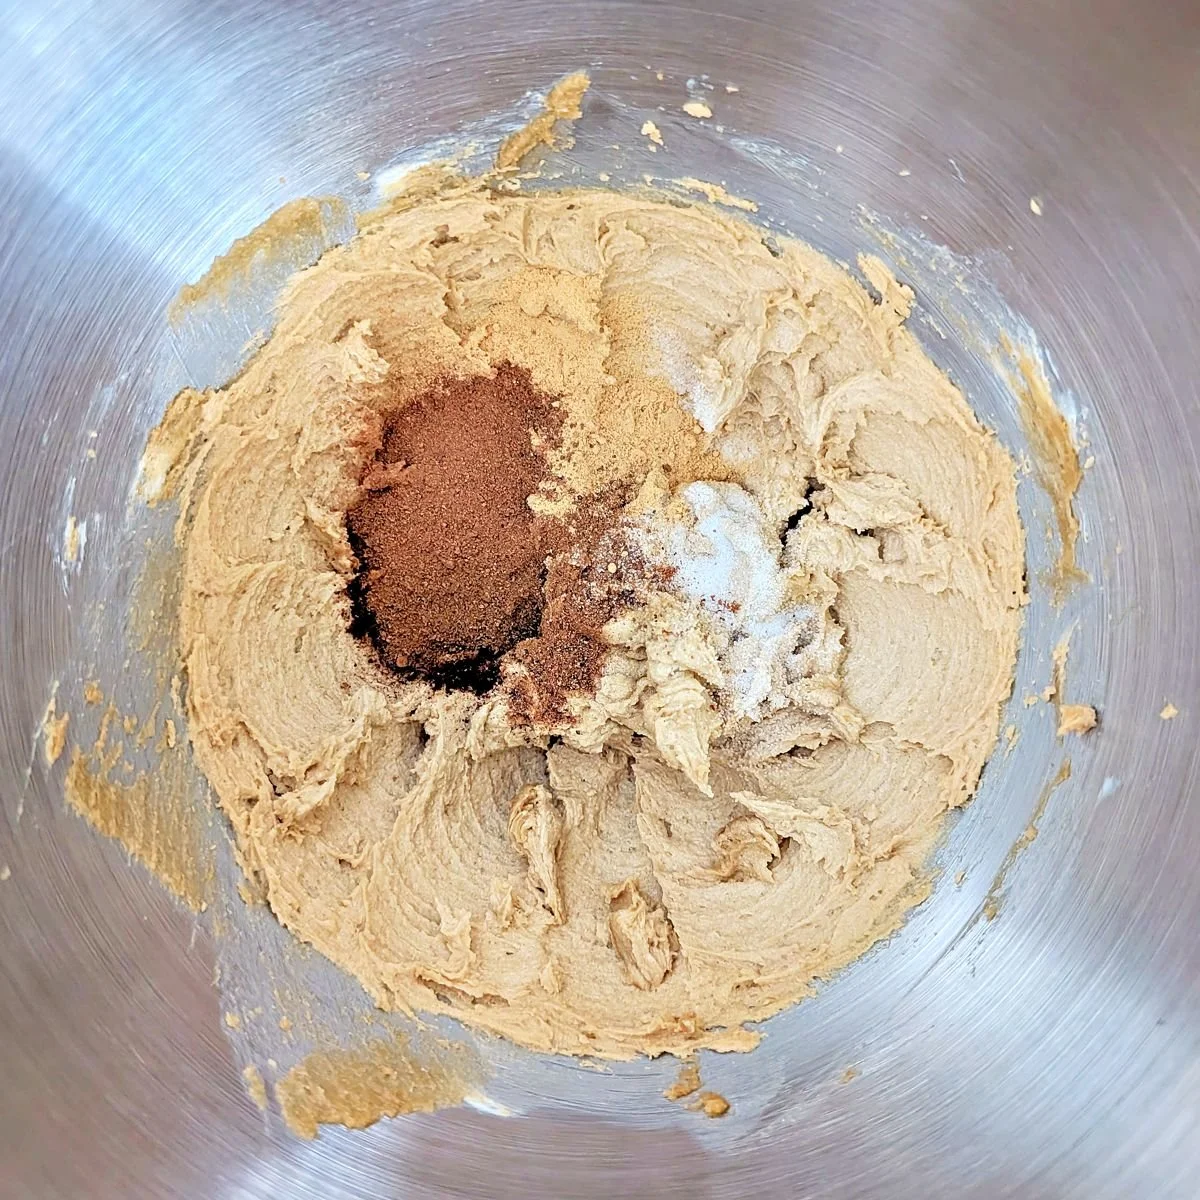
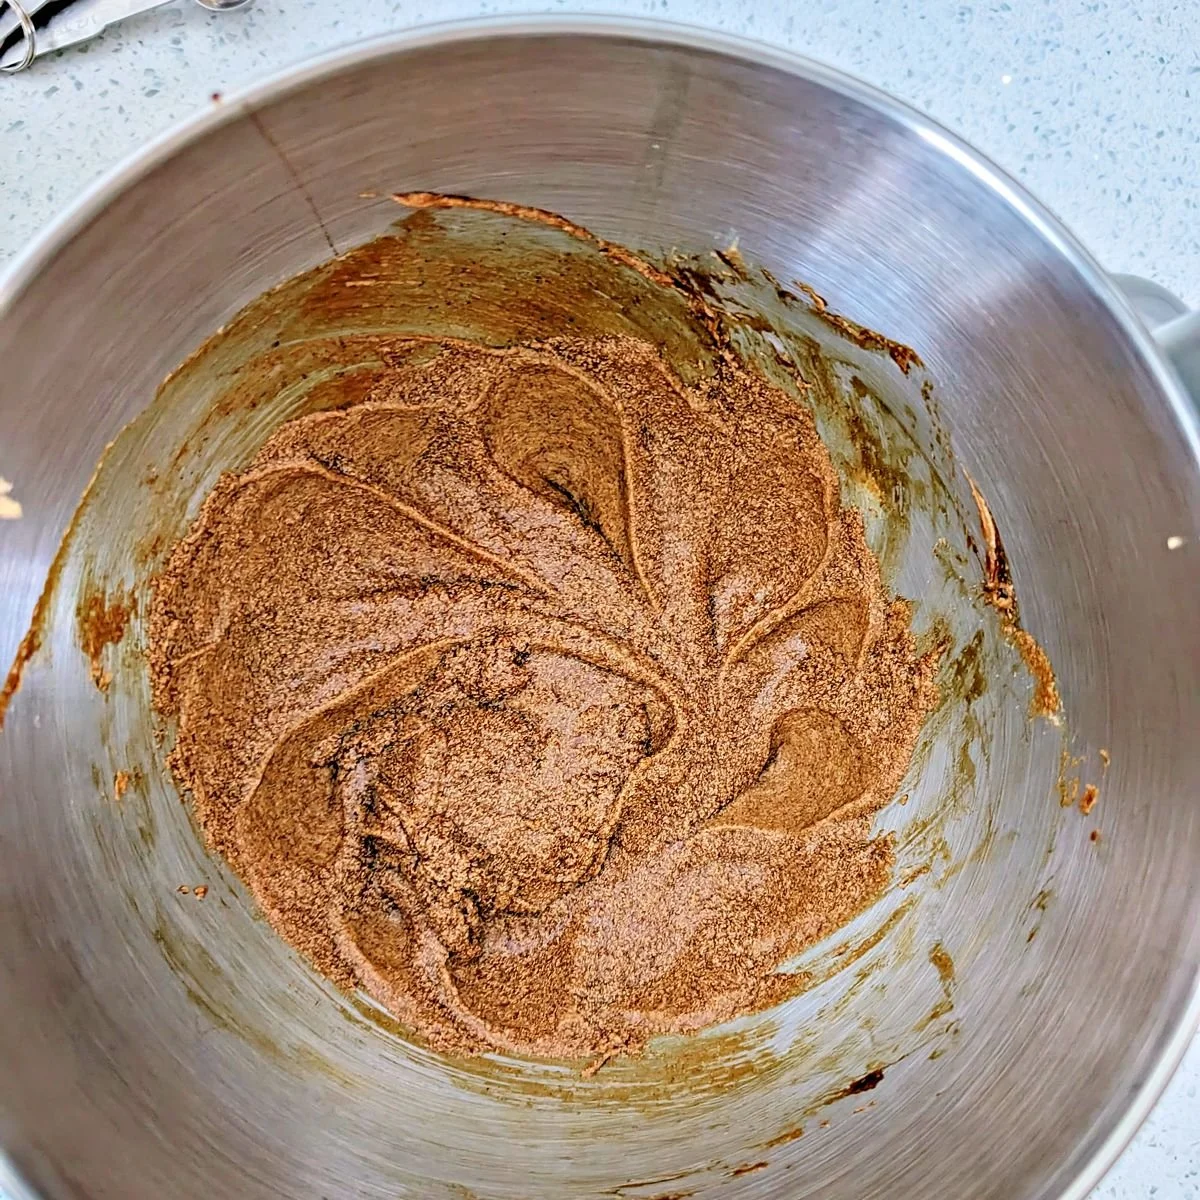
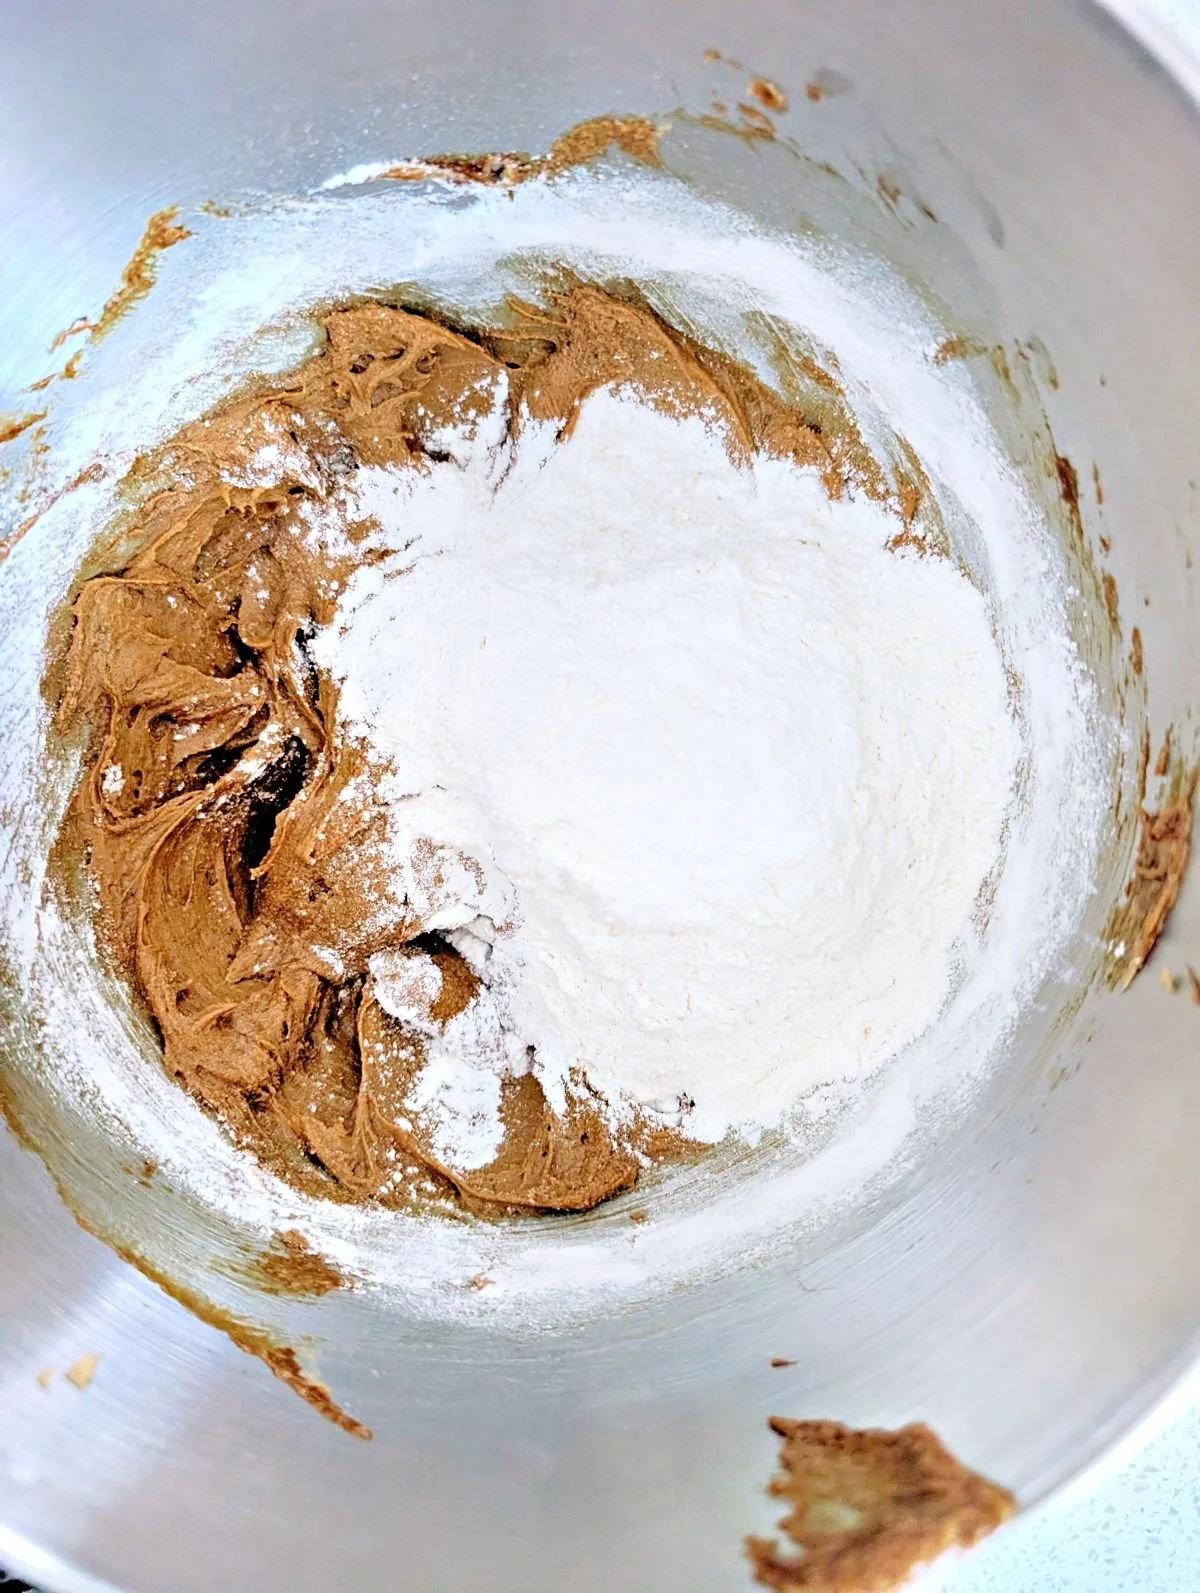
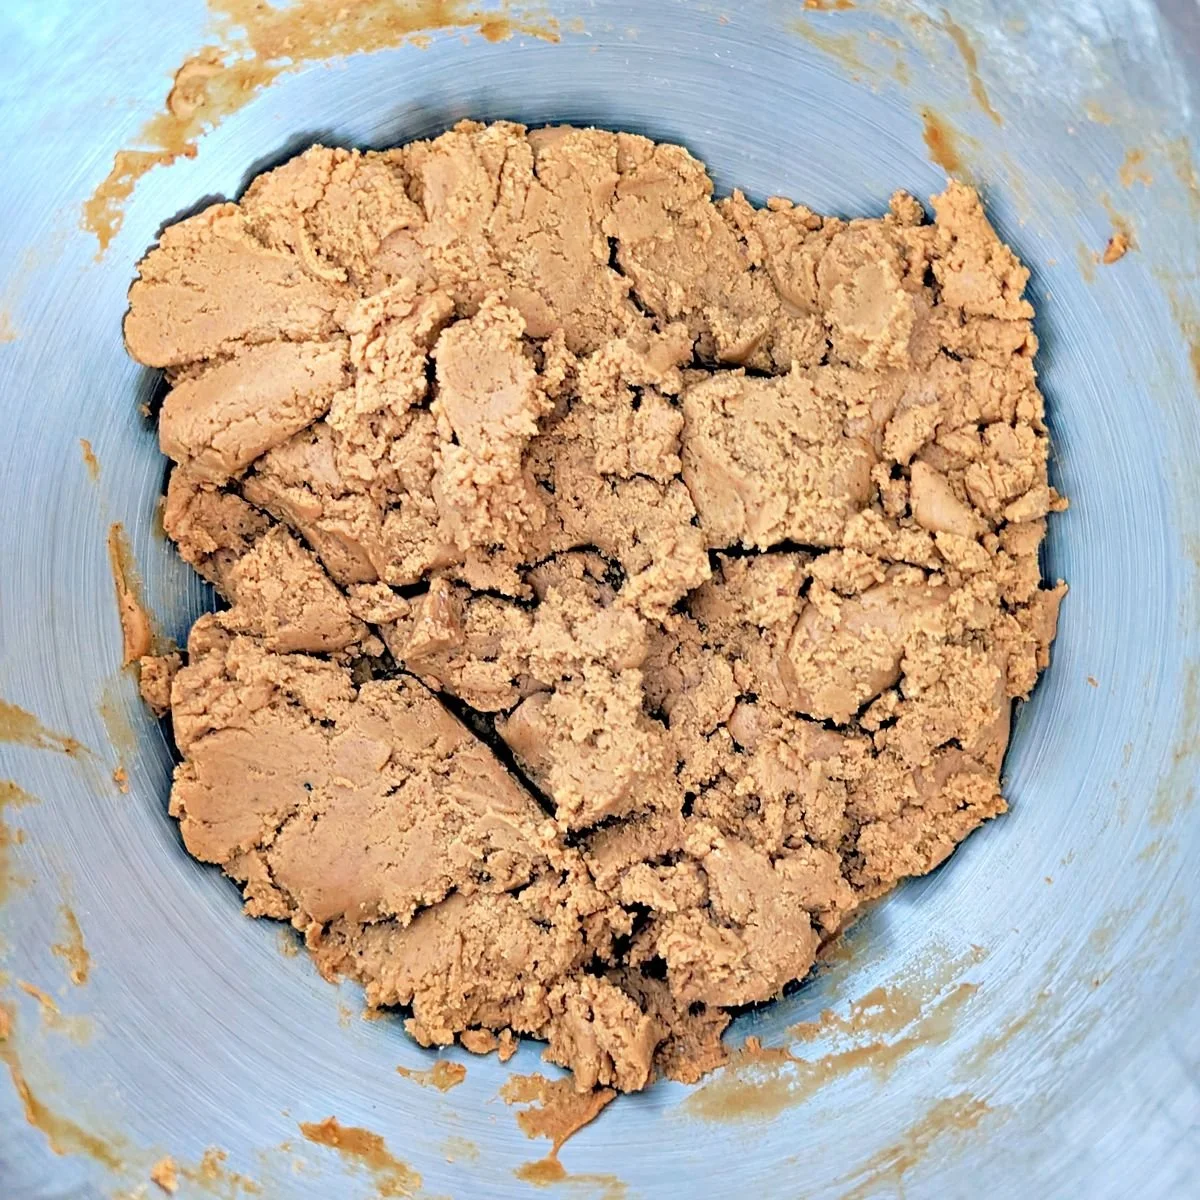
Step 4: Wrap and chill the dough
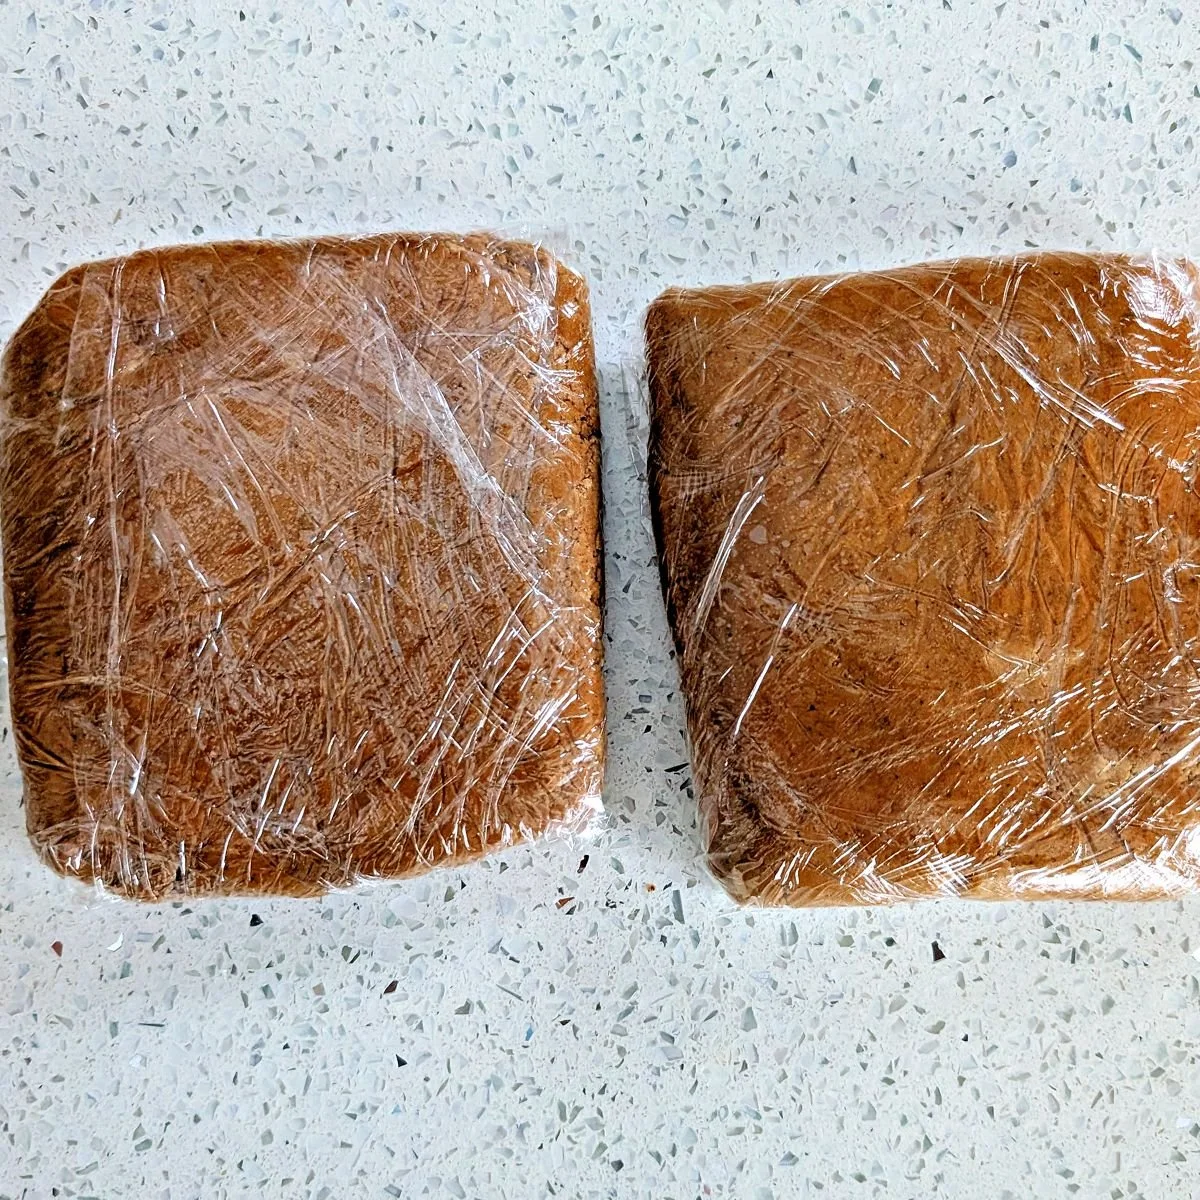
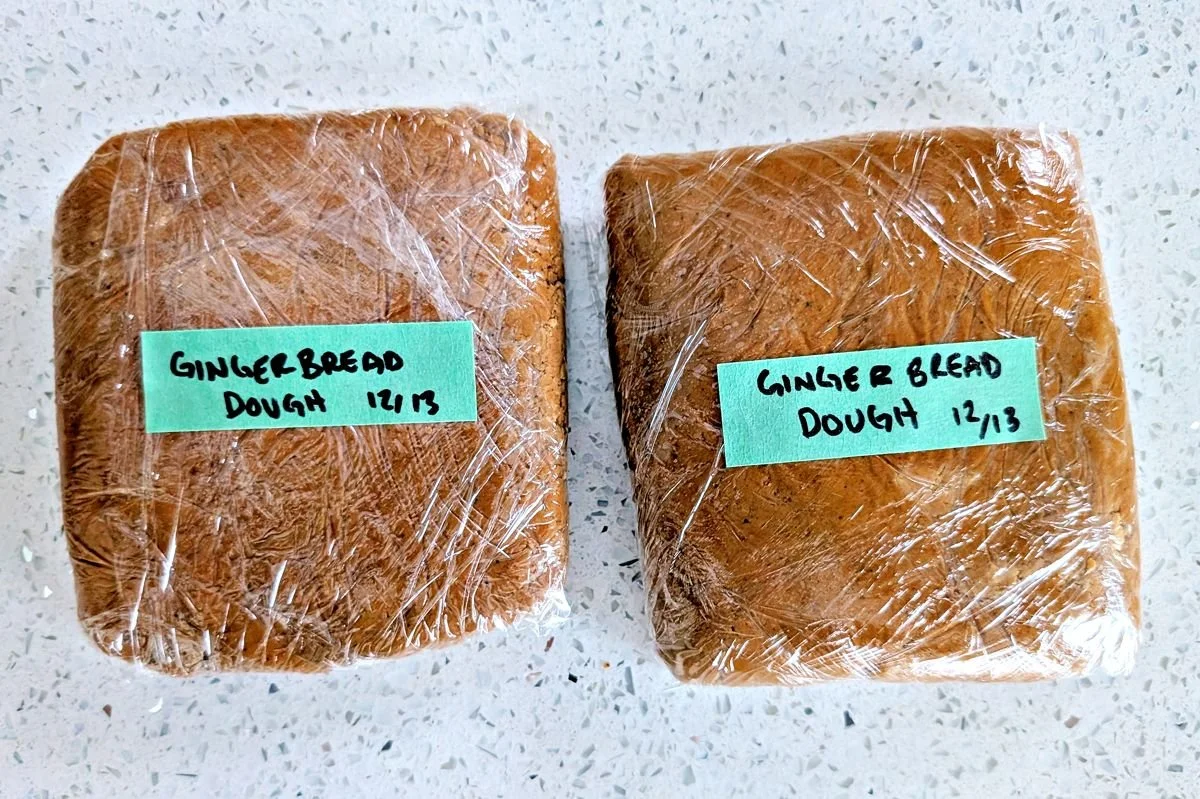
Divide the dough into two equal portions and wrap each one tightly in plastic wrap.
Chill for at least 1 hour. If you have the time, you can leave it in the fridge overnight so the flavor has more time to develop.
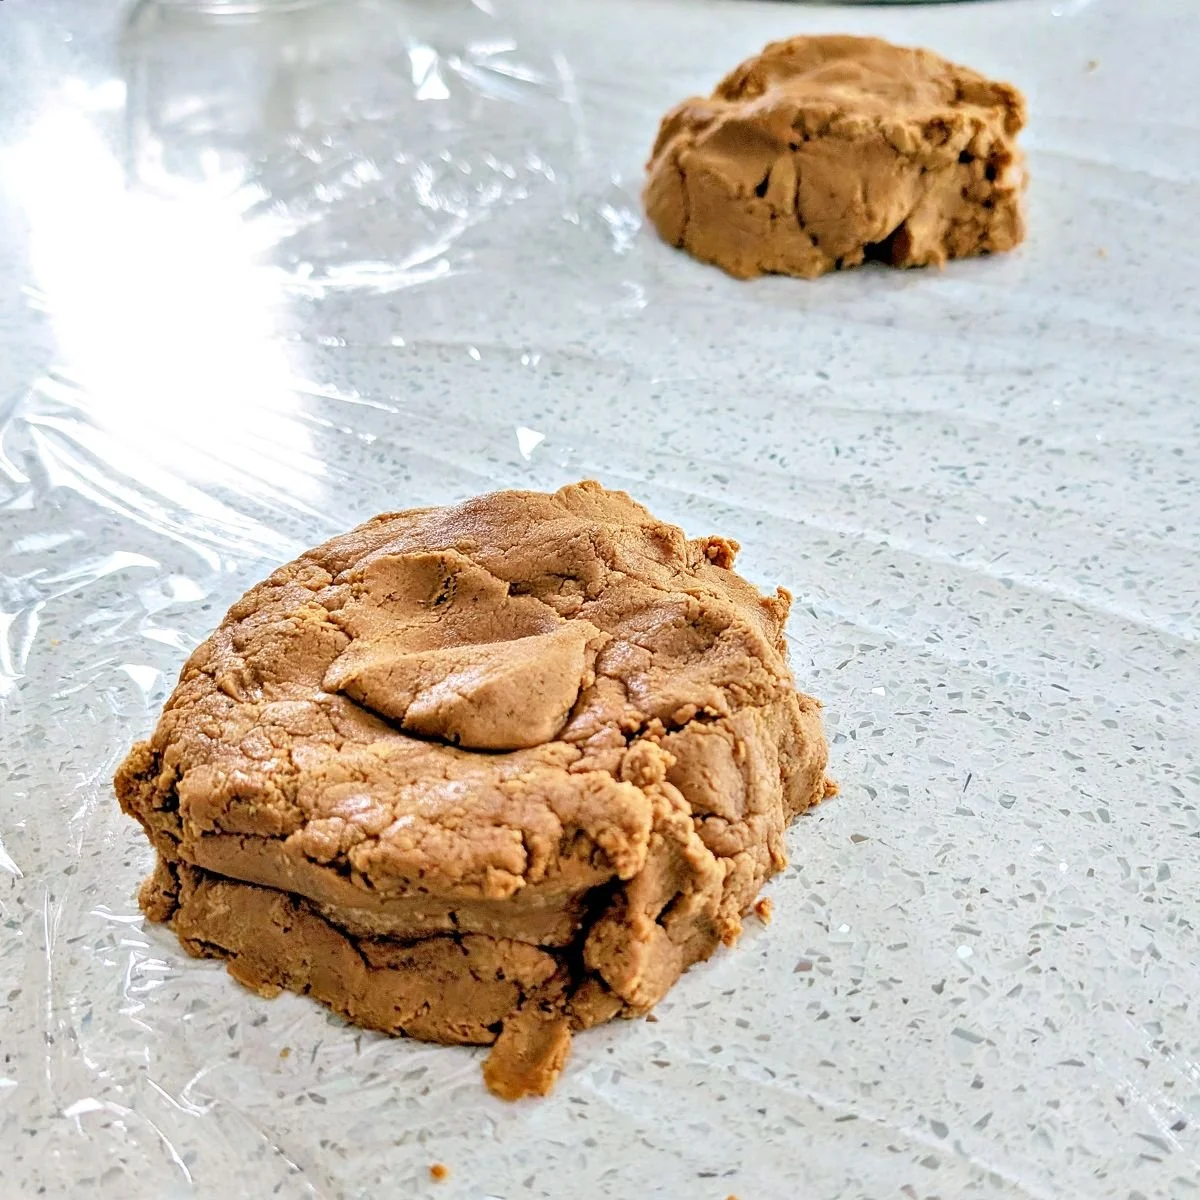
Step 5: Roll and cut the gingerbread cookies
If the dough has been chilling overnight, take it out of the fridge about 30 minutes before rolling, so it has time to soften a bit. Preheat the oven to 350°F.
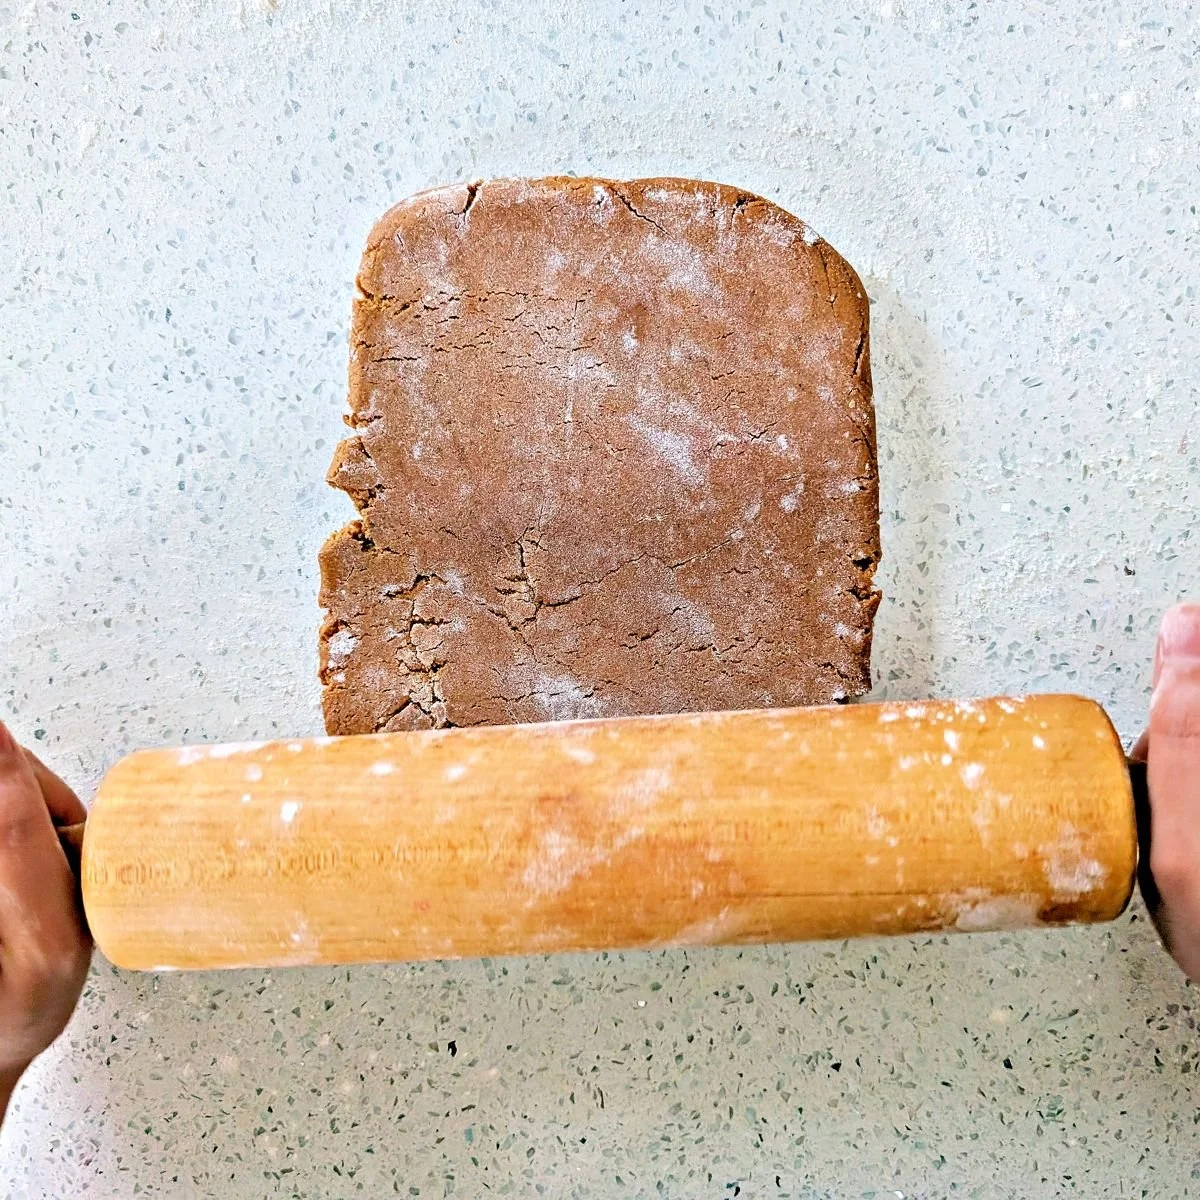
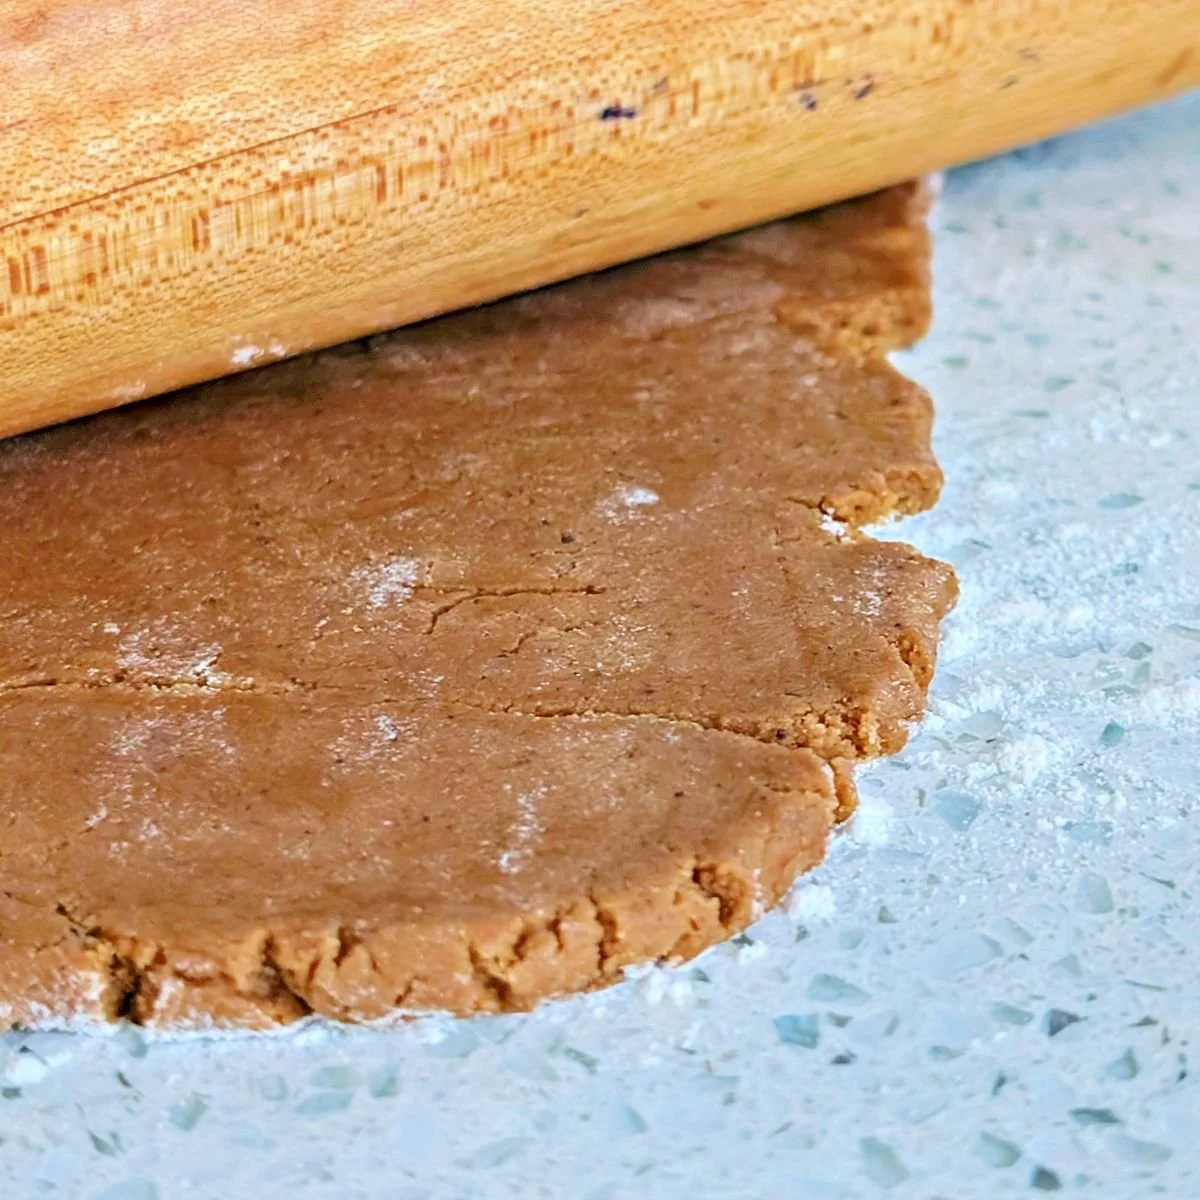
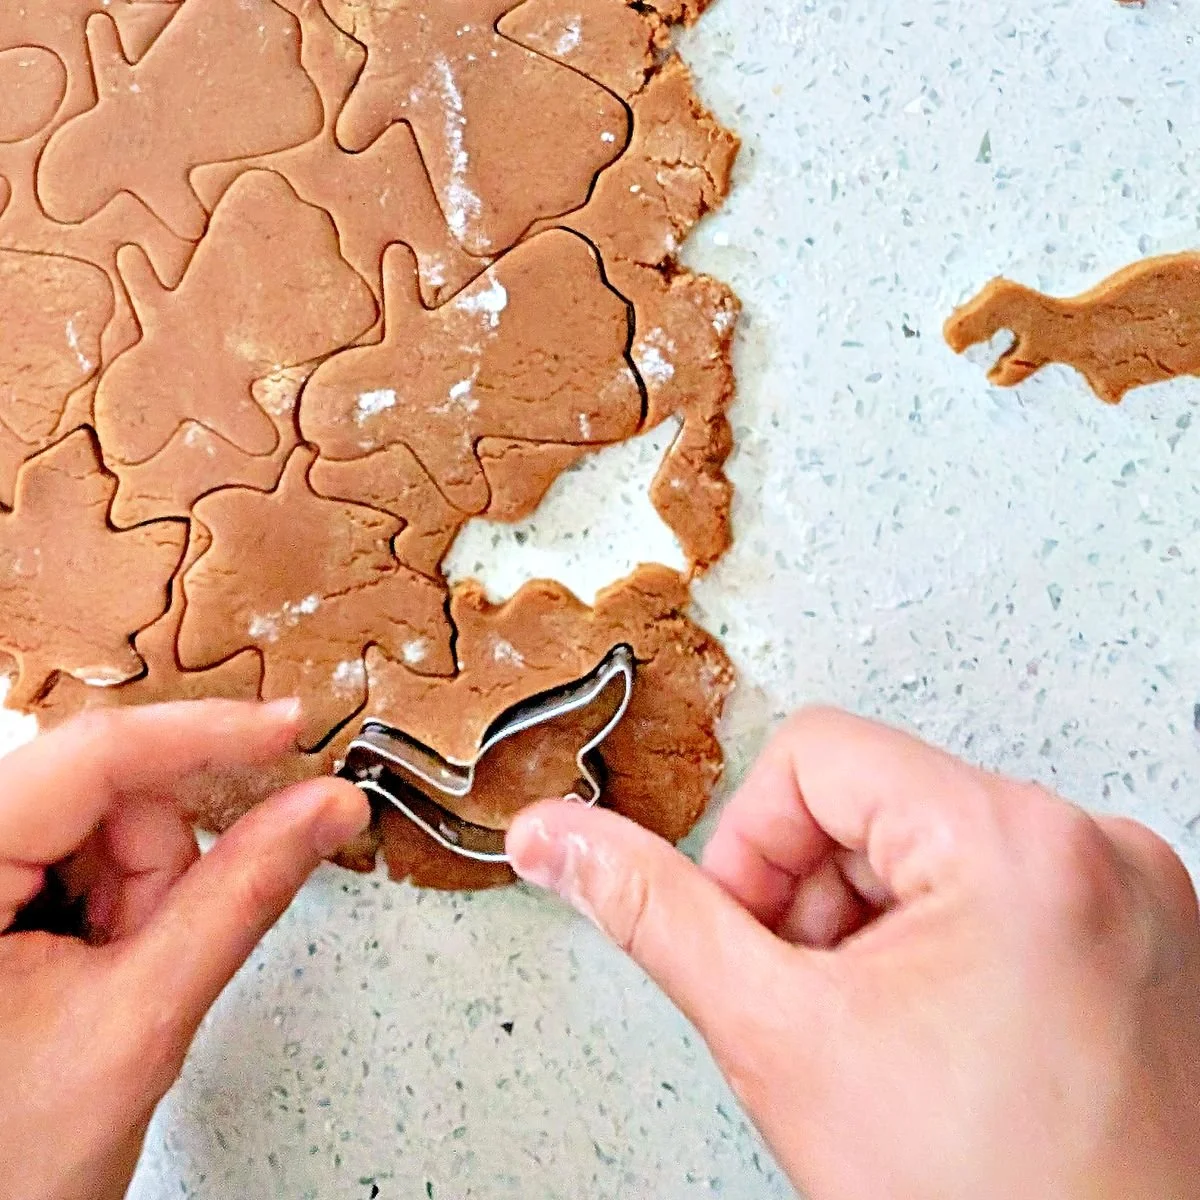
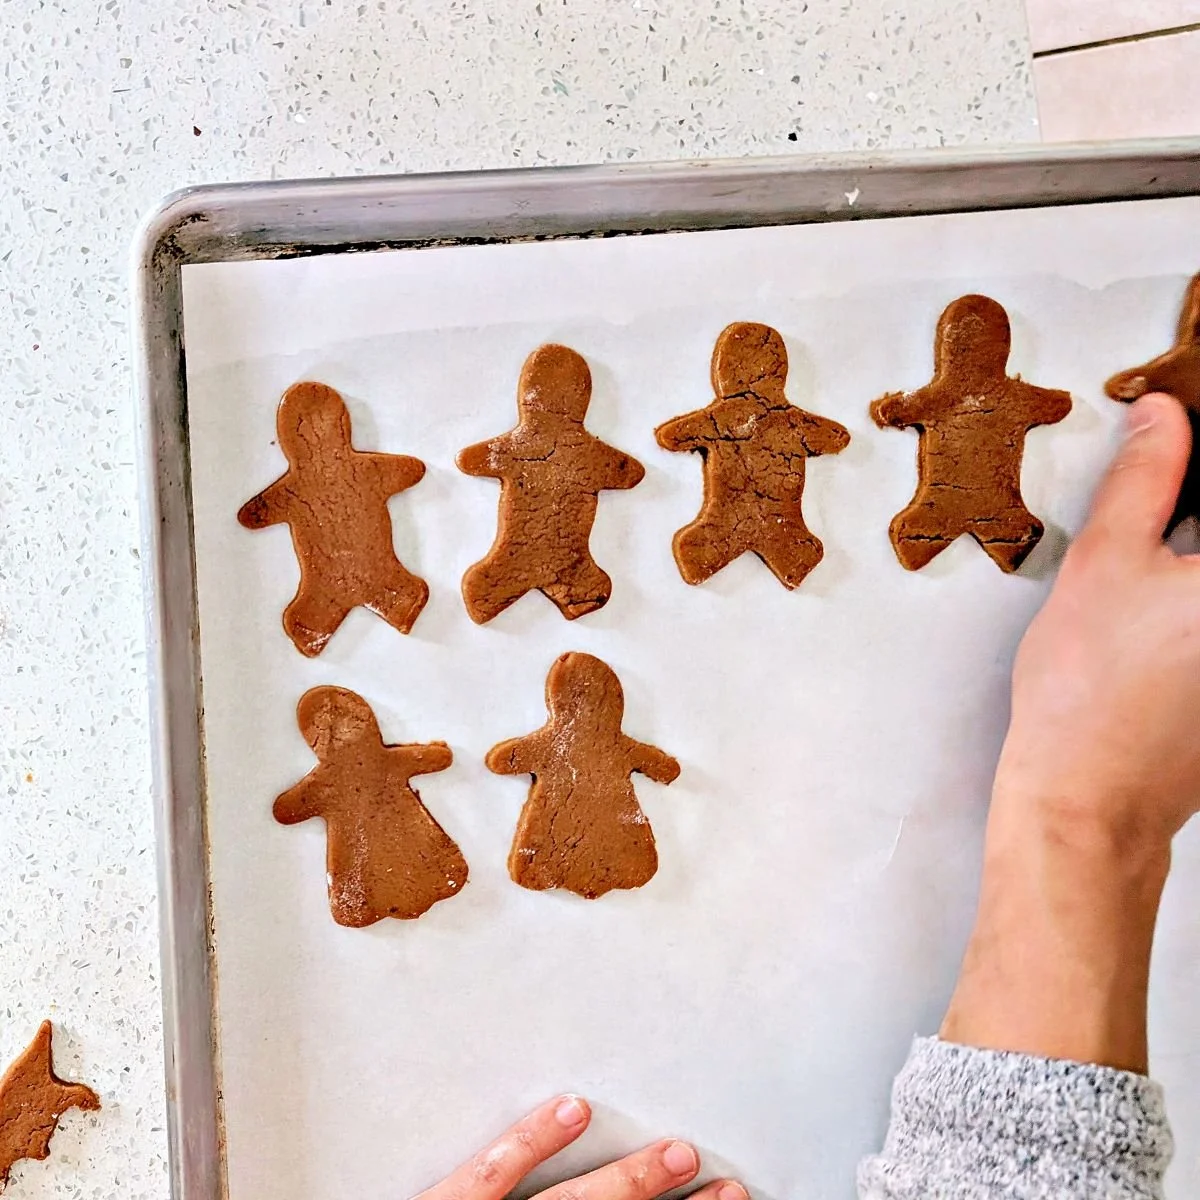
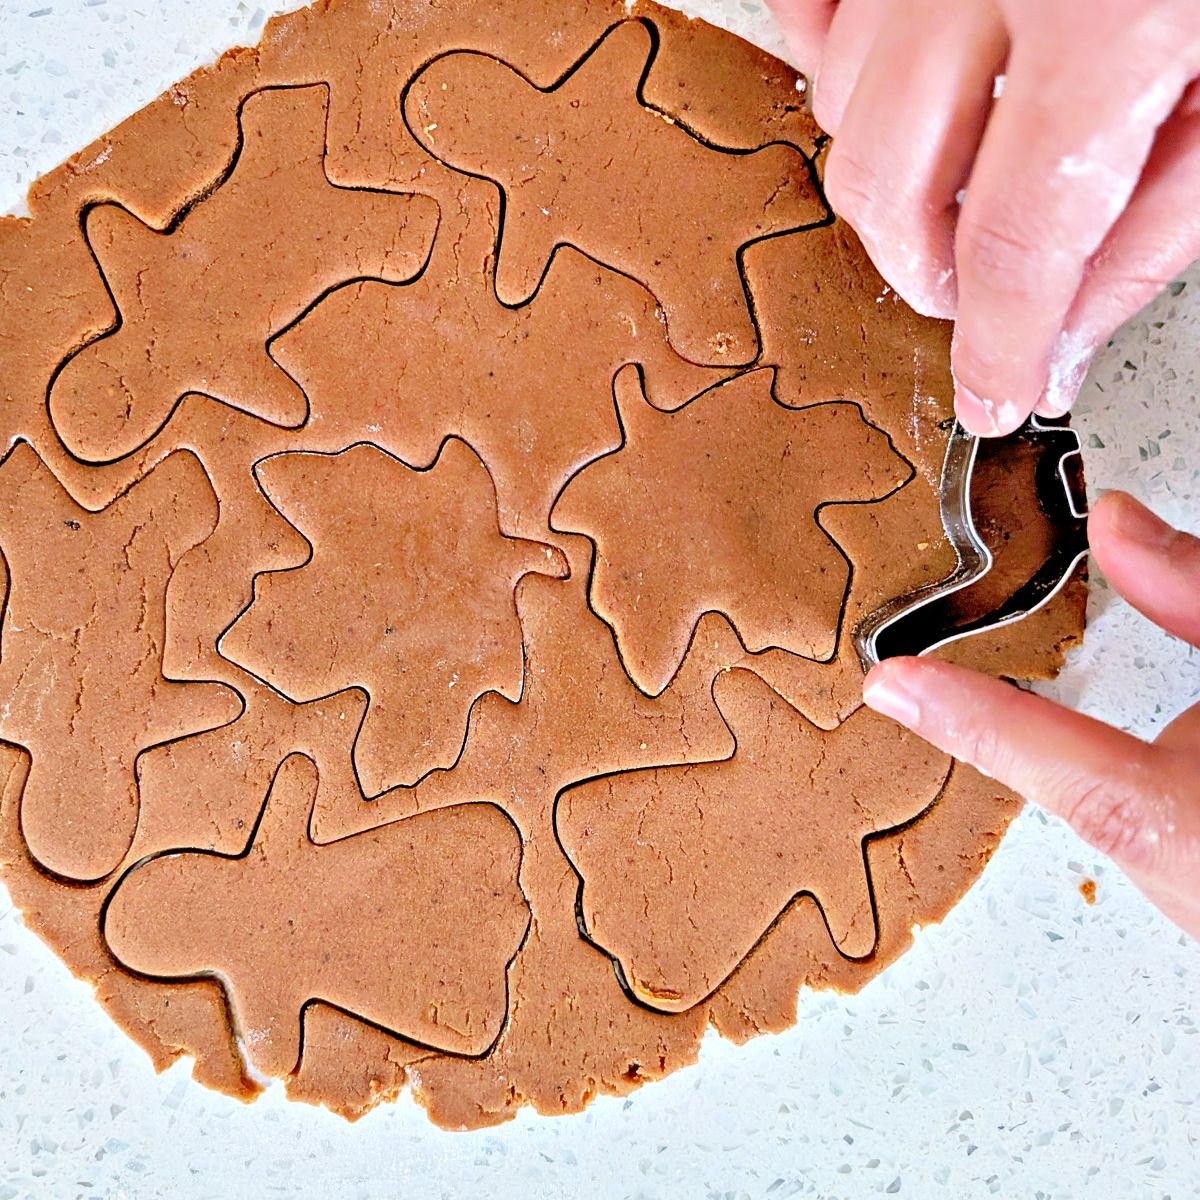
Lightly flour your work surface and rolling pin. Working with one portion at a time, roll the dough to about ⅛ inch thick. Cut out your shapes and use a spatula to help lift them onto a parchment-lined baking sheet if they’re sticking. Leave ½ inch of space between cookies for expansion.
I used gingerbread boys and girls, maple leaves, and dinosaurs. The dinosaurs were a big hit with my niece and nephew, but use whatever cutters you have.
Gather the scraps and reroll them, using as little extra flour as you can. I try not to reroll them more than twice so the cookies don’t get tough.
Step 6: Bake the cookies and cool
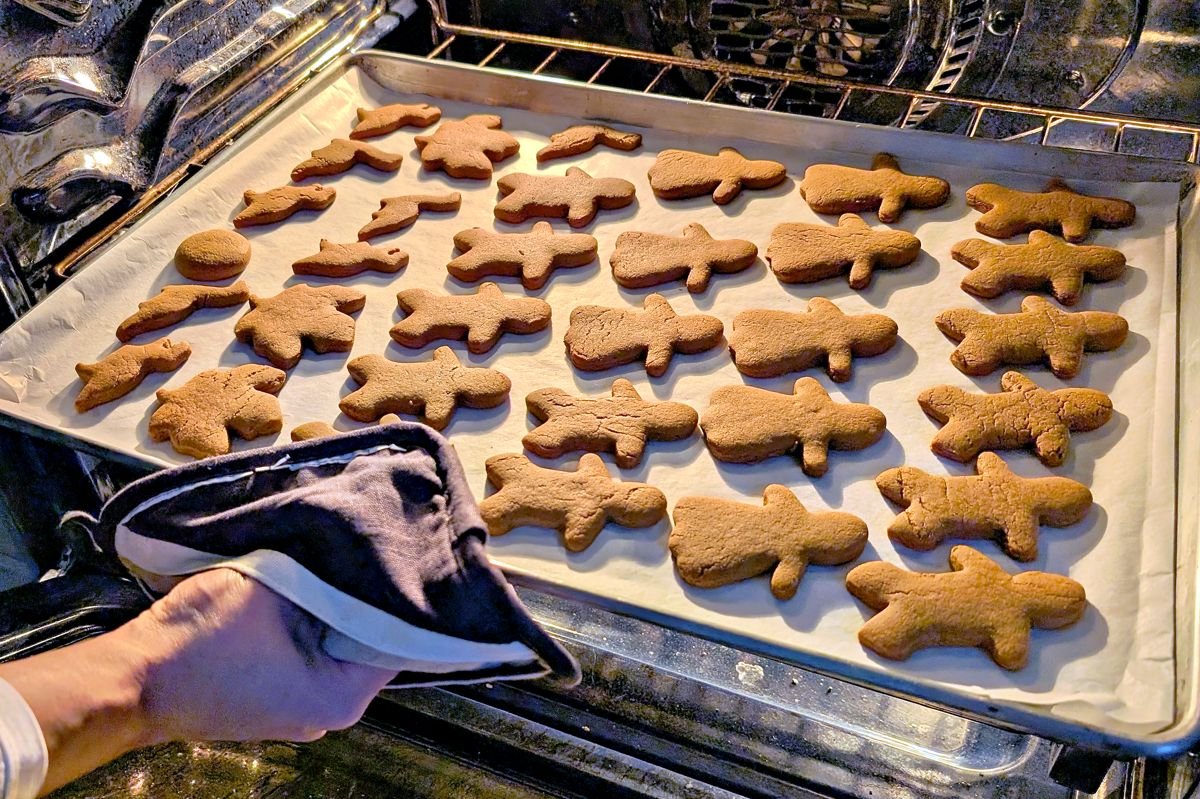
Bake the cookies on the middle rack of your preheated 350°F oven for about 10 minutes, rotating the baking sheet halfway through. Most ovens have hot spots, so doing this helps them bake evenly. I also bake one tray at a time to get the most consistent results.
The cookies should puff up slightly, with edges that look set while the centers are still a little soft. Thinner cookies or smaller shapes can firm up all the way through, so keep an eye on those and check them at the 8-minute mark. Thicker cookies or larger shapes might need an extra couple of minutes.
They’ll be very soft when they first come out of the oven, so leave them on the baking sheet to cool and firm up completely—no need to transfer them to a cooling rack.
Step 7: Make the royal icing and decorate the cookies
Whisk the egg white in a medium bowl until it’s foamy and slightly thickened. Add the icing sugar, ½ teaspoon lemon juice, and vanilla, if you’re using it, and whisk until smooth.
Now check the consistency. Scoop up a little icing with a spoon and let it fall back into the bowl. For fine details, like eyes, smiles, buttons, and squiggles, it should take about 20 seconds for the icing to blend back in. It should feel like toothpaste: cream cheese consistency is too thick, and ketchup is too thin.
If it’s too thick, add more lemon juice one drop at a time. If it’s too thin, add more icing sugar, a spoonful at a time. Go slowly—a little adjustment can make a big difference.
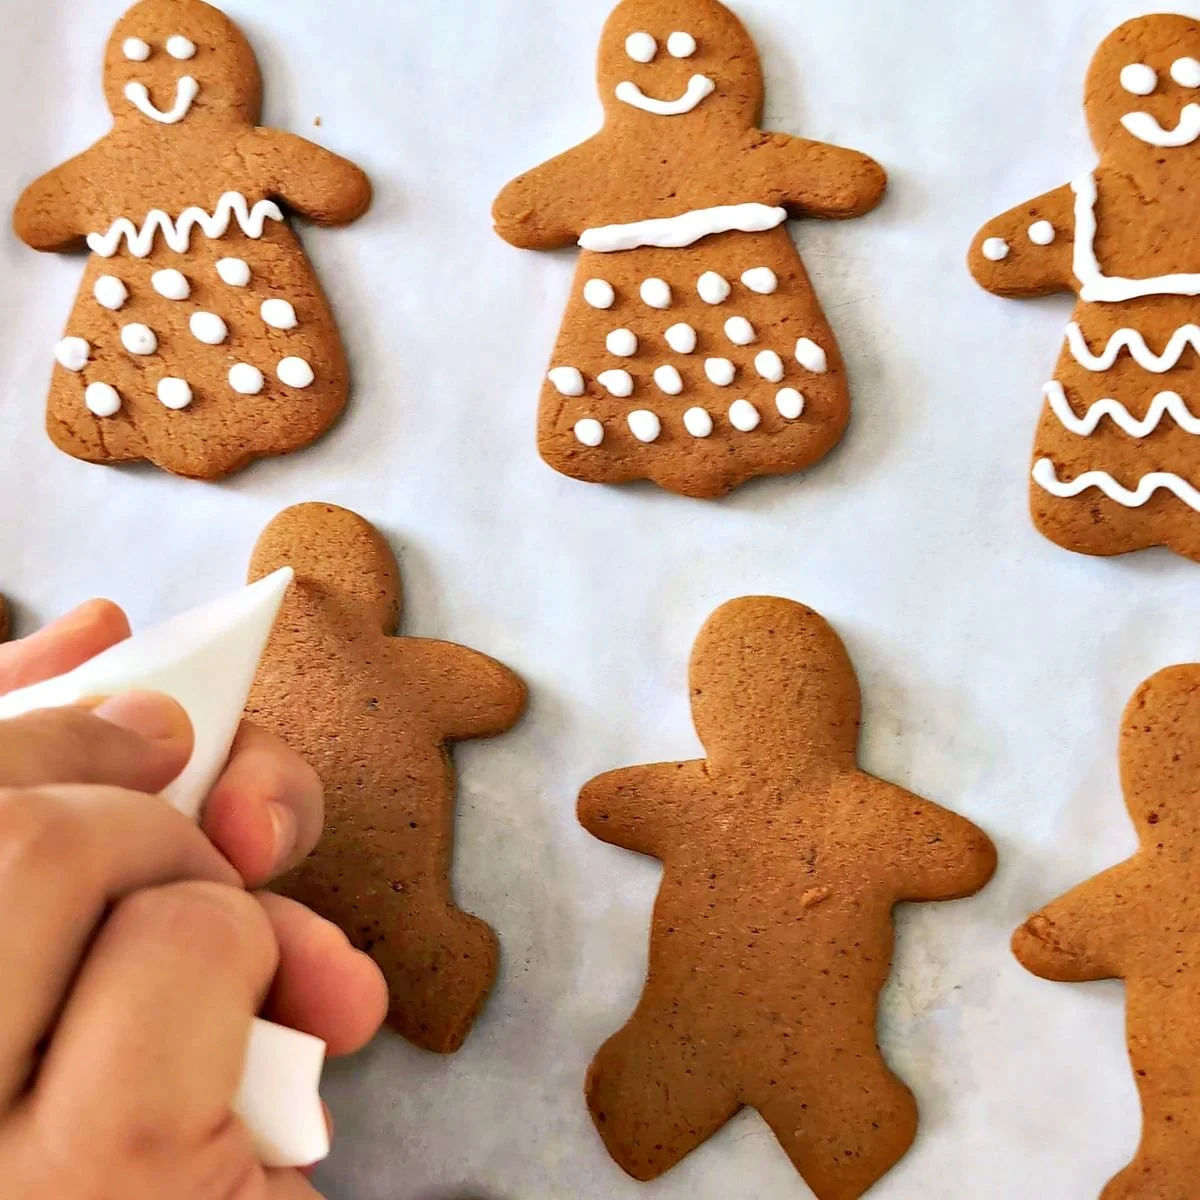
Transfer the icing to a piping bag fitted with a small round tip, then twist the top closed. Use one hand to apply gentle, even pressure from the top and the other to guide the tip.
Now for the fun part! Decorate your cooled cookies with whatever designs your heart desires. I made bow ties, buttons, eyes, smiles, pants, skirts, dresses, squiggles, and dots. There’s no need to make them all match.
Let the icing dry before stacking or storing the cookies. It should feel set after a couple of hours, but can take up to 6 hours to dry completely.

Tips for Rolling and Cutting Gingerbread Cookies
How much flour to use: You only need a light dusting of flour on the counter and rolling pin. I don’t mind if the dough sticks a little because I can always slide a spatula underneath the cut cookies to lift them. If you do end up with a lot of flour stuck to the dough, just brush it off with a pastry brush before baking.
How to fix dough that cracks: Cold gingerbread dough will often crack around the edges when you first start rolling it, especially after an overnight chill. Just press the cracks back together and roll over them again. If it’s fighting you, give it a little more time at room temperature—the dough gets easier to roll as it warms up.
How to roll the dough evenly: I always start rolling from the middle and push the rolling pin away from me, lifting it before I reach the edge so I don’t accidentally make the edges too thin. Run your hand over the dough to feel for thicker spots, and even pick up the edge and work your way around it with your fingers. If you want to be really precise, grab a ruler and check that it’s about ⅛ inch thick all the way around.
How to transfer cutout cookies: After cutting the shapes, remove all the dough around them before trying to pick up the cookies. Then you can gently lift each one with your hand, or slide a spatula underneath if it’s sticking or you’re working with a bigger, more delicate shape.
How to minimize leftover scraps: I try to squeeze the shapes as close together as I can, turning the cutters in different directions to use every bit of space. The less scrap dough you leave between the cookies, the less you’ll have to gather up and reroll.
Don’t reroll the dough more than twice: All-purpose flour contains enough gluten that the dough can start getting tougher the more you work and reroll it. I usually stop after two rerolls. If I still have little scraps left, I just press them together, roll them into small balls, flatten them into circles, and bake those too.
Gingerbread Cookie Ingredient and Equipment Swaps
Butter: I usually use salted butter because that’s what I keep in my fridge, but unsalted butter works too. Use the same amount and add ½ teaspoon of salt. If you forget to soften your butter, cut it into cubes and microwave it in 5-second bursts, stirring in between, until soft but not melted.
Molasses: I used unsulfured fancy molasses, which has a milder, sweeter flavor that works well with the warm spices and helps keep these gingerbread cookies soft and chewy. I’ve also made them with cooking or dark molasses, and while they’re slightly more bitter, the difference wasn’t very noticeable once mixed with the other ingredients. I would avoid blackstrap molasses because it’s much stronger and more bitter. I haven’t tested sulfured molasses in this recipe, but it can have a sharper flavor, too.
Icing sugar: If you don’t have icing sugar, you can grind regular granulated sugar into a fine powder. That’s actually what I did for this recipe. I used a spice grinder and buzzed the sugar until it was very fine, and it worked well in the royal icing.
Egg whites: I used pasteurized carton egg whites for my royal icing, which is a good option if you want to avoid using raw shell eggs. You can also use an egg white from a whole egg, but keep in mind that raw shell eggs can carry Salmonella, which can be a more serious risk for little ones. Meringue powder is another option, but because brands can vary, follow the package directions for replacing the egg white.
Stand mixer: If you don’t have a stand mixer, I’ve made gingerbread cookie dough in a bowl with a handheld electric mixer before, and it worked great for creaming the butter and sugar. After that, everything can just be folded in with a spatula.
Piping bag: I actually decorated these cookies using a parchment paper piping bag. It works well for fine details, but it’s slippery and fiddly to fill, so I wouldn’t recommend it for beginners. A regular piping bag is much easier, or you can even use a zip-top bag with the corner snipped off, although the opening can stretch and make your lines thicker as you go. If you want to try the parchment method, this video showing how to fold a parchment piping bag is quite helpful.
How to Store and Make Ahead
Room temperature: Store baked gingerbread cookies in an airtight container at room temperature for up to 1 week. You can store them decorated or undecorated, but make sure the royal icing is completely dry before stacking the cookies.
Freezer: Gingerbread cookies can be frozen with or without the royal icing for up to 3 months. I froze my decorated cookies for a couple of weeks, and they froze and defrosted perfectly. I kept them in a zip-top bag in a single layer, although an airtight container works too. To thaw them, I just left the cookies in the same bag on the counter until they were thawed. If you need to stack them for freezing, place parchment or wax paper between the layers.
Make the dough ahead: Gingerbread cookie dough can also be made ahead and frozen for up to 3 months. Wrap each portion tightly in two layers of plastic wrap or place it in a zip-top bag and squeeze out as much air as possible. Thaw it in the fridge overnight, then let it sit at room temperature for about 30 minutes before rolling.
Royal icing: Store leftover royal icing in an airtight container in the fridge for a couple of days, or freeze it for up to 3 months. Thaw it in the fridge overnight, then let it come to room temperature and give it a good stir before using. If the consistency has changed, adjust it again with a little lemon juice or icing sugar as needed.

Gingerbread Cookies with Royal Icing Recipe
Chef-tested gingerbread cookies with warm spices, chewy centres, crisp edges, and homemade royal icing for holiday decorating.
Makes: 48 cookies
Prep: 20 min Chill: at least 1 hour
Bake: about 10 min
Ingredients
For the Gingerbread Cookies
3 cups all-purpose flour, plus more for dusting
½ teaspoon baking soda
¼ teaspoon baking powder
1 stick salted butter, softened (or 1 stick unsalted butter plus ½ teaspoon salt)
½ cup dark brown sugar
2 teaspoons ground ginger
2 teaspoons ground cinnamon
1 teaspoon ground cloves
½ teaspoon ground nutmeg
1 large egg
½ cup unsulfured fancy molasses
For the Royal Icing
½ cup icing sugar
2 teaspoons egg white
½ to ¾ teaspoon lemon juice
1 drop vanilla extract (optional)
Note: This makes enough royal icing for simple decorations on all 48 cookies. If you want more detailed designs, make another batch of icing as needed.
Quick Instructions for Gingerbread Cookies
Measure and gather the ingredients. Whisk the flour, baking soda, and baking powder together in a bowl. Measure the brown sugar, spices, and molasses, and have the egg and softened butter ready.
Cream the butter and sugar. Add the softened butter and brown sugar to a stand mixer fitted with the paddle attachment. Cream on medium speed for 3–5 minutes, scraping down the bowl as needed, until the mixture changes from medium brown to a lighter golden color and looks light and fluffy.
Mix the gingerbread dough. With the mixer on low, mix in the spices, then add the egg and molasses. Add the flour mixture in a few additions, mixing just until the dough is evenly brown, soft, and pliable and holds together when pressed without sticking to your fingers. If it’s really sticky, add a little flour. If it’s dry and crumbly and won’t hold together, add a splash of water.
Wrap and chill the dough. Divide the dough into two equal portions and wrap each tightly in plastic wrap. Chill for at least 1 hour or overnight.
Roll and cut the gingerbread cookies. If the dough chilled overnight, let it sit at room temperature for about 30 minutes. Preheat the oven to 350°F. Lightly flour your work surface and rolling pin, then roll one portion at a time to about ⅛ inch thick. Cut out the cookies and transfer them to a parchment-lined baking sheet, leaving ½ inch between them. Gather and reroll the scraps no more than twice, using as little extra flour as possible.
Bake the cookies and cool. Bake one tray at a time on the middle rack at 350°F for about 10 minutes, rotating the baking sheet halfway through. The cookies should puff slightly, with set edges and centers that are still a little soft. Check thinner cookies or smaller shapes at the 8-minute mark. Thicker cookies or larger shapes may need an extra couple of minutes. Leave the cookies on the baking sheet to cool and firm up.
Make the royal icing and decorate. Whisk the egg white until foamy and slightly thickened. Whisk in the icing sugar, ½ teaspoon lemon juice, and vanilla, if using, until smooth. For fine details, the icing should have a toothpaste-like consistency. If it’s too thick, add lemon juice one drop at a time. If it’s too thin, add icing sugar a spoonful at a time. Transfer to a piping bag fitted with a small round tip, decorate the cooled cookies, and let the icing fully dry before stacking or storing (up to 6 hours).
Chef Tips for the Best Gingerbread Cookies
How to fix cracks: Cold gingerbread dough can crack around the edges when you first start rolling it, especially after an overnight chill. Press the cracks back together and roll over them again. If the dough is still fighting you, let it warm up a little longer at room temperature.
Transfer delicate shapes carefully: Remove the excess dough from around the cut cookies first, then gently lift each shape with your hand. For larger shapes or cookies that stick, slide a spatula underneath to transfer them without stretching them.
Use up the last scraps: After two rerolls, I stop working the dough so the cookies don’t get tough. Instead of wasting the small scraps, press them together, roll them into balls, flatten them into circles, and bake them with the rest.
Store the cookies properly: Let the royal icing dry completely before stacking the cookies. Store them airtight at room temperature for up to 1 week, or freeze them for up to 3 months. If stacking them for freezing, place parchment or wax paper between the layers to keep the royal icing decorations intact.
More Holiday Cooking
Boozy aged eggnog: This rich, smooth aged eggnog gets better as it rests in the fridge and makes a festive drink to serve alongside your holiday cookies.
Salted dark chocolate chunk cookies: Add another cookie to your holiday baking with these gooey chocolate chunk cookies made with dark chocolate and flaky sea salt.
Perfect homemade pumpkin pie: Make your holiday dessert table from scratch with one of my most popular recipes: a flaky homemade all-butter pie crust with a classic spiced pumpkin filling.
A chef’s Christmas dinner menu: Planning more than dessert? Browse 18 of my chef-curated Christmas recipes, including festive mains, sides, desserts, and drinks.
Best small kitchen appliances worth the splurge: You can find the exact stand mixer I used to make these gingerbread cookies, plus my other chef-recommended kitchen appliances and tools I’ve used both professionally and at home.

Did you try making this gingerbread cookie recipe?
I’d love to hear how it went or if you have any questions before making it—just leave a comment below. I’m always happy to help!