Beef Wellington for Two
Learn how to make beef Wellington with crisp puff pastry and medium-rare beef, using the same techniques I mastered in professional kitchens.
or read on for step-by-step instructions with photos
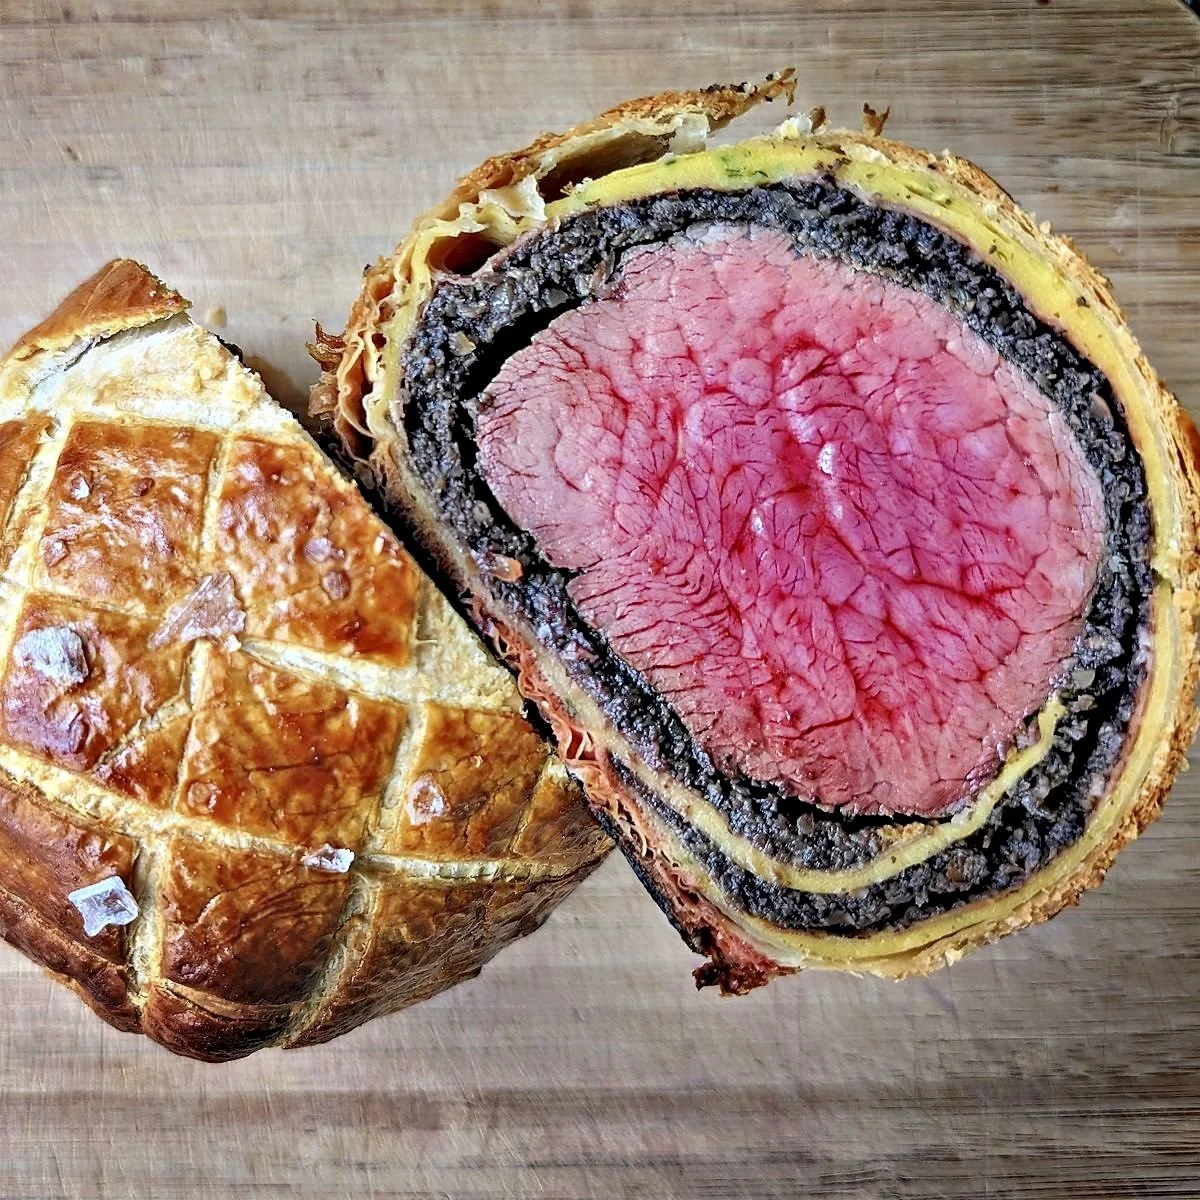
A Chef’s Guide to Beef Wellington
Beef Wellington can be intimidating, to say the least, especially if it’s your first time making it. You take an expensive cut of beef and wrap it in multiple layers of ingredients you’ve spent hours prepping, cooking, and chilling. Then you put the whole thing in the oven and hope for the best: crisp puff pastry, clean slices that don’t fall apart, a perfectly pink medium-rare center, and a bottom that isn’t soggy.
It’s a lot. I know because I’ve made dozens of them, both in restaurants and at home, and I still get a little nervous when one finally goes into the oven. The good news is that you don’t need to be a chef to make a great beef Wellington, and you can absolutely get it right on your first try.
Over the years, I’ve learned which techniques take the guesswork out of the process. I’ll walk you through them step by step, show you how I break up the work over 3 days, and explain exactly how carryover cooking works. By the time you’re ready to make your own Beef Wellington, you’ll know exactly what you’re doing.
Why this Beef Wellington Recipe Works
Moisture control: Cooking the duxelles until completely dry, resting and drying the seared beef tenderloin, and adding a crêpe and prosciutto layer all help keep excess moisture away from the puff pastry so it stays crisp.
Keeping everything cold: Chilling and freezing at specific stages firms everything up, making the Wellington easier to shape and wrap tightly while keeping the pastry cold so it puffs properly in the oven.
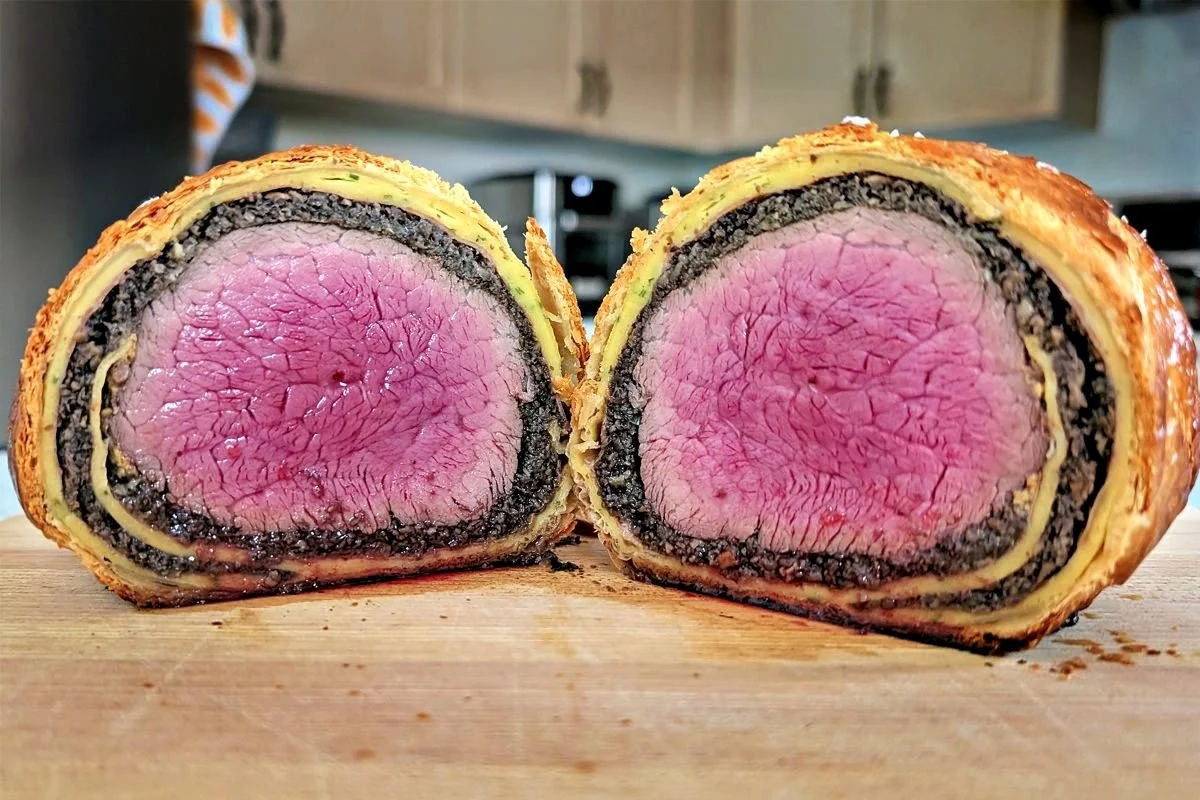
Carryover cooking finishes the beef: I pull my beef Wellington from the oven when it’s only 90°F in the center. During the rest, the center rises by about 50°F and finishes perfectly medium-rare. That dramatic temperature rise is intentional, and I’ll explain exactly why it happens later in the recipe.
What You’ll Need
Beef Wellington Ingredients
For the Mushroom Duxelles
1 pound cremini mushrooms
2 small shallots, finely diced
1 garlic clove, minced
2 sprigs fresh thyme, leaves picked
2 ounces medium sherry
2 tablespoons butter
salt and black pepper, to taste
For the Chive Crêpes
1 large egg
½ cup milk
½ cup all-purpose flour
2 tablespoons olive oil
1 teaspoon salt
2 tablespoons fresh chives, finely chopped
For Assembling the Beef Wellington
14–16 ounce center-cut beef tenderloin (Chateaubriand)
olive oil, for searing beef
2 tablespoons Dijon mustard
5 slices prosciutto
1 sheet all-butter puff pastry, defrosted
1 large egg, for egg wash
flaky sea salt, for finishing
Equipment for Making Beef Wellington
Large skillet, for the duxelles and searing the beef
Food processor
Knife & cutting board
Measuring cups and spoons
Whisk and bowl
Nonstick skillet, for the crêpes
Spatula
Wire cooling rack and tray
Paper towels
Plastic wrap
Rolling pin, if needed
Pastry brush
Sharp paring knife, for scoring
Parchment paper
Thin aluminum baking sheet
Oven-safe probe thermometer
Makes: 2 servings
Prep: 1 hour Cook: 1 hour
Chill & Rest: 5 hours combined
Total: About 7 hours
How to Make Beef Wellington
Step-by-Step with Photos
For best results, start 1–2 days ahead. The beef Wellington can be assembled and chilled overnight, which makes the process much easier to manage. See my make-ahead timeline after the steps.
Step 1: Sear and chill the beef tenderloin
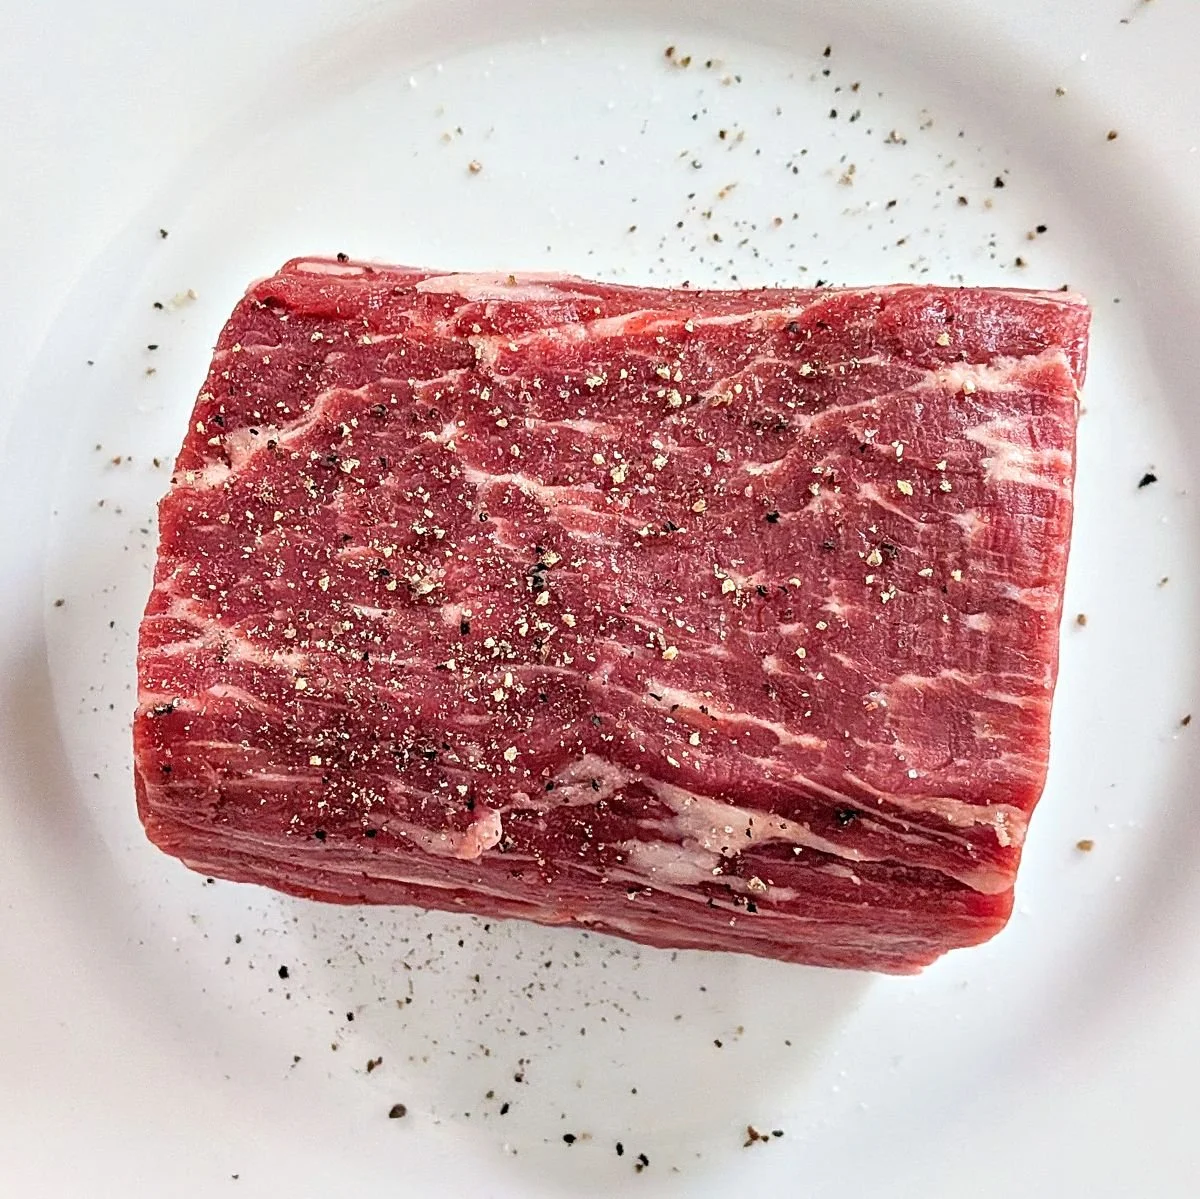
Season the beef tenderloin generously with salt and pepper.
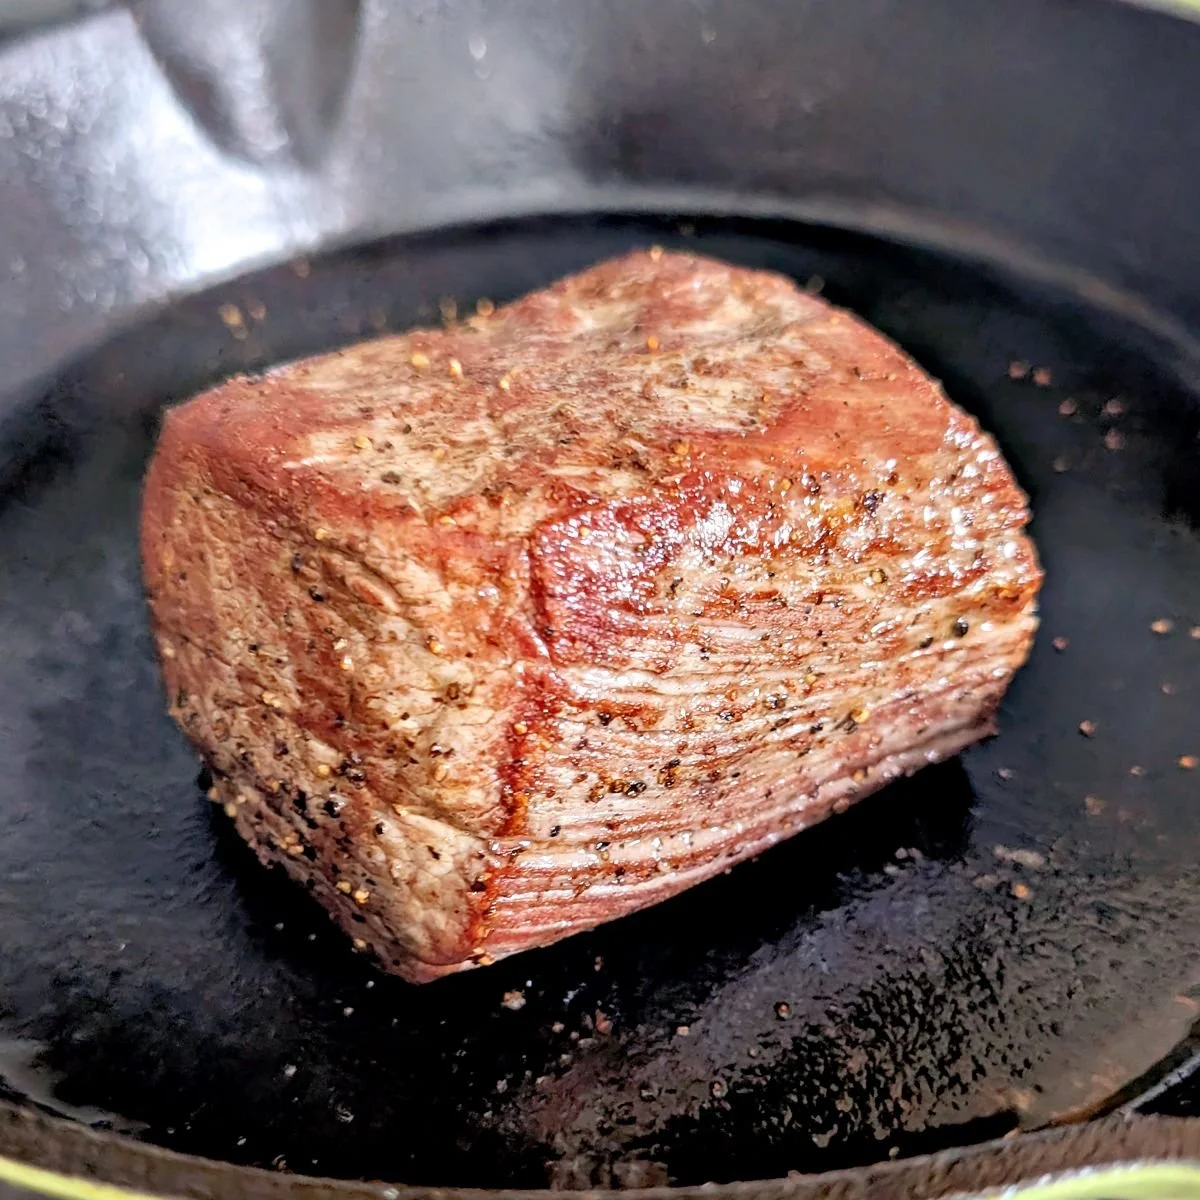
Heat a large skillet over medium-high heat, add a splash of oil, then sear the beef on all sides until well browned.
Work quickly here because you don’t want to cook the beef too much—it’ll finish cooking in the oven. Your pan should be hot enough to get a hard sear within a few minutes.
Once it’s nicely browned, transfer the beef to a wire rack or paper towel-lined plate and refrigerate it uncovered until completely cold and dry, at least 1 hour or overnight.
The beef will release quite a bit of moisture as it sits. If you’re using paper towels, change them 2–3 times as they become wet.
Step 2: Make the mushroom duxelles
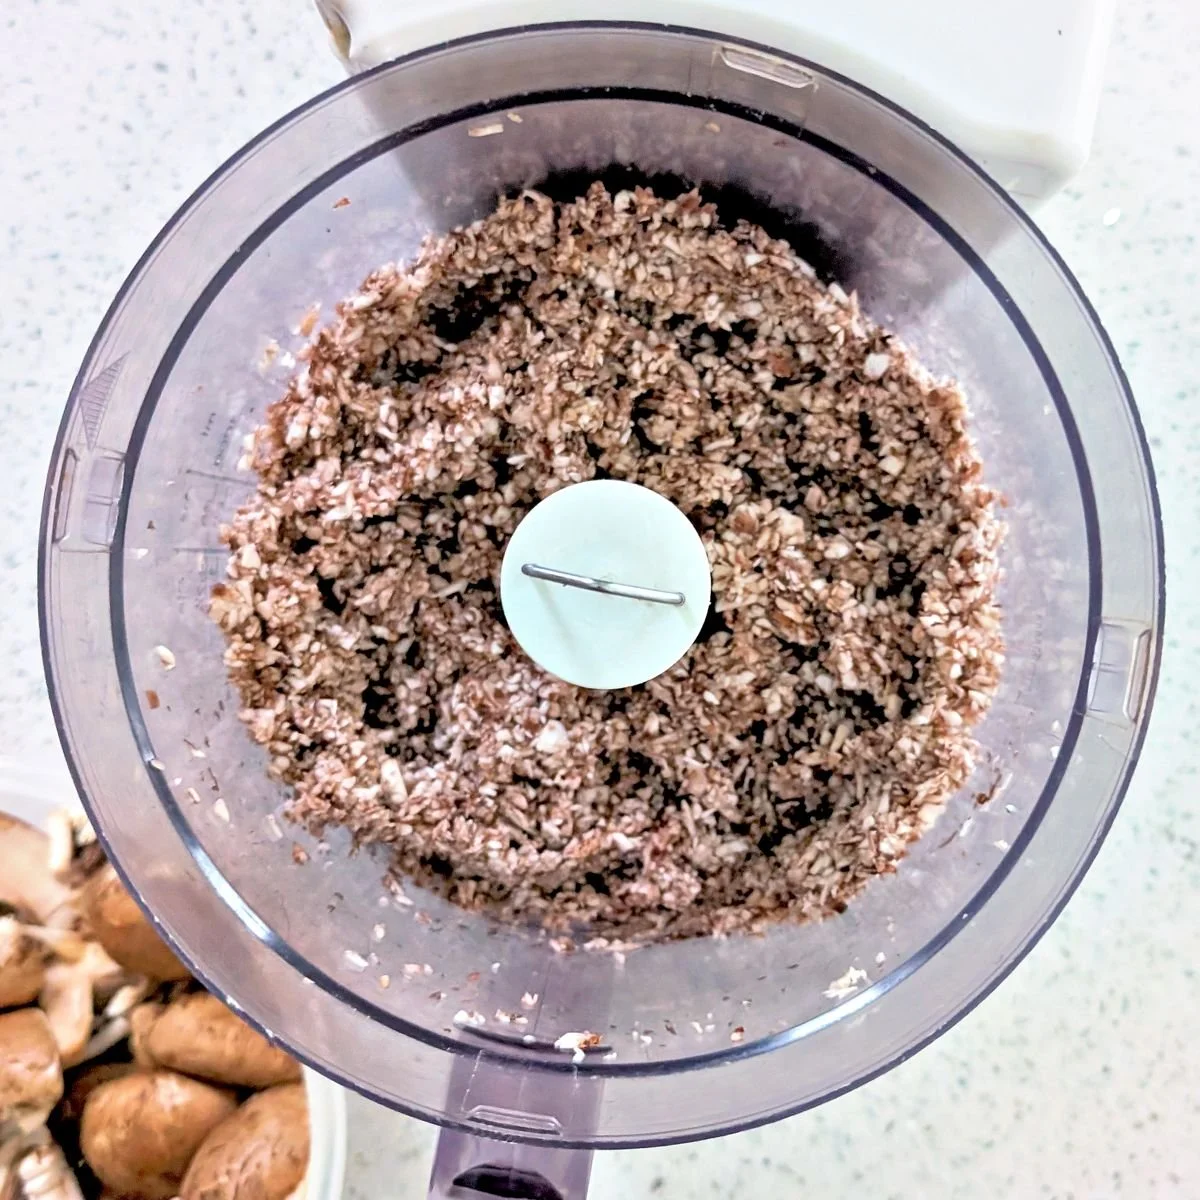
Cut the mushrooms in half and pulse in a food processor in batches until finely minced. Don’t fill the food processor more than halfway so they get chopped evenly. Scrape down the sides every few seconds, and stop before they turn into a paste.
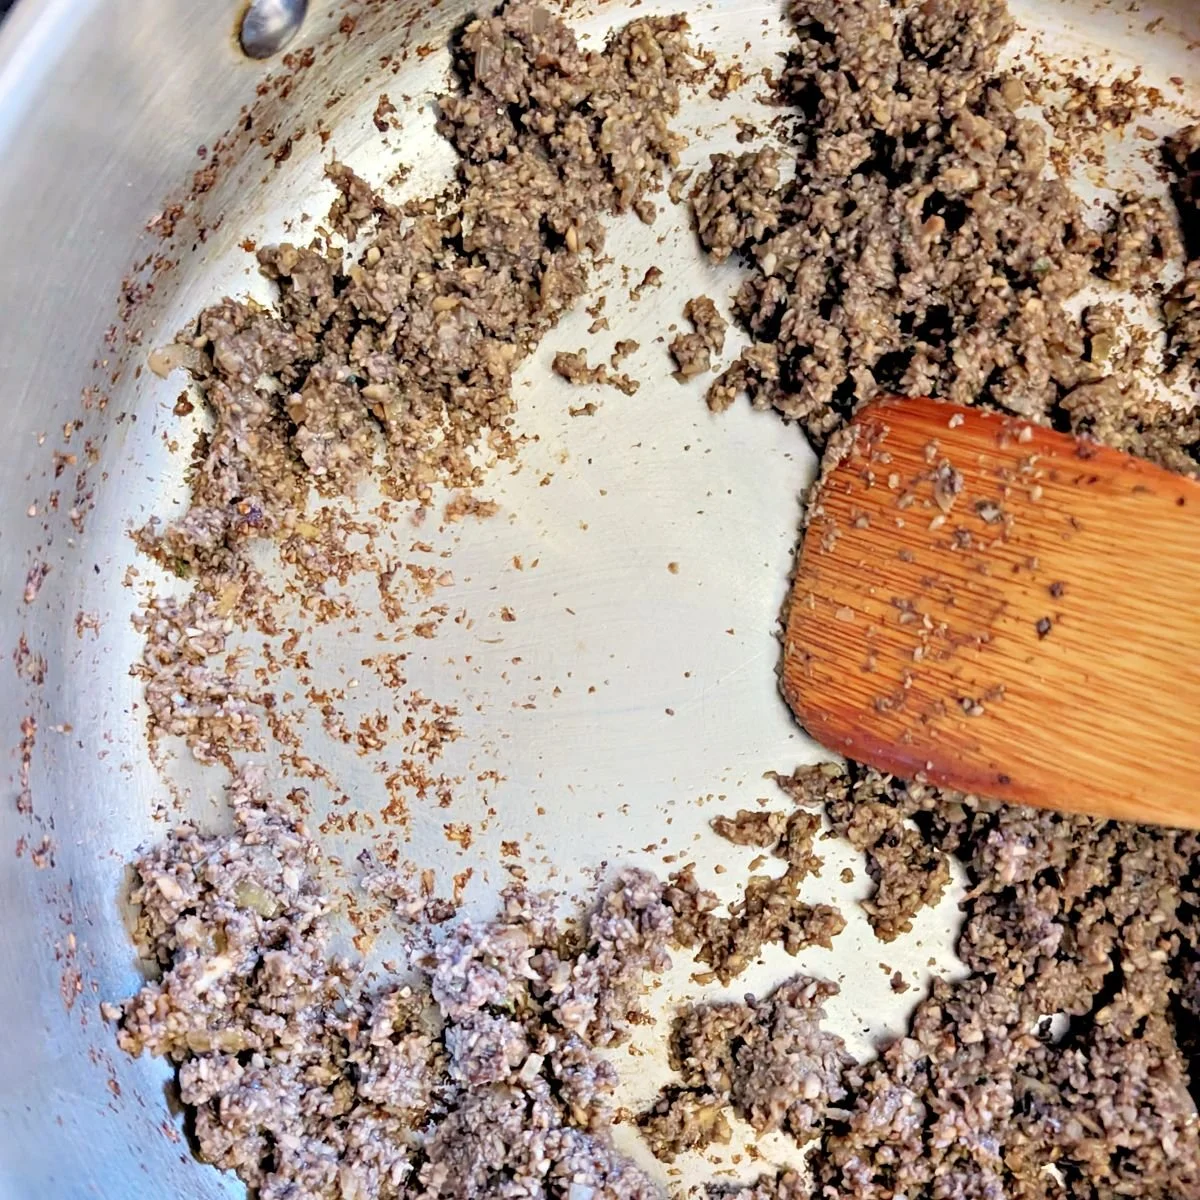
Melt the butter in a large skillet over medium heat, then add the shallots, garlic, and thyme and cook until the shallots are translucent.
Add the mushrooms and cook, stirring often, until all the moisture they release has evaporated. Don’t rush this part, and keep an eye on the pan. Once the mushrooms stop steaming and start catching slightly on the bottom, you know you’ve cooked out the moisture.
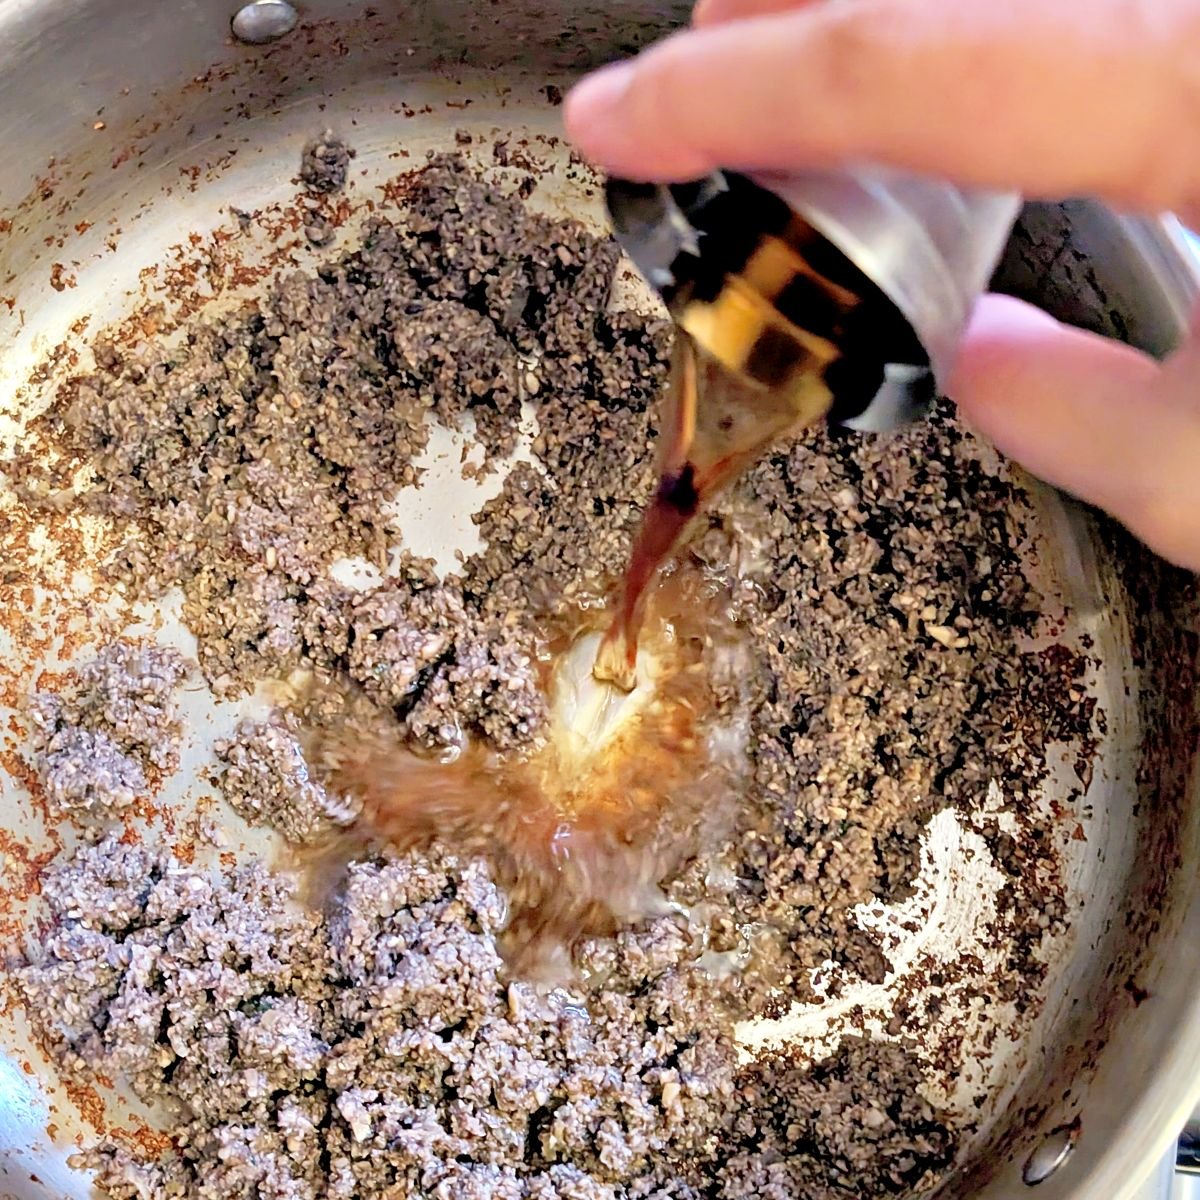
Deglaze with the sherry and continue cooking until the pan is dry and the duxelles start to catch again. Then season with salt and pepper to taste.
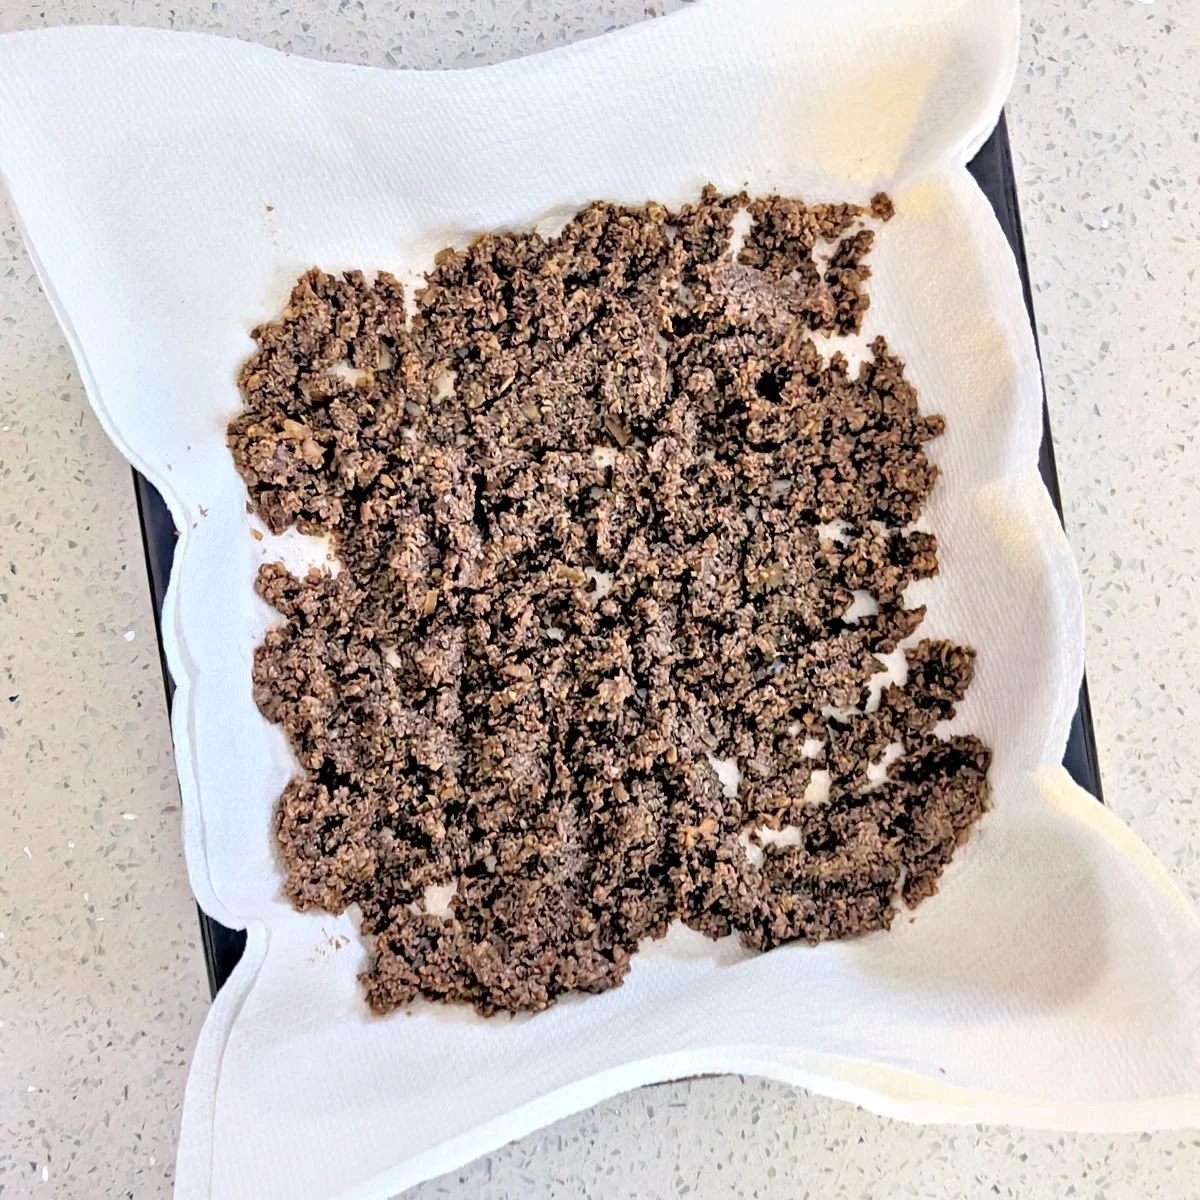
Spread the duxelles into a thin layer on a paper towel-lined tray or plate and refrigerate uncovered until completely cold. The paper towel will absorb any remaining moisture, while spreading the mushrooms out helps them cool and dry more quickly.
Step 3: Make the chive crêpes
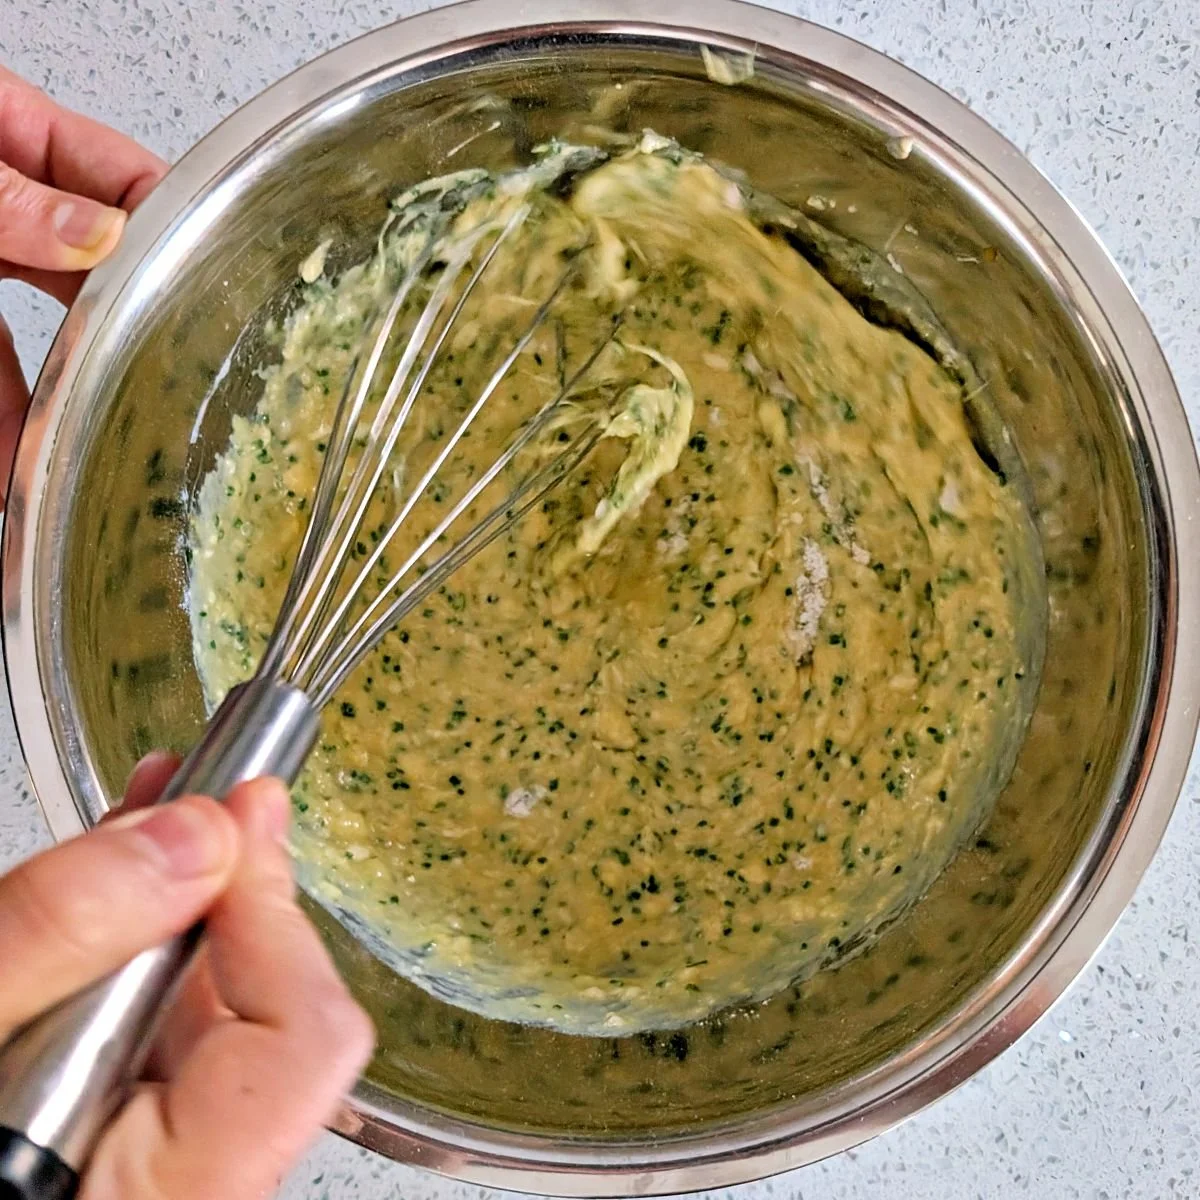
Whisk together the crêpe ingredients in a bowl: egg, milk, flour, olive oil, salt, and chopped chives until smooth. The batter should be thin and pour easily.
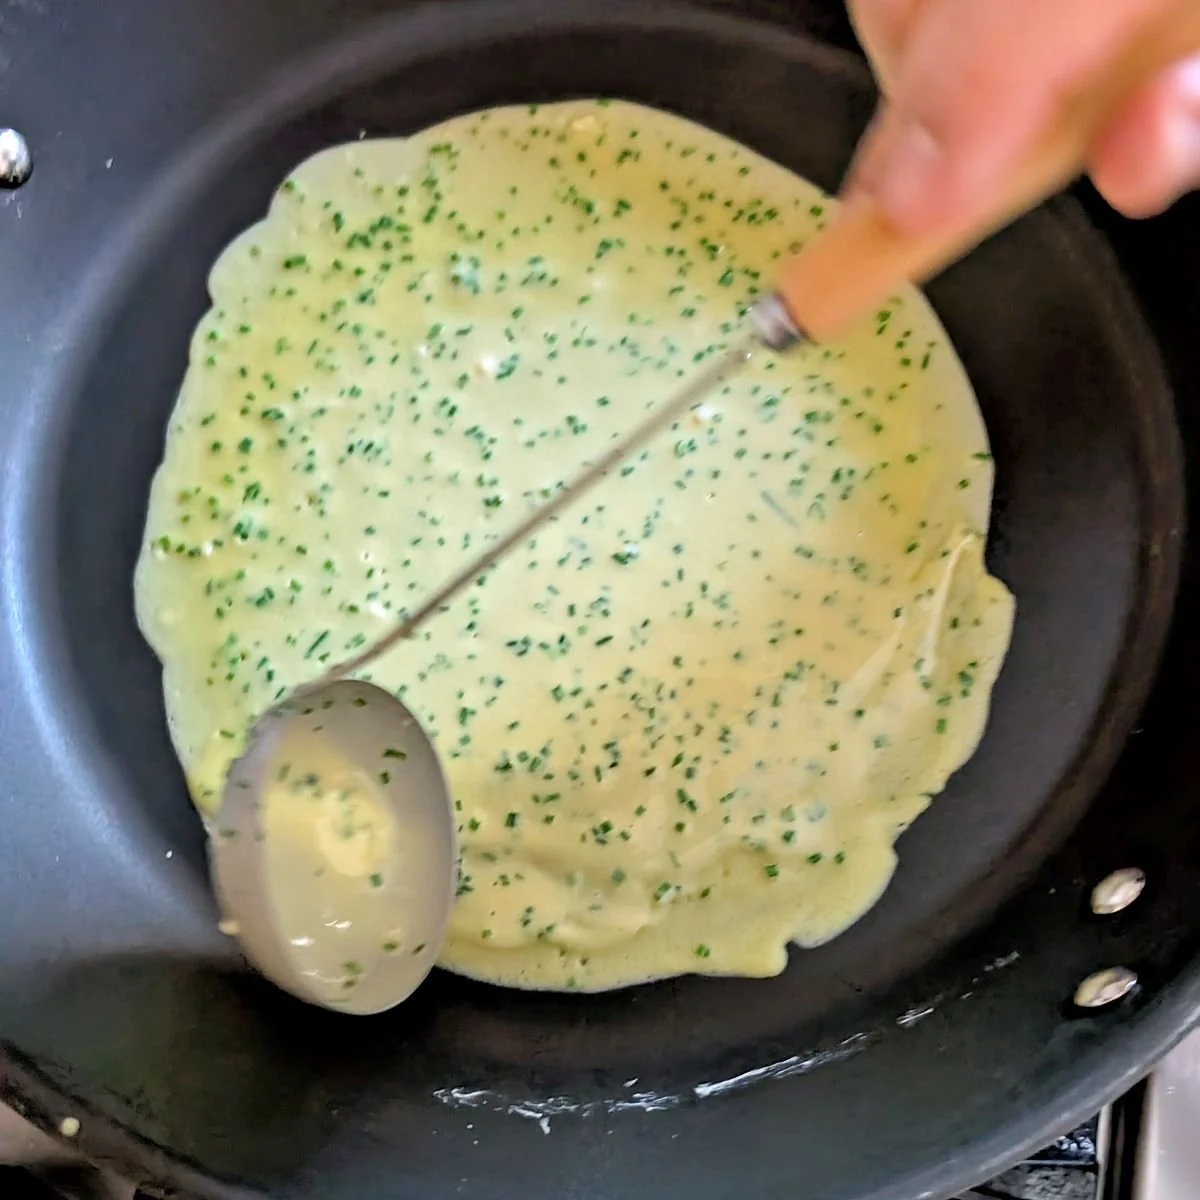
Heat a nonstick skillet over low heat. Add about ¼ cup of batter and immediately swirl the pan to spread it into a paper-thin crêpe. If needed, use a spatula to gently spread the batter a little farther.
Your first crêpe will tell you if the batter is the right consistency. If it feels thick or doesn’t spread easily, whisk a splash of milk into the batter to loosen it before making the next one.
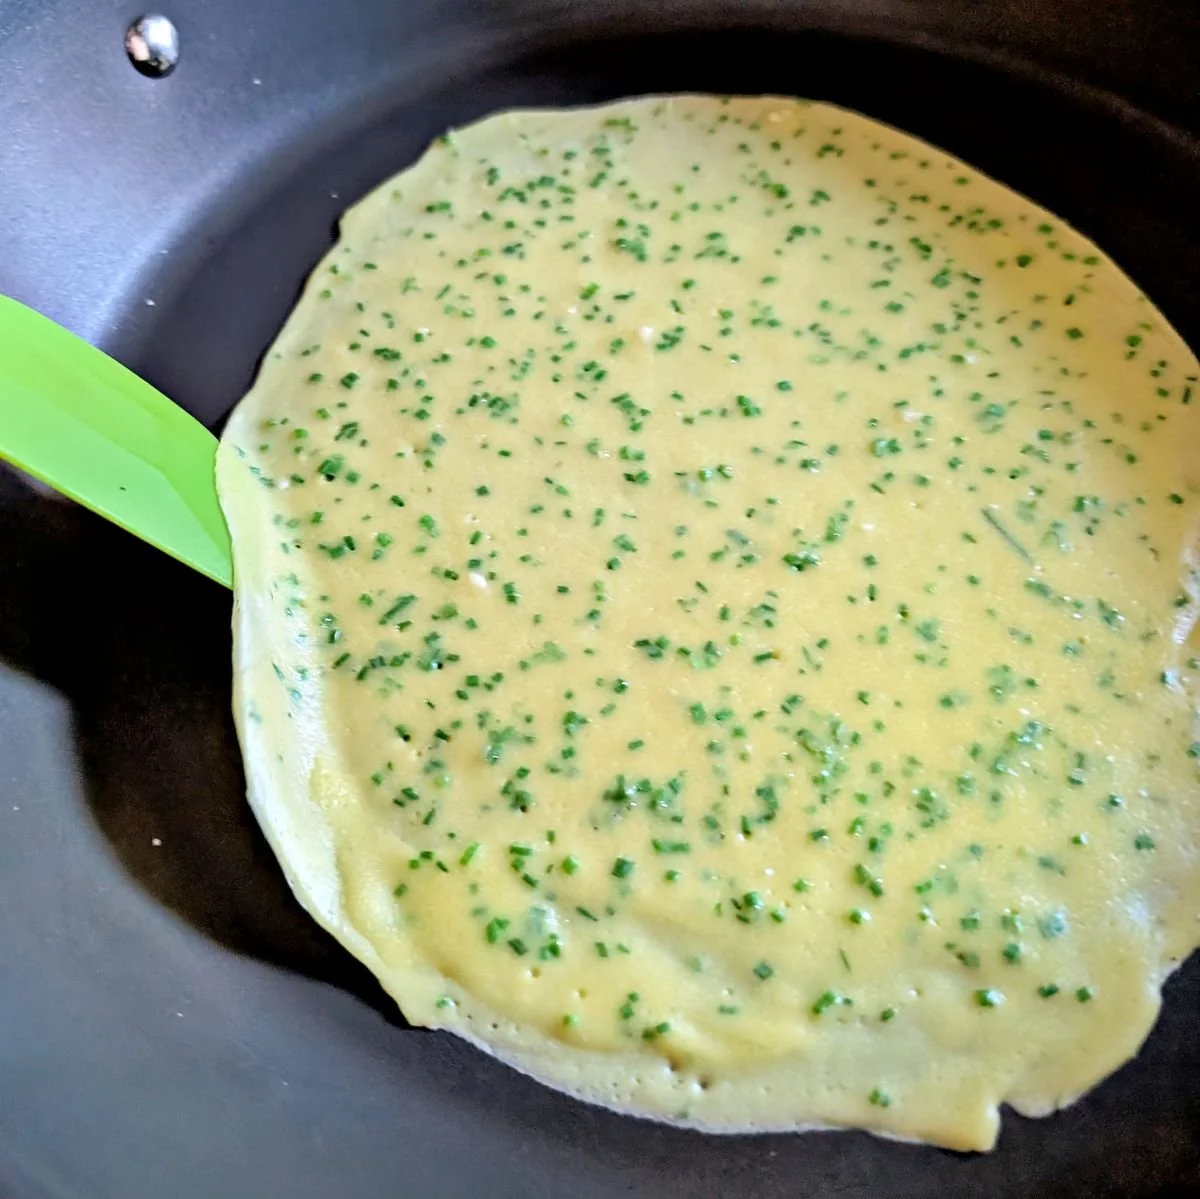
Keep the heat low, as you want the crêpes cooked through without adding much color. Once a crêpe looks set, use a spatula to loosen the edges, working your way toward the center until it releases from the pan. Flip and cook the second side for about 30 seconds.
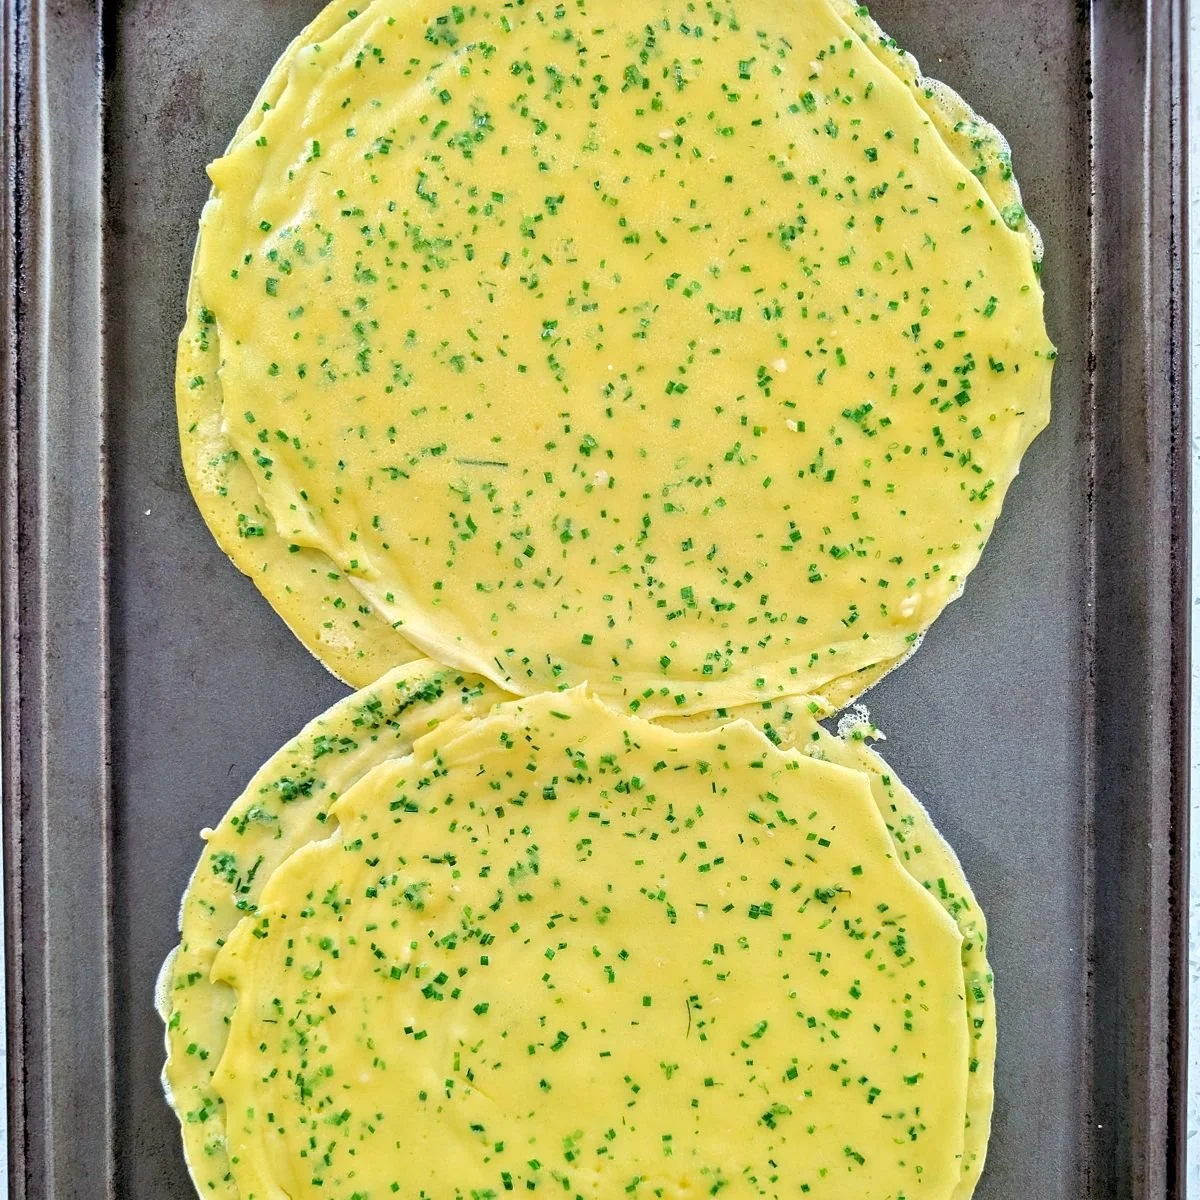
Transfer to a sheet tray or plate to cool, then repeat with the remaining batter.
You’ll need at least 2 crêpes for the Wellington. The batter should make about 3–4, so you’ll have a little room for error.
Step 4: Shape the beef tenderloin
Remove the chilled beef from the refrigerator and pat it dry with a paper towel to remove any last bits of moisture.
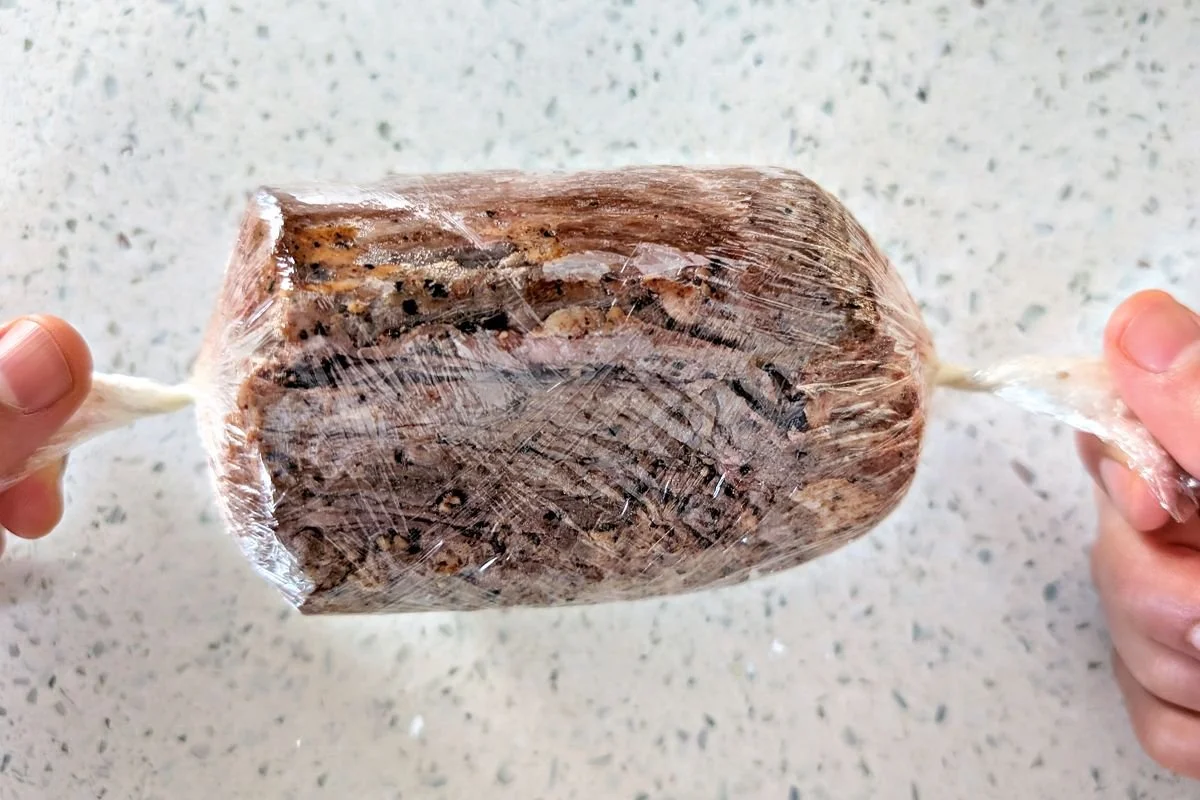
Lay it on a large piece of plastic wrap and roll it into a cylinder.
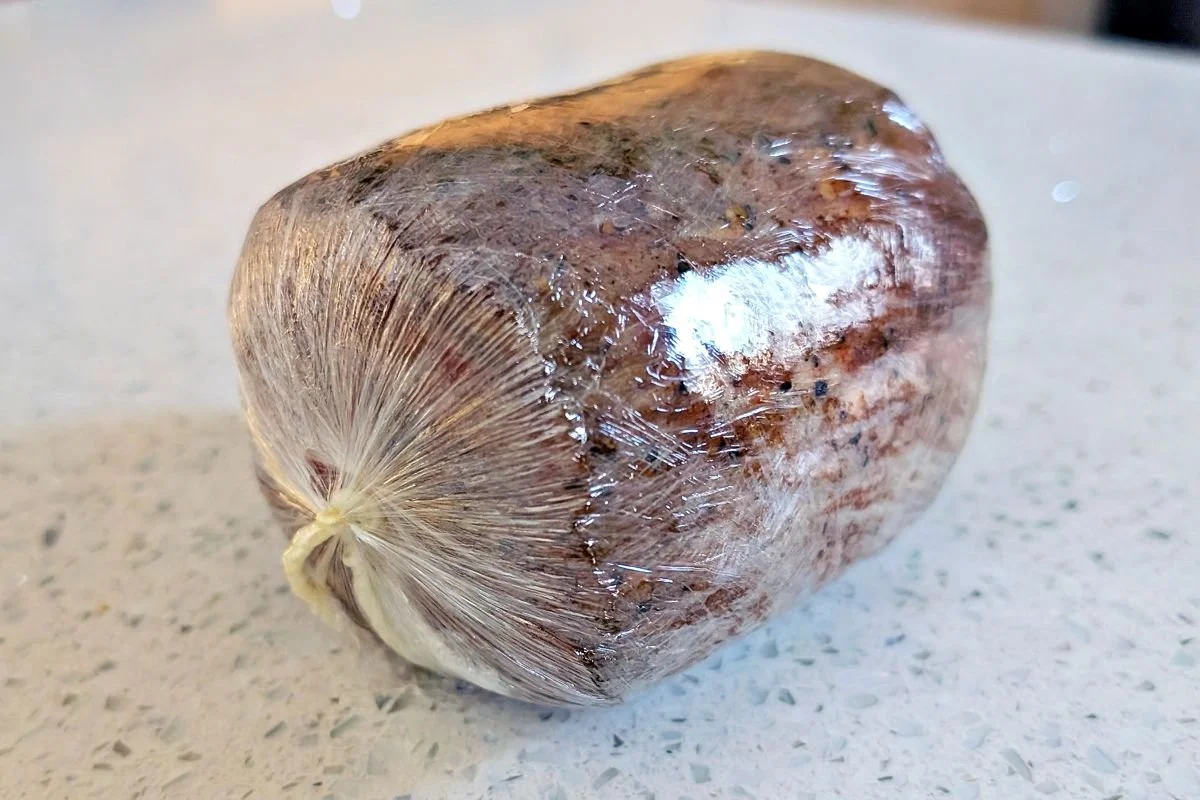
Twist both ends of the plastic wrap in opposite directions, like a candy wrapper.
While holding onto the two ends of the plastic wrap, roll the wrapped tenderloin in one direction against the counter until it forms a tight, even cylinder (see video below).
Wrap it again with another layer of plastic wrap, using the same candy-wrapper technique.
Freeze for 30 minutes to set the shape.
Step 5: Layer the crêpes, prosciutto, and duxelles
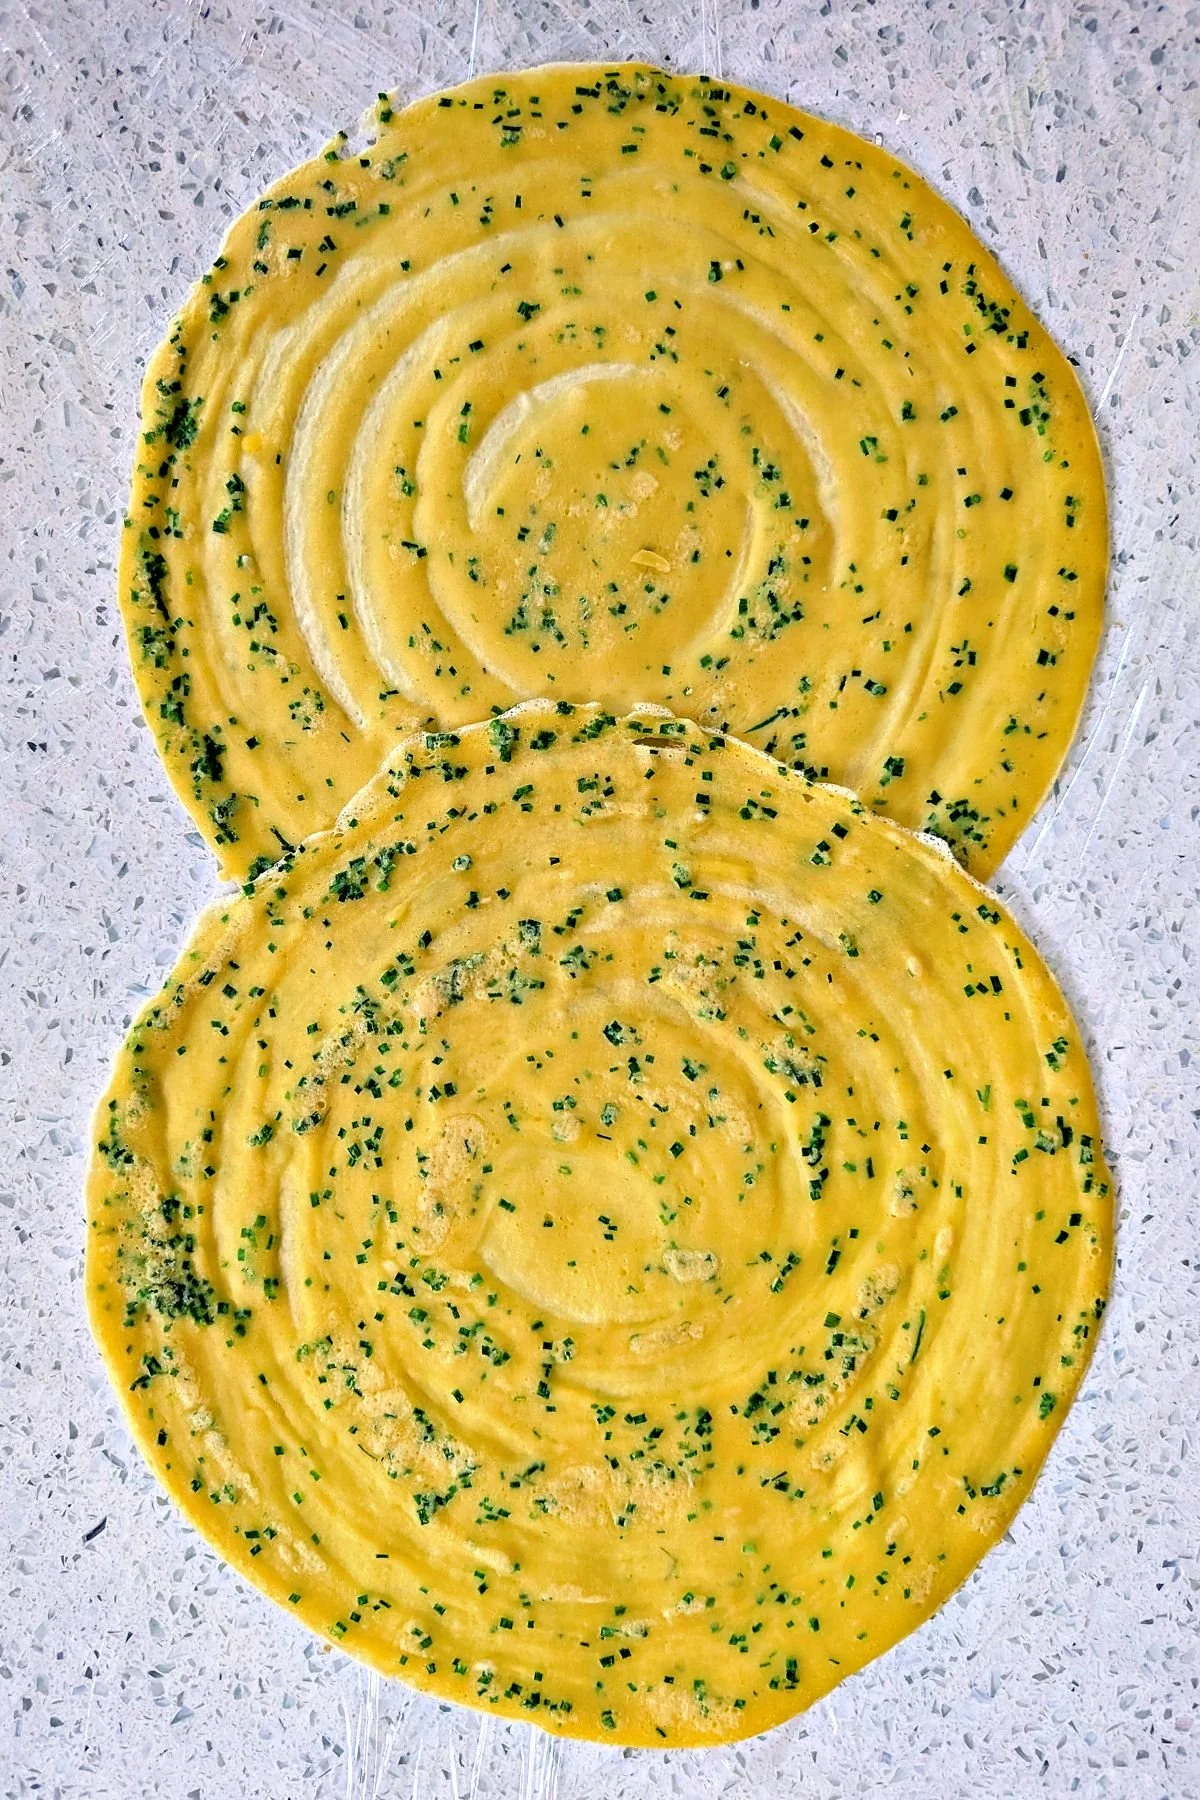
Lay a large sheet of plastic wrap on your work surface.
Place two cooled crêpes on top, overlapping them by a couple of inches so you have enough surface area to wrap the beef.
Before adding anything else, use the wrapped beef to check the size. Place it at one end of the crêpes and roll it across them to make sure they can wrap completely around the beef with about 2 inches of overlap. Make sure they also extend past both ends of the beef. If your crêpe area is too small, overlap another crêpe where you need more coverage.
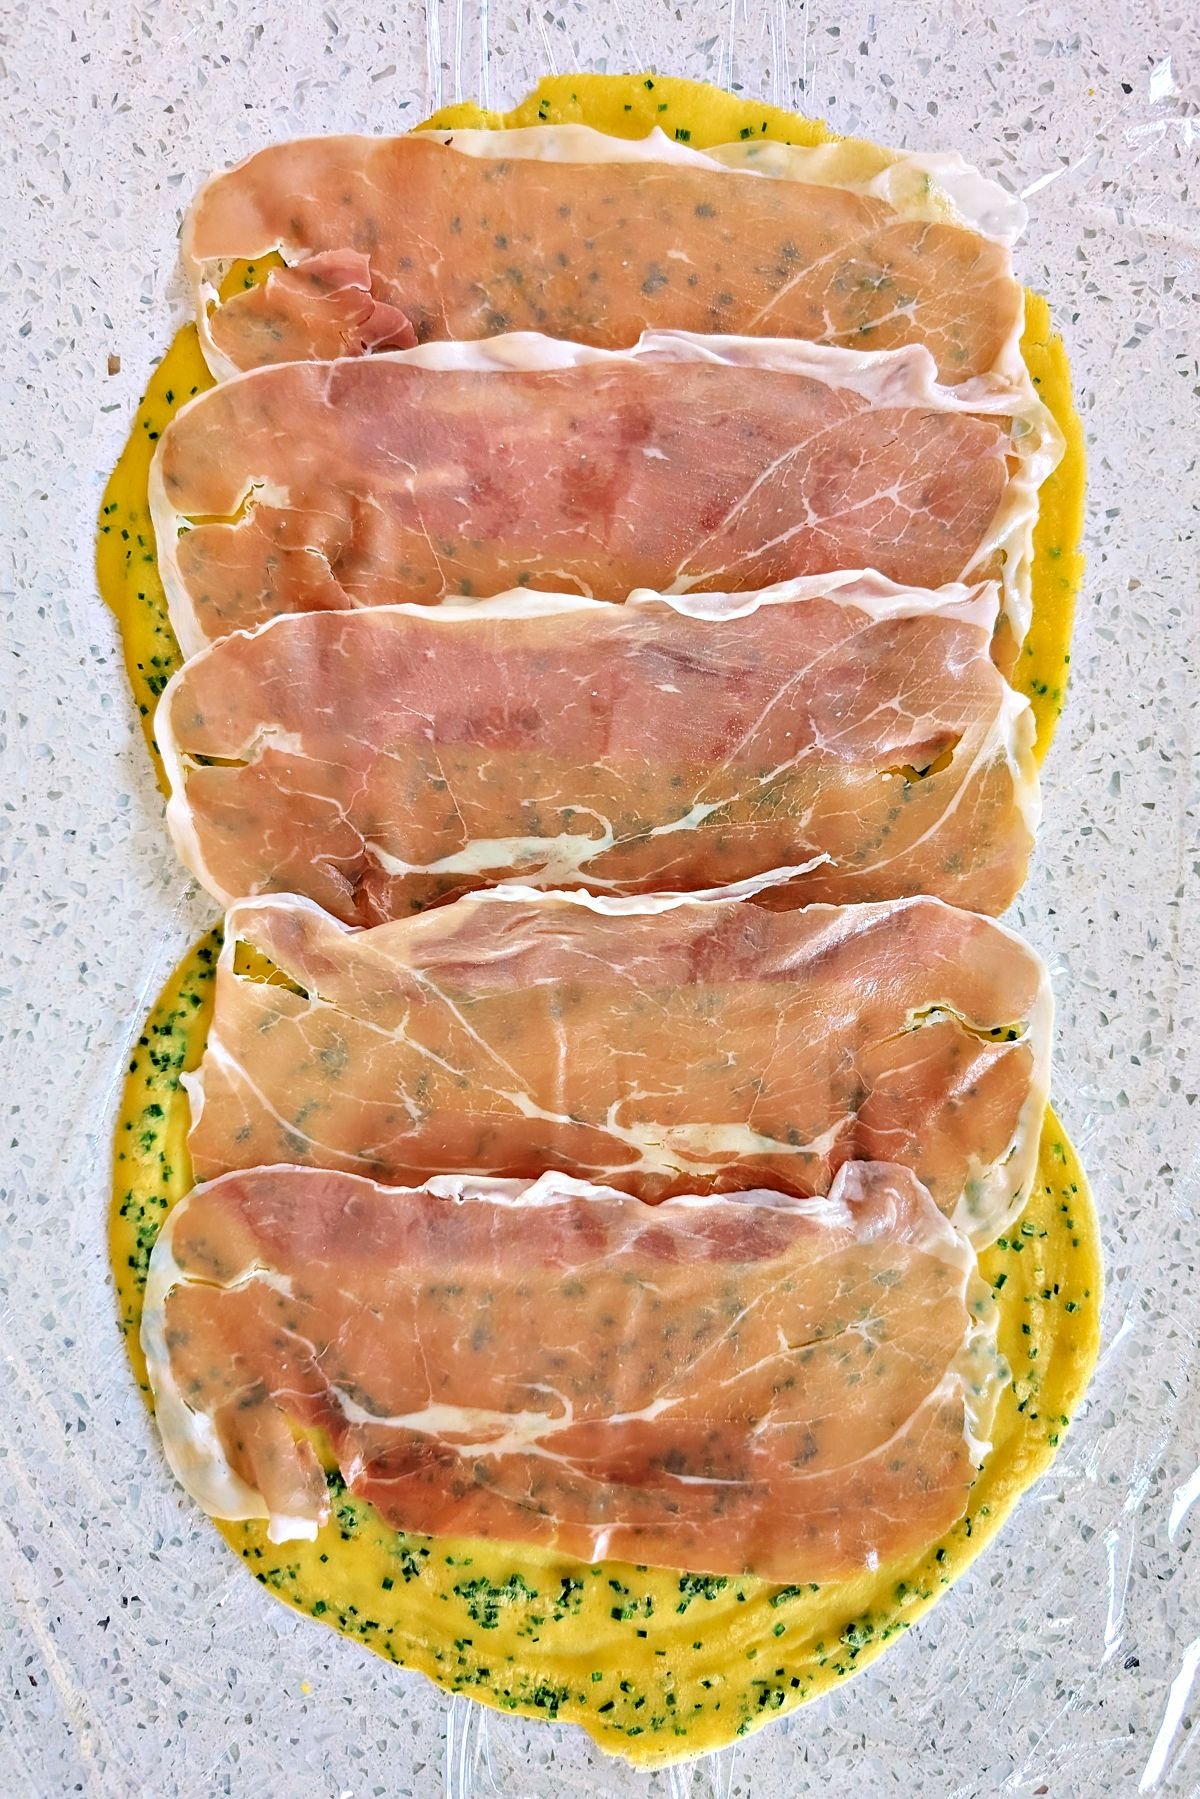
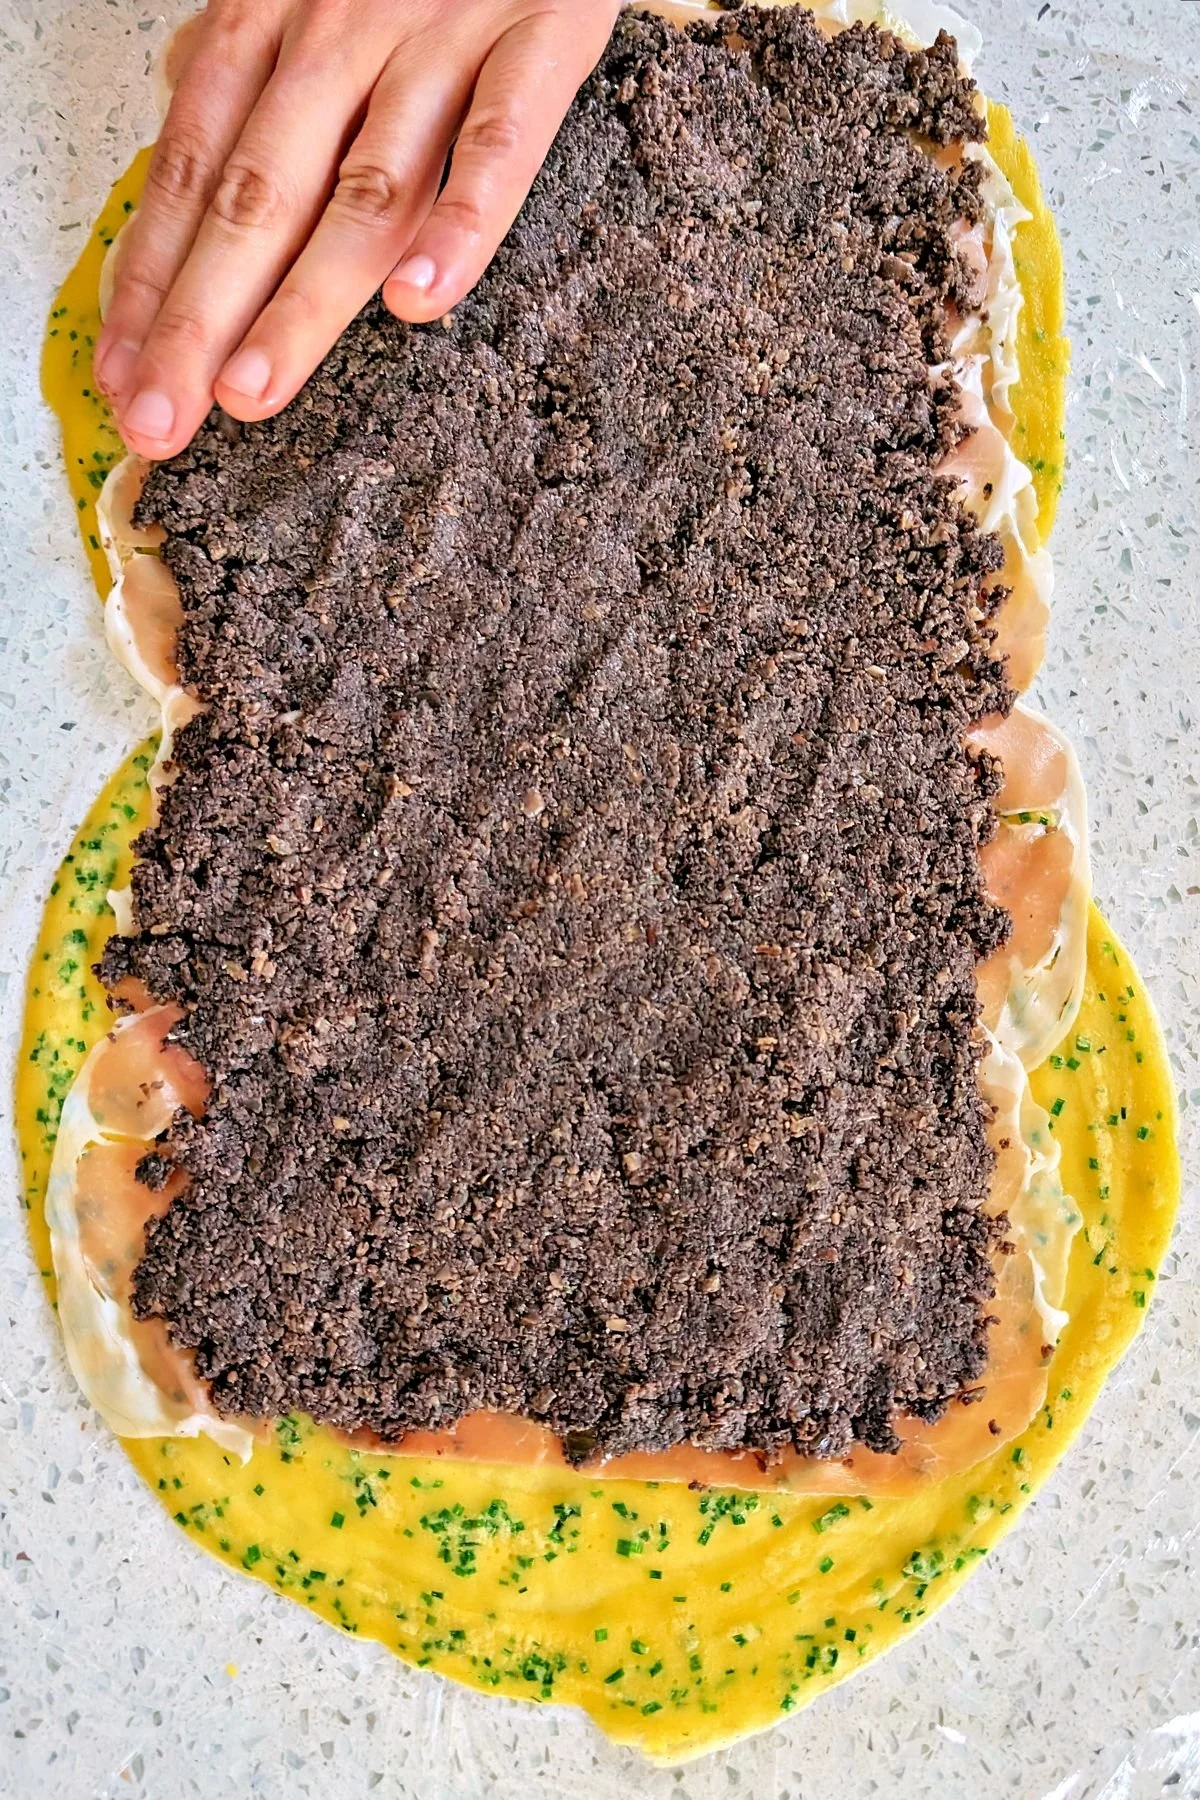
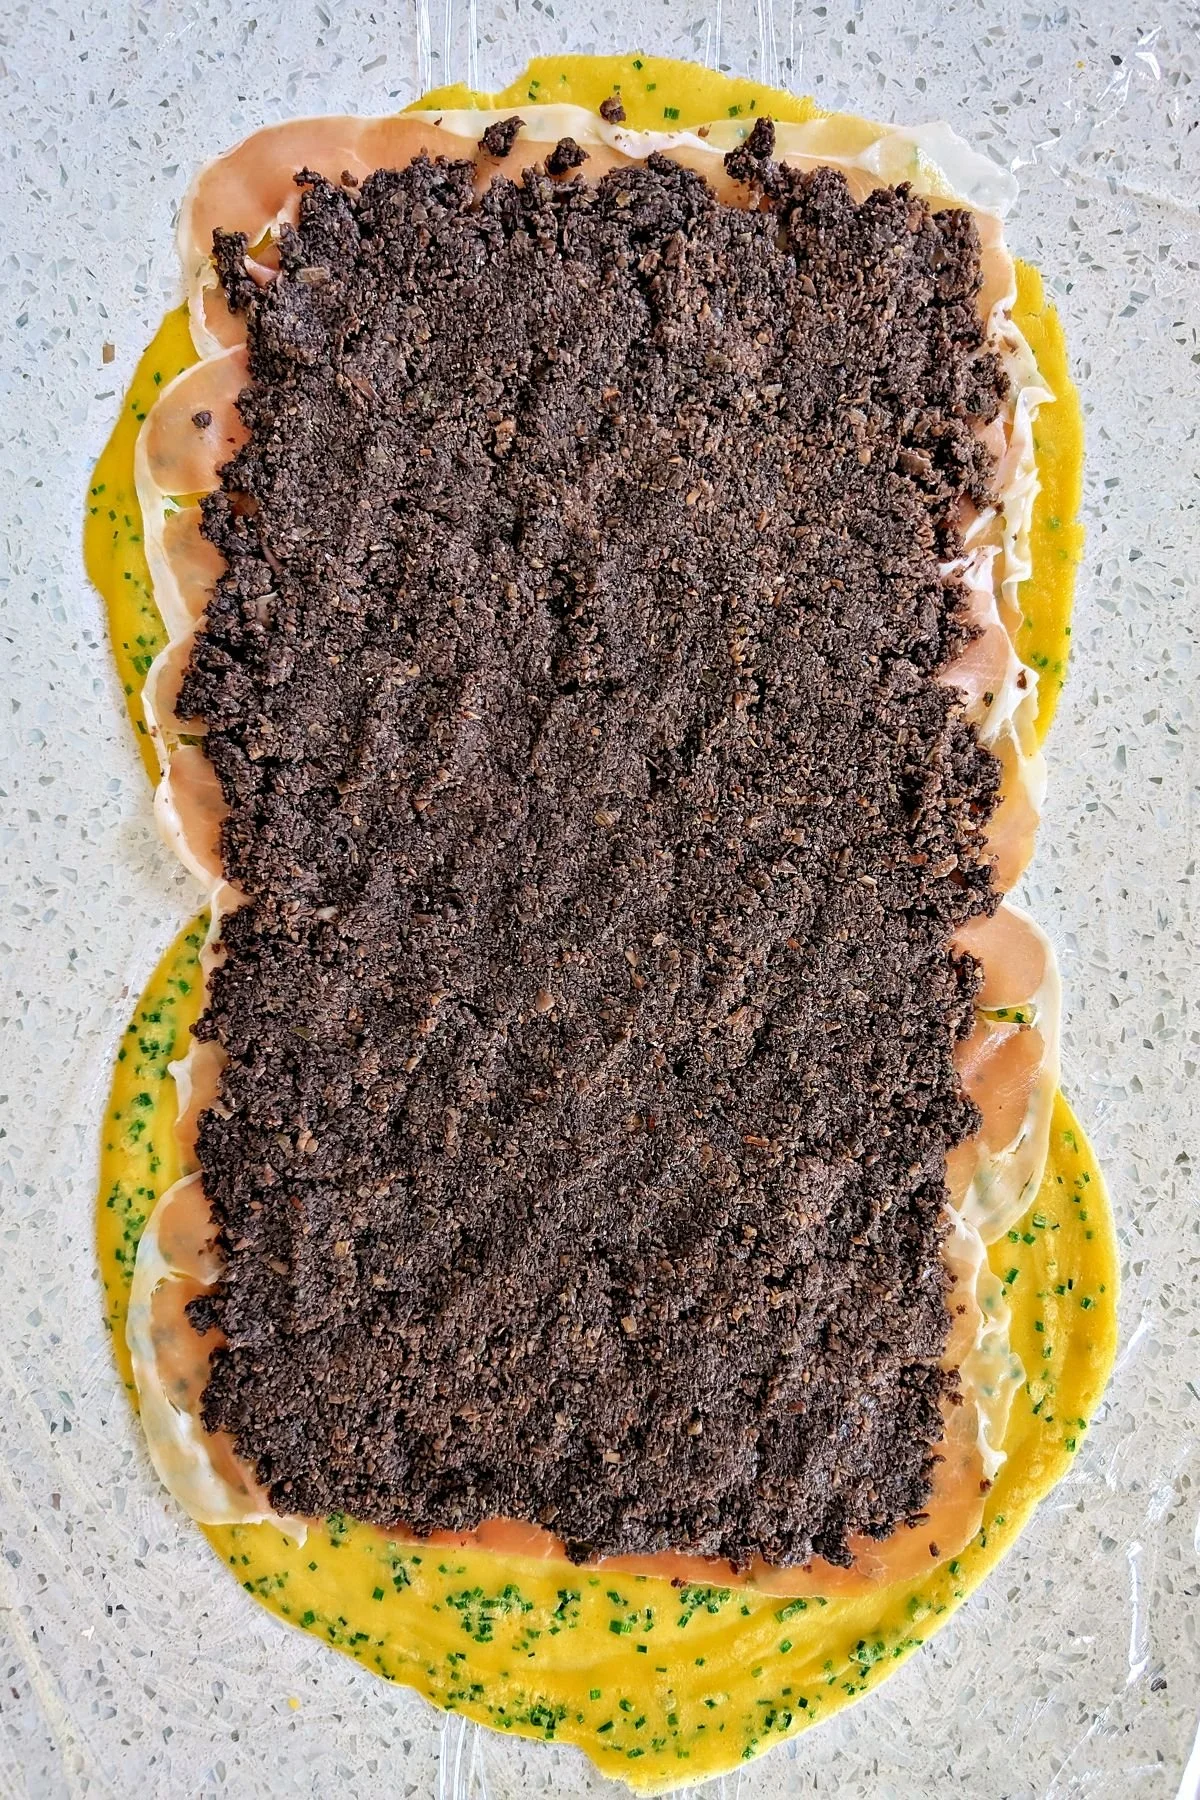
Shingle the prosciutto over the crêpes, then spread the cold duxelles evenly over the prosciutto, keeping it about an inch away from the edges. Press it down with a spatula or your hand to flatten it and help it stick together.
Keep the mushroom layer thin and even rather than piling it up. This makes the Wellington easier to roll tightly and evenly. You don’t have to use all the duxelles, and any leftovers make a great snack.
Step 6: Brush the beef tenderloin with mustard and position it
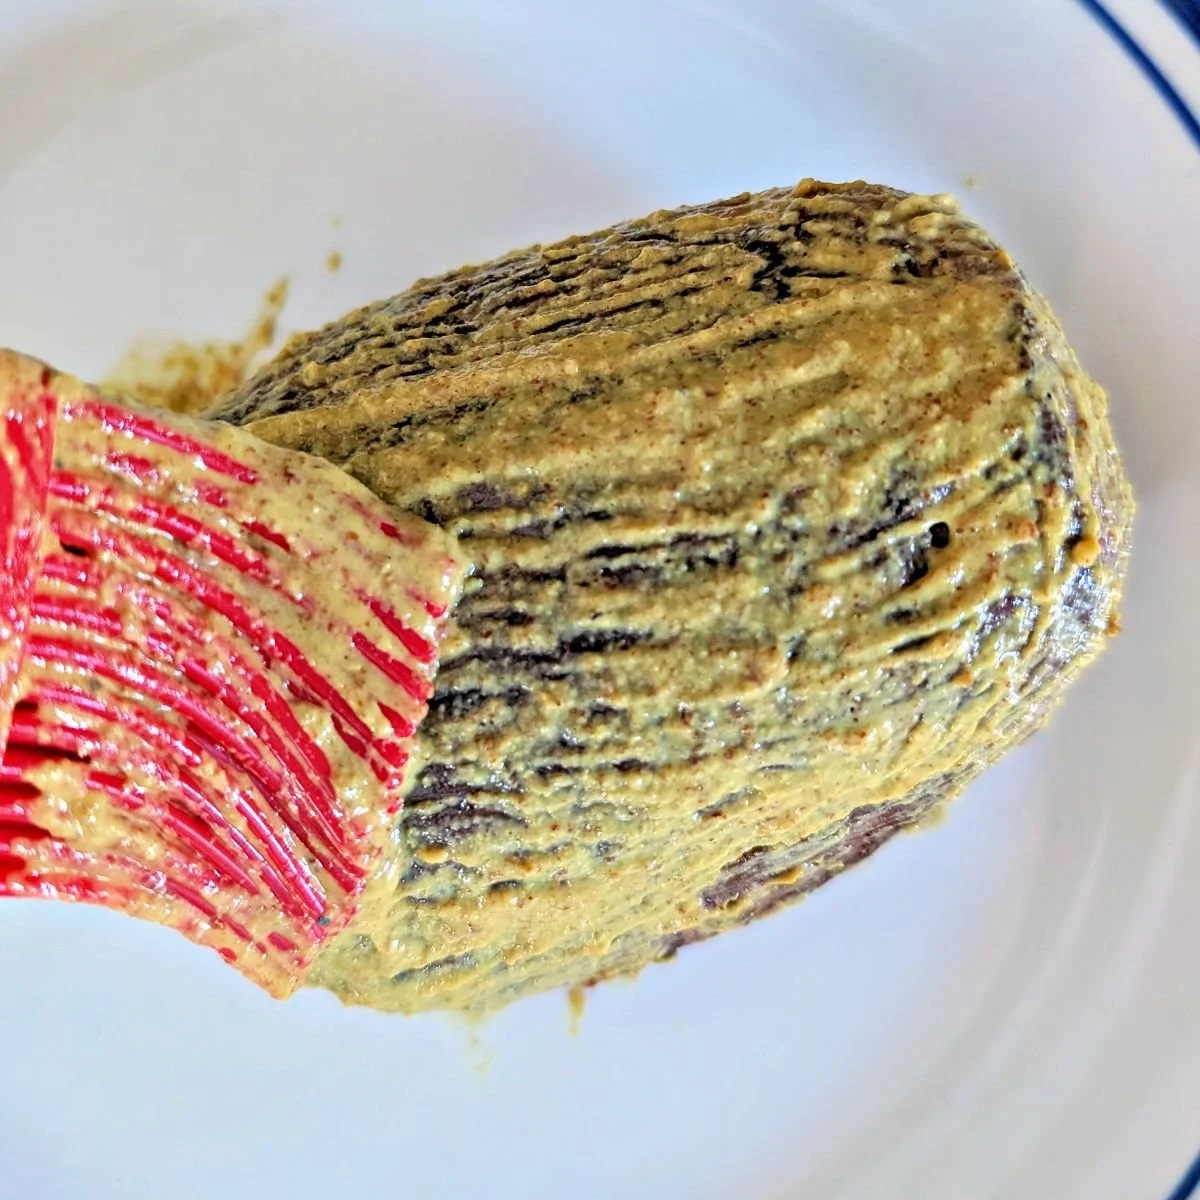
After 30 minutes in the freezer, remove the beef from the plastic wrap and brush the entire surface with the Dijon mustard.
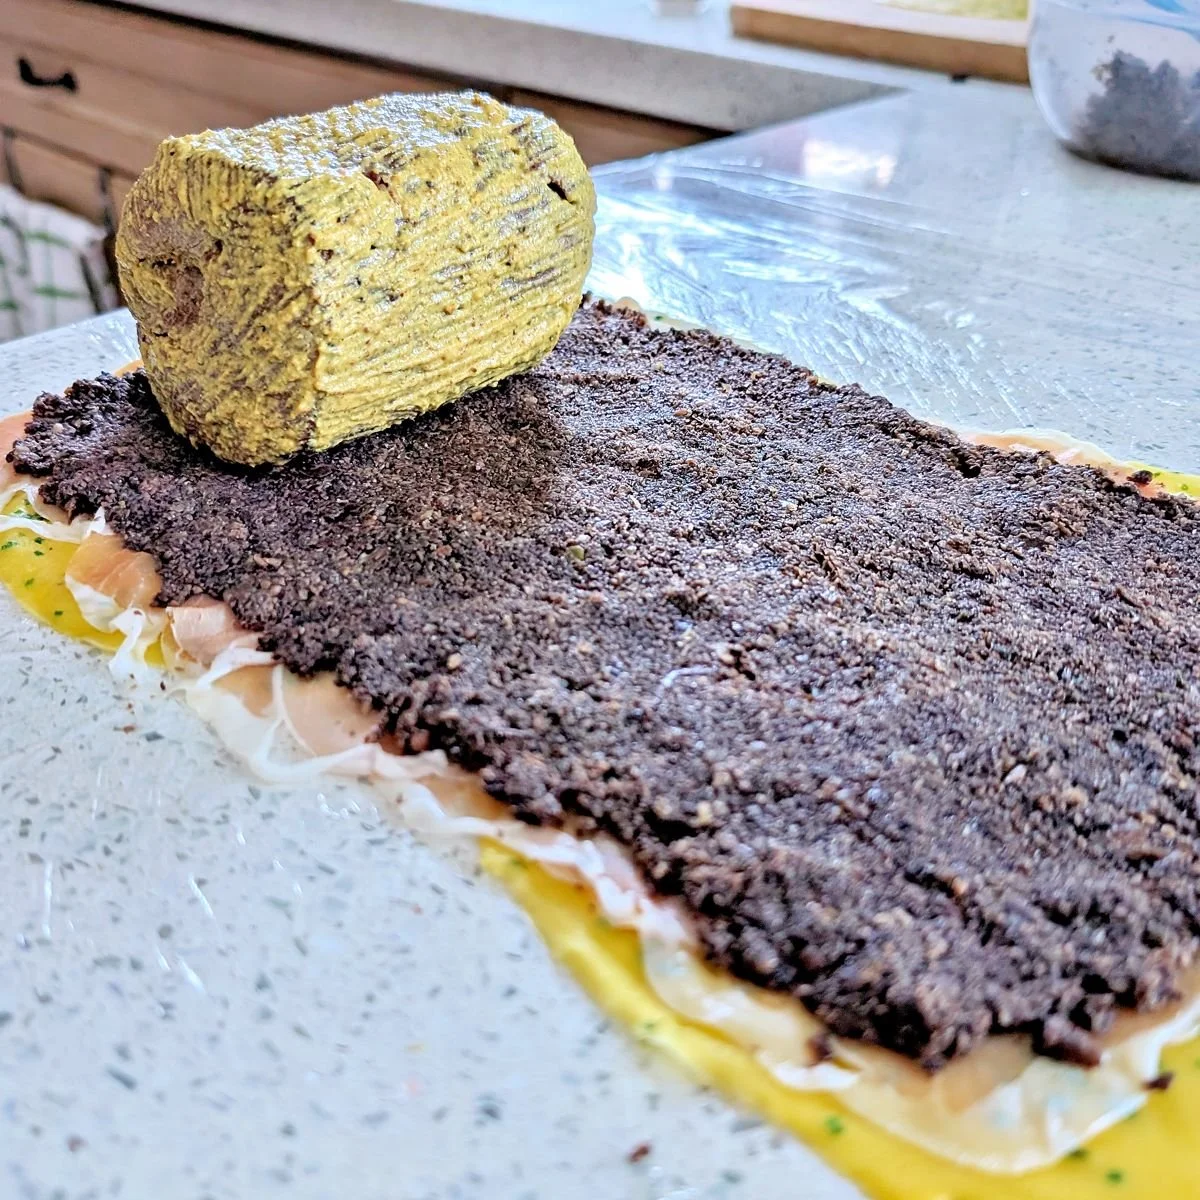
Place it near the bottom edge of your prepared crêpe, prosciutto, and duxelles layer.
Step 7: Wrap the beef in the crêpe layer
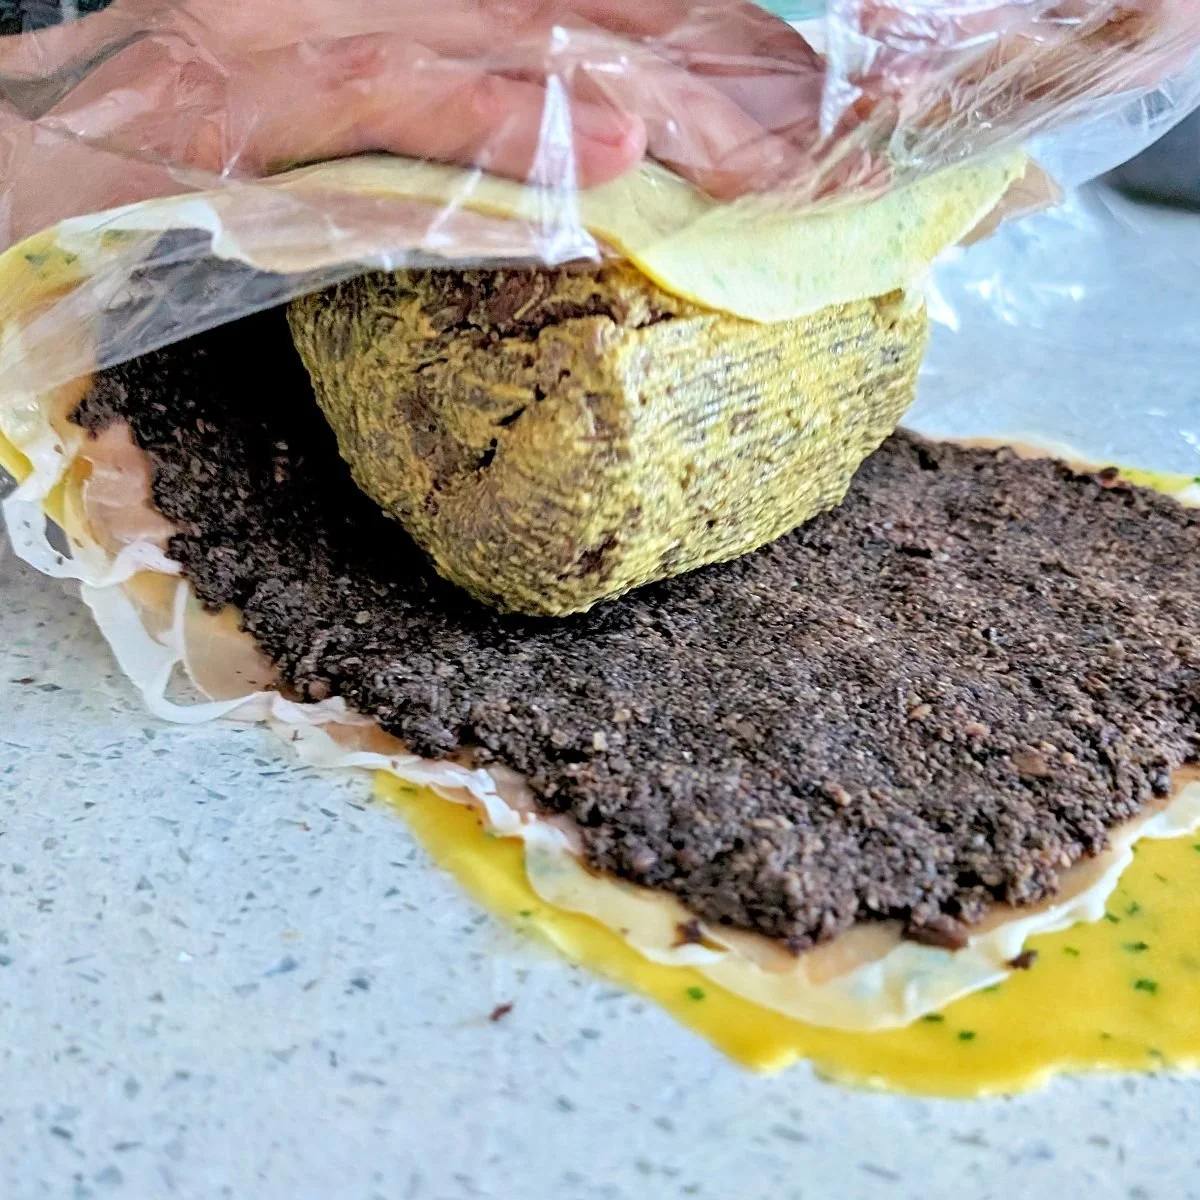
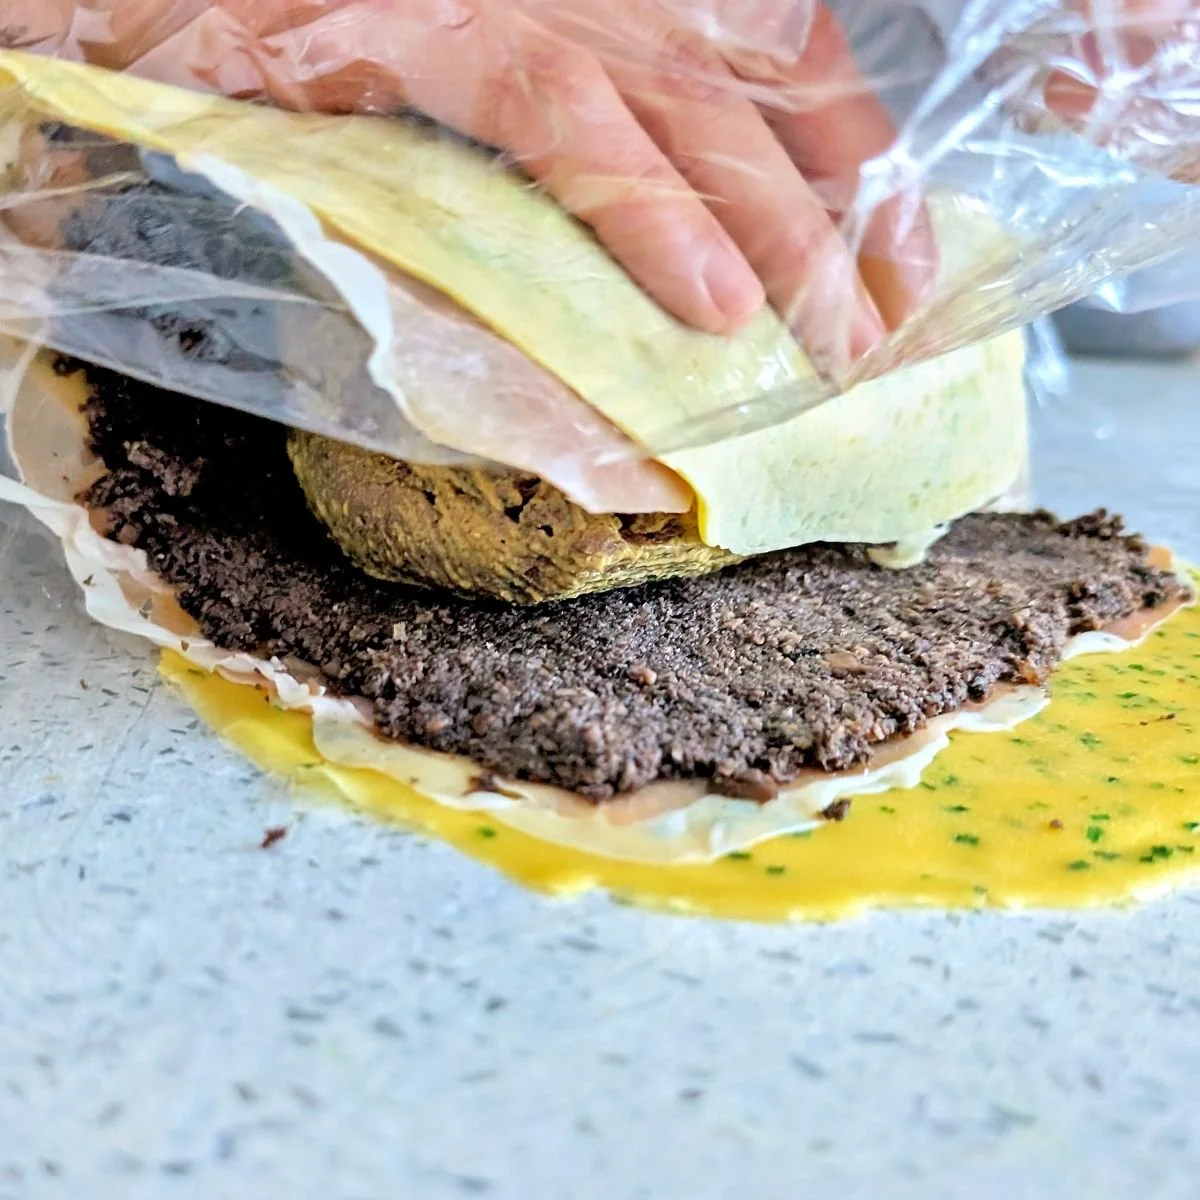
Using the plastic wrap underneath to help lift the crêpe layer, gently lift it up and roll it over the beef.
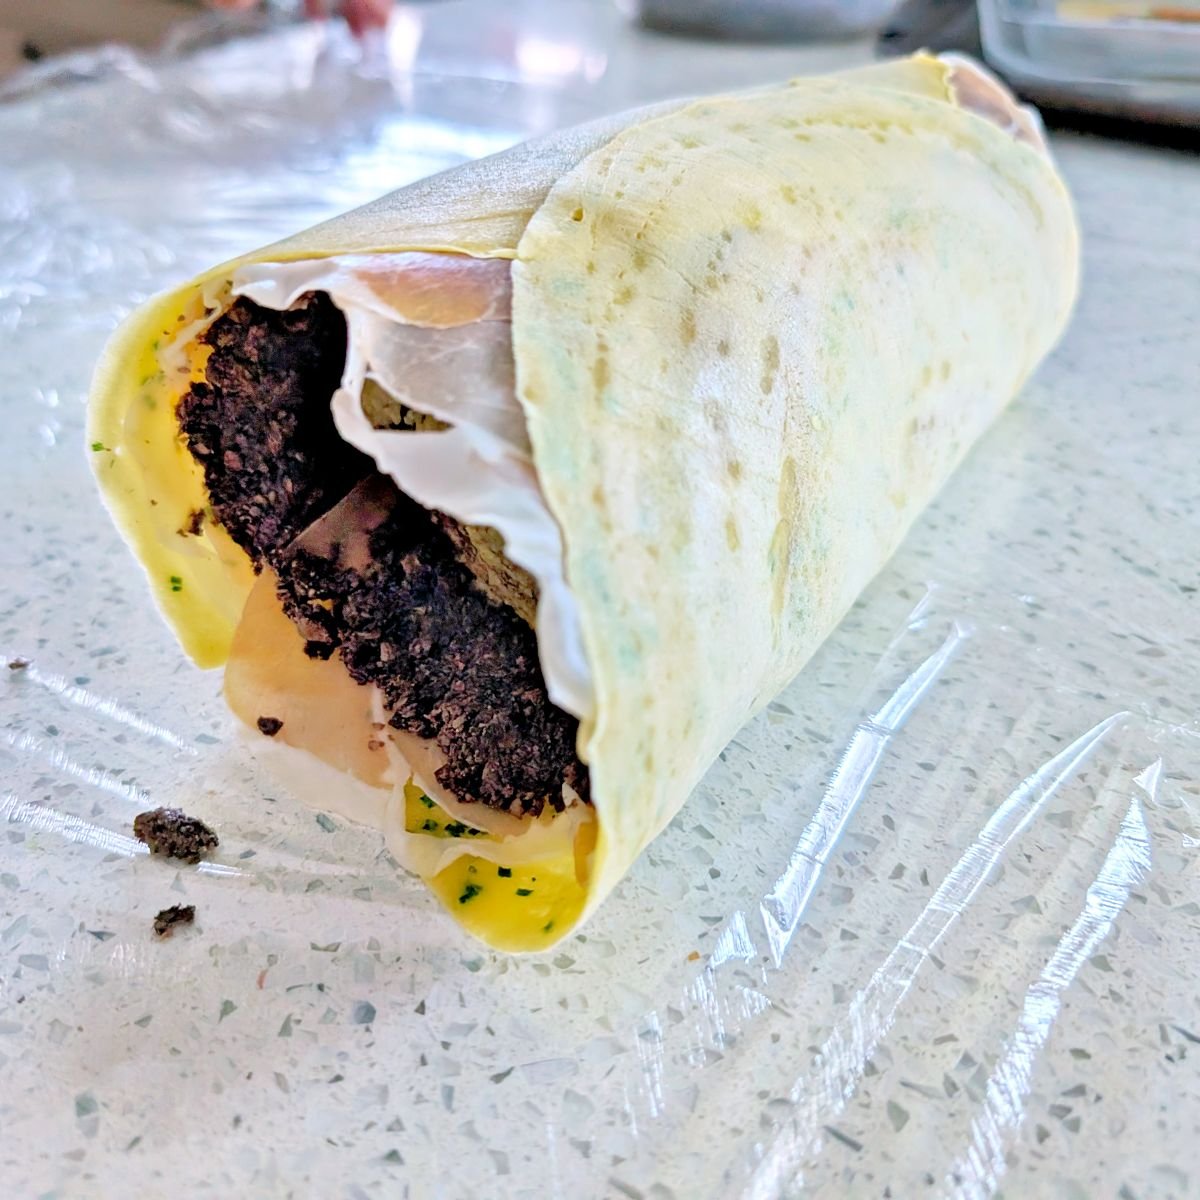
Continue rolling until the beef is completely enclosed, and the crêpe layer overlaps by 1–2 inches. Trim away any excess crêpe if needed.
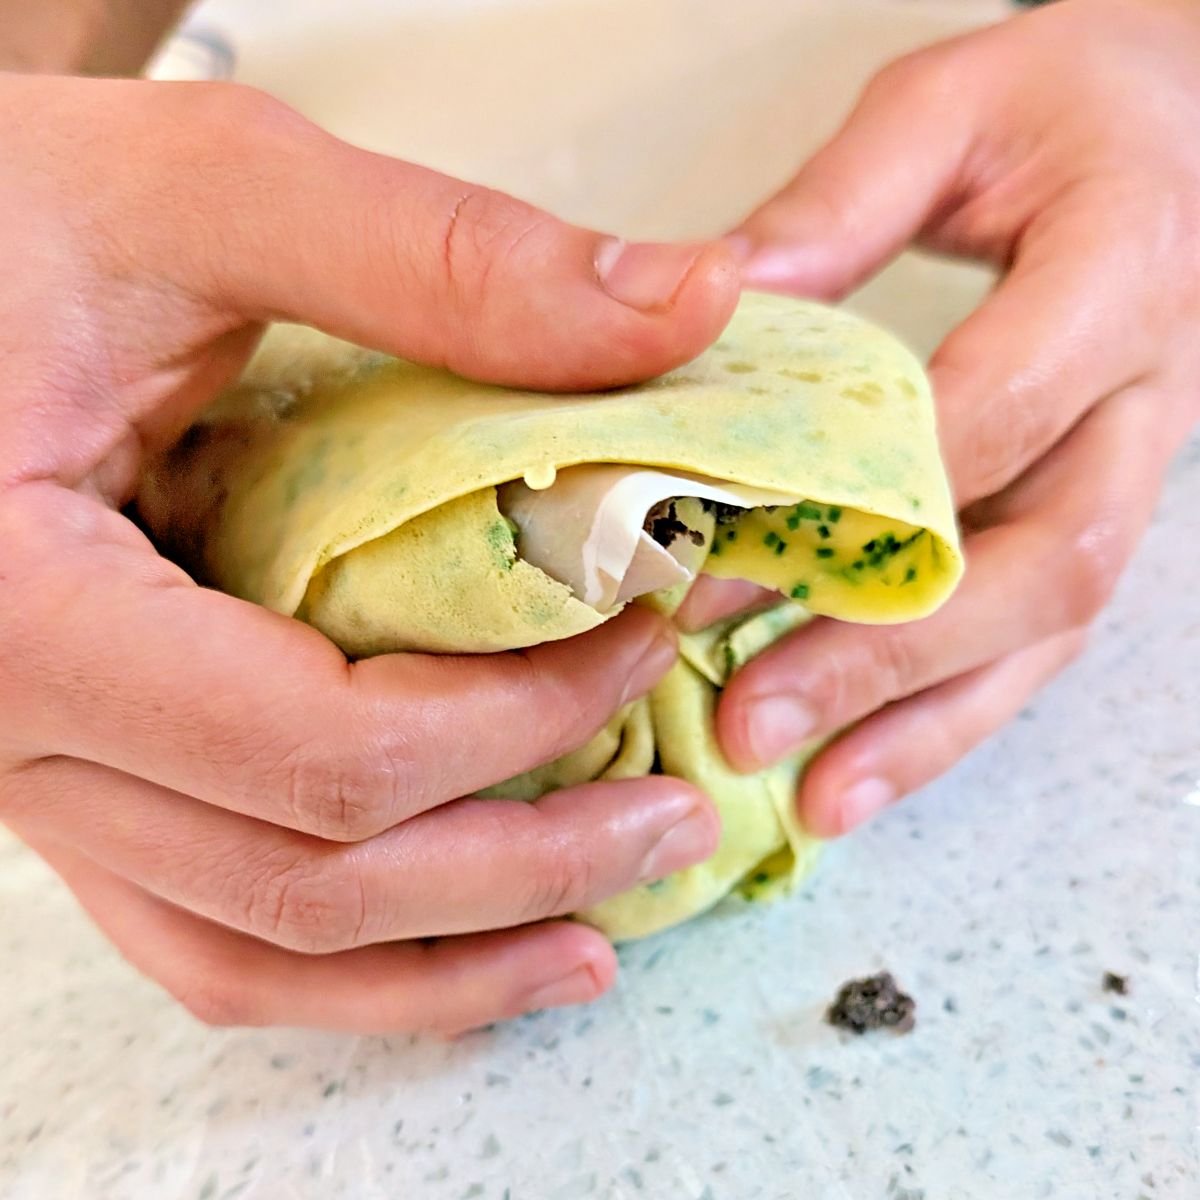
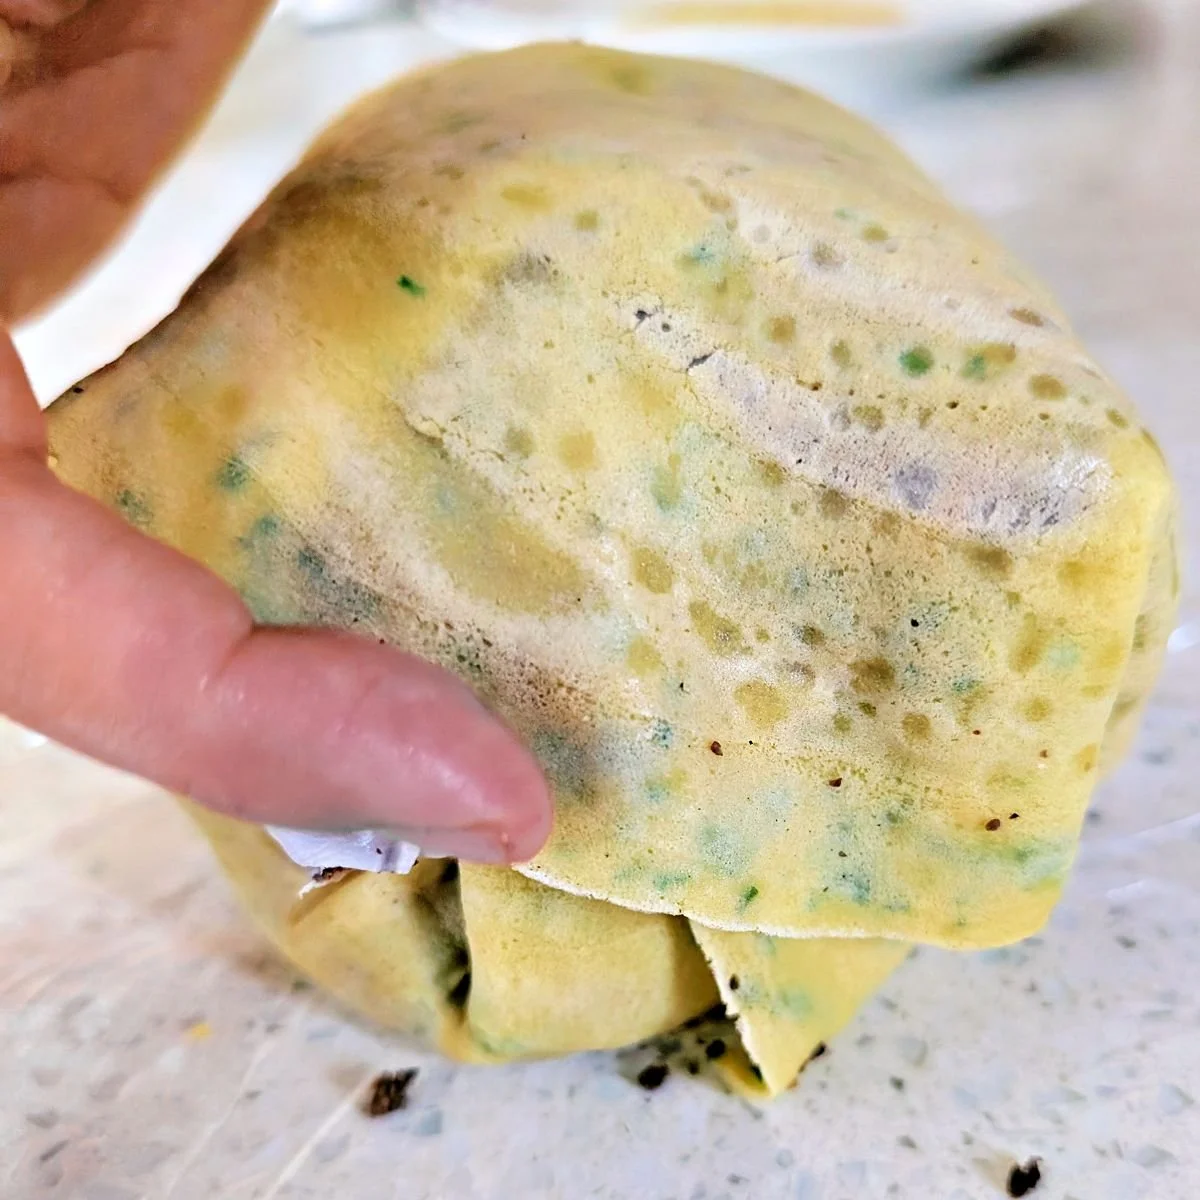
Close each end by folding the bottom of the crêpe layer up over the beef first, tucking in the sides, then folding the top flap down over it. Repeat on the other end.
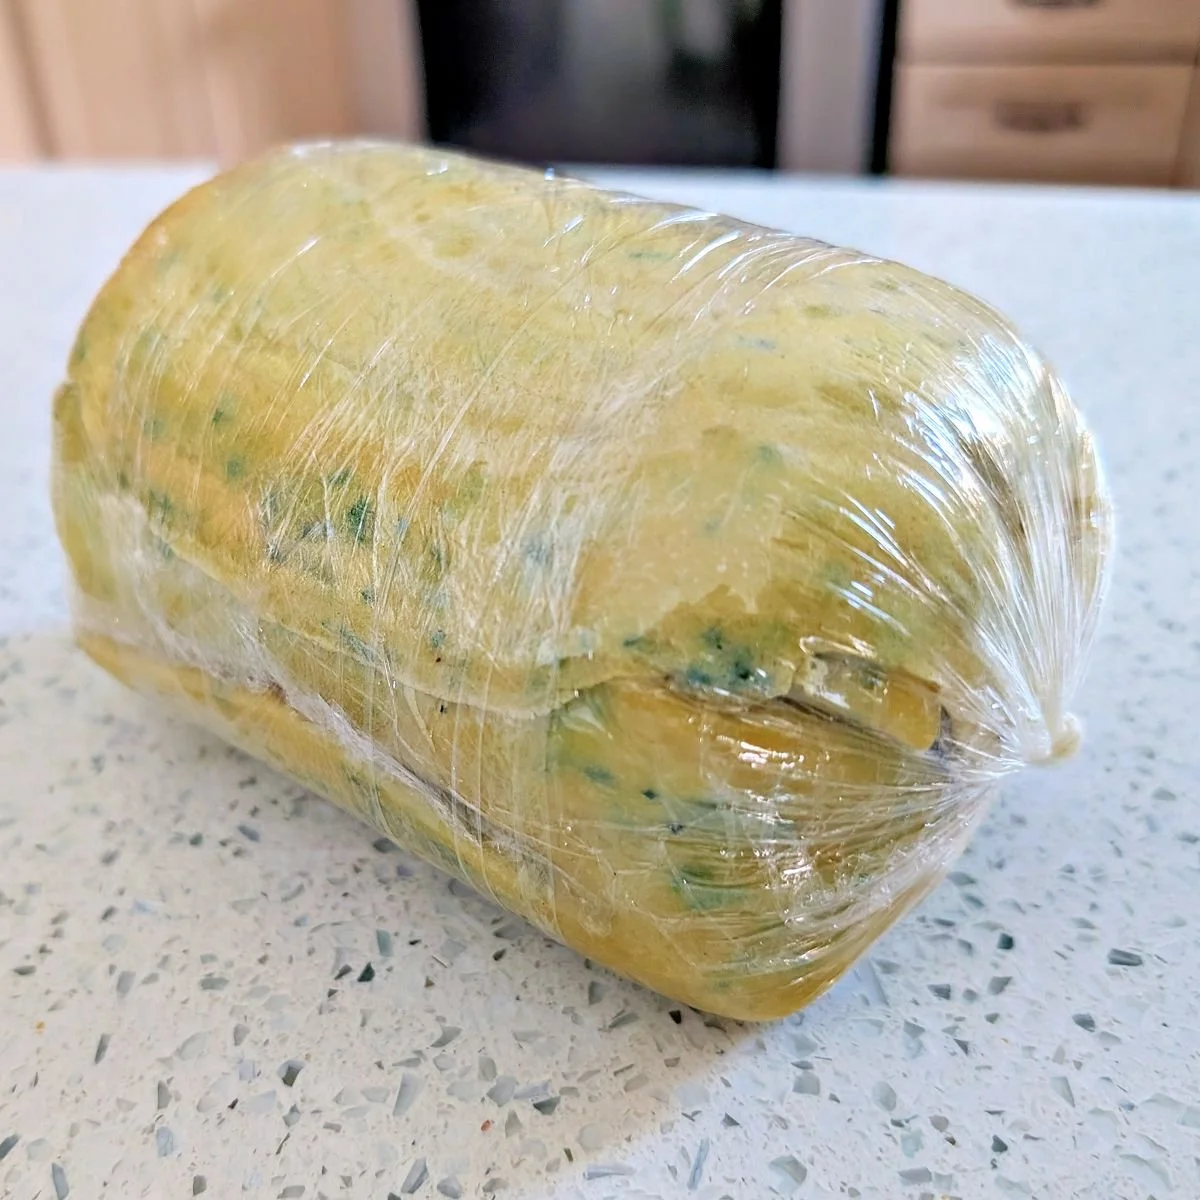
Wipe away any duxelles that may have fallen out, then wrap the entire log tightly in the plastic wrap. Use the same candy-wrapper technique from Step 4, twisting the ends and rolling the log against the counter until it feels firm and evenly shaped. Wrap it in a second layer of plastic wrap the same way.
Freeze for 30 minutes to firm up the layers so they stay in place when you wrap the Wellington in puff pastry.
Step 8: Wrap in puff pastry
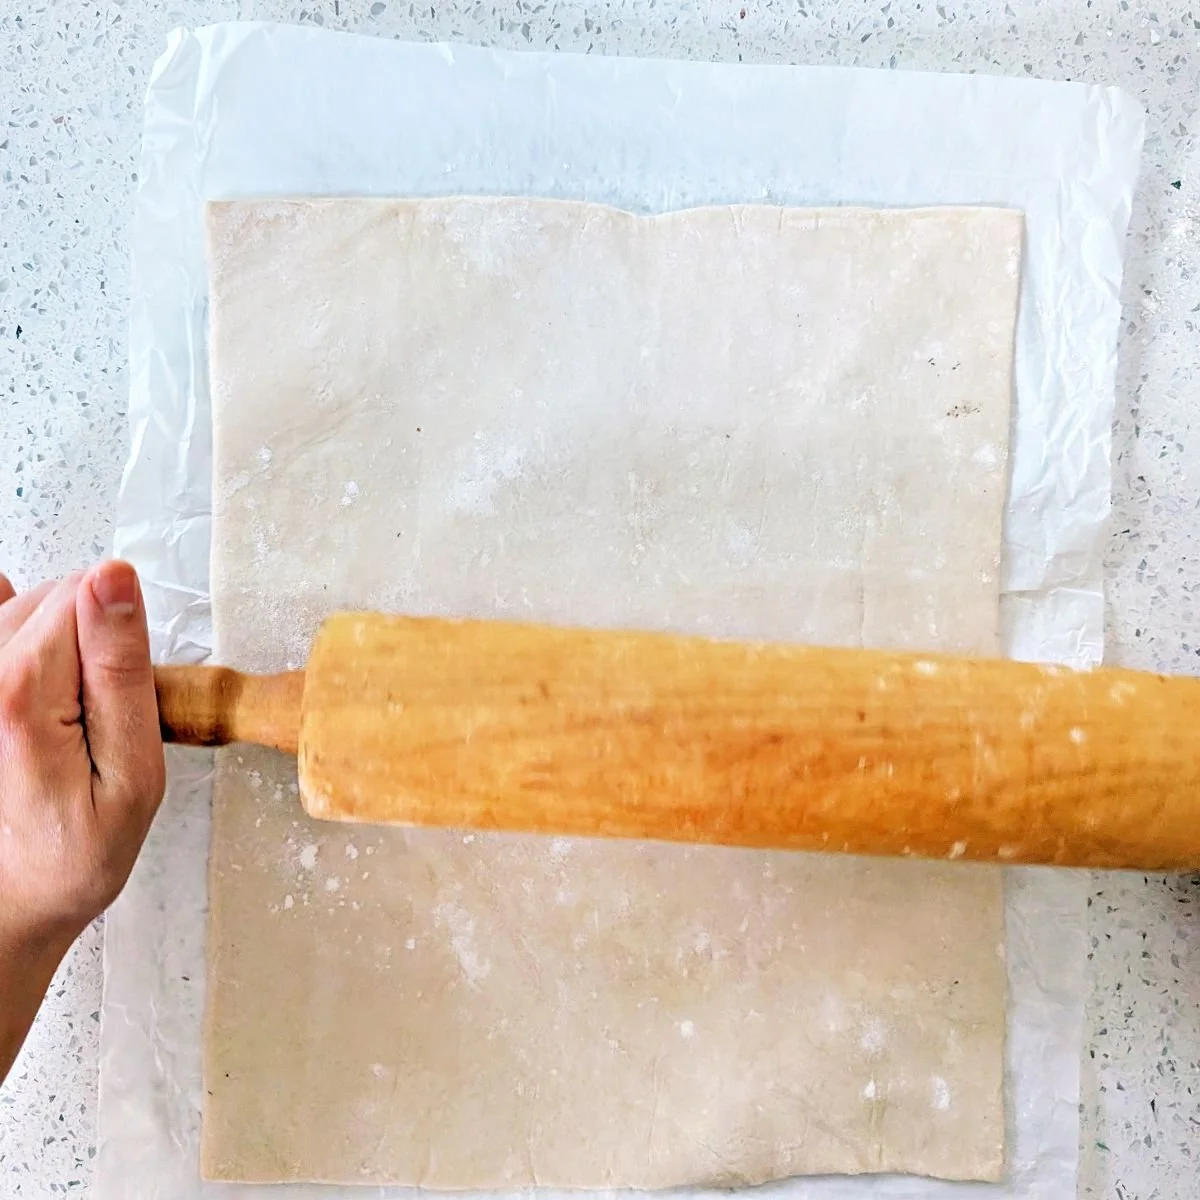
Gently unroll the thawed puff pastry. If it feels stiff, warm it slightly with your hands as you unroll it so it doesn’t crack.
Use the plastic-wrapped beef log to check the size of the pastry. You need enough pastry to completely enclose the beef with a little overlap and extra pastry at both ends. If your pastry is already large enough, there’s no need to roll it out.
If the pastry is too small, leave it on the parchment paper it came on so it doesn’t stick to your work surface, lightly flour the top, and roll it into a rectangle large enough to enclose the beef. Use the wrapped beef to check the size again as needed.
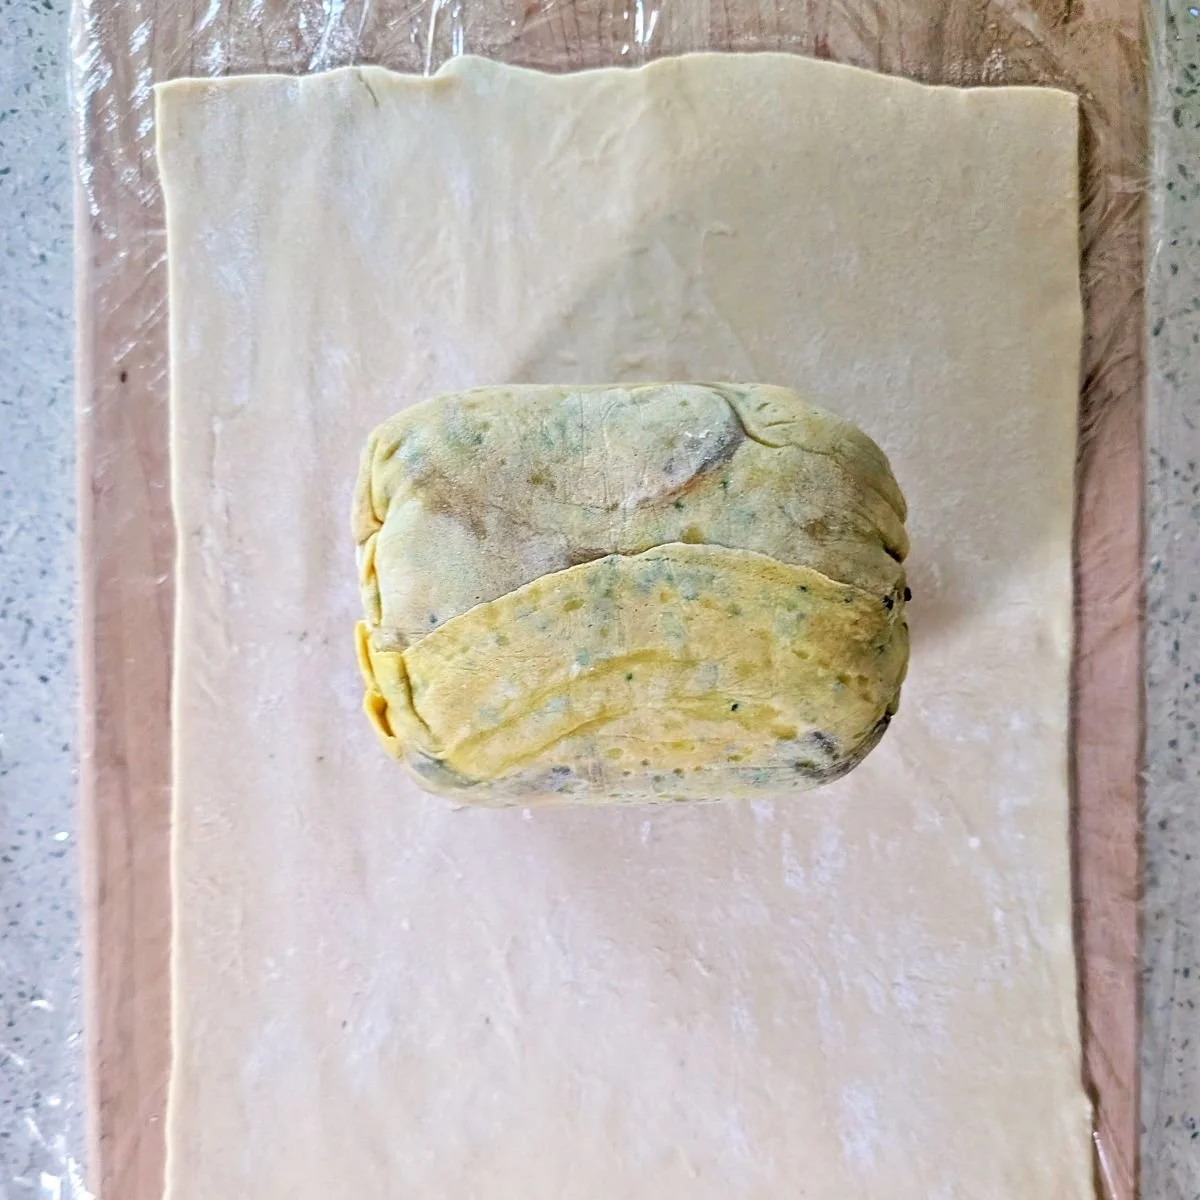
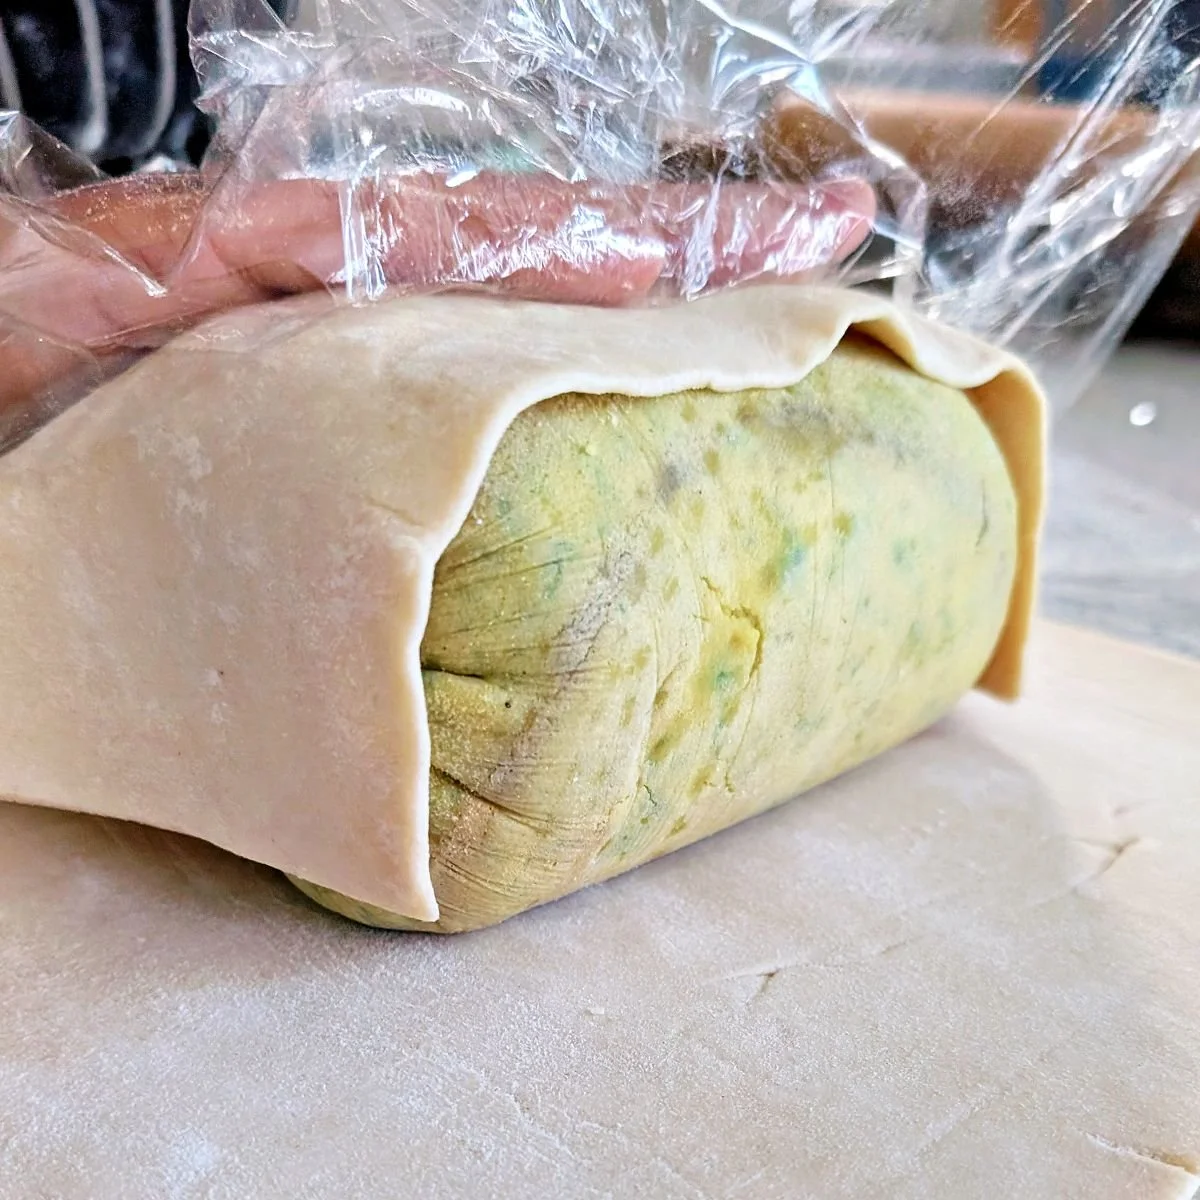
Lay a large piece of plastic wrap on your work surface and transfer the puff pastry onto it. Remove the beef from its plastic wrap and place it in the center of the pastry.
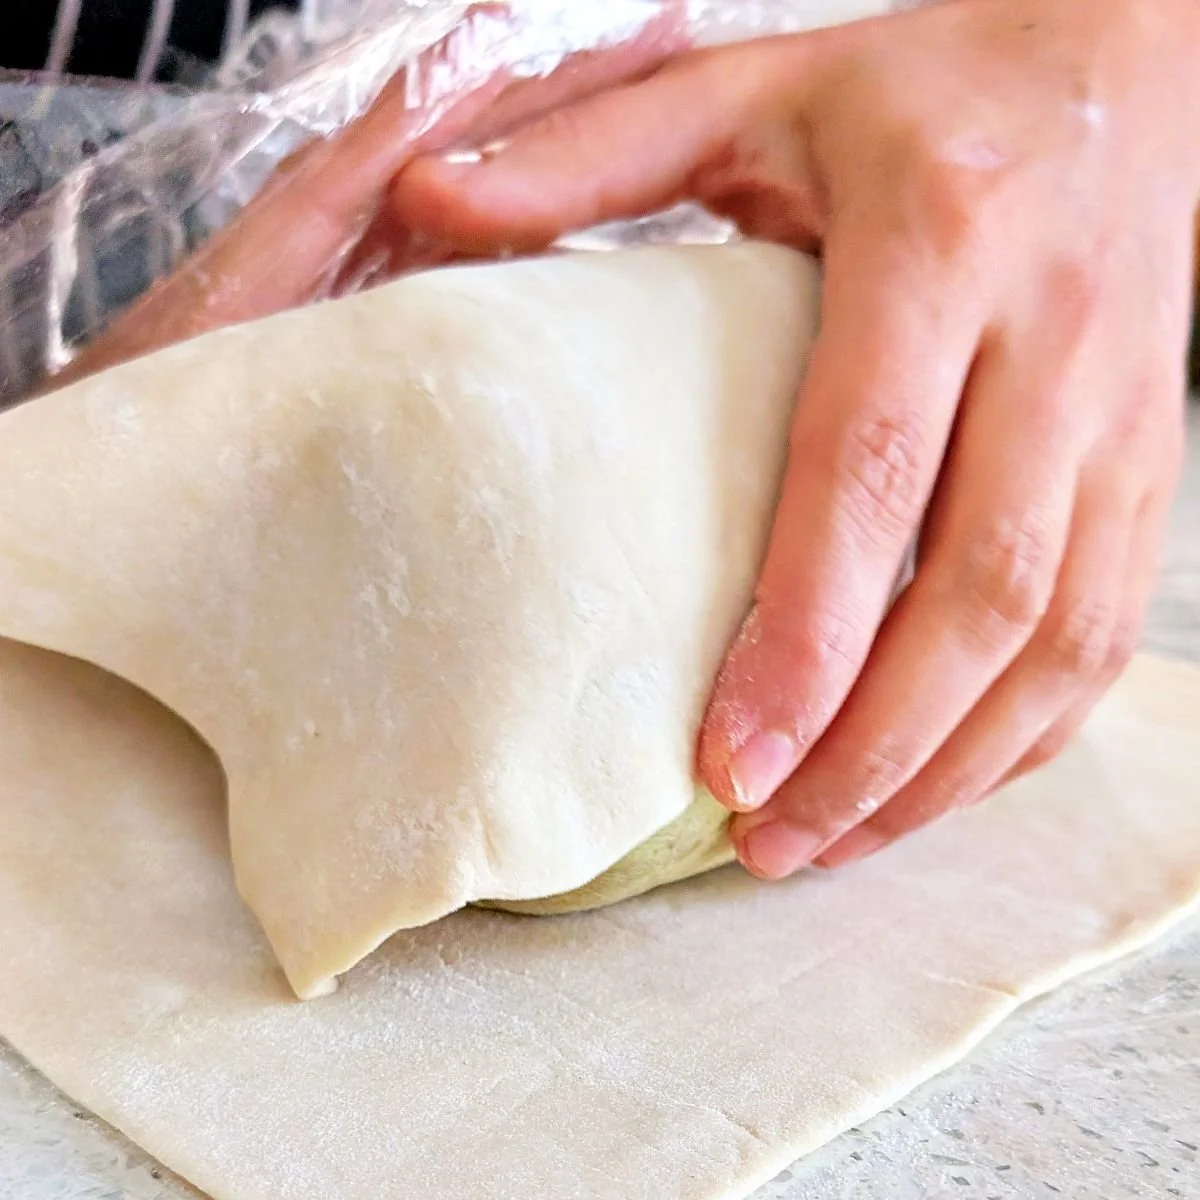
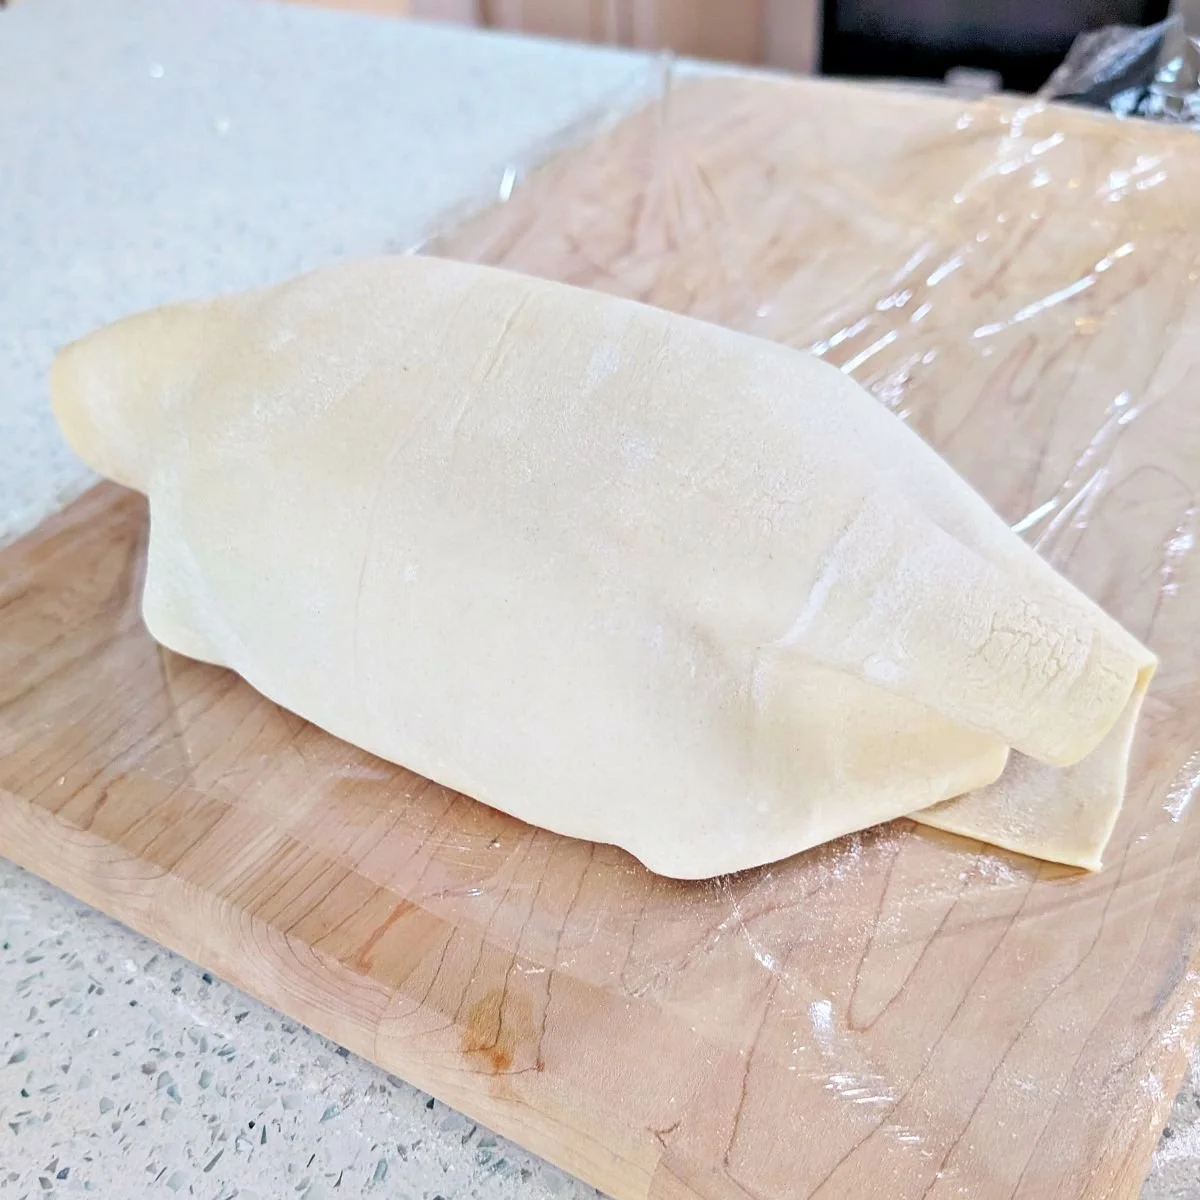
Using the plastic wrap underneath for support, roll the pastry around the beef until it’s completely enclosed with about 1 inch of overlap. If it overlaps by a lot more than 1 inch, trim away the excess pastry.
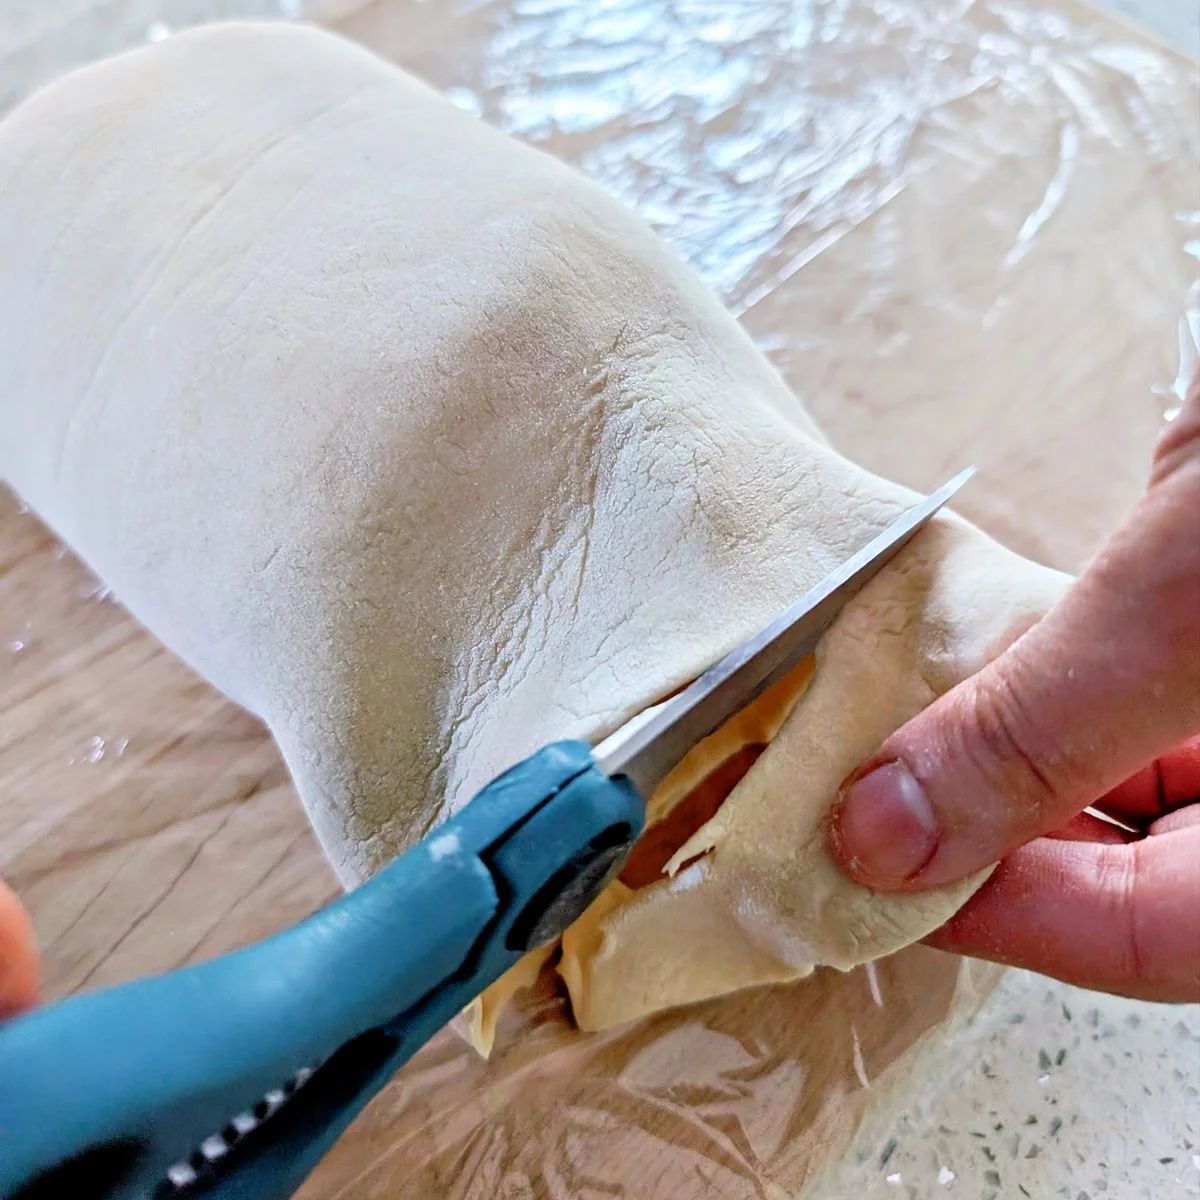
The pastry should extend about 1 inch past each end of the beef. If you have more than that, trim away the excess. I find kitchen scissors easiest for trimming.
Step 9: Seal and shape the beef Wellington
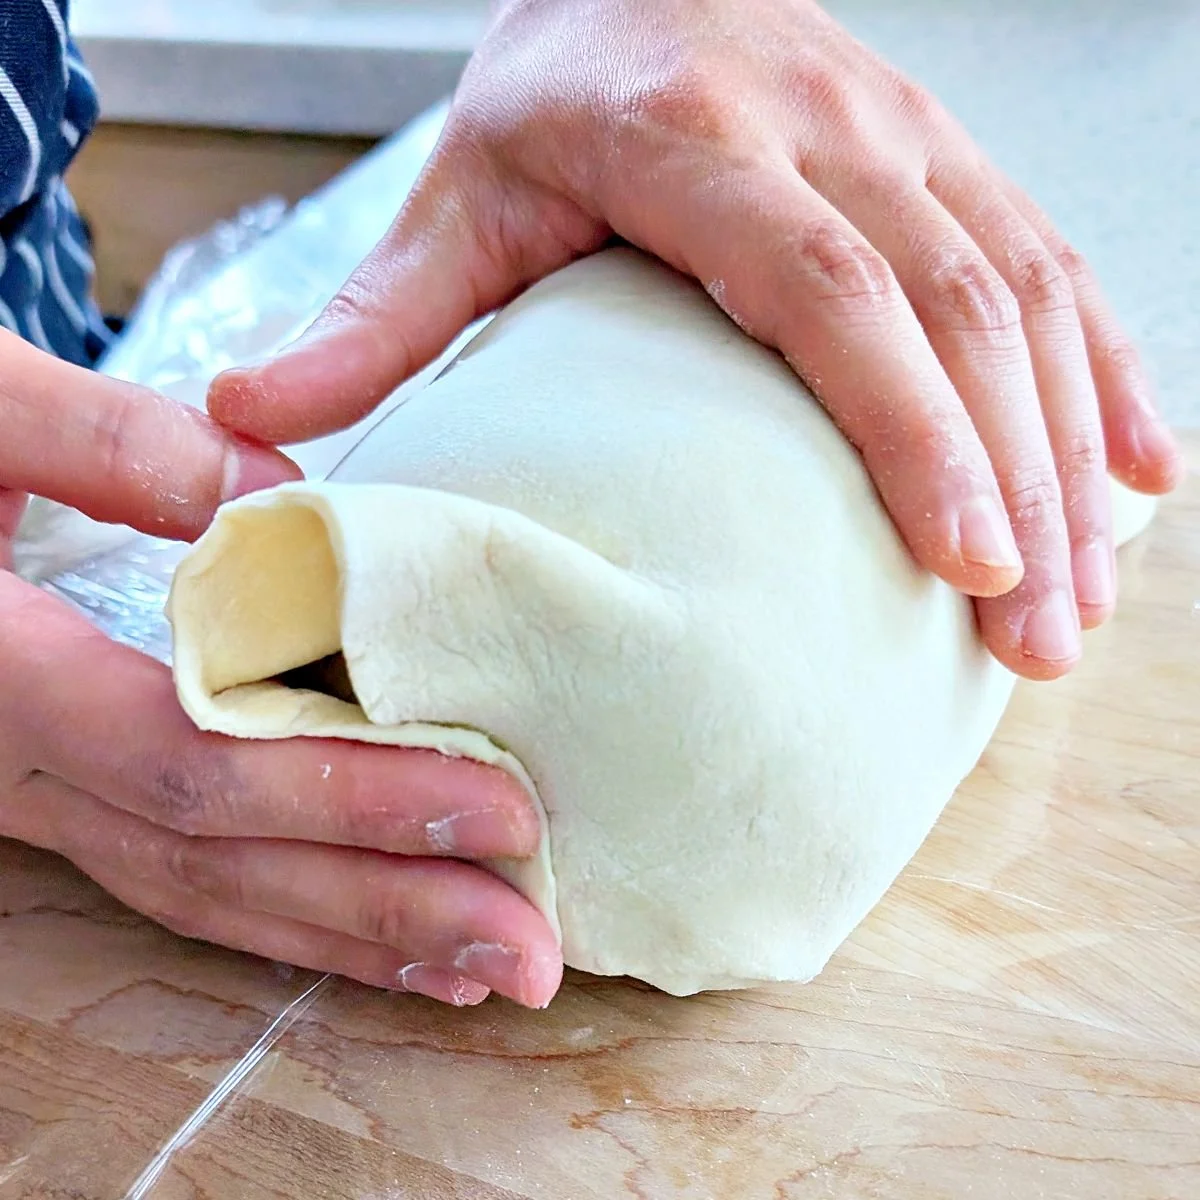
Make sure the beef roll is seam-side down. Then close each end by folding the bottom pastry upward first, tucking in the sides, then folding the top flap down over it.
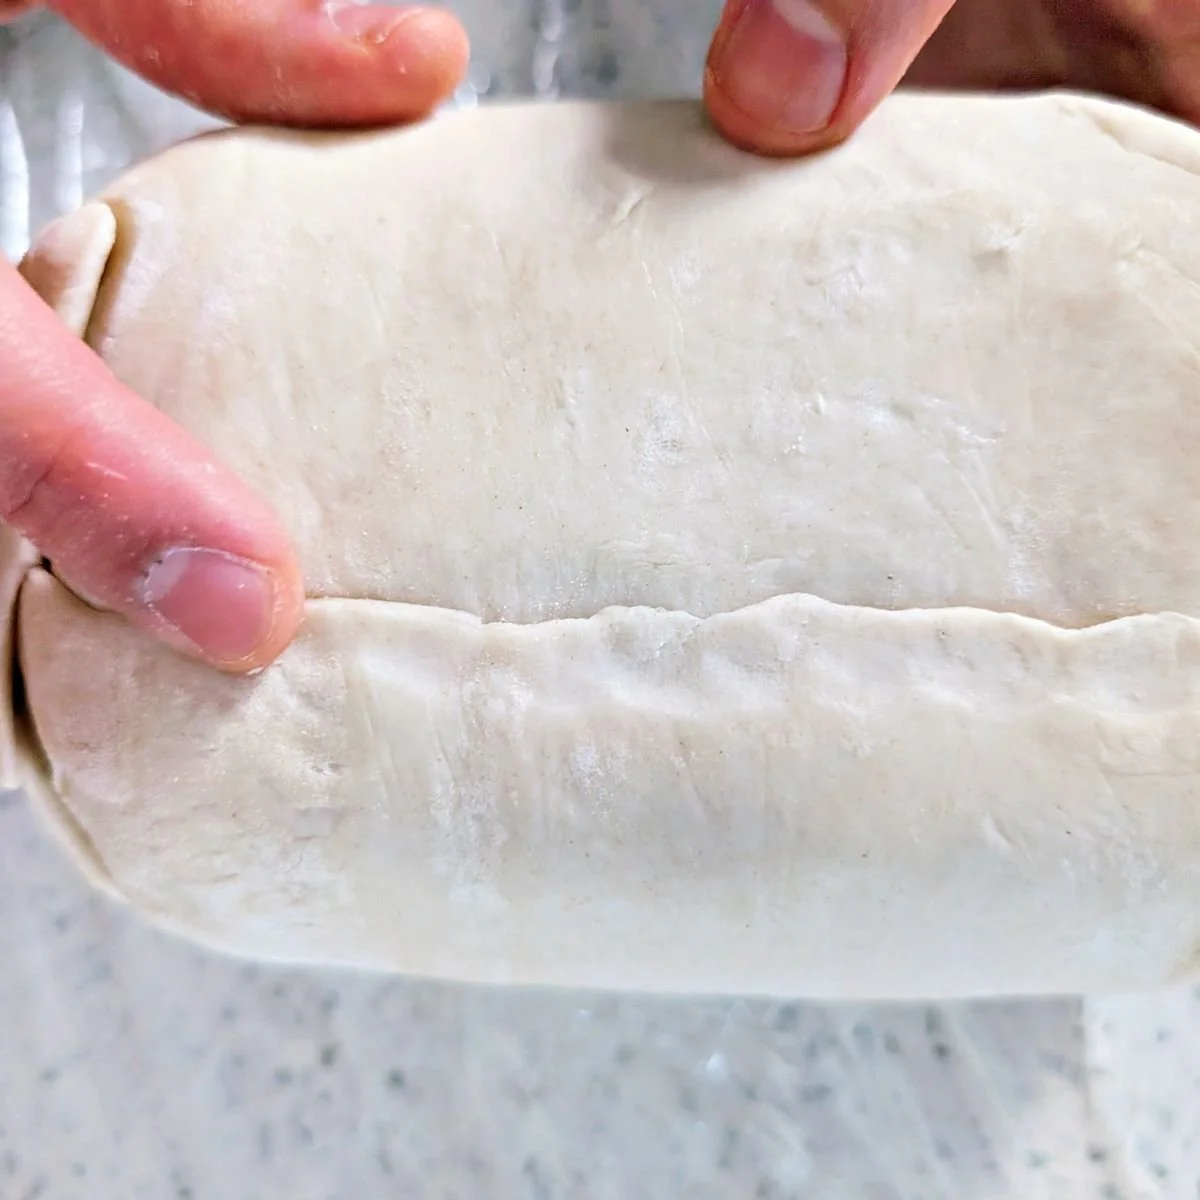
Press the overlapping pastry firmly together to seal it. You don’t need egg wash to make it stick. Press along the seam on the bottom with your fingers as well to make sure it’s sealed.
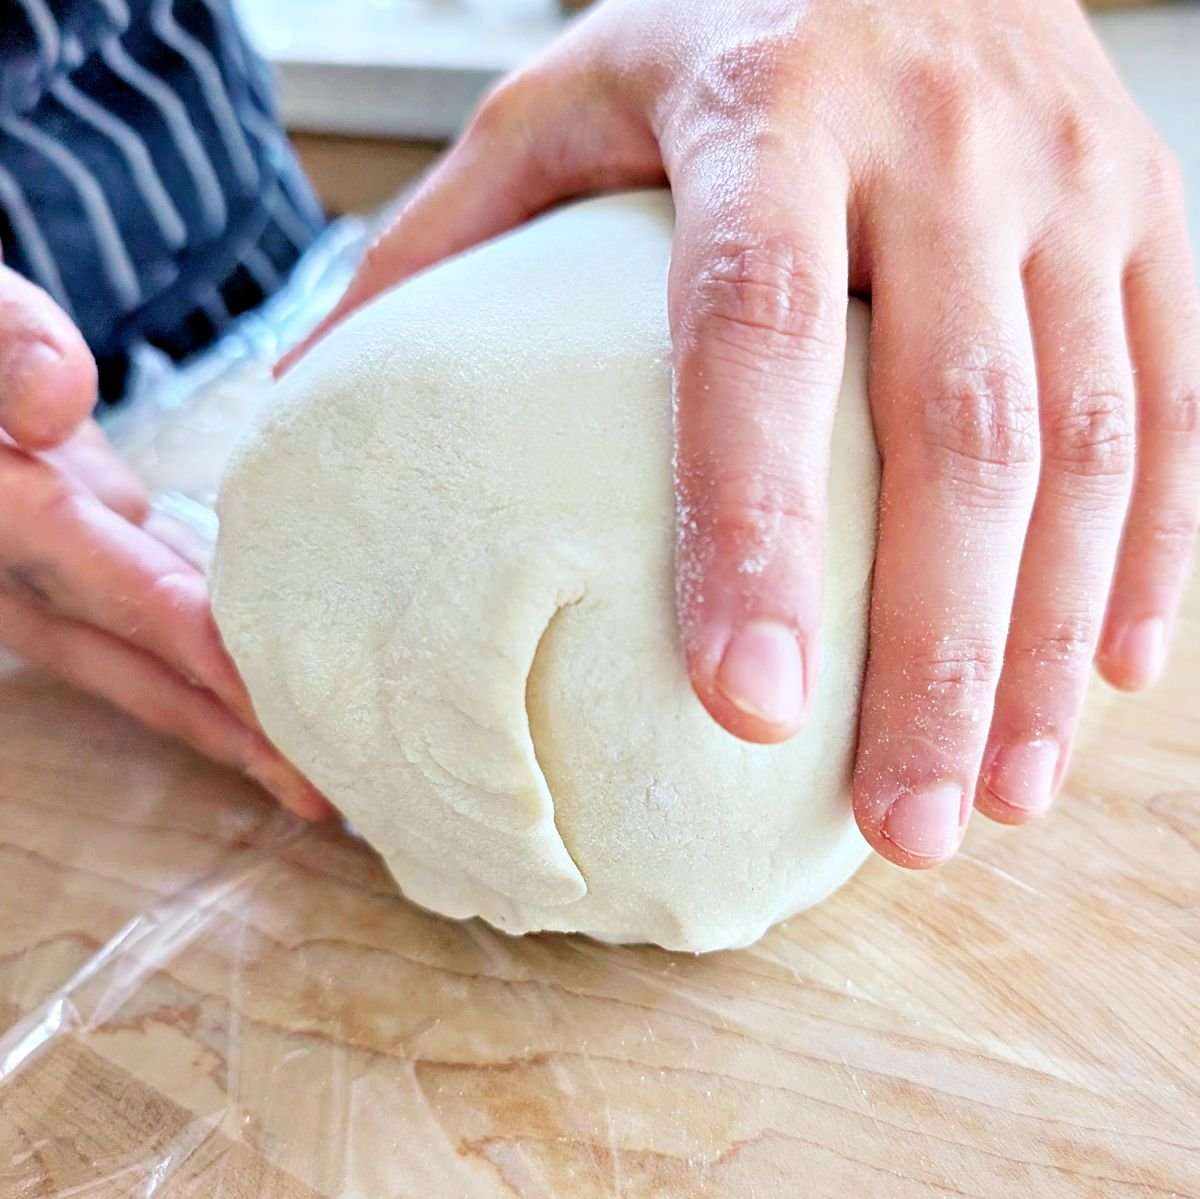
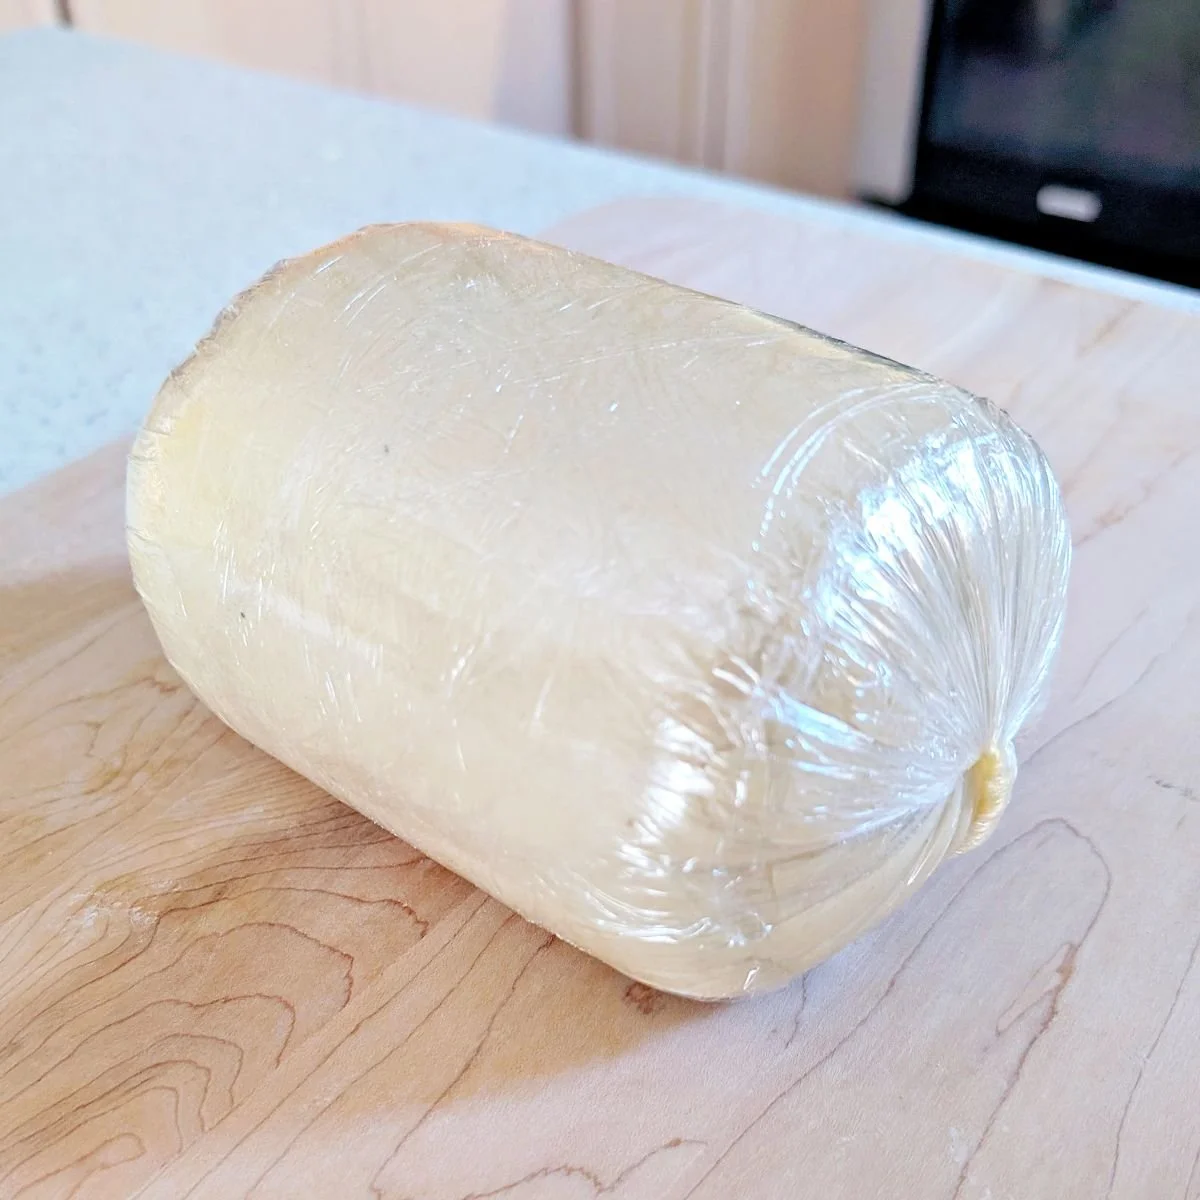
Lay down a piece of plastic wrap and place the Wellington seam-side down. Wrap it tightly, twist the ends, and use the same candy-wrapper shaping technique as before, rolling it against the counter until it feels firm and evenly shaped. Wrap it in a second layer of plastic wrap the same way.
Refrigerate the Wellington seam-side down for at least 1 hour or up to overnight to set the shape.
Step 10: Prep the beef Wellington for baking
About 3 hours before you plan to serve dinner, unwrap the Wellington and refrigerate it uncovered for an hour. This dries any surface moisture from the pastry before baking, which helps it brown and crisp more evenly.
About 2 hours before you plan to serve, turn the oven on to 425°F to preheat, and transfer the uncovered Wellington to the freezer for 30 minutes to firm up the pastry and help it puff better in the oven.
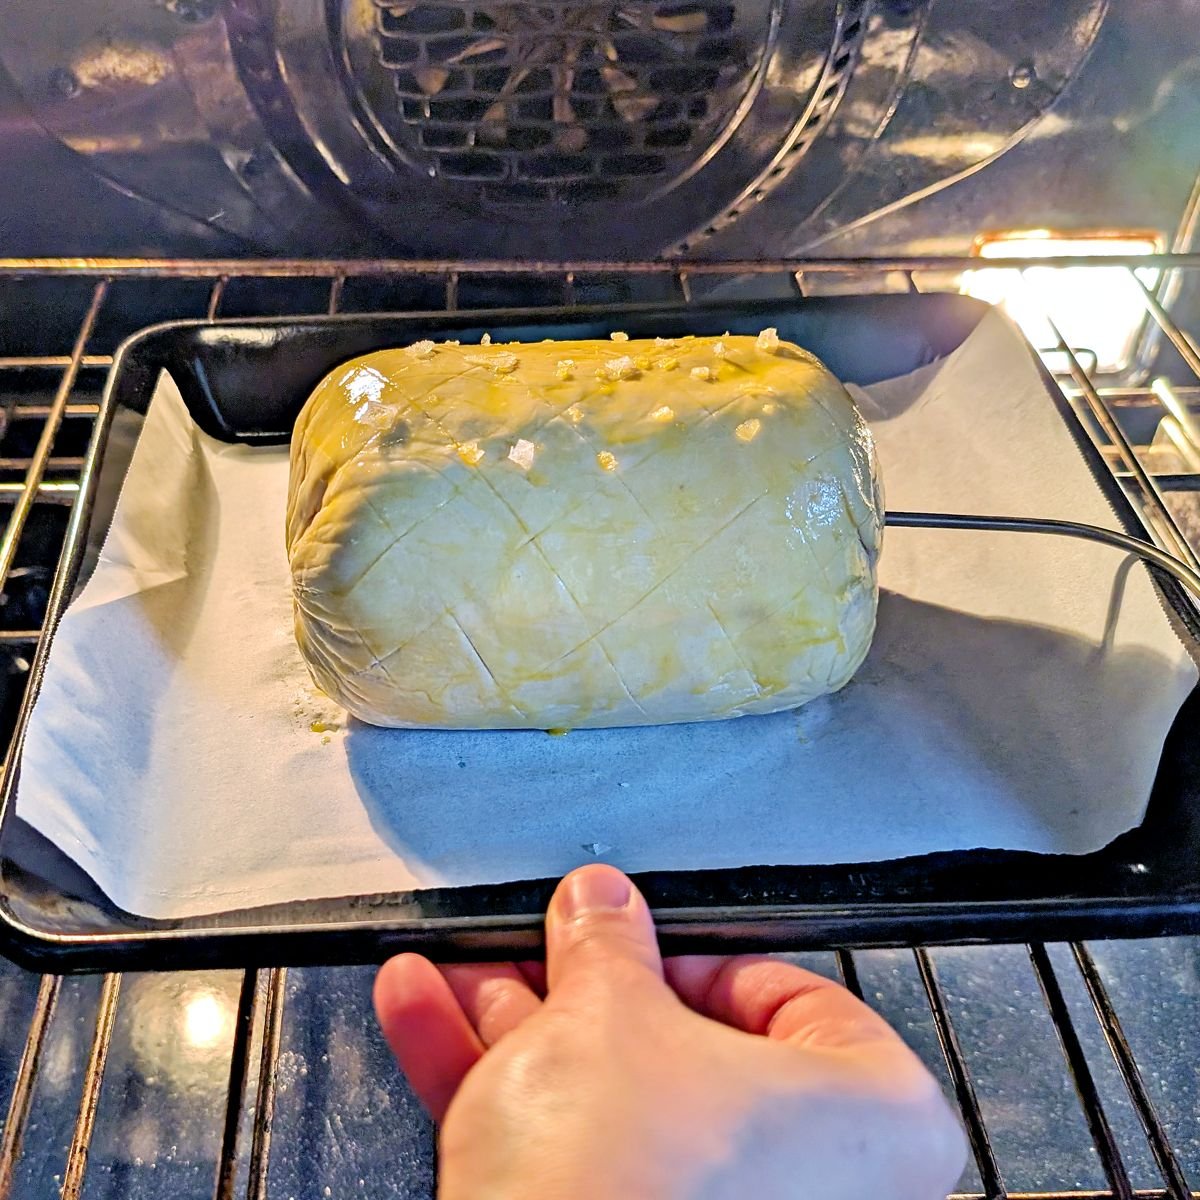
After 30 minutes, place the Wellington seam-side down on a parchment-lined thin aluminum baking sheet. I learned the hard way that a heavy baking sheet can burn the bottom quickly, so stick with a thin one here.
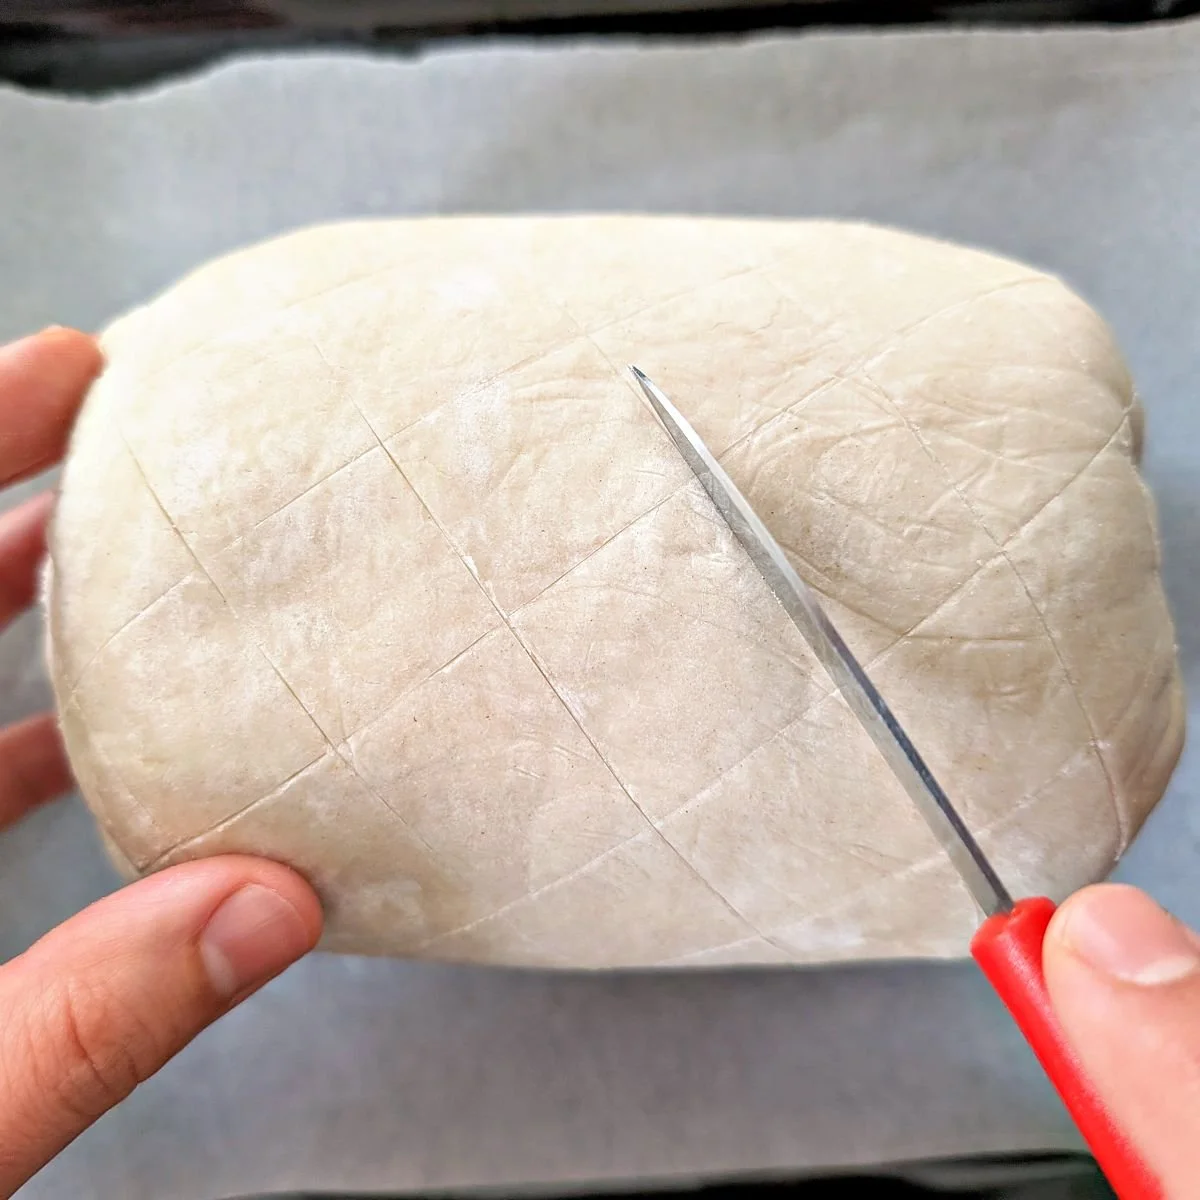
Use a very sharp paring knife to lightly score a decorative pattern into the pastry. You only want to graze the surface enough to leave a visible line without cutting through the pastry. This step is optional, but I think it’s worth it for an impressive presentation, and I find that a crosshatch pattern is the easiest to pull off.
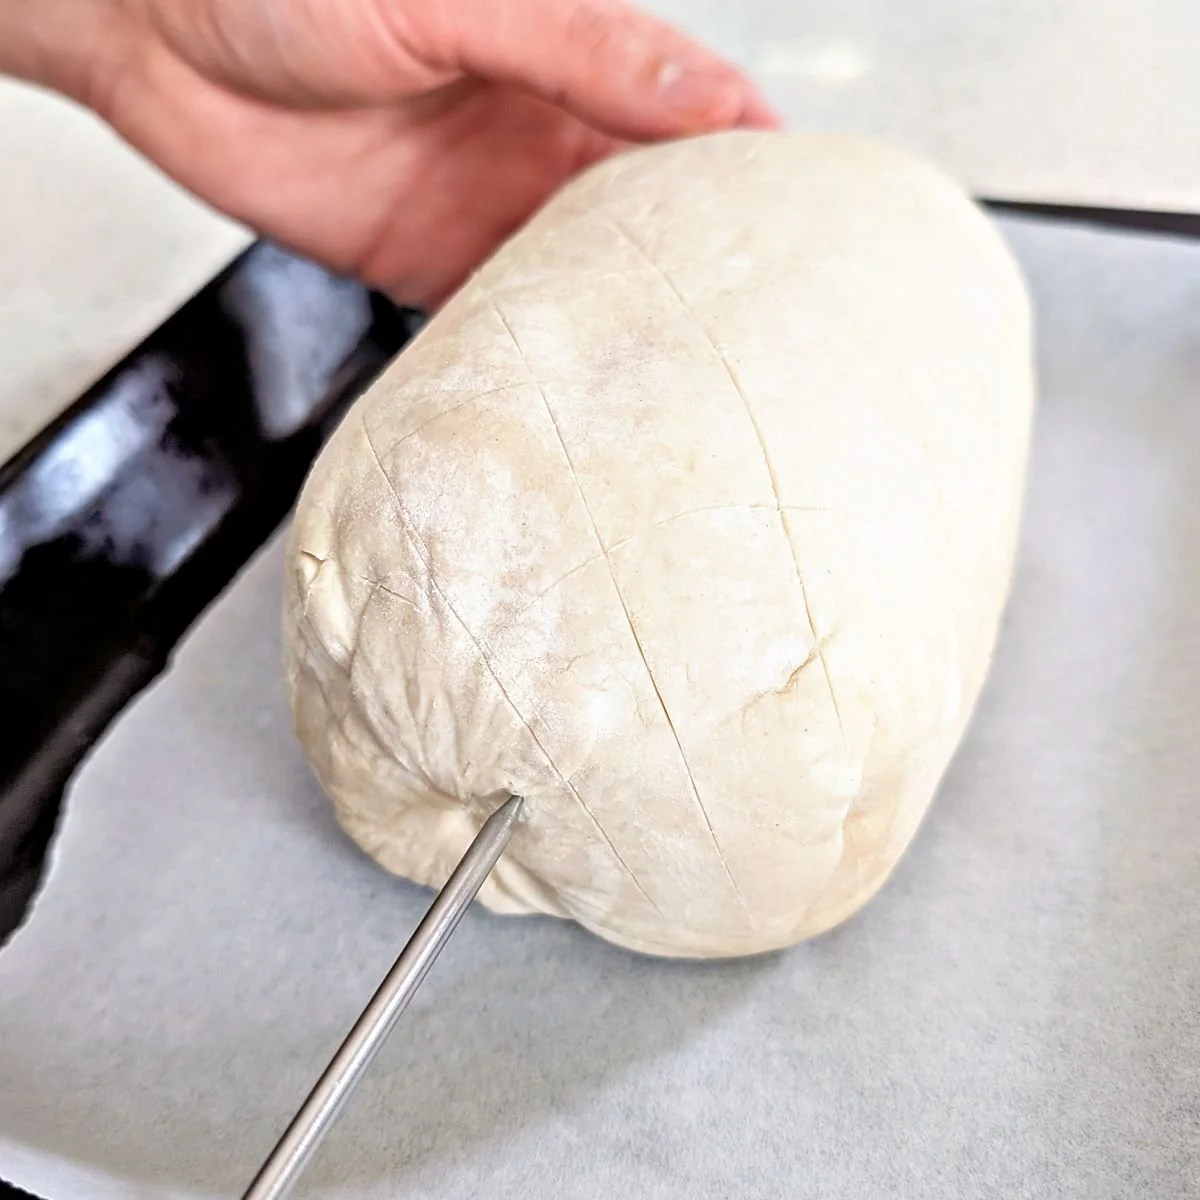
Insert an oven-safe probe thermometer into the center of the beef through one end of the Wellington, making sure the tip reaches the center. Press the pastry tightly around the probe so the Wellington remains sealed.
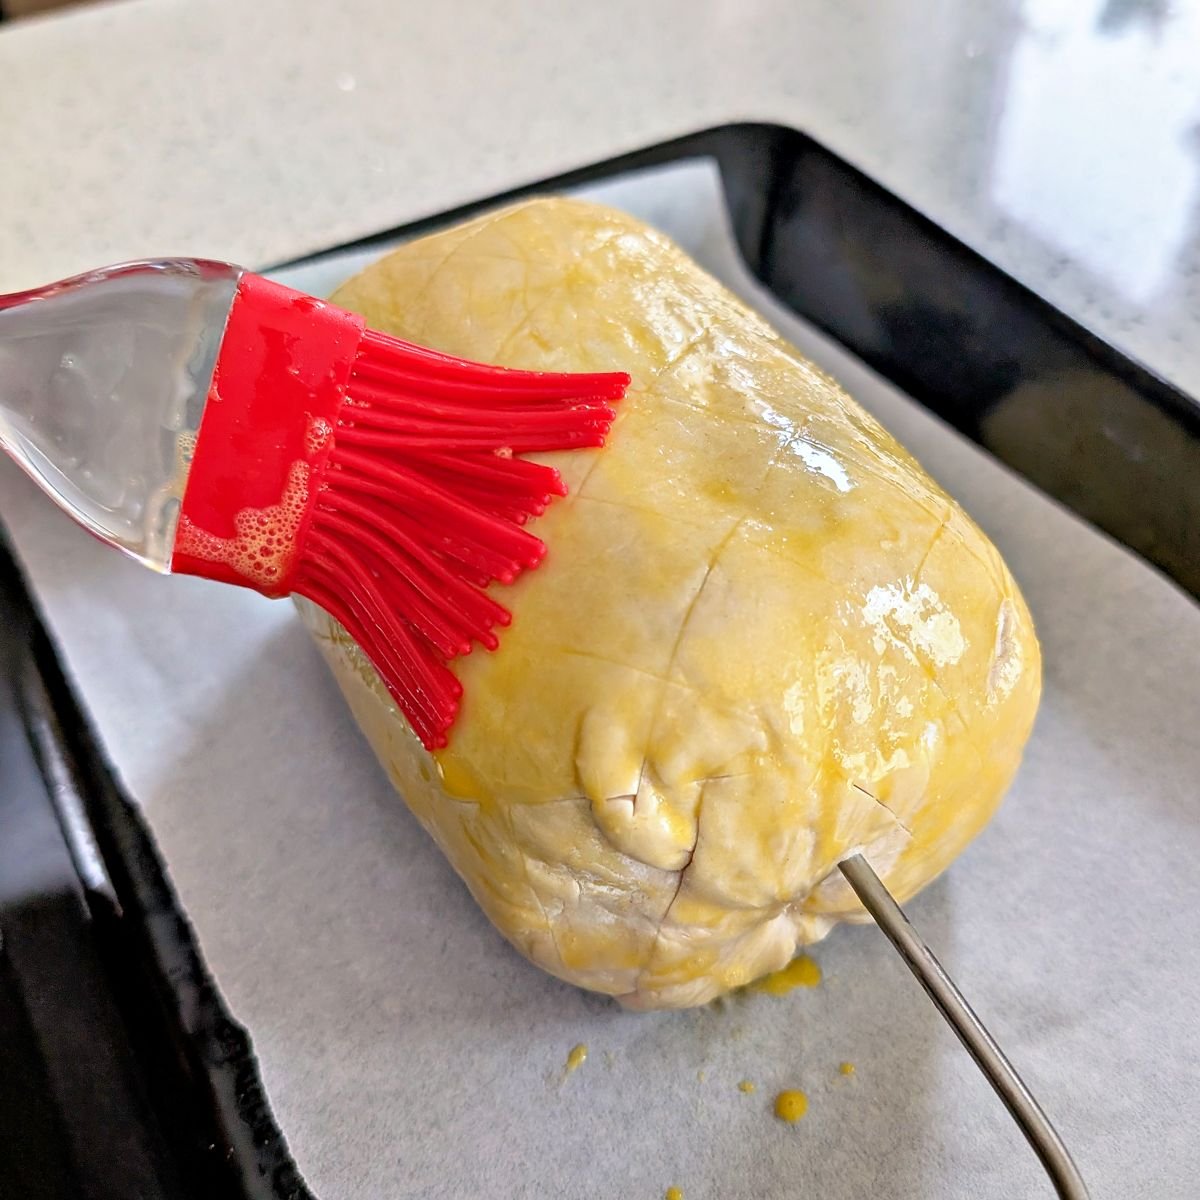
Beat 1 large egg to make the egg wash and brush it evenly over the pastry. Watch that it doesn’t run down and pool underneath, and wipe away any excess if necessary.
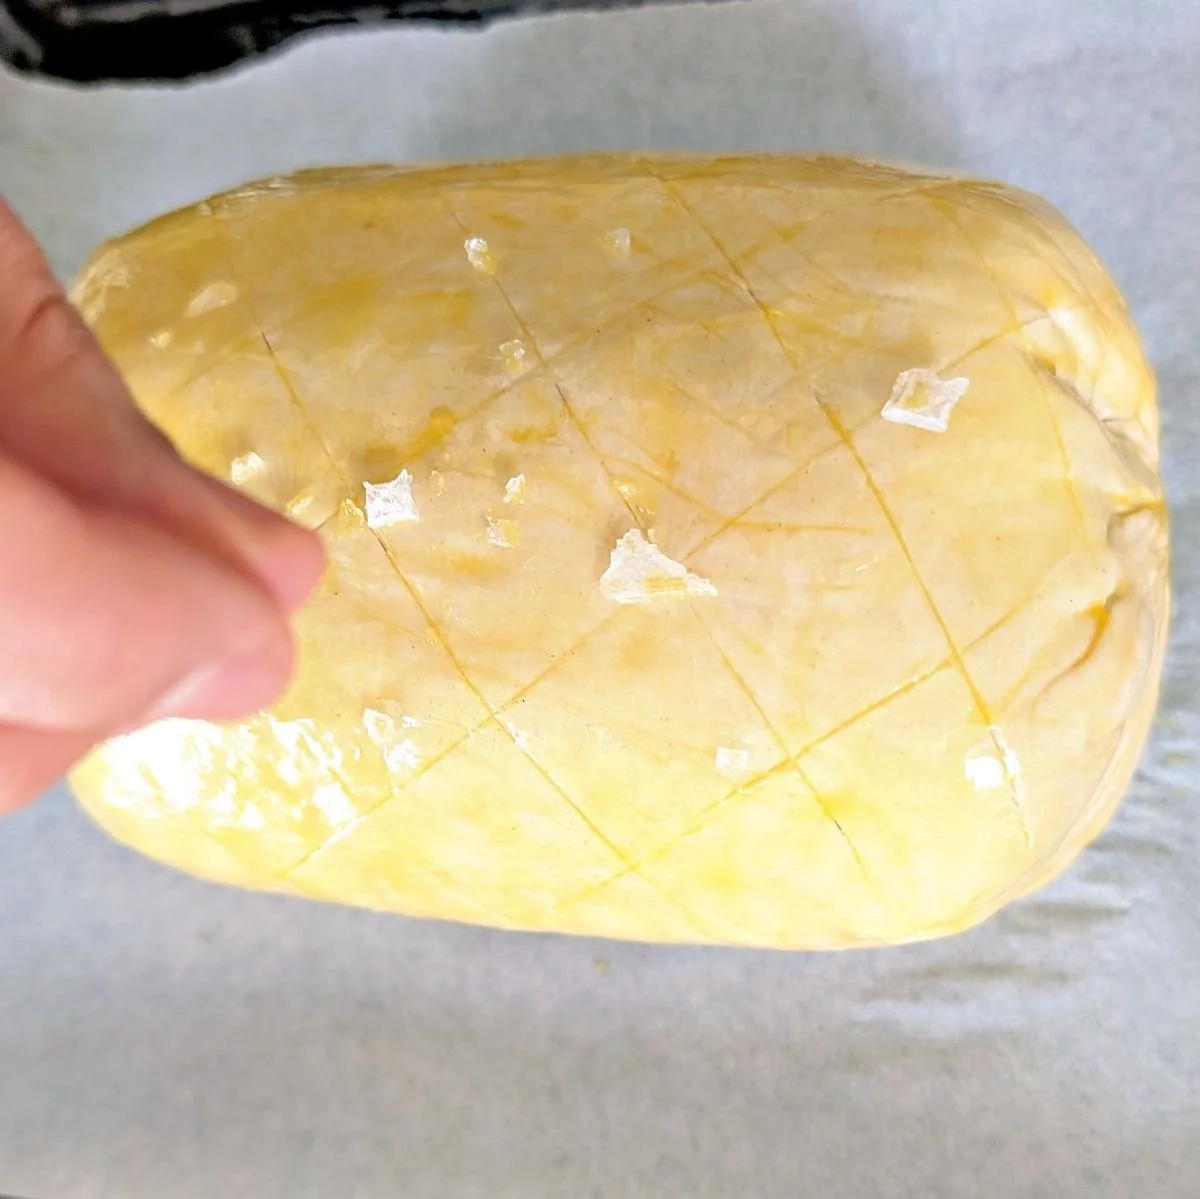
Finally, sprinkle a little flaky sea salt over the top.
Step 11: Bake, rest, and slice
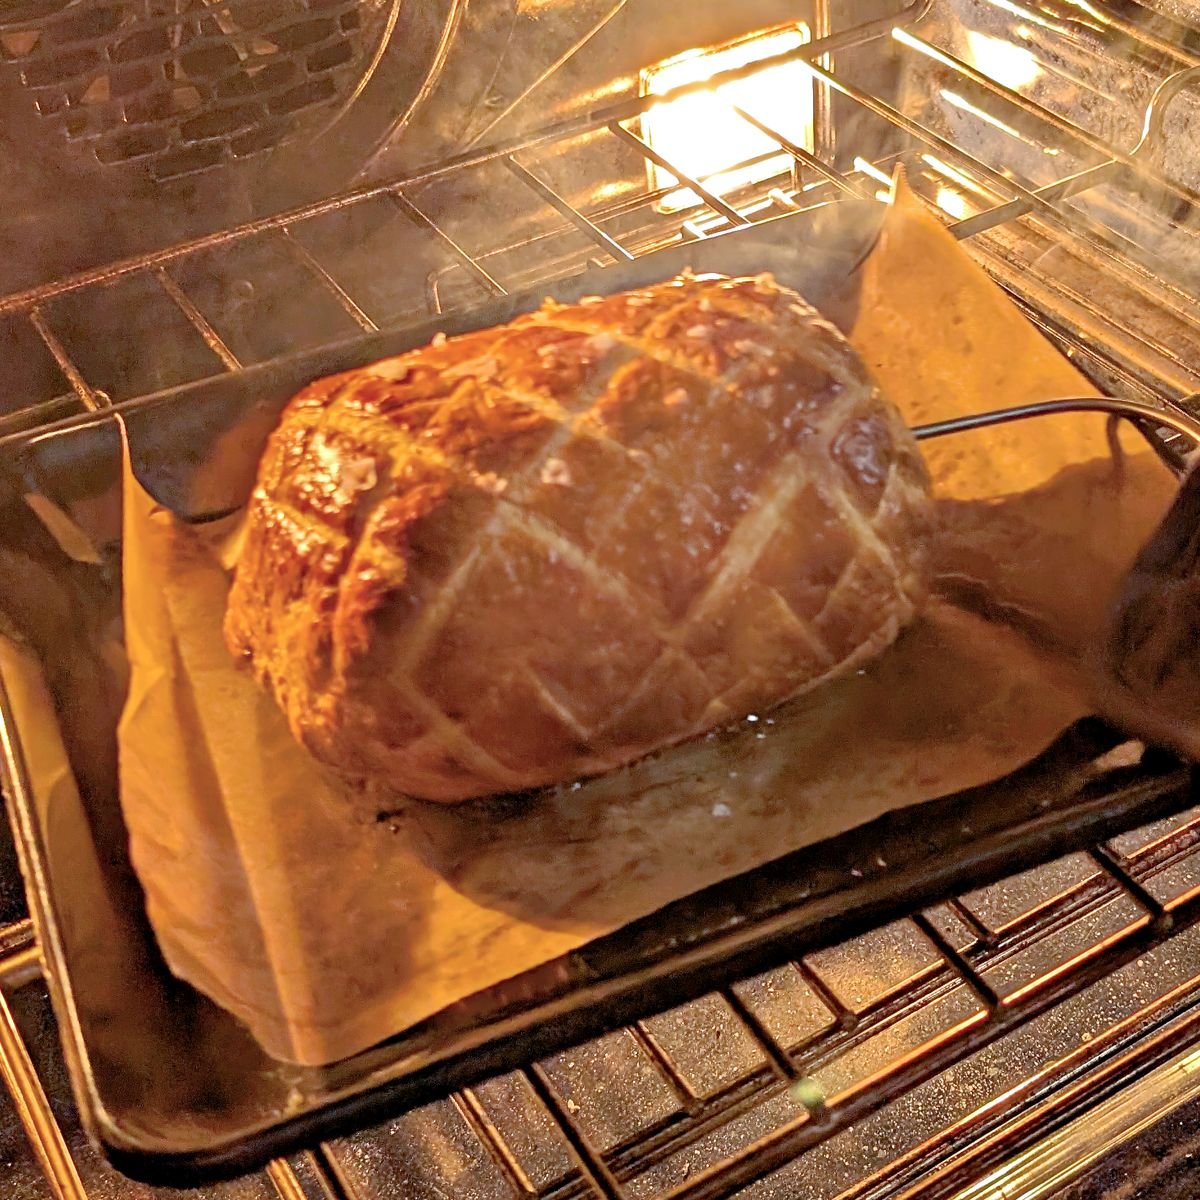
Bake the Wellington at 425°F for 30–40 minutes, rotating the tray halfway through so the pastry browns evenly.
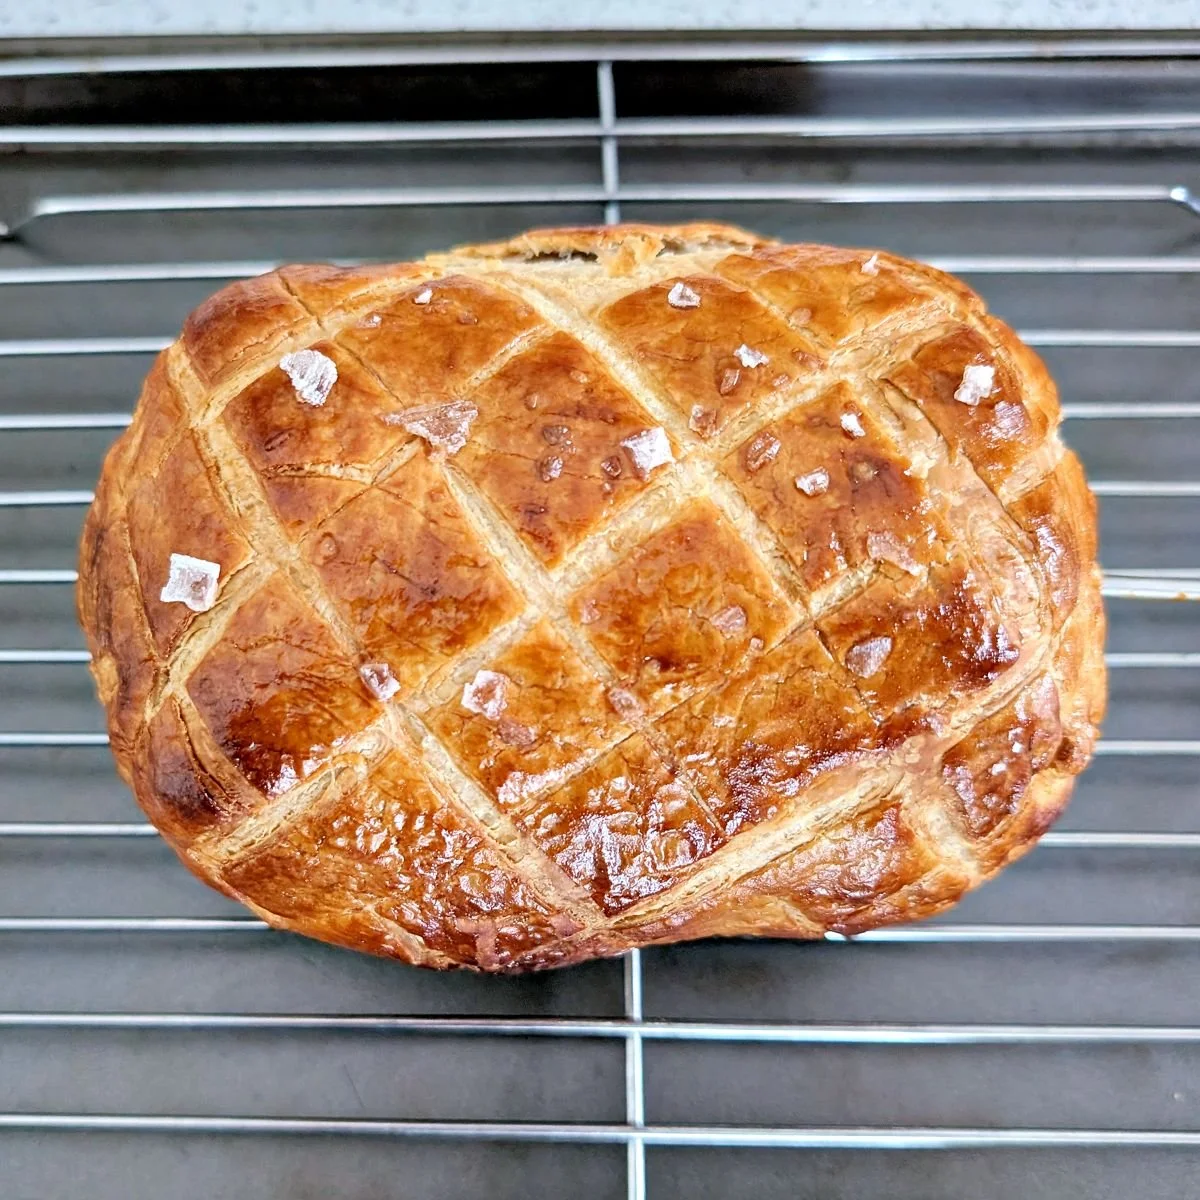
For medium-rare, I pull the Wellington when the center of the beef reaches 90°F. By this point, the pastry should be deeply golden and crisp.
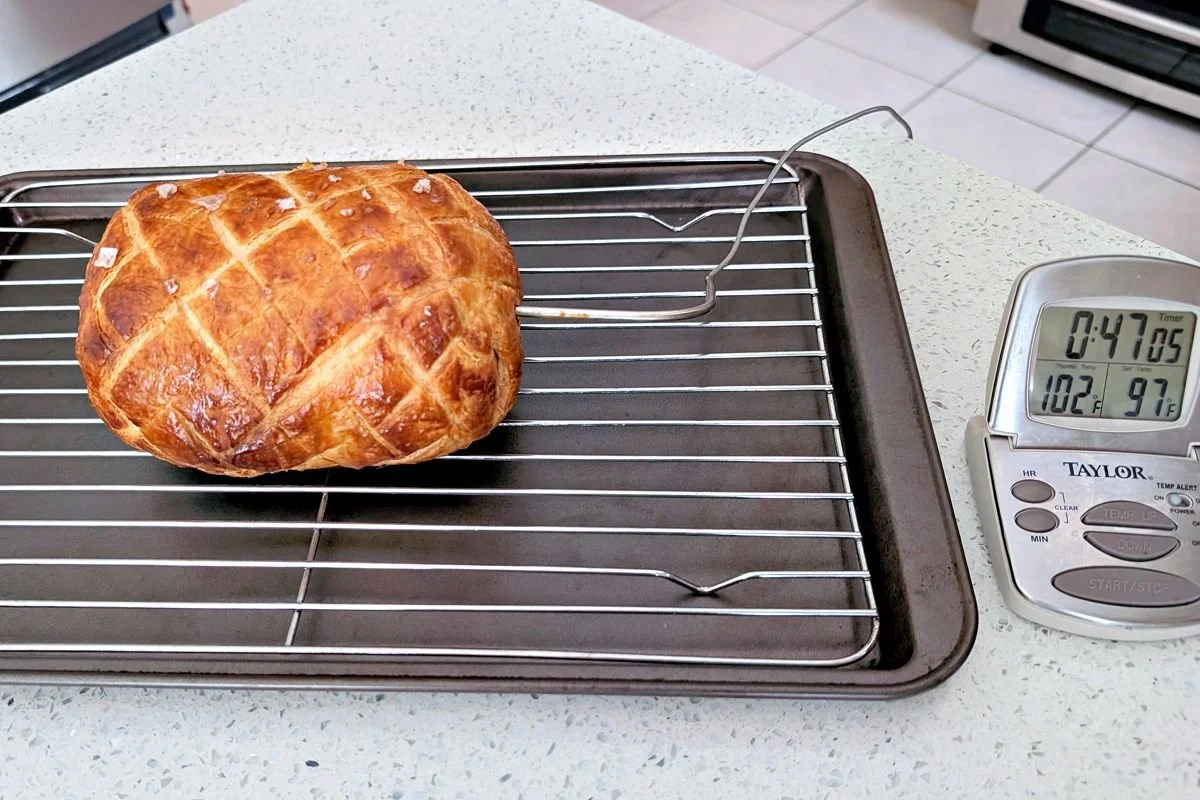
Transfer the Wellington immediately to a wire cooling rack and let it rest for at least 30 minutes, or until the internal temperature stops rising and levels off. The beef is still cooking as it rests.
Don’t panic as you watch the temperature keep climbing. Mine rose from 90°F to around 140°F before leveling off and was still perfectly pink and medium-rare. I’ll explain exactly what’s happening in the carryover cooking section below.
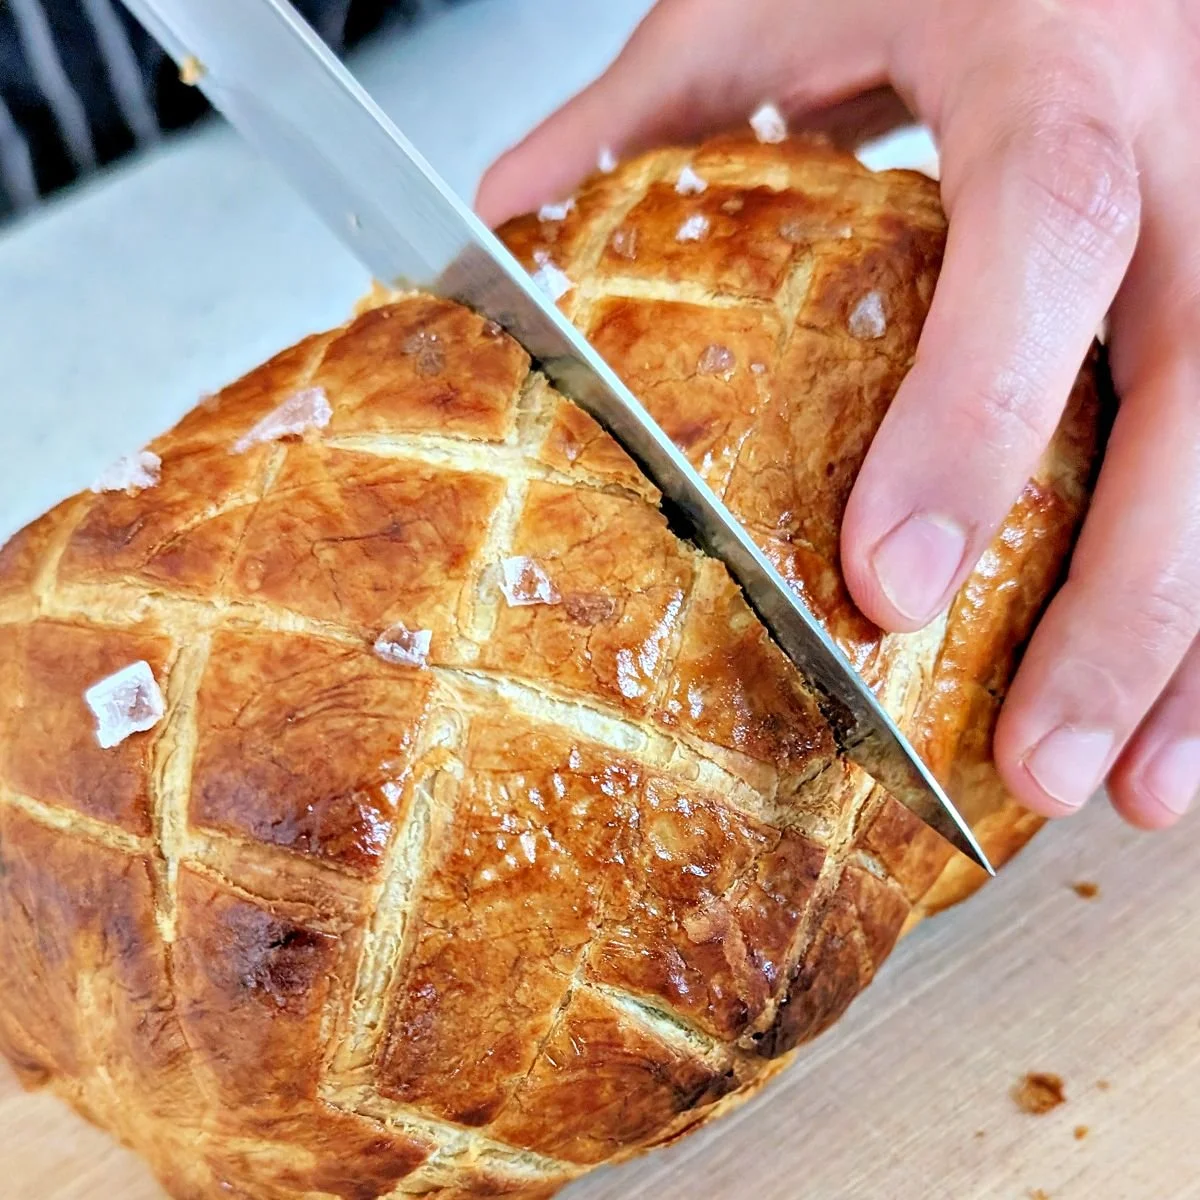
When you’re ready to serve, use a sharp knife to slice the Wellington crosswise through the center. Each half makes a generous portion, so you can cut them in half again for smaller portions if needed. Serve right away.
Make-Ahead Beef Wellington Timeline
This is the exact 3-day timeline I used to make the beef Wellington pictured here, and it’s the way I recommend making this recipe for the best results.
Breaking up the work makes the whole process much less overwhelming and gives the beef, duxelles, and assembled Wellington plenty of time to chill and dry properly.
Day 1: Prepare the beef, duxelles, and puff pastry
Move the puff pastry from the freezer to the refrigerator and let it thaw overnight.
Sear the beef tenderloin, then refrigerate it uncovered overnight until completely cold and dry. If you’re using a paper towel-lined plate instead of a wire rack, change the paper towels as they become wet.
Make the mushroom duxelles, spread it on a paper towel-lined tray or plate, and refrigerate it uncovered overnight until completely cold and dry.
Day 2: Assemble the beef Wellington
Shape the chilled beef tenderloin and freeze for 30 minutes to set the shape. While it freezes, make the crêpes and let them cool completely.
Layer the crêpes, prosciutto, and duxelles, then wrap the beef and freeze for 30 minutes to set the layers.
Wrap the beef in puff pastry, seal and shape the Wellington in plastic wrap, then refrigerate it seam-side down overnight to set the shape.
Day 3: Bake and serve the beef Wellington
3 hours before serving: Unwrap the Wellington and refrigerate it uncovered for 1 hour to dry the surface of the pastry.
2 hours before serving: Preheat the oven to 425°F and transfer the uncovered Wellington to the freezer for 30 minutes.
1 1⁄2 hours before serving: Score the pastry, insert the probe thermometer, brush with egg wash, and sprinkle with flaky sea salt. Bake until the center of the beef reaches 90°F, about 30–40 minutes.
About 1 hour before serving: Transfer the Wellington to a wire cooling rack and let it rest for at least 30 minutes, or until the internal temperature stops rising and levels off. This is a good time to finish or reheat your side dishes and get everything else ready for dinner.
When you’re ready to eat: Once the Wellington has finished resting, leave it whole until you’re ready to serve. It stays warm surprisingly well with all those layers insulating the beef, so you have a little breathing room here. Slice when ready and serve right away.
Can I Make Beef Wellington in 2 Days?
Yes. You can complete both Day 1 and Day 2 of the timeline on the first day, then refrigerate the fully assembled Wellington overnight. Just make sure your puff pastry is thawed before you start, either overnight in the refrigerator or for about 2 hours on the counter. Then on the second day, follow the Day 3 baking and serving schedule above.
Understanding Carryover Cooking
Pulling a beef Wellington from the oven at 90°F might sound a little crazy at first. At that temperature, the center of the beef is just starting to get warm, and you might be thinking, how is this possibly going to reach medium-rare just sitting on the kitchen counter?
But there’s a reason it’s called carryover cooking. The beef doesn’t stop cooking the second it leaves the oven. This happens with anything you cook, but with something as well insulated as a beef Wellington, the effect is much more dramatic.
How Carryover Cooking Actually Works
It really just comes down to heat transfer. The outside of the Wellington gets hot much faster in the oven than the center does. By the time the center of the beef reaches 90°F, the pastry is deeply browned and crisp, the crêpe, prosciutto, and duxelles are piping hot, and the outside of the beef is much hotter than the middle.
When you take the Wellington out of the oven, all that heat keeps working its way from the hotter outside toward the cooler center as the temperatures begin to equalize. At the same time, some of that heat escapes into the air.
The temperature in the center is going to continue to rise, which means the beef is still cooking. Eventually, the temperature stops climbing, levels off, and then starts coming back down as the whole Wellington cools.
Why the Temperature Rises So Much in Beef Wellington
This is where all those layers around the beef make a huge difference. If you rest a steak on a plate, it’s exposed to the air and can lose heat pretty quickly. You might only see the center rise another 10–20°F as it rests.
With beef Wellington, the beef is wrapped in so many ingredients that it’s basically sitting inside a little insulated package. All that insulation holds onto a lot of heat, giving it more time to work its way toward the center.
I saw just how dramatic this was when I was testing the recipe. The first time, I pulled my Wellington at around 100°F, thinking I was playing it pretty safe. It kept climbing as it rested and eventually reached around 150°F.
So the next time, I pulled it at 90°F. I even pointed a fan at it while it rested because I wanted to see if I could slow down the carryover cooking. The fan basically did nothing, and the temperature still climbed to around 140°F before it finally leveled off.
That’s about a 50°F rise after the Wellington has already left the oven!
Why 140°F Is Still Medium-Rare
Now, if you know your steak temperatures, you might be looking at 140°F and thinking, isn’t that medium? Normally, yes. But there’s a big difference between cooking a steak to 140°F over direct heat and watching the very center of a Wellington briefly peak around 140°F during a long rest.
By the time the center gets there, the Wellington has been out of the oven for quite a while and is already losing heat. The center is still slowly getting warmer, but it’s happening through that gentle, gradual transfer of leftover heat rather than sitting in a hot oven.
The Wellington that reached around 140°F was still beautifully pink and medium-rare when I cut into it. The one that reached around 150°F was starting to get a larger gray ring and wasn’t as deeply pink in the center, but it was still much pinker than I would normally expect at 150°F.
What I’ve learned from all of this is that resting is really the final stage of cooking. Pulling my Wellington at 90°F gives me a safe margin of error while accounting for the insane amount of carryover cooking that happens from the many insulated layers.
And I wouldn’t worry too much about exactly where the temperature peaks during the rest. A few degrees in either direction isn’t going to make or break your Wellington.
How to Avoid Common Beef Wellington Mistakes
How to prevent a soggy bottom
A soggy bottom usually comes down to too much moisture getting trapped inside the Wellington. That’s why I cook the mushroom duxelles until completely dry, chill and dry the seared beef, and use both prosciutto and a crêpe between the beef and puff pastry.
Once the Wellington is baked, move it to a wire rack right away instead of letting it sit on the hot baking sheet, where steam can collect underneath. And give it enough time to rest, because if juices start leaking out when you slice, they’ll soak into the pastry.
How to keep the bottom from burning
I learned this one the hard way. The first time I baked my Wellington on a heavy steel baking sheet, I didn’t realize the bottom had burnt until after it rested and I sliced into it. Thankfully, I was able to trim off the burnt layer and still enjoy it, but it taught me an important lesson about baking puff pastry.
A heavy baking sheet holds onto a lot of heat, and much of that heat transfers directly into the buttery puff pastry, causing the bottom to brown very quickly. I found that a thin aluminum baking sheet didn’t brown the pastry nearly as fast.
If you’re using a heavier baking sheet, carefully lift the Wellington when you rotate it halfway through baking and check the bottom. If it’s already getting too dark, transfer it to a wire rack set over the baking sheet for the rest of the bake. I had to do this once, and it worked perfectly.
I wouldn’t start the Wellington on the wire rack, though, because the soft pastry can sink into the gaps as it bakes.
What to do if the pastry is getting too dark before the beef is ready
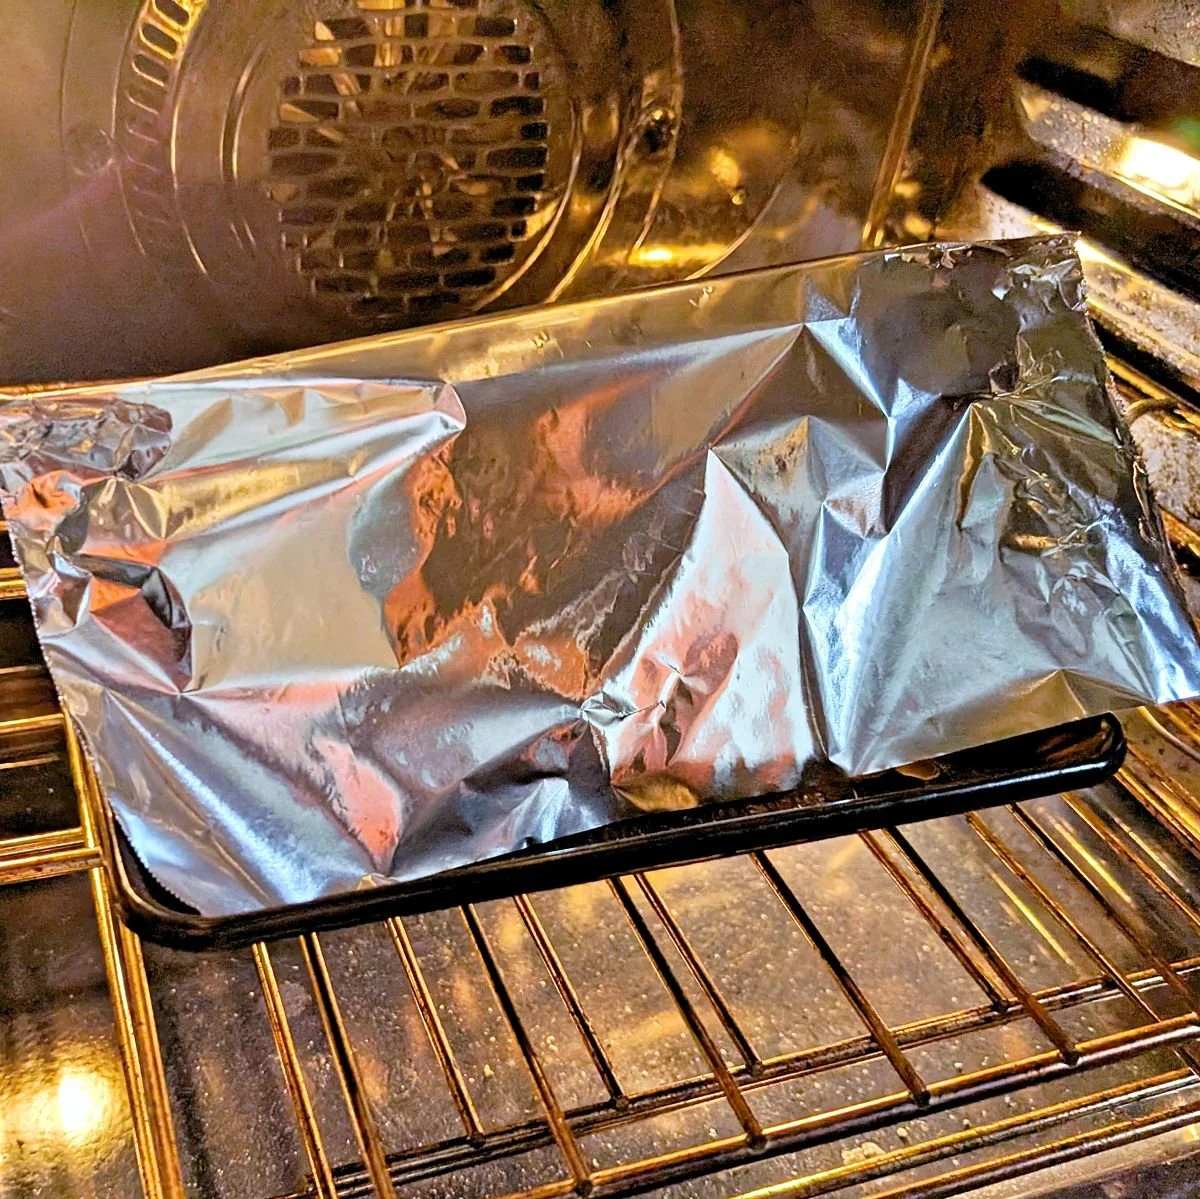
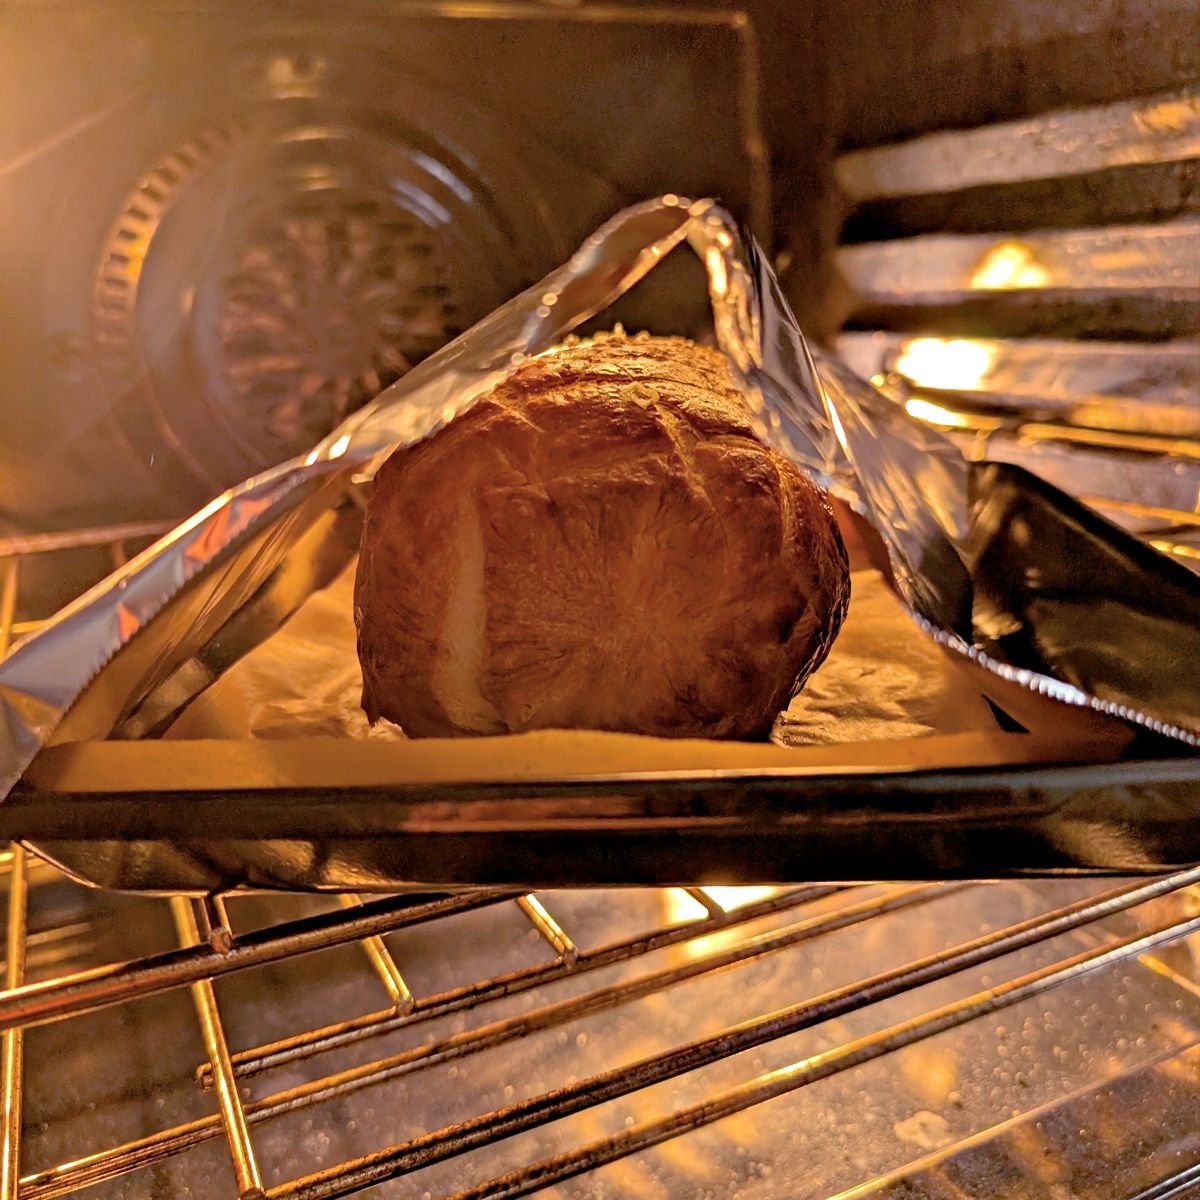
If your puff pastry is already deeply browned but the center of the beef hasn’t reached 90°F yet, loosely tent the top of the Wellington with aluminum foil and keep baking. The foil protects the pastry while giving the beef more time to cook.
I had to do this when I tested the Wellington at 450°F. The pastry was getting too dark before the beef was ready, so I covered the top with foil and let it finish cooking. It’s also one of the reasons I settled on 425°F for this recipe, which browned the pastry much more gradually.
Beef Wellington Ingredient Swaps
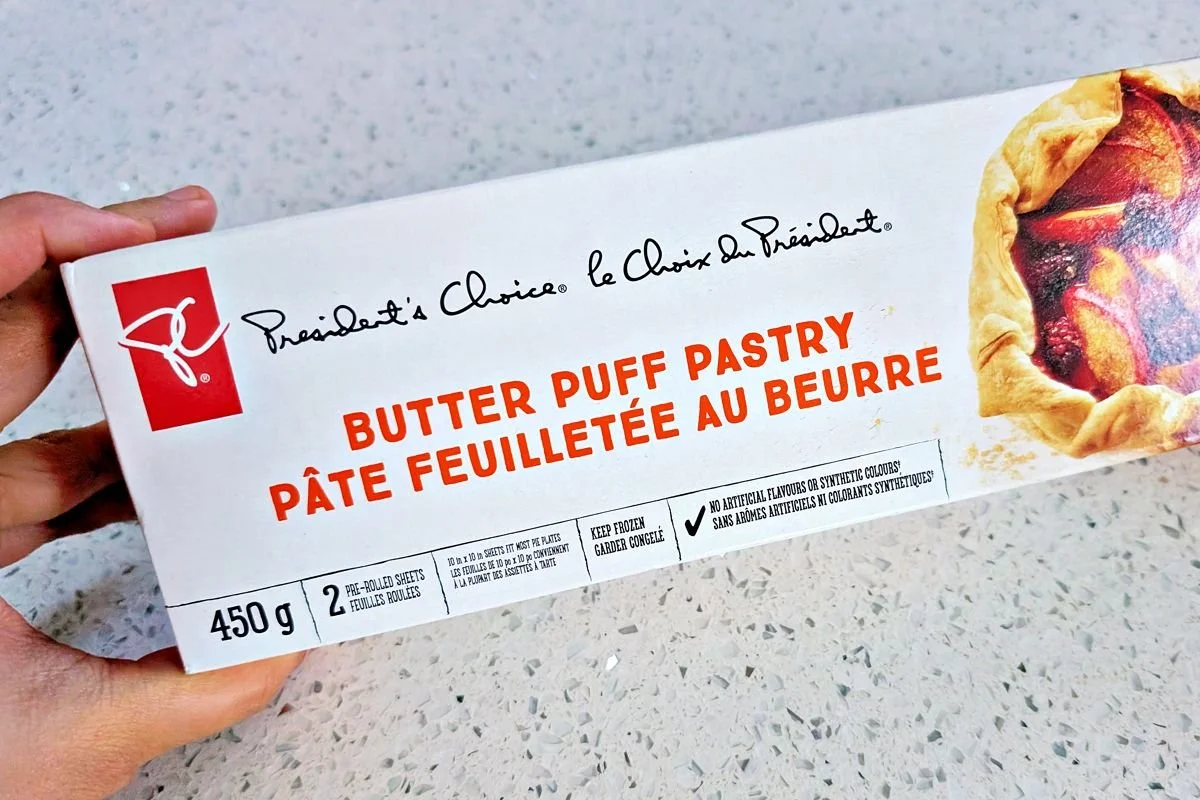
Puff pastry: I prefer all-butter puff pastry because it has the best flavor, and store-bought is perfectly fine and what I used for the Wellington pictured here.
Puff pastry made with other fats will still puff and work for Beef Wellington, but I don’t think the flavor is nearly as good as real butter. Look for butter in the ingredient list or on the front of the package to know which kind you’re getting.
Beef tenderloin: If you’re trimming a whole beef tenderloin, you can use the tête, or thicker head end, instead of the center-cut Chateaubriand. I’ve done this myself and couldn’t notice a difference in the finished Wellington.
For testing this recipe, I got three 14-ounce Chateaubriands and one 14-ounce portion from the tête out of a whole tenderloin. I made four Wellingtons with them, and they all turned out beautifully.
Sherry: I prefer medium sherry here because I think it has the best flavor with the mushrooms. Fino sherry will work too, but the flavor will be lighter. You can also use cognac, brandy, or a dry white wine, all of which I’ve used when cooking duxelles. I would avoid sweet sherry here.
Prosciutto: Serrano ham is an easy swap for prosciutto, and I’ve used it successfully before. I’ve also made Beef Wellington with dry-cured capicola in restaurants—it worked really well and gave it an even deeper savory flavor.
Dijon mustard: Grainy or Pommery mustard both work well here, and I’ve used both before. I would skip regular yellow mustard because its flavor is much stronger and can overpower the other ingredients.
How to Store and Reheat Leftovers
Fridge: Let the leftover Beef Wellington cool, then transfer it to a large storage container lined with a paper towel to help absorb excess moisture. I left the lid slightly cracked at first to keep condensation from building up and softening the pastry, then closed it once everything was cold.
To reheat: Take the Wellington out of the refrigerator at least half an hour before reheating and leave it uncovered to take some of the chill off. Place the pieces on a baking sheet, loosely cover them with foil, and reheat in a 400°F oven just until the beef is warm in the center. You can use your oven-safe probe thermometer to keep an eye on the internal temperature without repeatedly opening the oven.
When I reheated my leftovers, the pastry crisped back up surprisingly well, but the beef did go from medium-rare to somewhere around medium plus. It was honestly still delicious, especially with some extra gravy on top.
For best results: If you know you’ll have leftovers, leave the Wellington in the largest pieces possible rather than slicing everything ahead of time. Mine was already sliced, so there was a lot more exposed surface area and the beef naturally cooked further as it reheated.
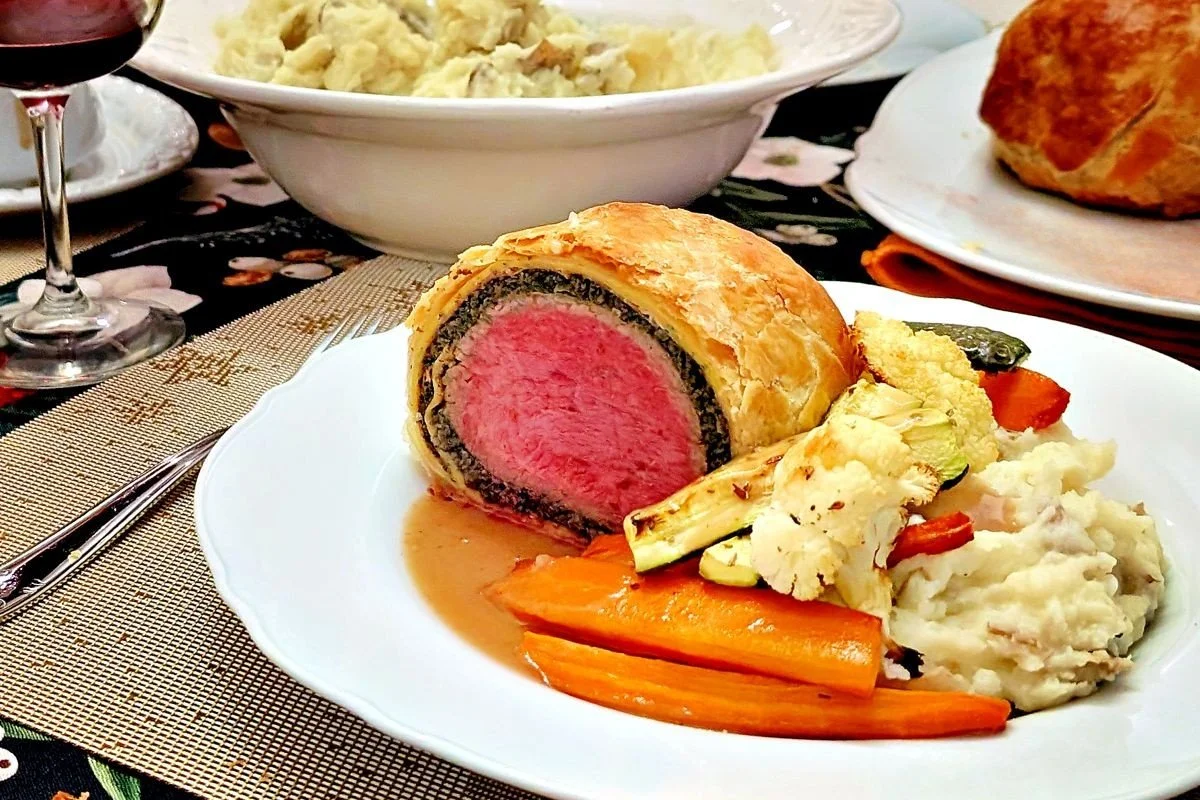
What to Serve with Beef Wellington
Potatoes: Mashed potatoes are the classic choice and perfect for catching any bits of duxelles or pastry on the plate. If you want something a little fancier, fondant potatoes or a gratin would be beautiful, or keep it simple with oven-roasted potatoes for more of a traditional roast dinner feel.
Vegetables: Roasted vegetables are an easy fit, especially carrots, asparagus, or Brussels sprouts. My roasted Mediterranean vegetables, marinated green beans, or roasted butternut squash would all work really well here too.
Sauces and gravy: A good beef gravy or classic Espagnole sauce is hard to beat, especially spooned around the Wellington so the pastry stays crisp. Mushroom gravy would be delicious if you want to double down on those mushroom flavors, while a red wine sauce, Bordelaise, or peppercorn sauce can make the whole dinner feel a little more restaurant-style.
Salads: Keep the salad fresh and acidic to balance all that richness. An arugula salad with apple, pumpkin seeds, and balsamic would be great, or try bitter greens like endive, frisée, or radicchio with preserved lemon vinaigrette. Even simple romaine with lemon, olive oil, and shaved Parmesan would be a great match.
Pin This Beef Wellington Recipe for Later
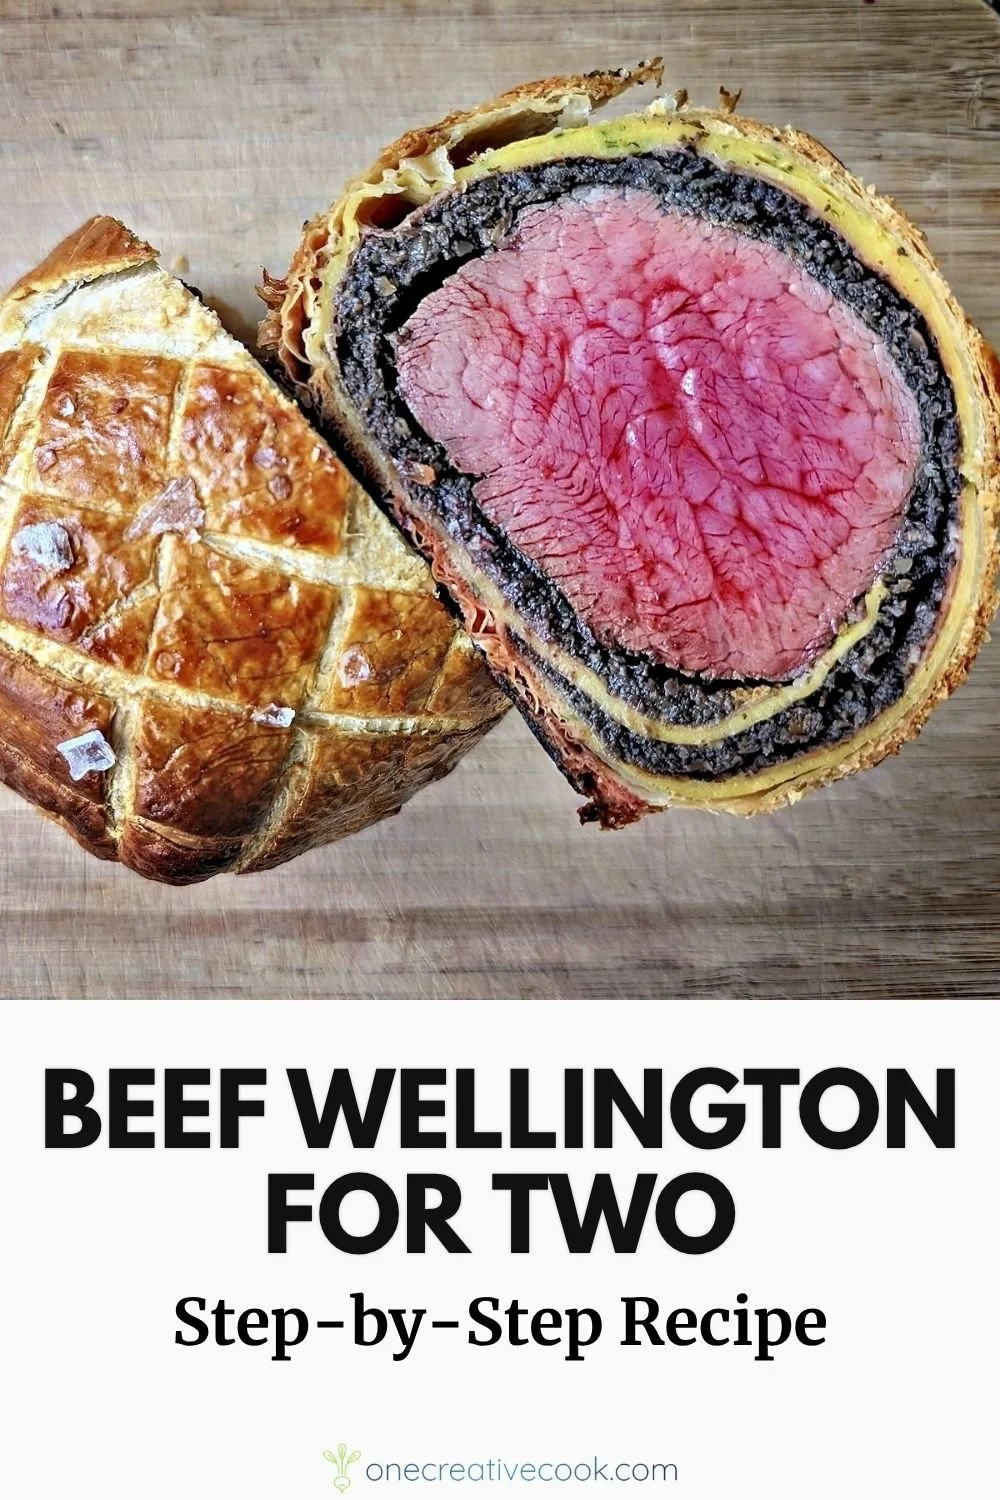
Homemade Beef Wellington Recipe for Two
Learn how to make beef Wellington for two with crisp puff pastry and medium-rare beef, using the same techniques I mastered in restaurants.
Makes: 2 servings
Prep: 1 hour Cook: 1 hour
Chill & Rest: 5 hours combined
Total: About 7 hours
Ingredients
For the Mushroom Duxelles
1 pound cremini mushrooms
2 small shallots, finely diced
1 garlic clove, minced
2 sprigs fresh thyme, leaves picked
2 ounces medium sherry
2 tablespoons butter
salt and black pepper, to taste
For the Chive Crêpes
1 large egg
½ cup milk
½ cup all-purpose flour
2 tablespoons olive oil
1 teaspoon salt
2 tablespoons fresh chives, finely chopped
For Assembling the Beef Wellington
14–16 ounce center-cut beef tenderloin (Chateaubriand)
olive oil, for searing beef
2 tablespoons Dijon mustard
5 slices prosciutto
1 sheet all-butter puff pastry, defrosted
1 large egg, for egg wash
flaky sea salt, for finishing
Quick Instructions for Making Beef Wellington
Sear and chill the beef. Season the beef tenderloin generously with salt and pepper. Heat a large skillet over medium-high heat, add a splash of oil, then sear the beef quickly on all sides until well browned. Transfer to a wire rack or paper towel-lined plate and refrigerate uncovered until completely cold and dry, at least 1 hour or overnight. If using paper towels, change them as they become wet.
Make the mushroom duxelles. Working in batches, pulse the mushrooms in a food processor until finely minced. Melt the butter in a large skillet over medium heat, then cook the shallots, garlic, and thyme until the shallots are translucent. Add the mushrooms and cook until all their moisture has evaporated and they begin catching slightly on the bottom of the pan. Deglaze with the sherry and continue cooking until the pan is dry and the duxelles begin catching again. Season with salt and pepper to taste. Spread in a thin layer on a paper towel-lined tray or plate, and refrigerate uncovered until completely cold.
Make the chive crêpes. Whisk the crêpe ingredients in a bowl until smooth and thin enough to pour easily, adding a splash of milk to loosen if needed. Heat a nonstick skillet over low heat, add about ¼ cup batter, and immediately swirl it into a paper-thin crêpe. Cook until set without allowing it to brown much, flip with a spatula, and cook for about 30 seconds on the other side. Transfer to a tray or plate to cool and repeat with the remaining batter. You’ll need at least 2 crêpes, and the batter should make about 3–4 crêpes.
Shape the beef tenderloin. Pat the chilled beef completely dry and place it on a large piece of plastic wrap. Roll it into a cylinder, then twist the ends of the plastic wrap in opposite directions like a candy wrapper. While holding onto the ends, roll the wrapped beef against the counter until it forms a tight, even cylinder. Wrap it in a second layer of plastic wrap and freeze for 30 minutes.
Layer the crêpes, prosciutto, and duxelles. Lay a large sheet of plastic wrap on your work surface and overlap 2 cooled crêpes by a couple of inches. Check that the crêpes are large enough to wrap completely around the beef with about 2 inches of overlap and extend past both ends, adding another crêpe if needed. Shingle the prosciutto over the crêpes, then spread a thin, even layer of cold duxelles over the prosciutto, stopping about 1 inch from the edges. Pat the duxelles down to flatten it and make it stick together.
Brush the beef with mustard and position it. Remove the beef from the freezer and discard the plastic wrap. Brush the entire surface with Dijon mustard, then place it near the bottom edge of the prepared crêpe, prosciutto, and duxelles layer.
Wrap the beef in the crêpe layer. Use the plastic wrap underneath to help roll the crêpe layer tightly around the beef until completely enclosed with 1–2 inches of overlap, trimming excess crêpe if needed. Fold the crêpes over both ends to seal them, folding the bottom crêpe up first, tucking in the sides, then folding the top flap down over it. Brush away any duxelles that may have fallen out, then wrap the log tightly in plastic wrap, using the same candy-wrapper technique. Twist the ends and roll it against the counter until firm and evenly shaped. Wrap in a second layer of plastic and freeze for 30 minutes.
Wrap in puff pastry. Gently unroll the thawed puff pastry. Use the plastic-wrapped beef log to check that the puff pastry sheet is large enough to completely enclose the beef with a little overlap and extra pastry at both ends. If needed, lightly flour and roll it into a larger rectangle. Place the pastry on a large piece of plastic wrap, unwrap the chilled beef, and position it in the center. Use the plastic wrap to help lift the pastry over the beef and roll it with about 1 inch of overlap. Leave about 1 inch of pastry extending past each end, trimming away any excess.
Seal and shape the beef Wellington. Place the Wellington seam-side down. To seal the sides, fold the pastry up from the bottom first, tuck in the sides, then fold the top flap down over it. Press the overlapping pastry firmly together to seal the ends and bottom seam. Wrap tightly in plastic wrap and use the same candy-wrapper technique to shape it into a firm, even log. Wrap in a second layer of plastic and refrigerate seam-side down for at least 1 hour or overnight.
Prep the beef Wellington for baking. About 3 hours before serving, unwrap the Wellington and refrigerate it uncovered for 1 hour to dry the surface of the pastry. About 2 hours before serving, preheat the oven to 425°F and transfer the uncovered Wellington to the freezer for 30 minutes. Then place it seam-side down on a parchment-lined thin aluminum baking sheet. Lightly score a decorative pattern into the pastry with a sharp paring knife if desired, grazing the surface just enough to leave a visible line without cutting through the pastry. Insert an oven-safe probe thermometer through one end into the center of the beef and press the pastry around the probe to keep it sealed. Brush evenly with egg wash, wipe away any egg wash pooling underneath, and sprinkle with flaky sea salt.
Bake, rest, and slice the beef Wellington. Bake at 425°F for 30–40 minutes, rotating the tray halfway through. For medium-rare, remove the Wellington when the center of the beef reaches 90°F and the pastry is deeply golden and crisp. Immediately transfer it to a wire rack and rest for at least 30 minutes, or until the internal temperature stops rising and levels off. Slice crosswise through the center with a sharp knife. Each half is one generous portion, or cut each half again for smaller portions. Serve right away.
Helpful Tips for Success
Make ahead: I highly recommend breaking up the prep for this recipe over 3 days to make it less overwhelming and give everything enough time to chill properly and set. Jump to see my make-ahead Beef Wellington timeline.
Sear the beef quickly: Get the pan properly hot and work quickly when searing the tenderloin. You want good browning on the outside to build flavor without cooking the beef very much, since it still has to finish cooking in the oven.
Expect a lot of carryover cooking: Don’t panic when the temperature keeps climbing after the Wellington comes out of the oven. In my testing, the temperature in the center rose by about 50°F during the rest, which is why I pull it at just 90°F for medium-rare. Read more about this in my carryover cooking section.
Plan Your Holiday Dinner
Planning this Beef Wellington for Christmas? My Christmas dinner menu has plenty of elegant recipes to help you plan the rest of the meal, including appetizers, sides, sauces, festive drinks, and desserts.
Did you try this Beef Wellington recipe?
I’d love to hear how it went or if you have any questions before making your own—I know it can be a lot if it’s your first time. Leave a comment below. I’m always happy to help!