How to Make Fresh Pasta Dough
A complete, step-by-step guide to making restaurant-quality fresh pasta dough at home, with a rich egg ratio and extended kneading time for true al dente texture.
Perfecting Fresh Egg Pasta Dough at Home
Restaurant-style pasta dough is designed for strength and elasticity. It rolls thin without tearing, stretches without snapping, and cooks to a springy, al dente texture that holds its shape. The high egg-to-flour ratio gives it a deep yellow color and enough protein to create a dough that’s soft and malleable, yet resilient enough to carry ravioli fillings or heavier sauces without falling apart.
This method comes from years of practice in professional kitchens and refining the process at home. Inspired by Thomas Keller’s high-yolk version in The French Laundry Cookbook, I gradually adapted his formula into a small-batch pasta dough scaled for two. I reduced the egg count slightly but kept the extended kneading time, preserving the integrity of the original method while making it practical and consistently reliable for home cooks.
What Makes This Fresh Pasta Dough Different
High egg ratio for structure: This dough uses more yolks than most recipes, creating richness and flexibility that helps the pasta hold up beautifully during cooking.
Extended kneading time: A full 20 minutes of kneading by hand develops a strong gluten network, giving you a dough that stretches smoothly and cooks with a true al dente bite.
Feel-based method: This recipe prioritizes feel over rigid weight measurements, teaching you to adjust hydration as you work—because egg size, humidity, and flour absorption vary every time.
Next, I’ll walk you through the entire pasta-making process step-by-step—then break down the technique so you understand exactly why it works.
What you’ll need
Fresh Pasta Dough Ingredients
1¾ cups all purpose flour
4 egg yolks
2 whole eggs
1 teaspoon olive oil
½ teaspoon salt
water, as needed
extra flour, as needed
Equipment for Making Fresh Pasta at Home
Large clean work surface
Measuring cups and spoons
Fork
Bench scraper
Clean kitchen towel
Plastic wrap
Stand mixer with pasta attachment or hand-crank pasta machine
Prep: 30 min Rest: 1 hour minimum
Cook: 2–3 min Makes: 2 servings
How to Make Fresh Pasta Dough
Step-by-Step with Photos
Step 1: Make a flour well and add the eggs, oil, and salt
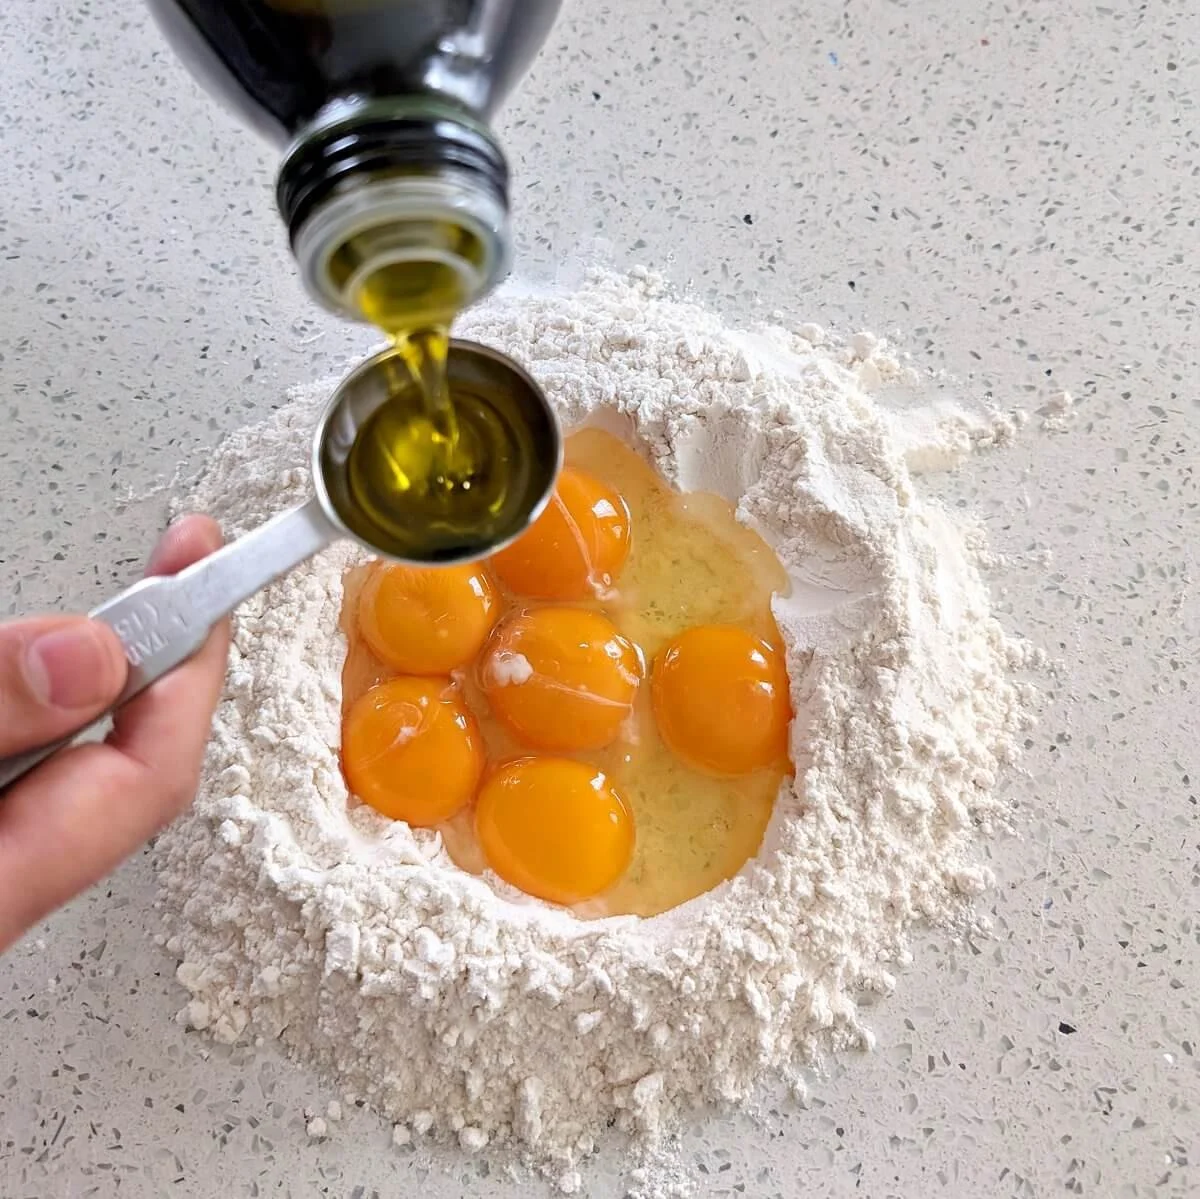
Measure the flour directly onto a clean countertop and shape it into a wide mound. Use your fingers or the bottom of the measuring cup to press a well into the center, making sure the walls are thick enough to hold the eggs.
Separate the yolks from 4 eggs and place them in the center of the well along with the 2 whole eggs. Add the olive oil and salt directly to the eggs in the well.

Step 2: Incorporate the flour to form a rough, shaggy dough
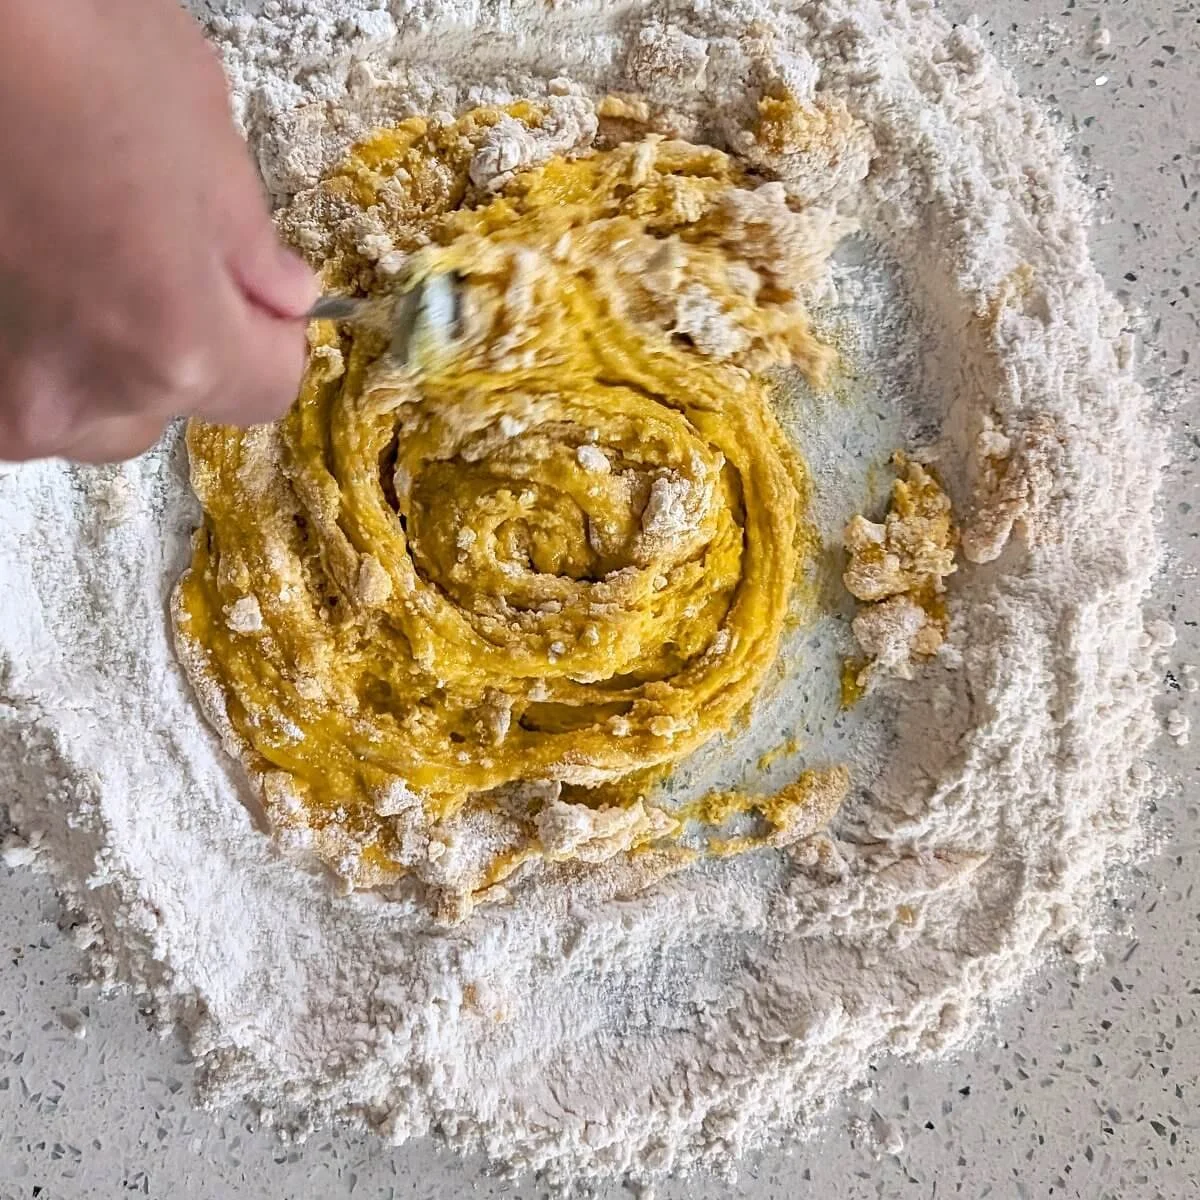
Use a fork to whisk the eggs, oil, and salt together in the center of the well until fully combined.
Begin pulling flour into the wet center a little at a time, swirling gently as you go. Work slowly and keep the flour walls intact so the liquid doesn’t spill before it thickens.
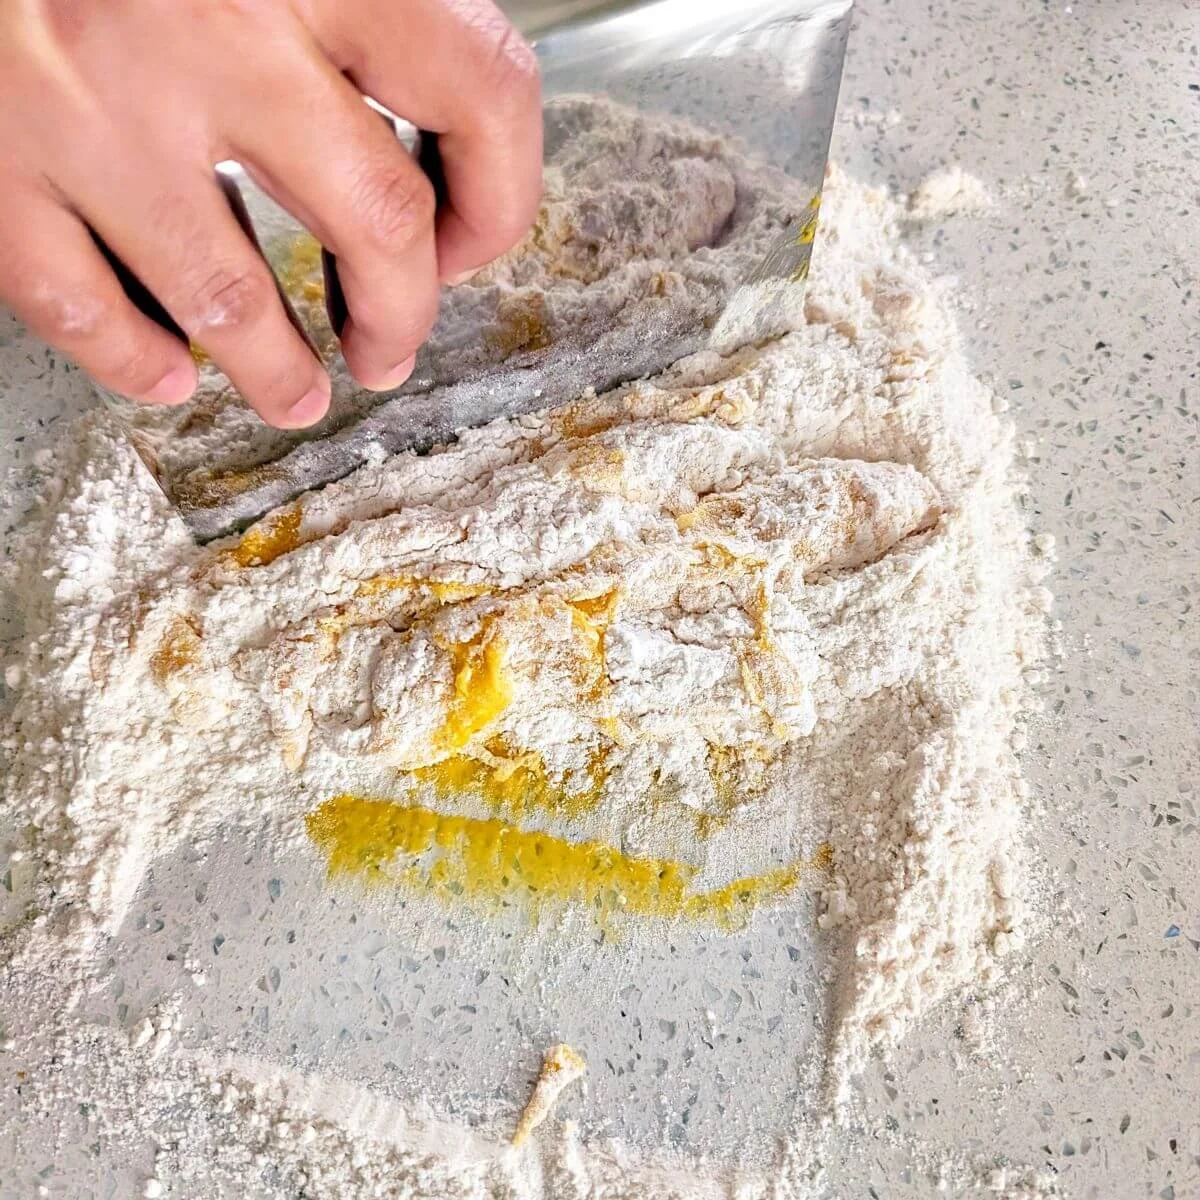
Once the mixture becomes thick and sticky, switch to your bench scraper. Scrape the fork clean, then fold flour over the center and cut down through it, until most of the flour is incorporated.
Use the scraper to gather any dry bits from the counter, then switch to your hands. Press and squeeze everything together until a rough, shaggy ball forms.

Step 3: Bring the dough together and adjust hydration
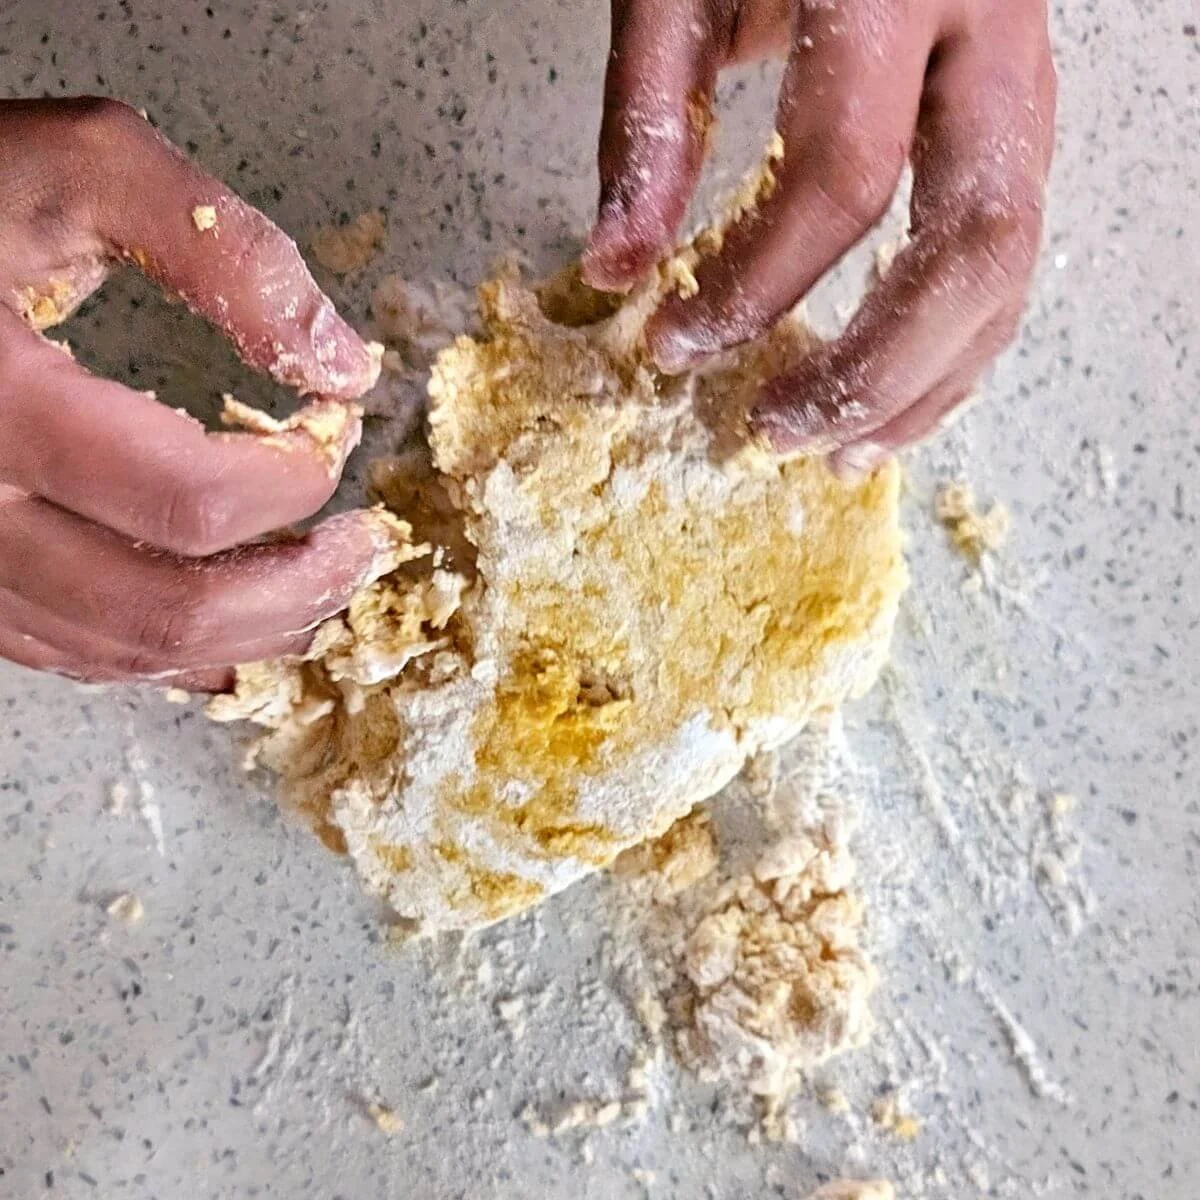
Work the dough with your hands, pressing and squeezing it together to pick up any loose bits from the countertop. As you keep working it, more pieces will begin sticking to the main mass, almost like a snowball gathering snow.
After a few minutes, there shouldn’t be many dry patches left. The dough should look mostly uniform in color, without any patches of flour.
Use your bench scraper to clean the countertop and remove any stuck bits from your workspace. Wash and dry your hands thoroughly before moving on to kneading.
The dough should feel soft and pliable when you squeeze it, but not sticky. When you press it and lift your hand away, it should release cleanly without clinging to your fingers.
If the dough is too dry:
It will feel firm and resist coming together, with loose flour that refuses to stick no matter how much you press. Add water sparingly with your fingertips or lightly mist the dough with a spray bottle. Work it in completely before deciding if it needs more. A very small amount goes a long way.
If the dough is too wet:
It will stick to your hands even after washing them clean. Sprinkle about 1 teaspoon of flour over the dough ball and work it in fully. If it becomes sticky again as you incorporate it, add another light dusting. The dough should become soft and supple, releasing cleanly from your hands.
💡 Pro Tip: Hydration is the biggest variable in fresh pasta dough. Egg size, flour absorption, and even humidity can shift the texture slightly, so expect to make small adjustments each time. In this batch, I added a light dusting of flour to bring it back into balance.

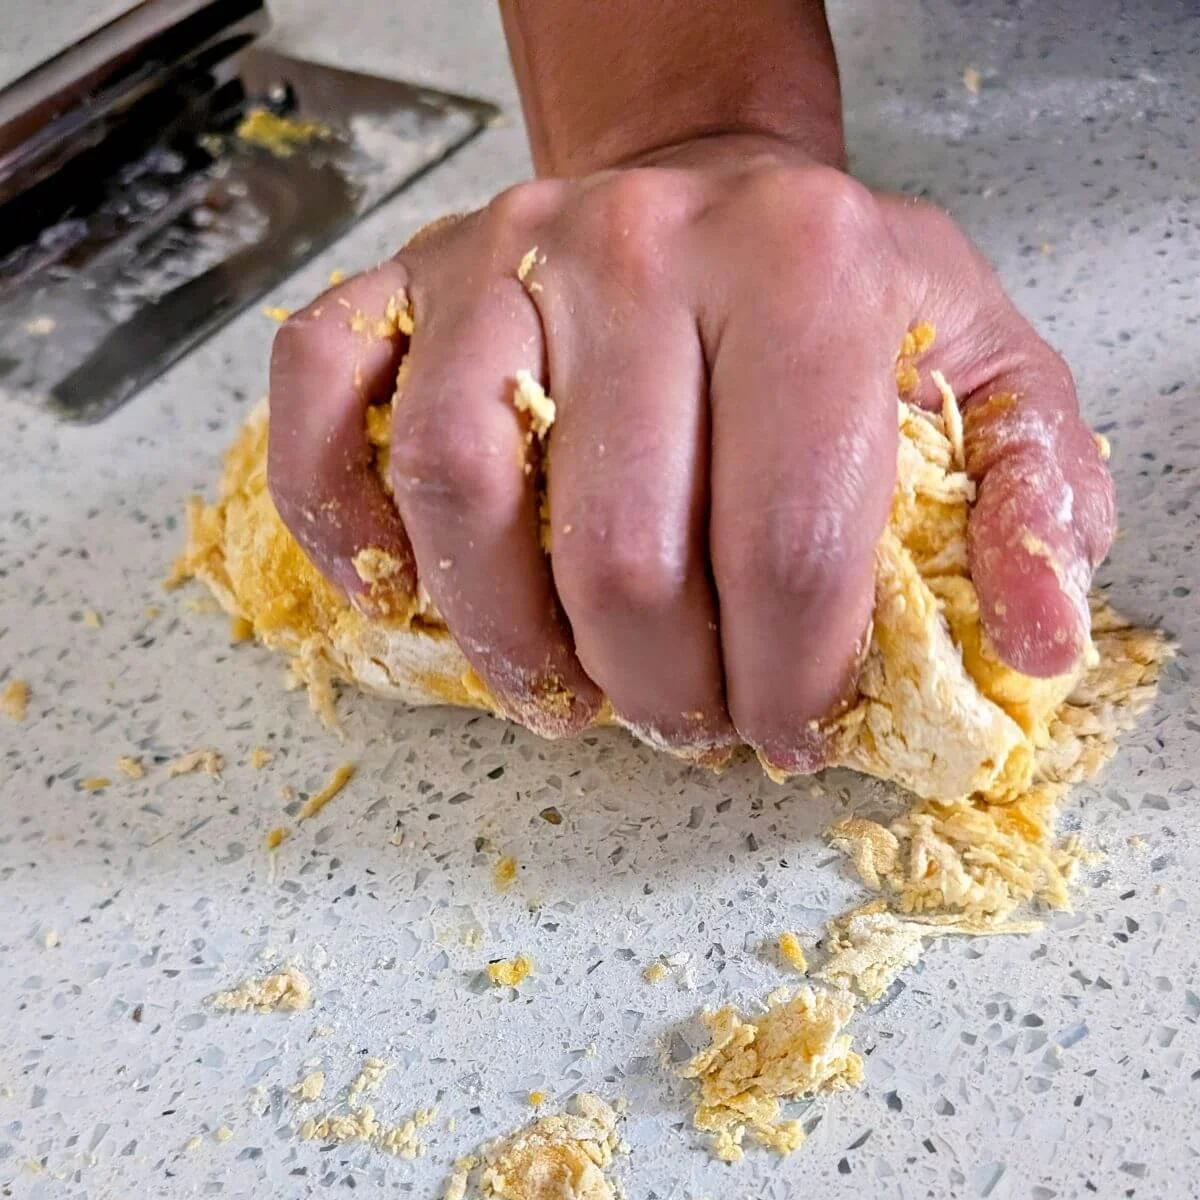

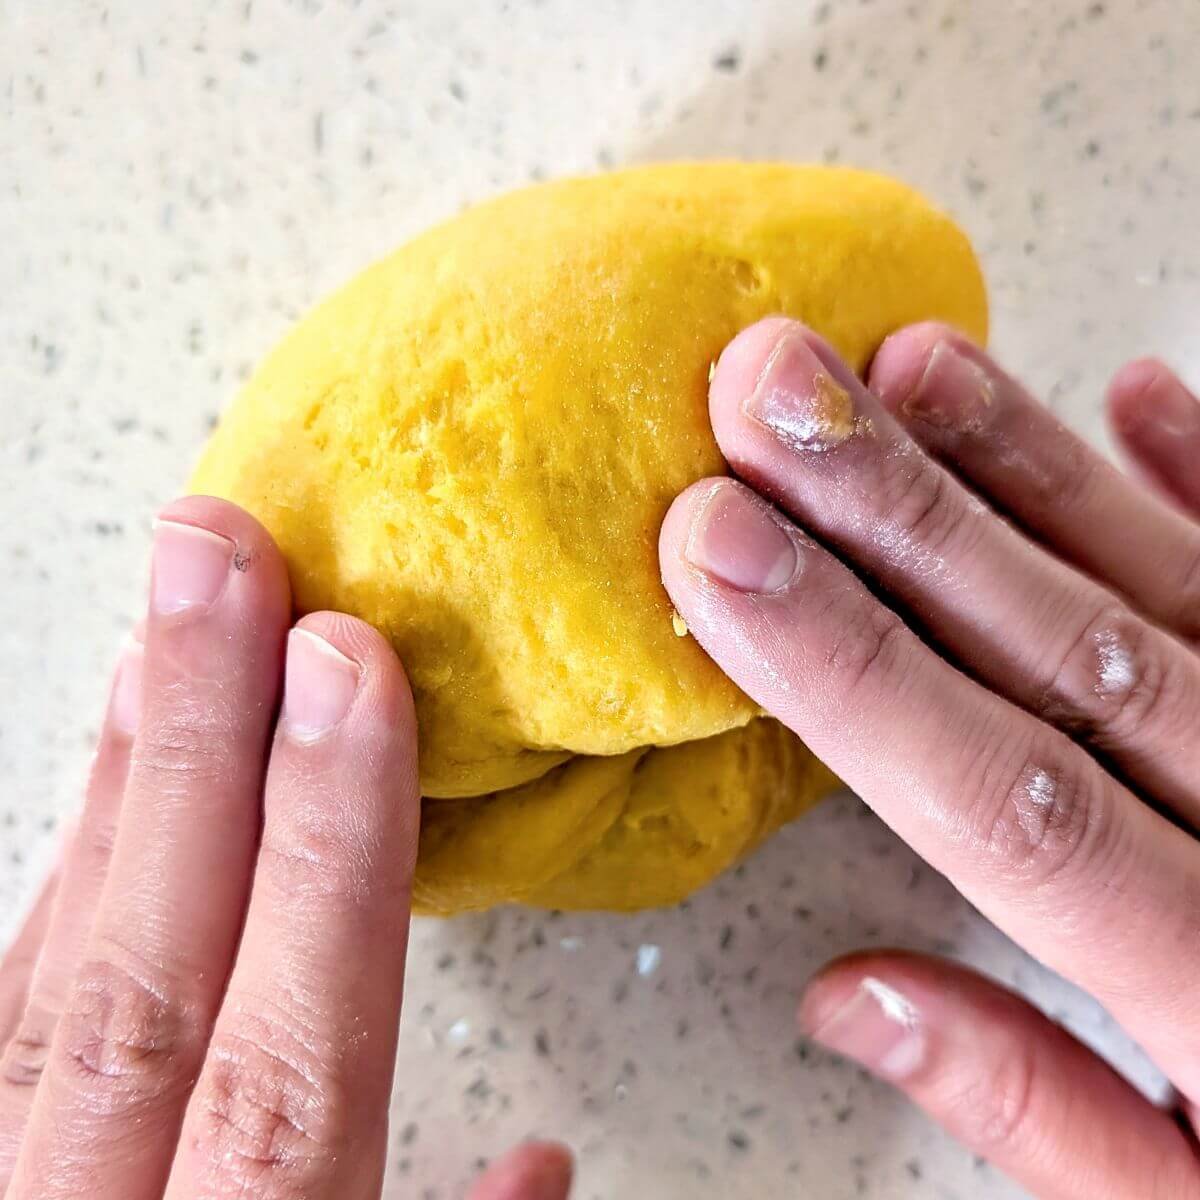
Step 4: Knead the pasta dough by hand for 20 minutes
Place the dough in front of you and use the heel of your hand to push it away while applying gentle downward pressure. You’re stretching it forward, not smashing it flat.
Turn the dough about a quarter turn, fold it back toward the center, then push it away again. Continue this steady rhythm: push, turn, fold, repeat.
Avoid folding the dough completely in half. That can distort the shape and cause tearing. Instead, fold it lightly into the center, then push outward from the middle. You don’t need to use all your strength. Steady, controlled pressure works better than force.
As you knead, you’ll notice a spiral forming on top, while the side against the counter stays smooth and rounded.
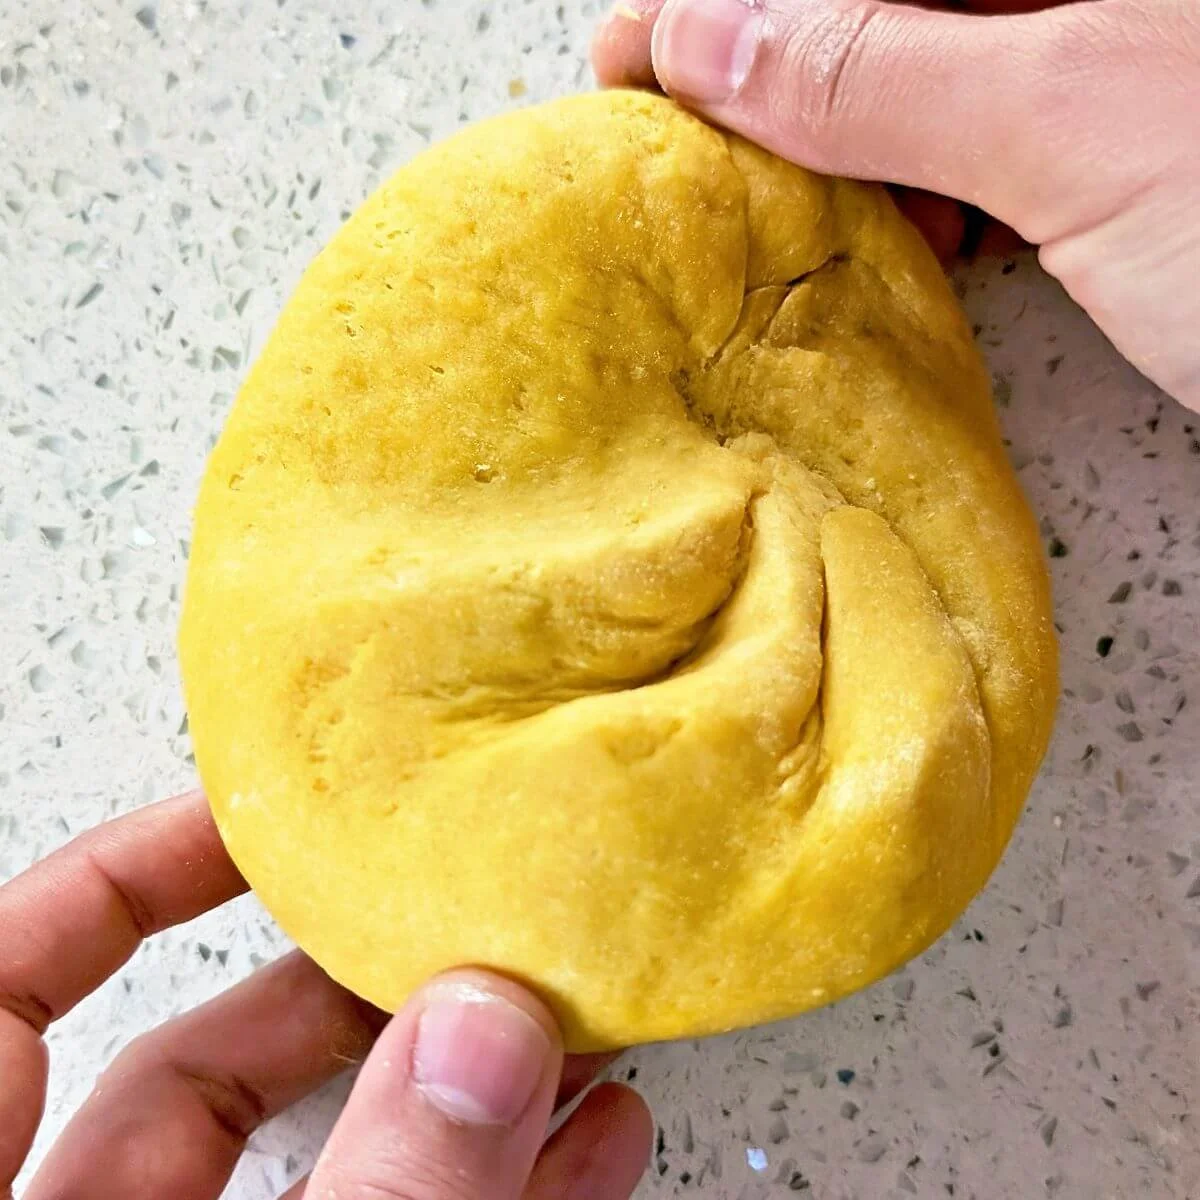
Knead for a full 20 minutes. It will feel long at first, but this is where a strong gluten network develops, giving fresh pasta its elasticity and spring. Set a timer and commit to it. Under-kneading is the most common mistake. In professional kitchens, we knead for at least 20 minutes, sometimes longer depending on the feel of the dough.
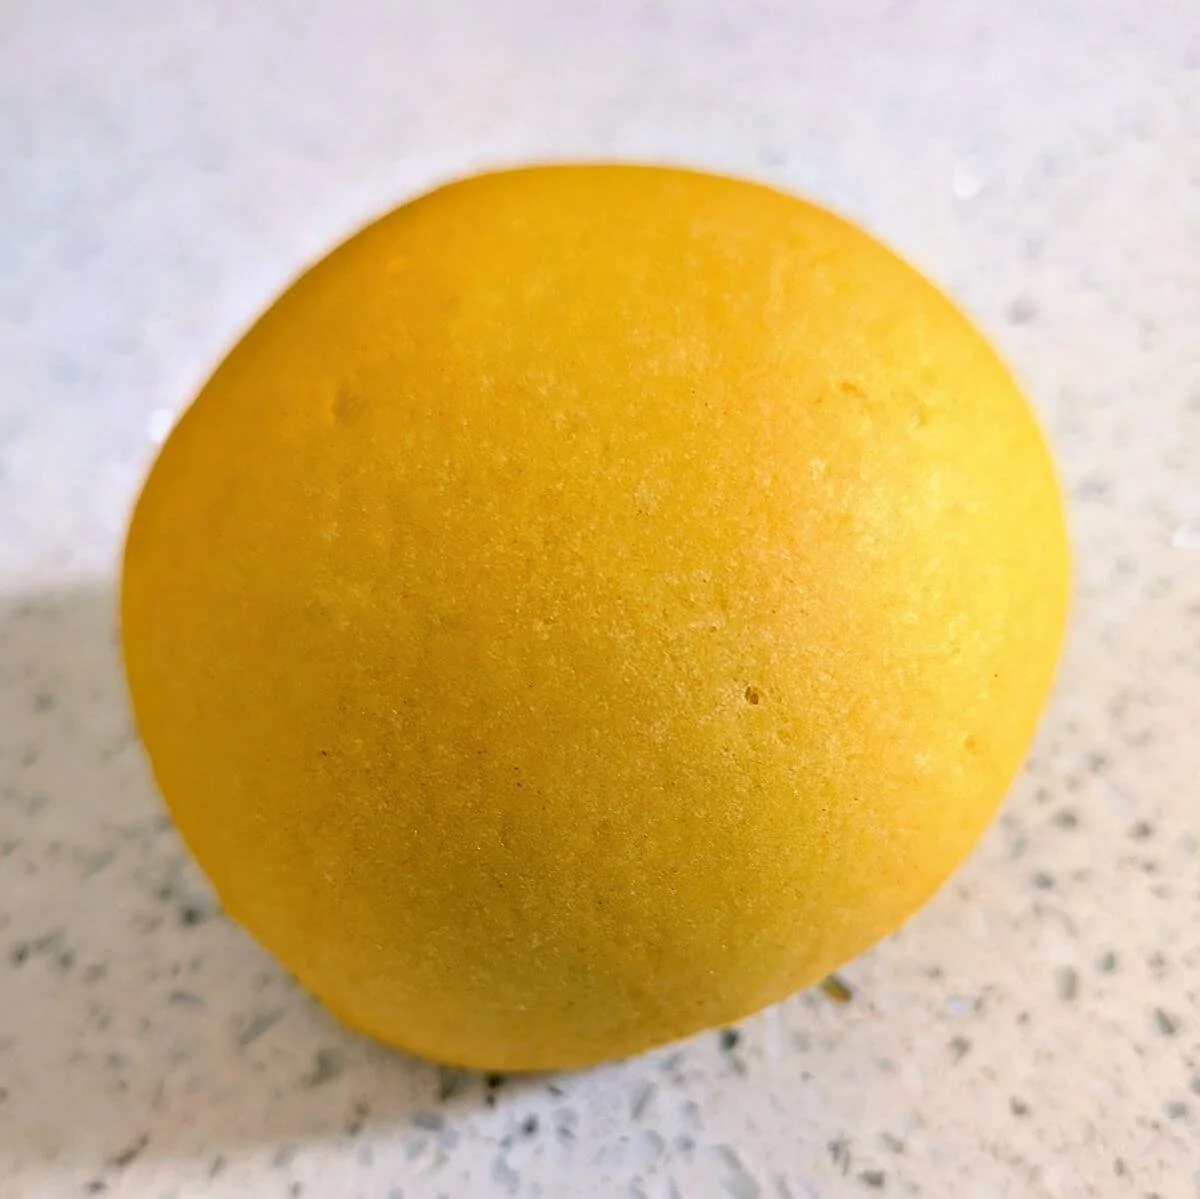
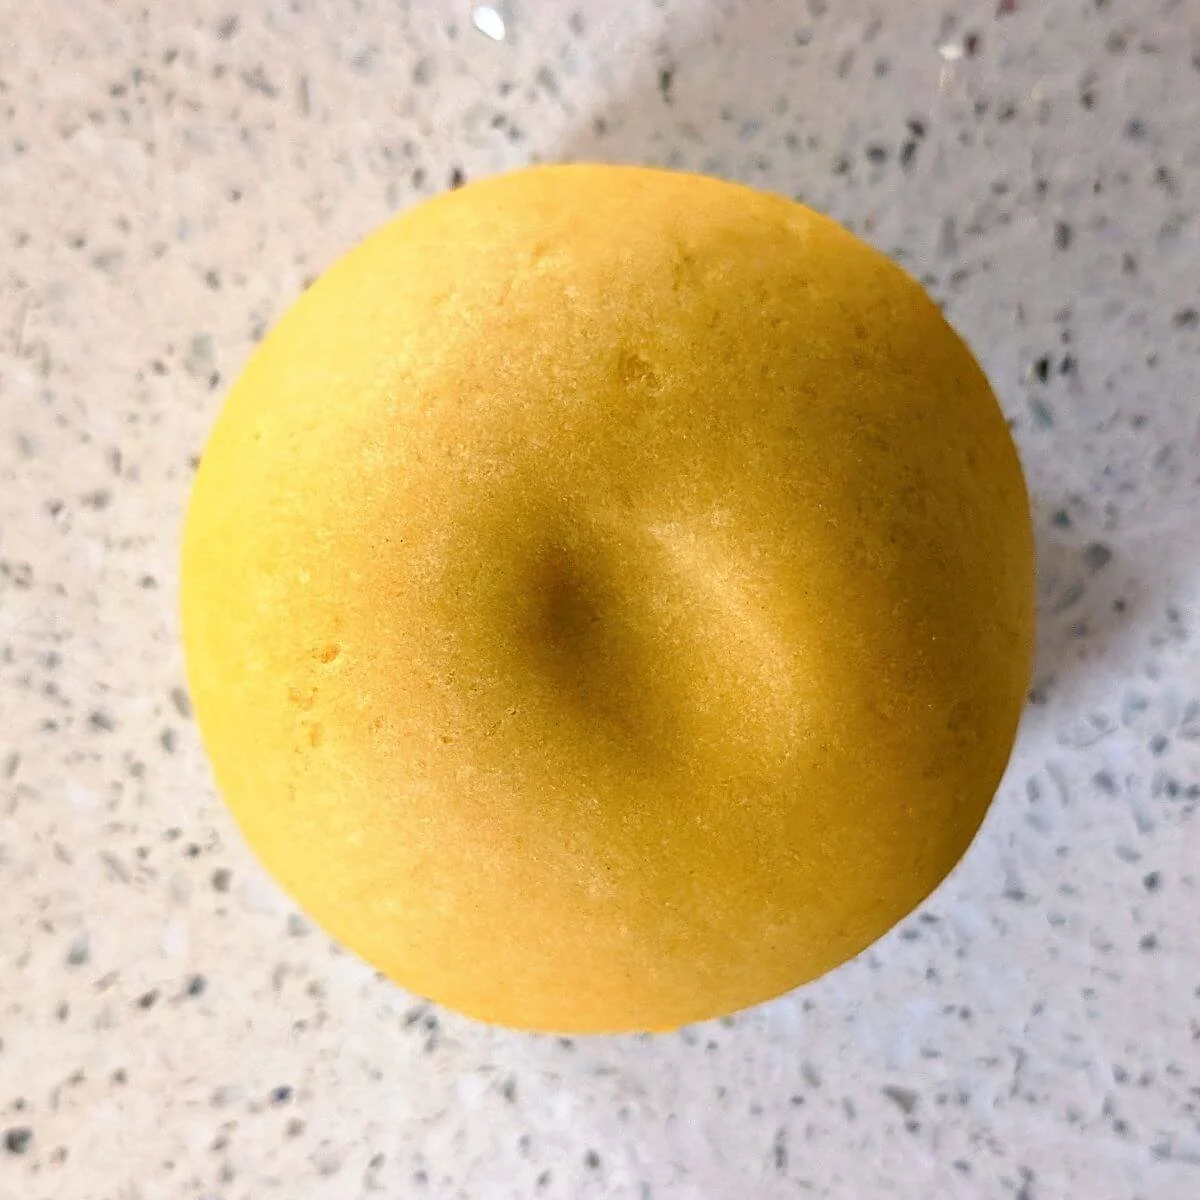
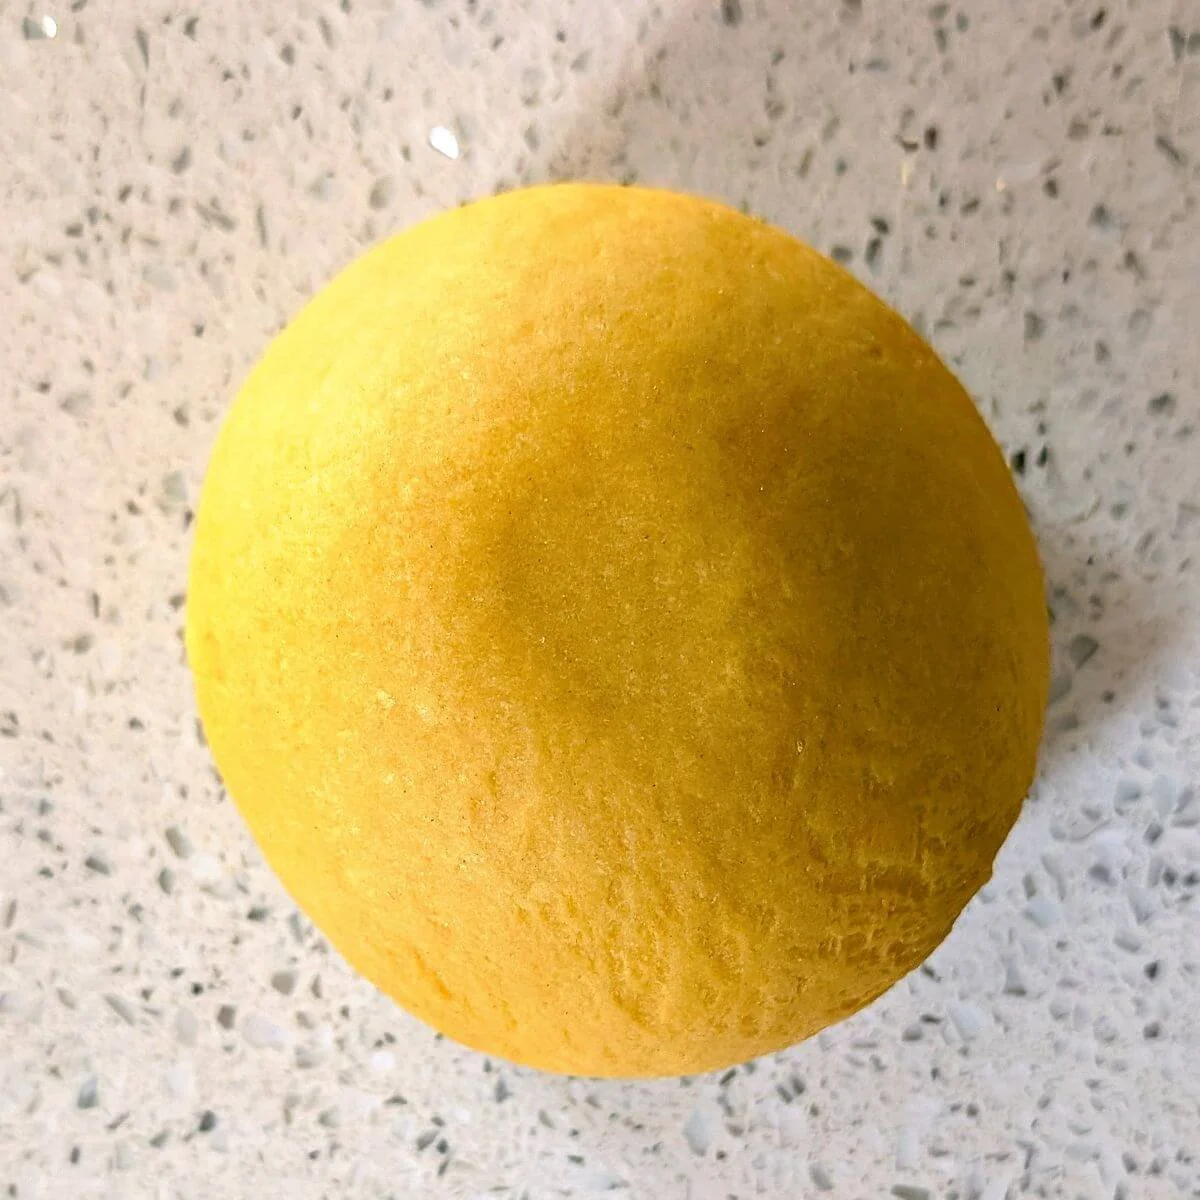
When finished, turn the dough smooth-side up and gently round it into a ball.


Step 5: Test the pasta dough for elasticity, then wrap and rest
Before resting, check that the gluten is properly developed using the poke test. Gently press your finger into the dough, just enough to leave a shallow indentation. If the dough is ready, it will spring back and leave only a faint outline of where you pressed.
If the indentation remains clearly defined, the dough needs more kneading. Work it for a few more minutes and test again immediately. The dough is at its springiest right after kneading and shaping, so don’t wait too long before checking.
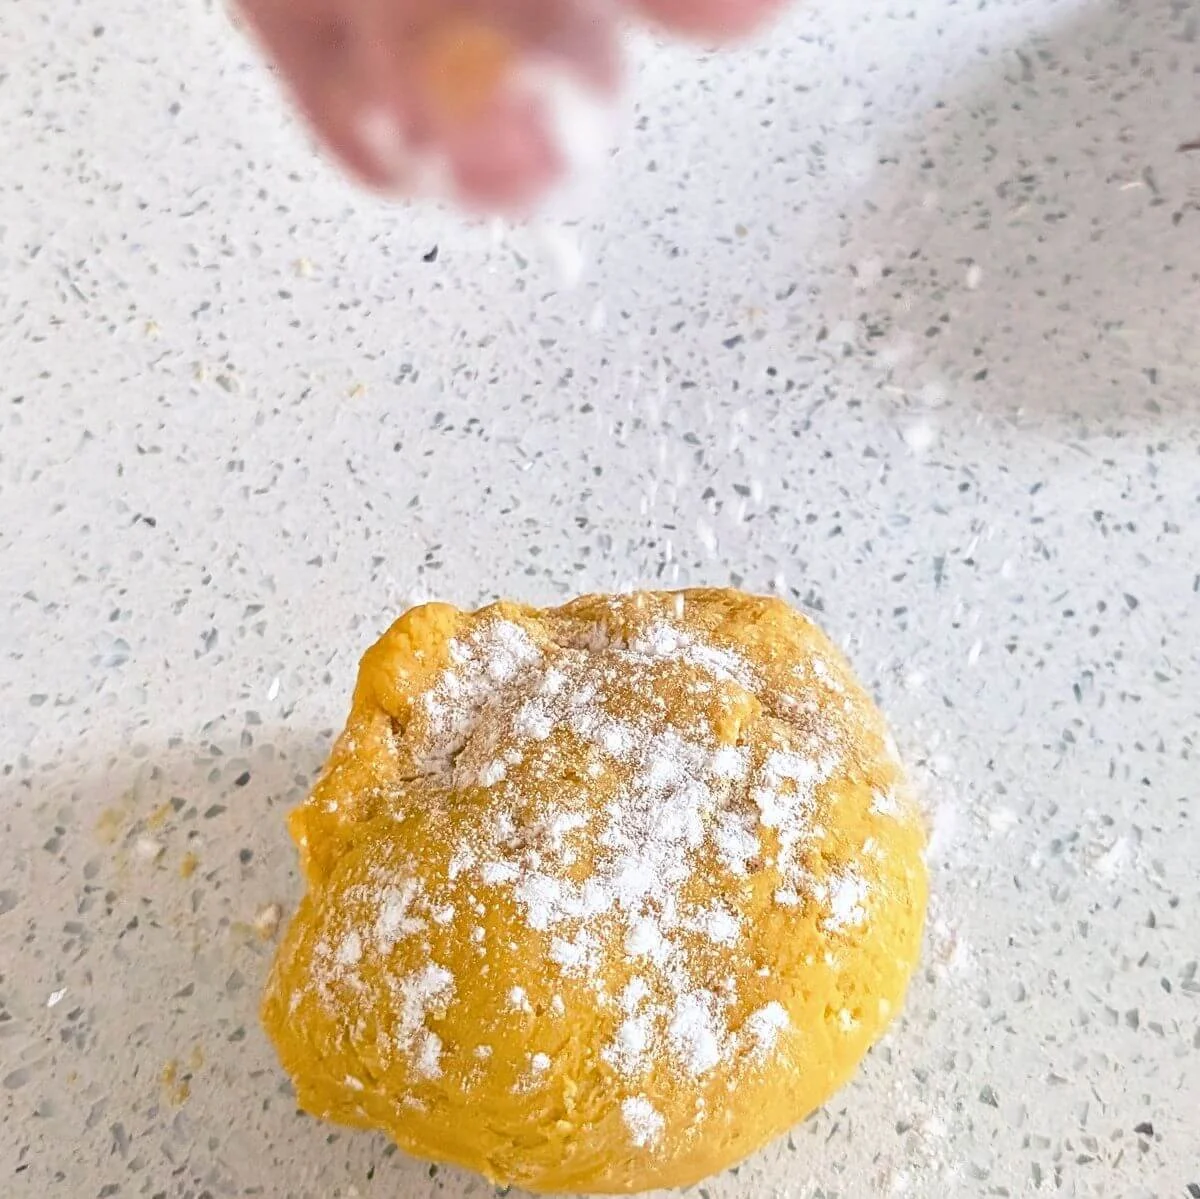
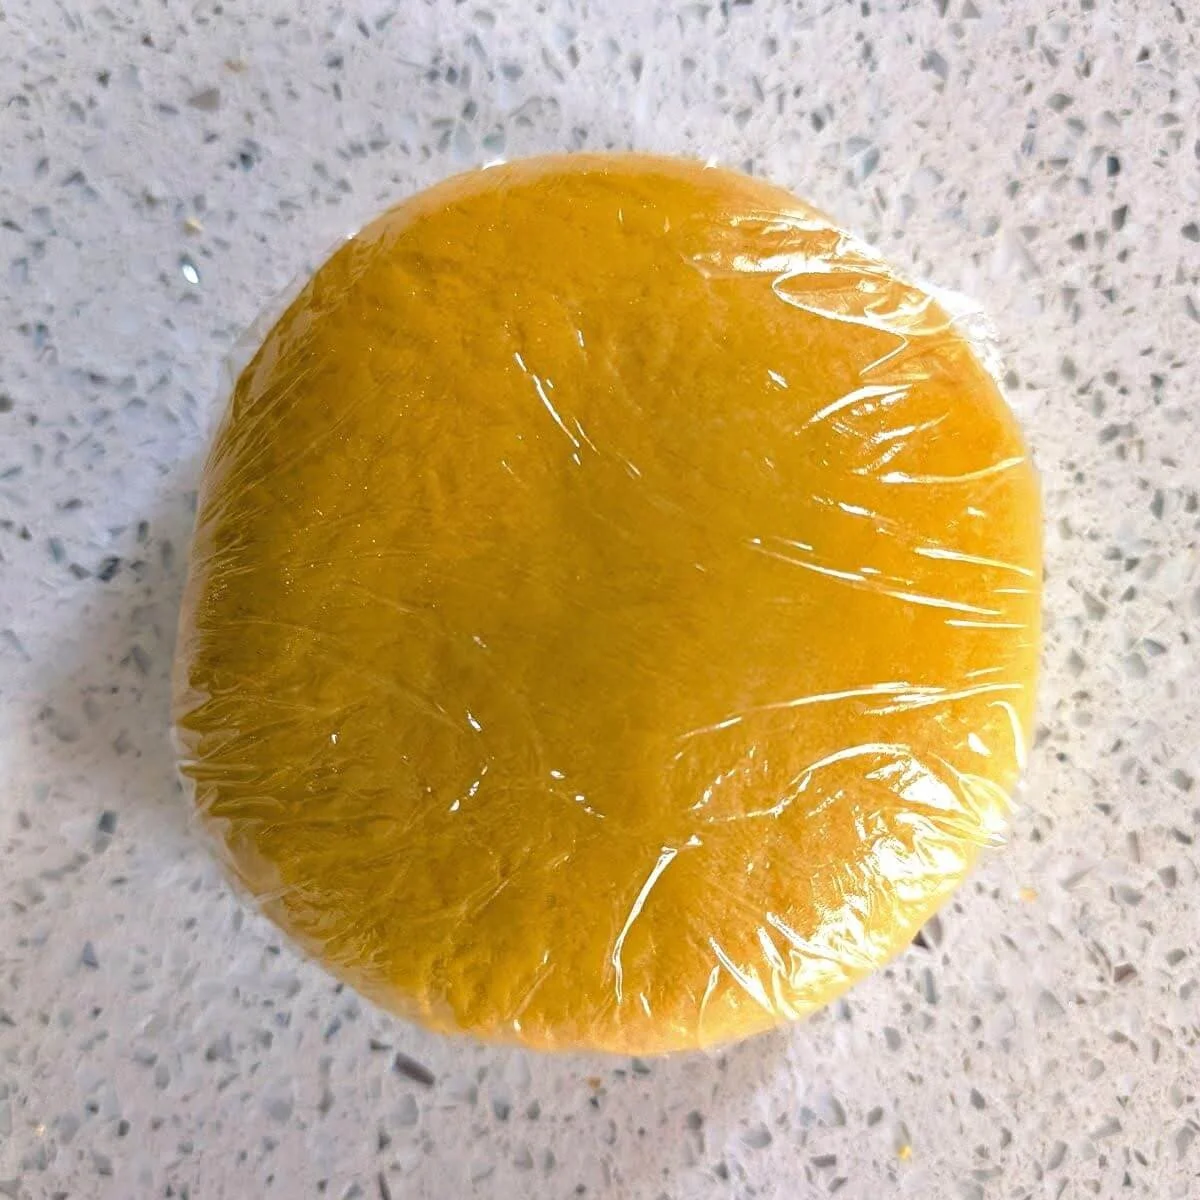
Once it passes the test, flatten the ball slightly and wrap it tightly in plastic wrap. It shouldn’t stick. Rest the dough in the refrigerator for at least 1 hour, or up to 24 hours. This allows the gluten to relax and the flour to fully hydrate, making the dough much easier to roll.


Step 6: Divide and flatten the dough
Divide the dough into 2 pieces. If you prefer working with shorter sheets, especially as a beginner, you can divide it into 4 smaller pieces instead. Keep the remaining dough covered so it doesn’t dry out.
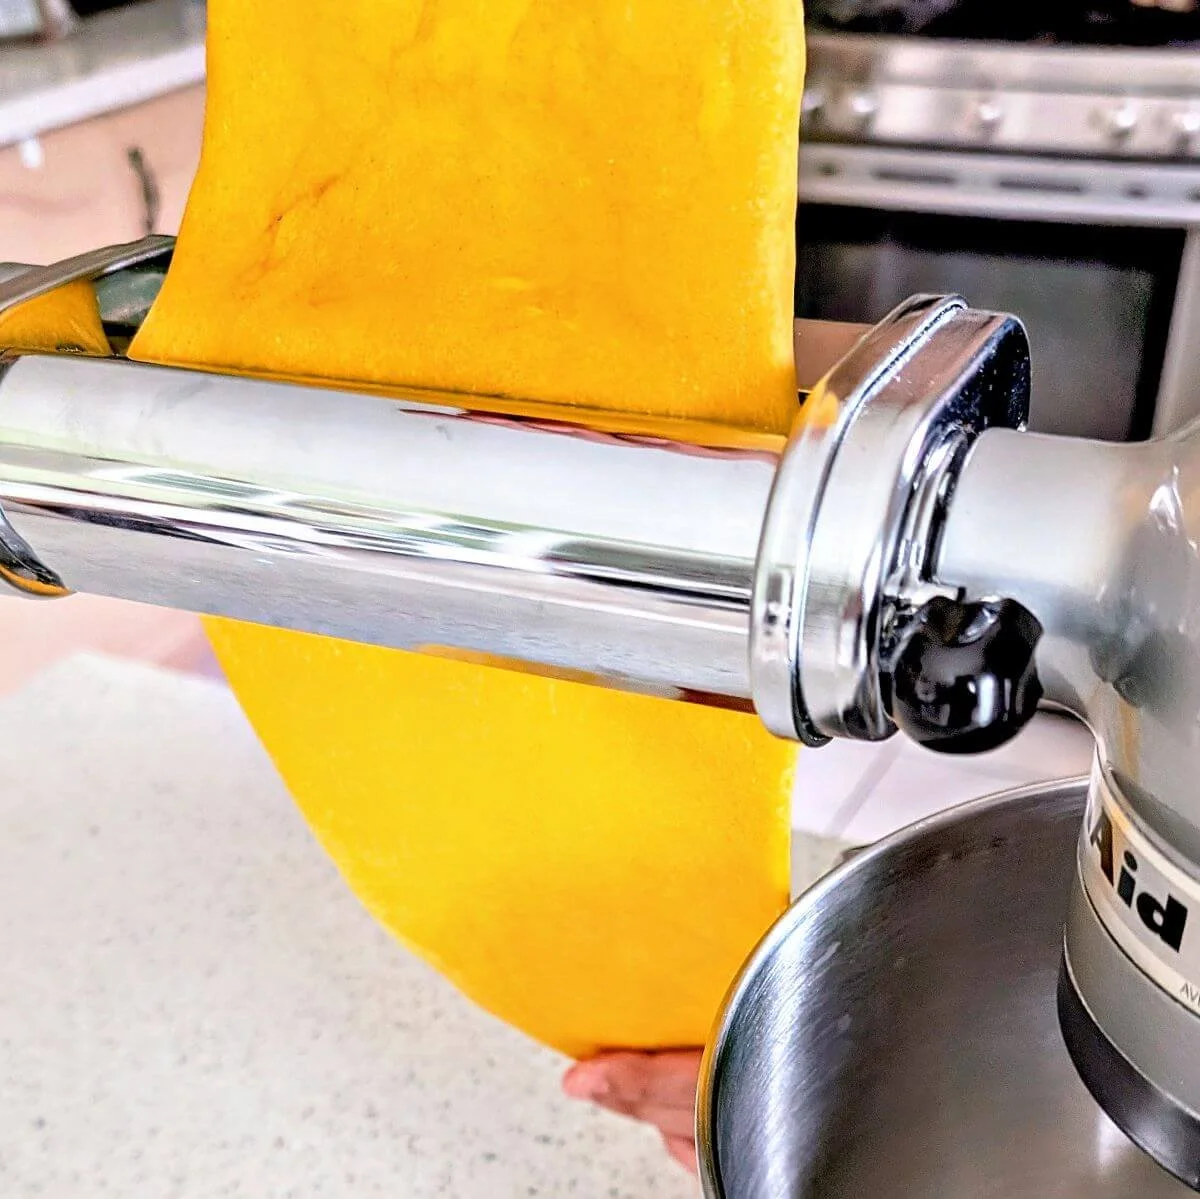
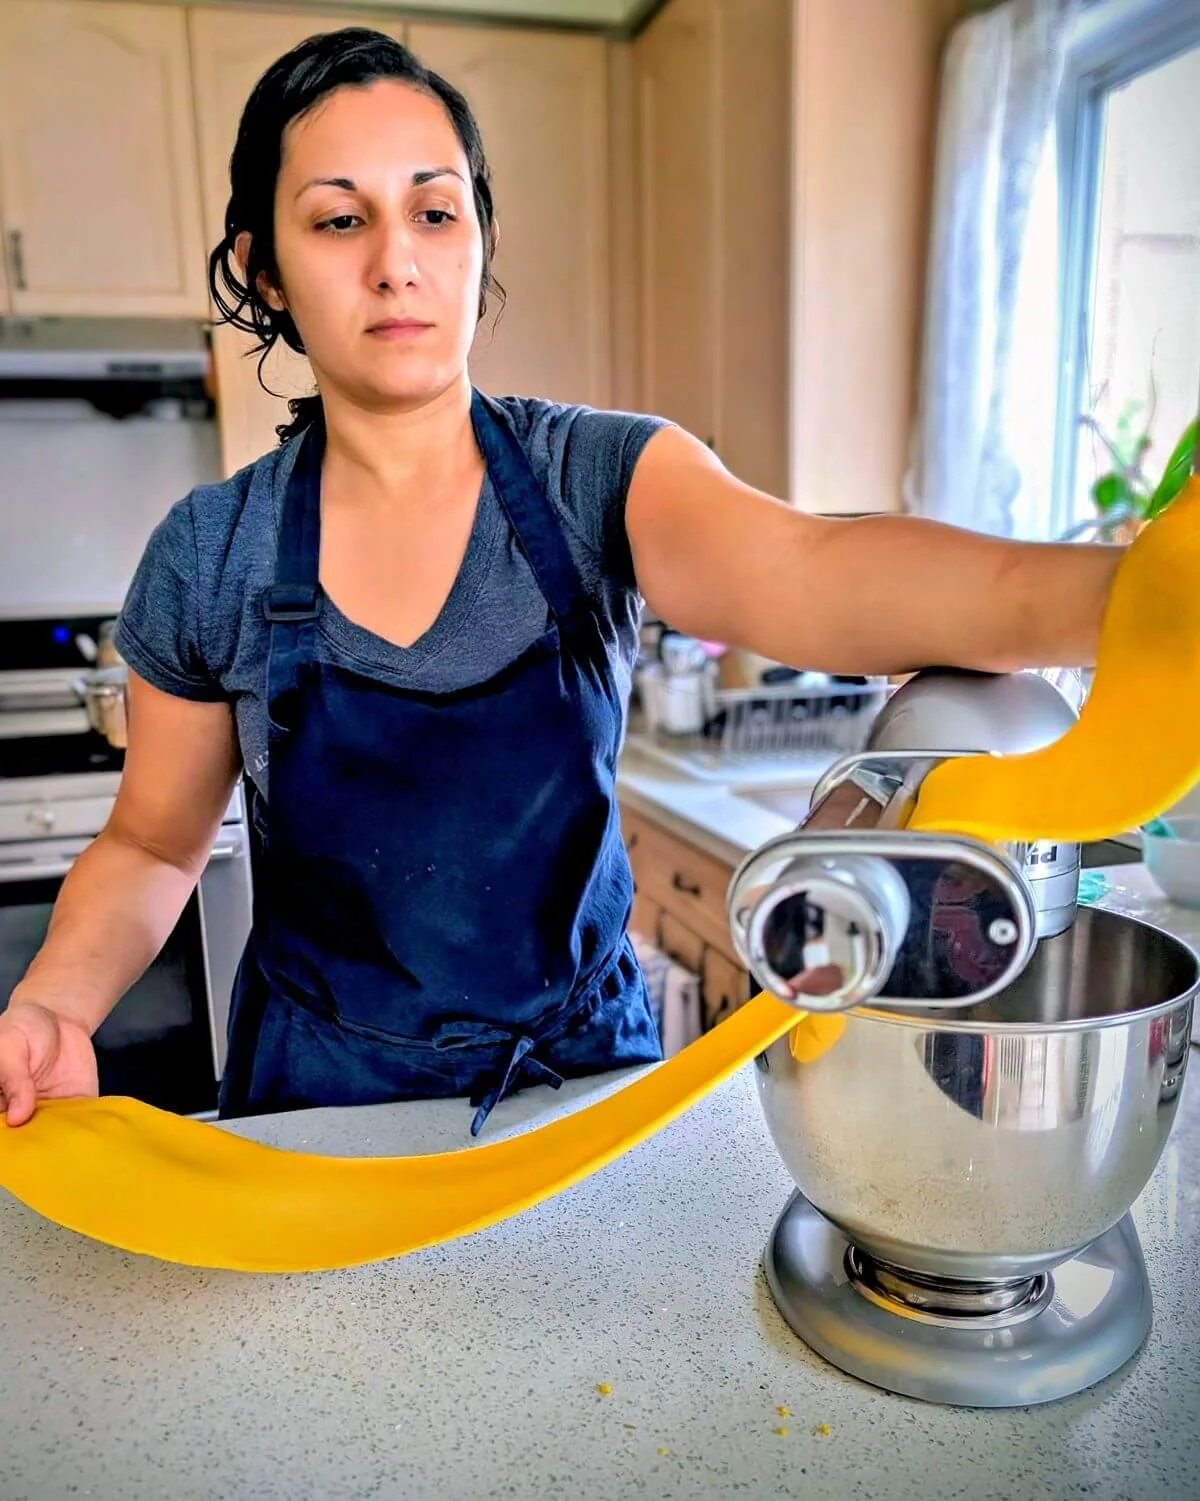
Press one piece flat with your hands and shape it into a short oval. You can use a rolling pin if that feels easier. Flatten it just enough so it will fit through the widest setting of your pasta machine, usually labeled 0 or 1.
Set your pasta machine to the widest setting. If you’re using a stand mixer attachment, set it to medium-low speed. Feed the dough through 2 to 3 times on this setting until you have a smooth, even sheet.

Step 7: Laminate the fresh pasta dough
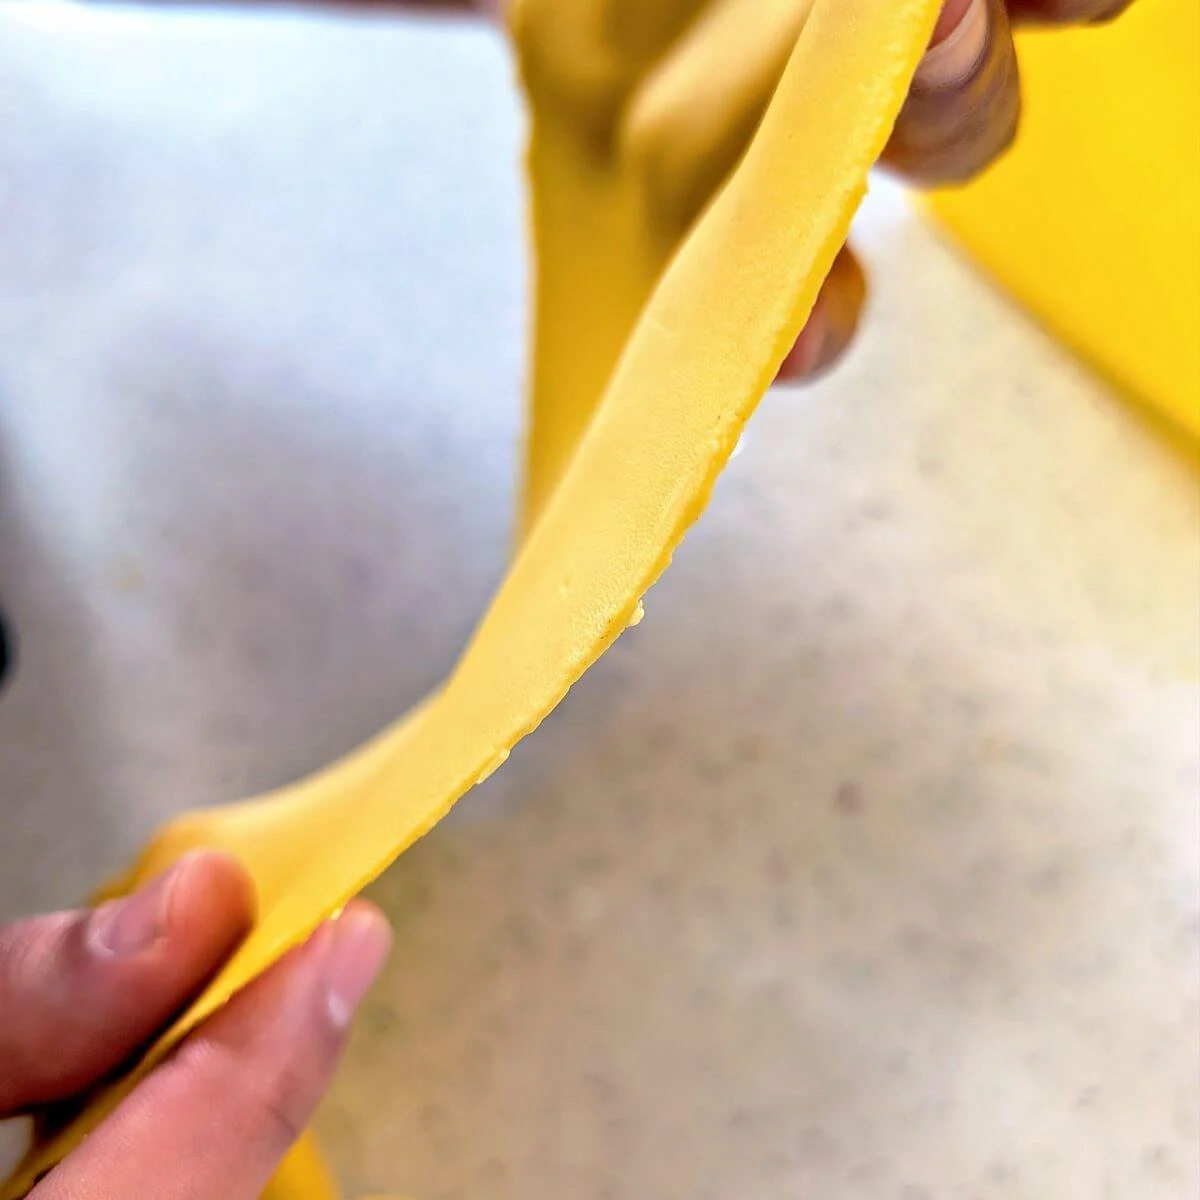
Before rolling the dough to its final thickness, we strengthen it through lamination. Lamination simply means folding the dough over itself and rolling it out again. This builds structure, smooths the surface, patches small holes, and creates a neater rectangle.
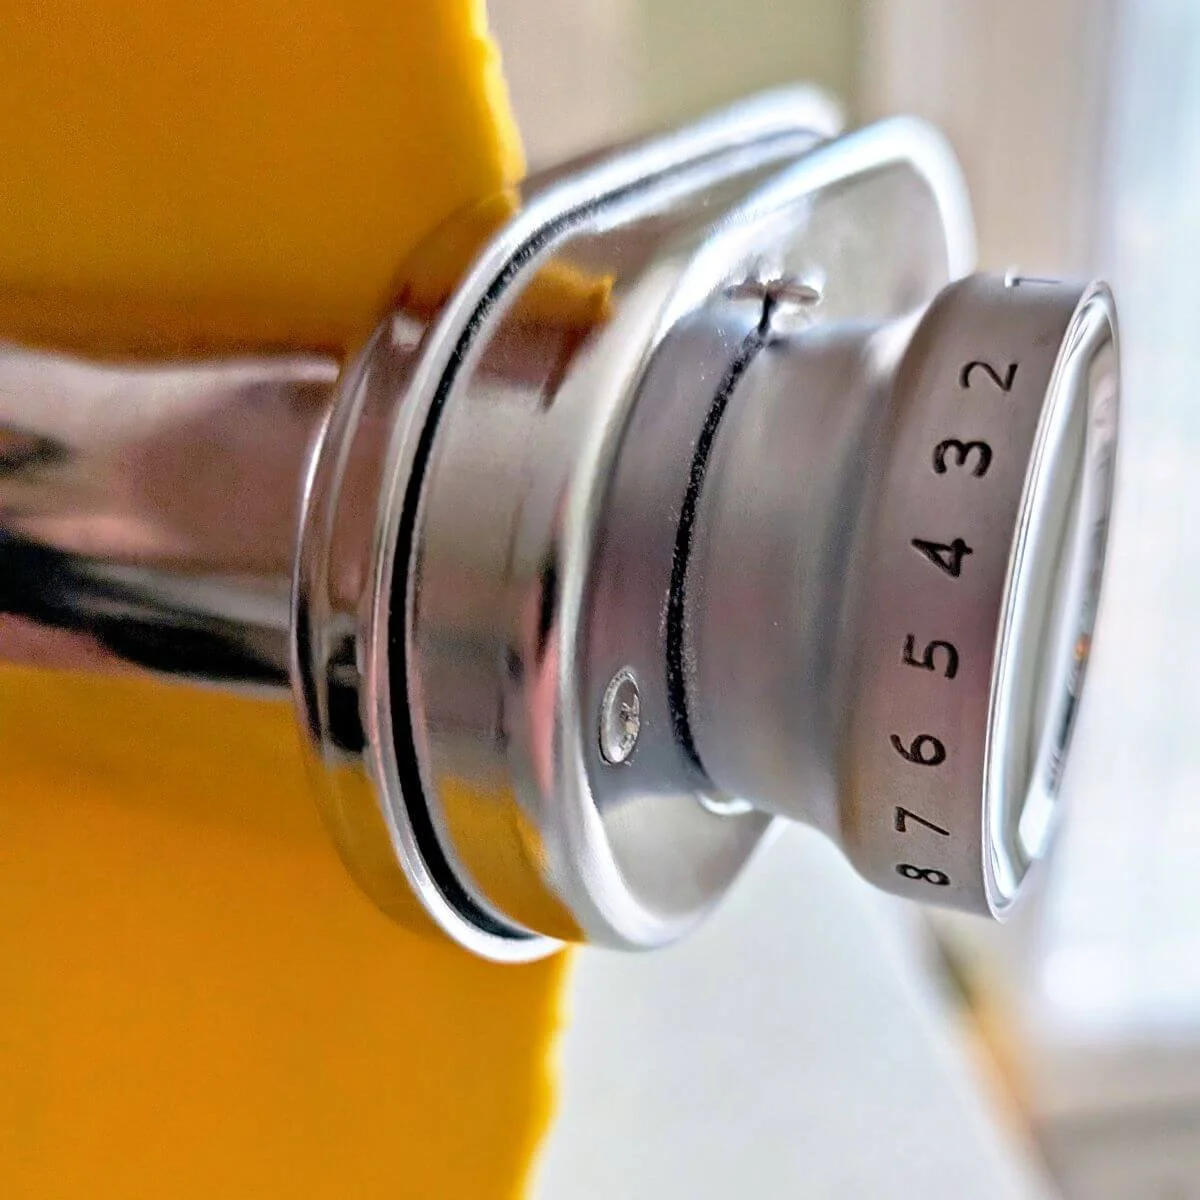
To prepare for folding, start by running the dough through the widest setting. Then turn the dial to 2 and feed it through twice, supporting the sheet with your palm as it comes out so it doesn’t stretch. Lightly dust with flour if it feels sticky. Turn the dial to 3 and feed it through twice.
Never jump more than one setting at a time or the sheet may tear. Rolling twice at each level ensures the first pass thins the dough and the second smooths it.
Now laminate: fold the sheet in half widthwise, tucking in rounded edges to form a clean rectangle. Return to the widest setting and roll through twice, then move back up through 2 and 3, rolling twice at each level.
Fold the sheet in half again, return to the widest setting, and repeat the lamination cycle 2 to 3 times. With each round, the dough will feel smoother, stronger, and less sticky.


Step 8: Roll to your final pasta thickness
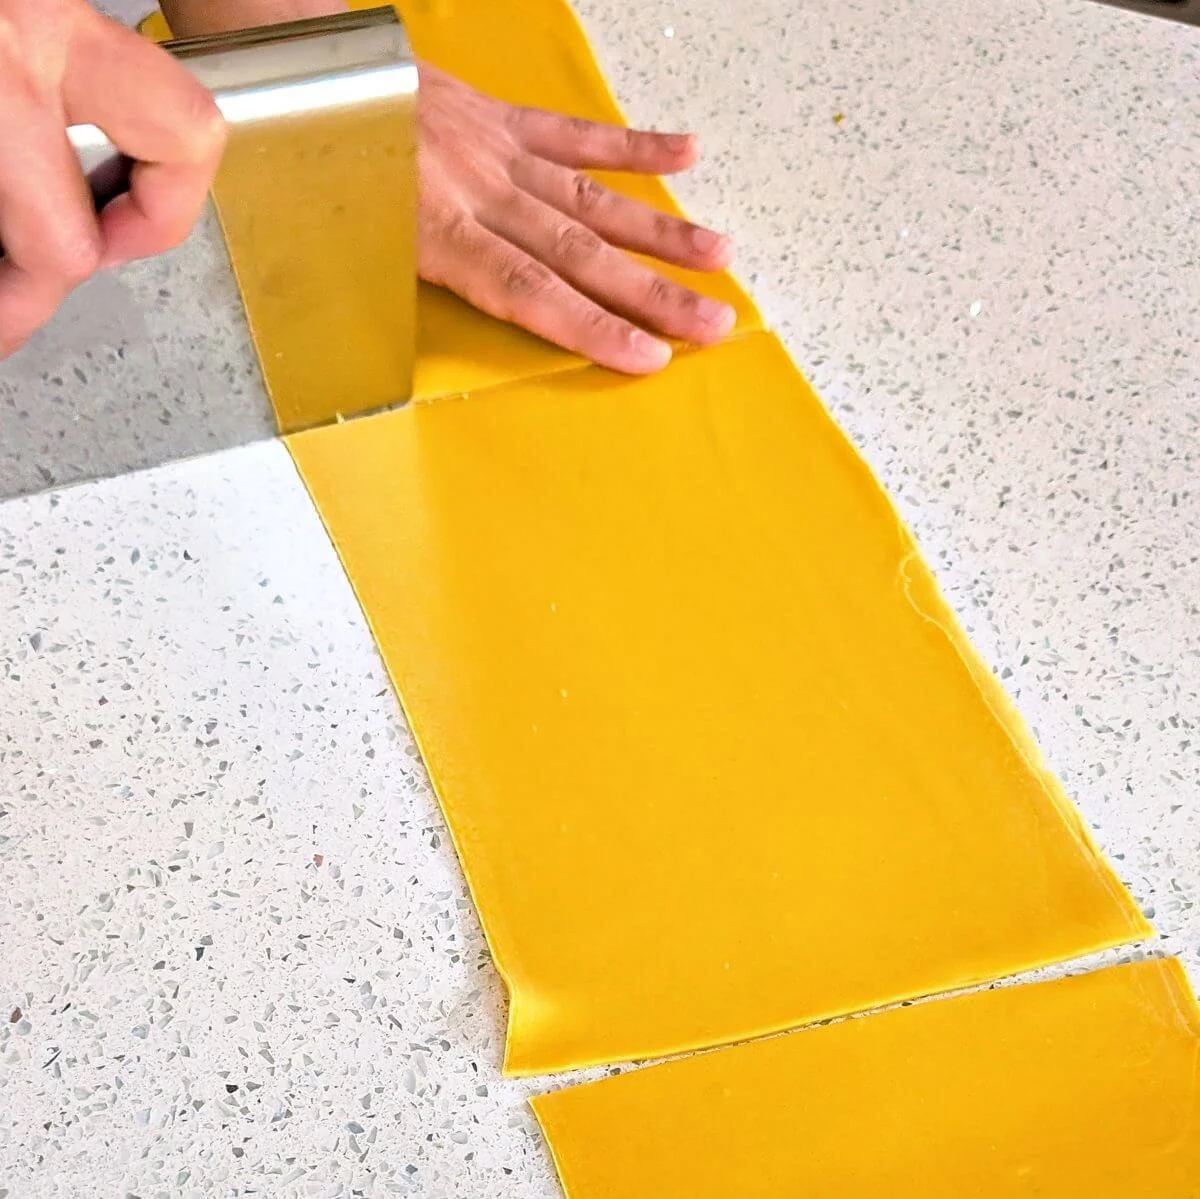
Cut your laminated pasta sheet into two shorter sections before continuing—once you roll thinner, it will lengthen quickly and become harder to control. Cover the unused half with a kitchen towel while you work.
Increase the setting one level at a time, rolling twice at each level until you reach your desired thickness. For fettuccine or lasagna, stop at 5 or 6. For ravioli, roll thinner to 7 or 8.
Once fully rolled, cut each sheet into 12-inch sections, lightly flour both sides, and cover with a kitchen towel while you finish the remaining dough.
Common Rolling Issues and How to Fix Them
The sheet is getting too long: Cut it into shorter, more manageable sections. Lightly flour the pieces and keep the unused portion covered so it doesn’t dry out.
The sheet is too wide for the machine: Fold it lengthwise to narrow it, then return to the widest setting and laminate again.
The dough tears or develops holes: Gently press the dough back together, flatten slightly if needed, and return to the widest setting and laminate again. The dough is pliable and will patch itself as it rolls.
The sheet feels sticky: Lightly dust with flour and continue rolling. Proper lamination will make the dough noticeably smoother and less tacky.
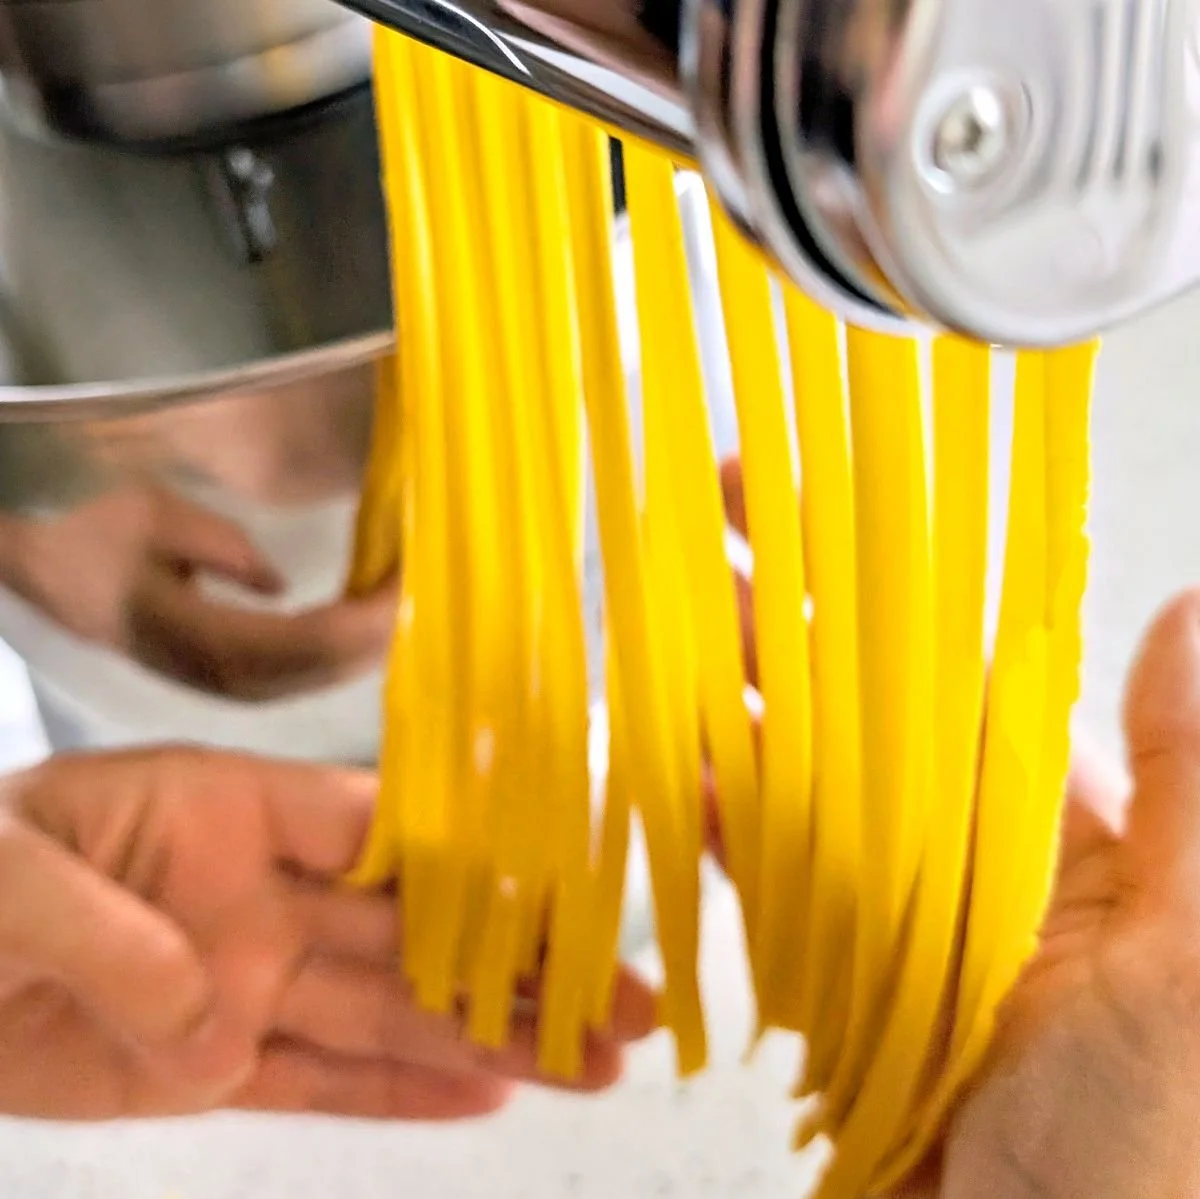
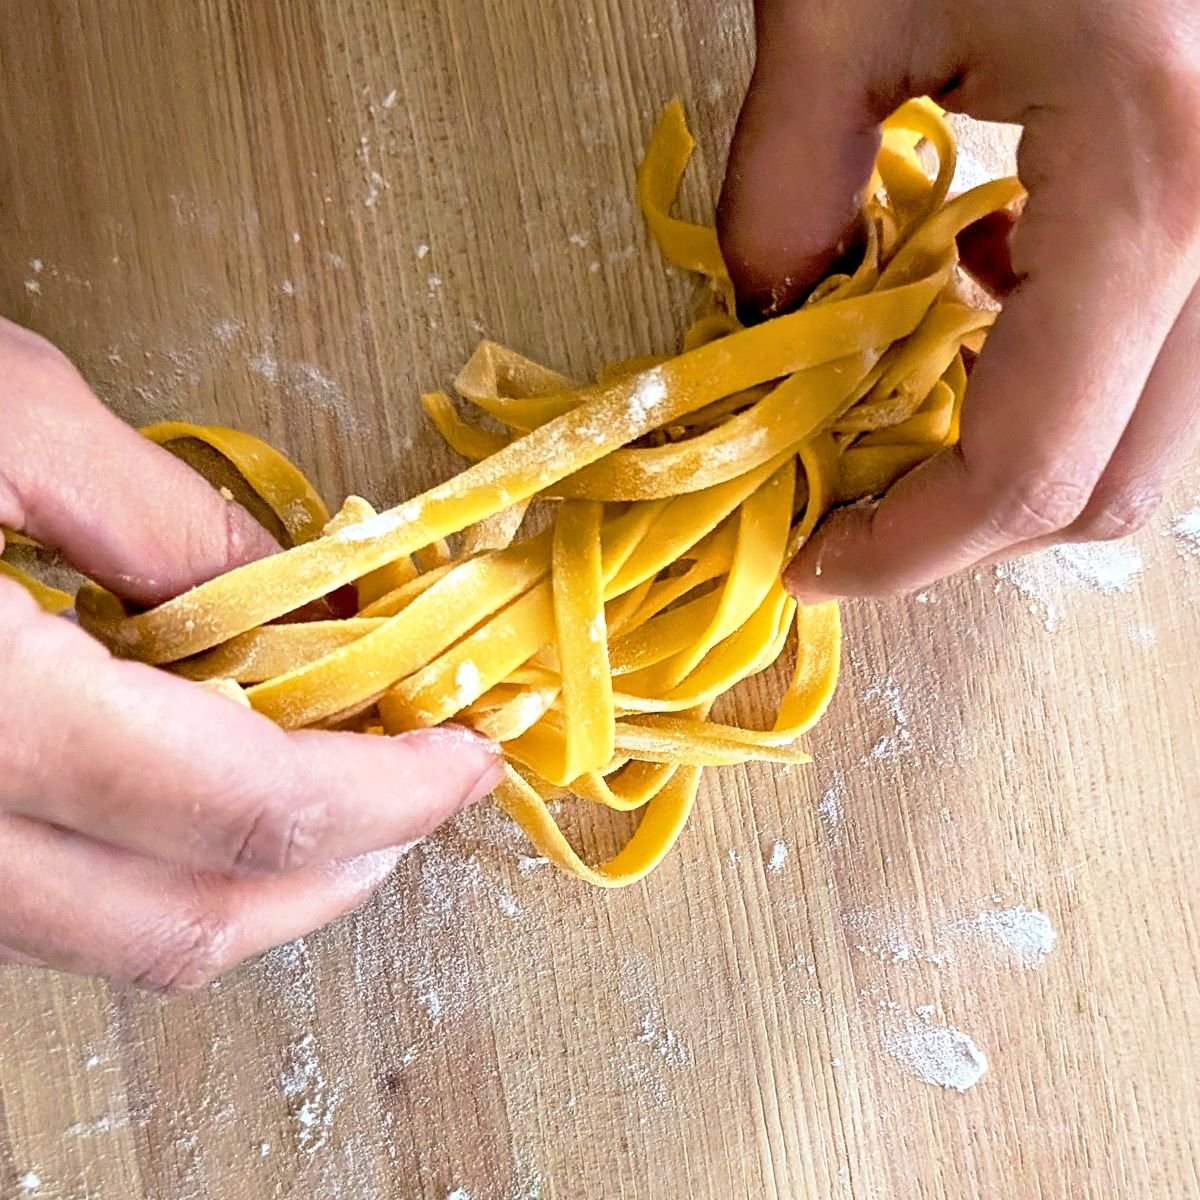
Step 9: Cut the fresh pasta
Once all your sheets are rolled out, they’re ready to use for lasagna or ravioli as is.
To cut noodles:
If cutting by hand, flour the sheet well, then roll it loosely from the short side into a log. Using a sharp knife, slice to your desired width, gliding through the dough without pressing too hard so the layers don’t stick. Gently unfurl the strands.
If using a pasta machine cutter attachment, switch to your desired cutter and feed the sheet through, catching the strands as they exit so they don’t stretch or clump.
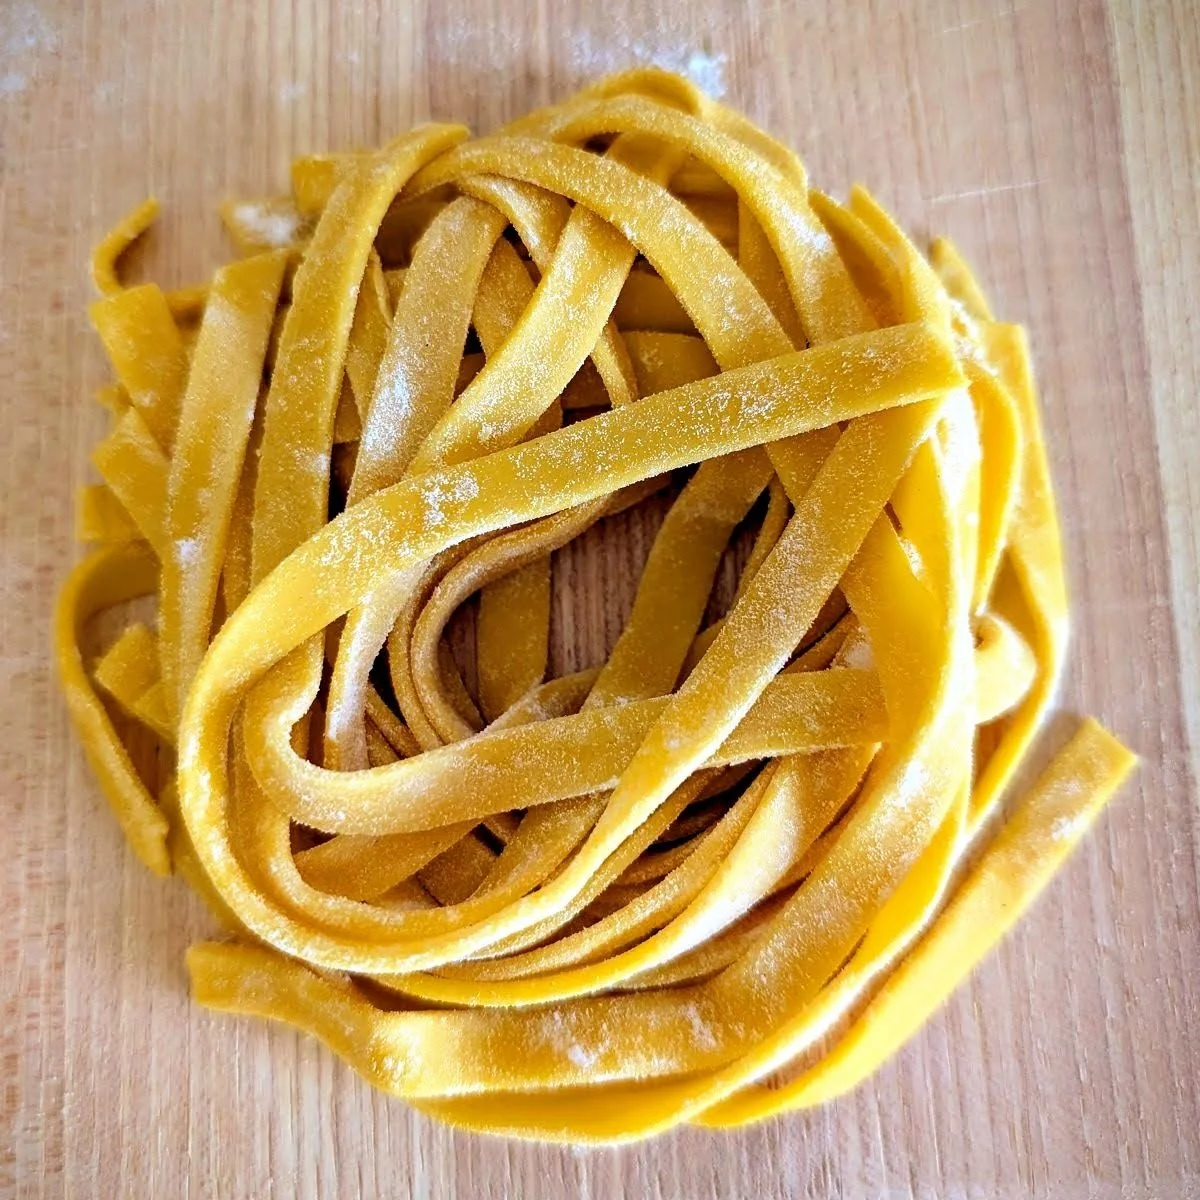
Once cut, dust the noodles generously with flour and toss lightly to coat. Fresh pasta can still stick at this stage, so don’t be shy with the flour.
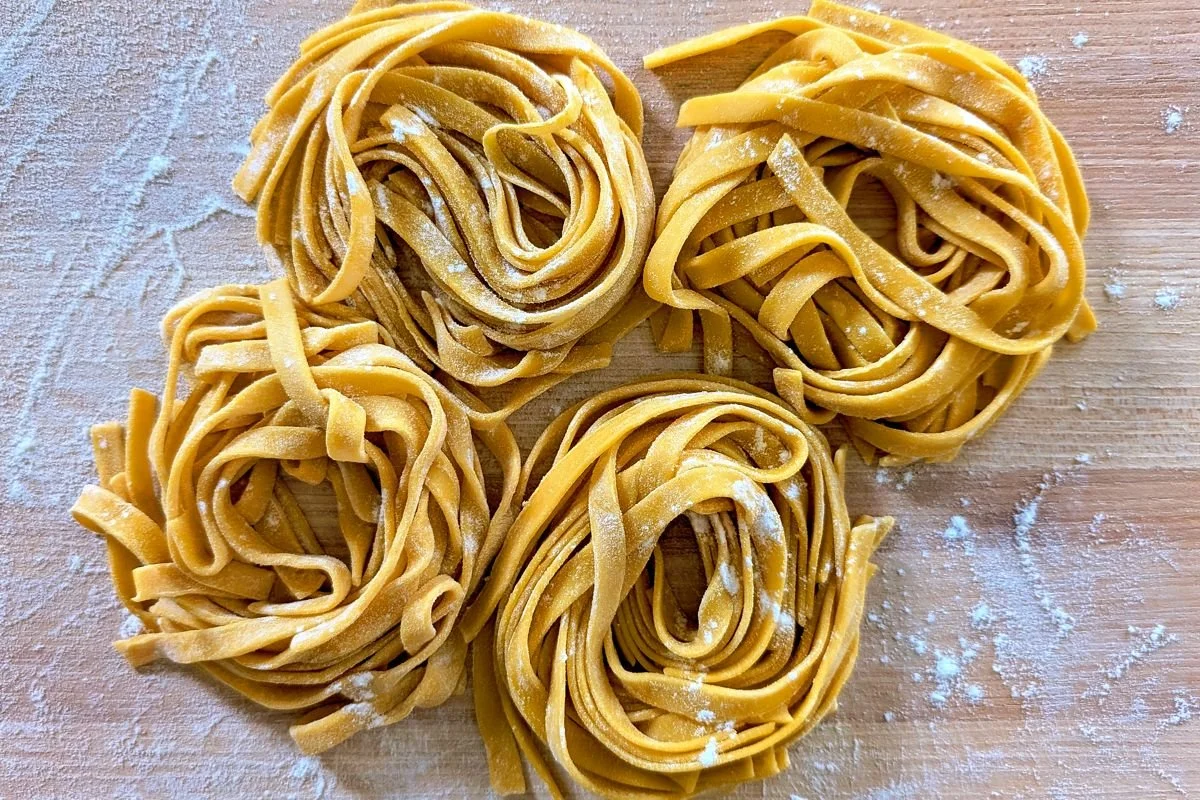
You can leave the noodles flat or gather them into loose nests. Nests make portioning and transferring to boiling water easier, but they aren’t required.
Place the pasta on a tray and cover with a kitchen towel to prevent drying. Refrigerate until ready to cook.
If you’re not cooking within 24 hours, dry or freeze the noodles. See the storage section below for details.


Step 10: Cook the fresh pasta until al dente
Cooking time will vary depending on the shape and thickness of your pasta.
For fresh lasagna sheets, you can layer them directly into the dish without pre-cooking. The pasta will hydrate and cook fully in the oven as it bakes.
For ravioli or noodles, cook in a pot of well-salted boiling water for about 2 to 3 minutes, until al dente—tender but still slightly firm in the center. Start checking around the 1-minute mark, especially if your sheets were rolled thin.
Fresh pasta cooks quickly, but it still needs enough time for the flour to hydrate and the egg proteins to set. Undercooked pasta can taste slightly raw, while overcooked pasta will turn mushy fast, so stay attentive.
My fettuccine rolled to setting 5 took about 3 minutes to reach the perfect bite.


How to Store Fresh Pasta
Pasta Dough
Fridge: Wrap tightly in plastic wrap and rest for at least 1 hour before using. Store for up to 24 hours in the fridge. After that, the dough may begin to oxidize and develop grey patches. This is normal and still safe to eat, but the color won’t be as vibrant. If you’re not using it within a day, freeze it instead.
Freezer: Wrap tightly in plastic wrap, then place in a zip-top freezer bag. Freeze for up to 3 months. Thaw in the fridge before using.
Cut Noodles
Fridge: If cooking within 24 hours, dust generously with flour, shape into loose nests, and refrigerate covered with a kitchen towel.
Freezer: Freeze fresh pasta nests on a tray until solid, then transfer to a freezer bag. Store for up to 3 months. Cook straight from frozen.
Dry: Lay flat on a towel overnight until fully dry, then store in an airtight container at room temperature for up to 1–2 weeks. Just note that dried pasta will take slightly longer to cook.
Understanding the Egg-to-Flour Ratio in Fresh Pasta Dough
The egg-to-flour ratio is what really determines how your pasta behaves. Fresh pasta dough isn’t a rigid formula, which is why recipes vary so much. But once you’ve made it a few times, you start to see how dramatically the number of eggs changes the outcome.
Yolks and whites do different jobs. Yolks bring fat, color, and richness—but that fat also coats the flour and slows gluten development, which is why higher-yolk doughs need longer kneading. The whites on the other hand are mostly water and protein, helping hydrate the flour and strengthen the network so the dough can stretch more easily.
Doughs with a higher egg ratio are simply more resilient. The added protein strengthens the dough, resulting in pasta that:
Stretches easily without tearing
Holds its shape in boiling water
Maintains a springy, true al dente bite
How Long to Knead Pasta Dough (And Why it Matters)
High-egg pasta dough needs about 20 minutes of kneading. Many recipes say 5 to 10 minutes, but with a richer dough like this one, that’s rarely enough. In my experience, the full 20 minutes is what builds the stretch and durability that makes this dough so reliable and versatile.
The fat from the yolks and olive oil slows gluten development. That means the dough needs more time and friction to build strength, which is why it starts out slightly sticky and soft before gradually becoming smoother and more elastic as you work it.
When it’s properly kneaded, the dough should:
Feel smooth and tight
Bounce back when pressed
Hold its shape without sagging
Hand-kneading also gives you more control. A mixer can move the dough, but it doesn’t create the same downward pressure and resistance your palm does against the counter. After years of making pasta, I’ve found that mixing and kneading by hand makes it much easier to adjust hydration in real time and dial in the exact texture you’re after.
Why Resting Pasta Dough Is Essential
Resting isn’t optional—it’s what makes the dough workable. When you knead pasta dough, you tighten and align the gluten strands. That strength gives the dough structure, but it also makes it snap back like a rubber band at first.
The dough needs time to relax and hydrate. Even after kneading, the flour continues absorbing moisture from the eggs. As it rests, the gluten relaxes and the flour fully hydrates, making the dough more uniform and easier to roll thin without rough texture or jagged edges.
A minimum of one hour in the fridge is essential. Overnight is even better. In professional kitchens, we almost always make pasta dough a day ahead because it rolls cleaner, stretches farther, and cooks evenly from edge to center.
Fresh Pasta Dough FAQs
Can I double this recipe?
You can easily scale this pasta dough recipe up. Simply double the ingredients and follow the same method from start to finish. The kneading time does not need to increase for a double batch.
If you’re making a larger quantity, divide it into separate dough balls no bigger than a double batch each. Smaller portions are easier to knead evenly and give you better control over the final texture.
What is the best flour for fresh pasta dough?
All-purpose flour is my go-to for fresh pasta dough. It has enough protein for proper gluten development, and it’s accessible and forgiving for home cooks.
Finely milled “00” flour produces a finer, silkier sheet, but it can get sticky more quickly and requires more precision. Semolina can create a slightly coarser texture, though I haven’t personally tested it in this recipe. I mostly used semolina in restaurants for dusting during rolling since it prevents sticking without being absorbed as easily as flour—not strictly necessary at home in my opinion.
Why is my pasta dough too dry or too sticky?
Most texture problems come down to hydration. If your pasta dough feels dry or crumbly, work in a few drops of water at a time until it comes together smoothly.
If it sticks to your hands, add flour in small increments until it releases cleanly. Egg size and humidity vary, so small adjustments are completely normal every time you make fresh pasta dough.
Can you over-knead pasta dough?
It’s very difficult to over-knead fresh pasta dough by hand. This dough is firm and low in moisture, so it handles extended kneading well. Under-kneading is far more common and leads to weak structure and brittle pasta.
How do you fix fresh pasta noodles that are stuck together?
If the noodles are lightly stuck, dust them generously with flour and gently separate them by hand. If they’re still soft and freshly cut, you can lay them flat instead of nesting to prevent further sticking.
If they’ve fully fused together right after cutting, add more flour, gather the dough back into a ball, and start over with rolling and cutting. This only works while the dough is still soft—once the noodles have dried on the outside, re-rolling will give you an uneven texture.
Fresh Pasta Gets Better With Practice
The first few times I made pasta at home, I overthought everything. I was scared to add extra water, so the dough stayed too dry and crumbly. My earliest batch used fewer eggs and not nearly enough kneading, so the noodles turned to mush almost instantly in the boiling water.
What finally made it click was committing to the method and finding the right ratio—more eggs, a full 20 minutes of kneading, no shortcuts. Once you feel what properly developed dough is supposed to feel like, it stops being intimidating. After one solid batch, your confidence jumps. After a few more, it becomes second nature.
Pin This Fresh Pasta Dough Recipe for Later!

Did you try this egg pasta dough?
I’d love to hear how it turned out or answer any questions you have. Leave a comment below, or tag me on Instagram @onecreativecook if you share your pasta!
Classic Sauces to Serve with Your Fresh Pasta
All-beef meat sauce: A rich, slow-simmered bolognese that clings beautifully to fresh pappardelle or tagliatelle.
San Marzano tomato sauce: A simple, vibrant red sauce that lets the flavor and texture of fresh egg pasta shine.
Arugula basil pesto: Bright, herbaceous, and slightly peppery, this pesto coats fresh noodles without weighing them down.
Béchamel sauce: A simple white sauce perfect for layering into lasagna or turning into a velvety cheese sauce.
Brown butter: Nutty, aromatic, and incredibly simple, brown butter is a classic pairing for fresh ricotta ravioli.